Category: Hiking

  • A fearless adventurer in hiking shorts, overlooking a majestic mountain vista on a cliff.

    Are Hiking Shorts Adequate for Protection and Utility on the Trail?

    Finding your ideal hiking shorts for women? This guide covers key features for comfort and style on the trails.

    • Look for durable, quick-dry fabric that offers comfort and fits well for hiking shorts.
    • Preferable features include moisture-wicking, stretchability, and abrasion resistance.
    • The right length is above the knee for men, with various rise options for women.
    • Check for functionality like UPF rating, waterproofing, and convertible designs.
    • Adjustability in waistbands and fit is vital for comfort and avoiding mishaps.
    • Pocket types and placements can add utility.
    • Patagonia and The North Face are leading brands for quality hiking shorts.
    • Style can be balanced with functionality, with options for eco-friendly materials and trendsetting designs.
    • Shorts are suitable for hiking in appropriate climates, offering freedom and comfort.
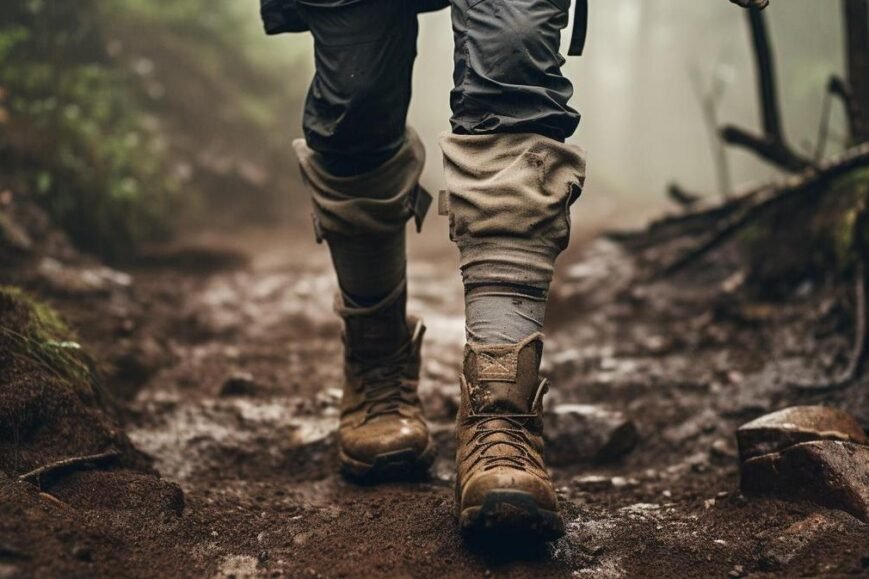
    • For challenging terrains, opt for tougher materials to protect against abrasion and moisture.

    Are your legs ready for the wild? As an outdoor enthusiast, it’s crucial to find the right gear, especially when it comes to what you wear below the belt. In “Are Hiking Shorts Adequate for Protection and Utility on the Trail?” we’ll delve into whether women’s hiking shorts can truly withstand the grit of the trails while keeping you comfortable and able. Let’s talk about fabrics, fit, and those ever-handy pockets to ensure your next outing is nothing short of epic. Gear up, and let’s get to the heart of what your adventurous soul needs!

    What Are the Ultimate Hiking Shorts for Women?

    Hiking shorts should be made of quick-dry, durable fabric. Yes, you can hike in board shorts, but they may lack certain features that hiking-specific shorts offer, like quick-drying material and comfort during long walks.

    For women who love the outdoors, picking the right shorts can make a big hike even better. Here are the types of hiking shorts women need. Look for shorts that feel good next to your skin, move with you, and dry fast if they get wet. Ladies’ hiking shorts come in many kinds. You want shorts that fit your body and your hike style. Some with pockets hold your stuff; others look slick with no extra bulk. You’ll find high-waisted trekking shorts a good pick for support on the trail. Women’s quick-dry shorts work great for crossing streams or when rain pours down. The fit? It matters a lot for comfort. Too tight and you may chafe. Too loose and they might snag on branches or not protect your skin. Women’s pull-on walking shorts with pockets are handy for easy wear and keeping small items.

    Think about body type too. Women’s petite trekking shorts are great for smaller frames, while plus-size walking shorts fit a wider range of hikers. Want bright colors? Colorful hiking shorts add fun and personal style to any hike. And women’s cargo hiking shorts? They are clutch for holding gear but can be bulky. Cargo or sleek, think about what works for you.

    Above all, balance style and function. Women’s outdoor trekking shorts come in diverse styles, from high-waisted to low-rise. Pick what feels best when you’re moving a lot. And for sizing, always check a brand’s guide to avoid surprises. You want durable outdoor shorts for women that fit well and last long. If you hike a lot, it’s smart to invest in a quality pair.

    In short, choose what works for your body, your hike, and your sense of fun!

    How to Choose Men’s Hiking Shorts for Optimal Comfort and Function?

    What material should hiking shorts be? Men’s hiking shorts should be made of breathable, moisture-wicking, and stretch fabrics for comfort and movement. Get shorts that are lightweight, yet durable enough to resist tears and abrasions. The best hiking shorts offer a blend of comfort, flexibility, and durability.

    For the ideal length and cut, look for shorts that reach above the knee. This offers good movement while protecting most of your thighs. Stretch fabric is a must for hiking. It lets you climb, jump, and walk with ease. Avoid any fabric that feels tight or holds you back.

    Waistbands matter too. Drawstring or elastic waistbands can adjust for a perfect fit. But some prefer buttoned shorts for a snug, secure feel. Always try on different types to see what you like most.

    Breathable and moisture-wicking materials keep you cool and dry. This is vital for long walks under the sun. Plus, these fabrics keep the skin dry, lowering chafing on long hikes.

    Pockets on men’s hiking shorts matter for carrying your gear. Look for deep, snug cargo pockets to keep items secure. Zippered or velcro pockets are best to avoid losing things.

    For big guys, it’s all about finding the right fit. Look for plus-size walking shorts that offer room without being too baggy. Stretch fabric shorts come in handy here, too. They give extra space where you need it.

    Durability doesn’t mean you have to sacrifice comfort. Go for rugged shorts that feel soft yet can take a hit. This way, you’re comfy and know your shorts will last.

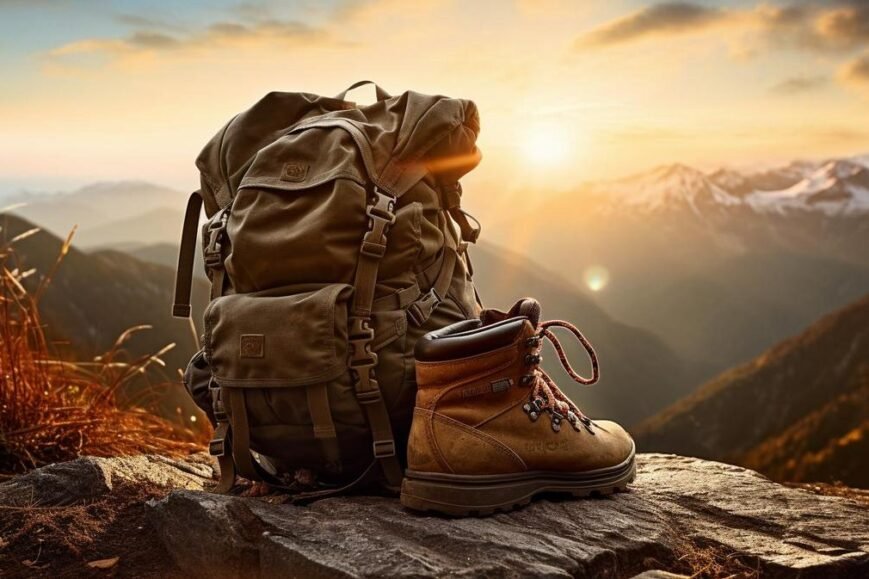
    Remember, your outdoor adventures are only as good as your gear. Choosing the right shorts can make all the difference.

    What Are the Best Hiking Shorts for Varied Climates and Terrains?

    When hiking, what should your shorts be like? They need to match your climate and terrain. For varied conditions, the best hiking shorts are quick-drying and breathable. Yes, it’s OK to wear shorts when hiking. They offer freedom and comfort. The material for hiking shorts should be light but tough, like nylon or spandex.

    When the sun beats down on a summer trail, breathable walking shorts for hot weather are a must. They keep you cool by letting air flow. If you find yourself wading through streams or caught in a downpour, fast drying hiking shorts for water activities are a game-changer. No one likes to hike in soggy shorts!

    Convertible hiking pants to shorts provide two-for-one value. They work well for sudden weather shifts. Just zip off the legs and, voilà, pants become shorts.

    Don’t overlook sun protection. UPF-rated shorts shield your skin from harmful rays. They are key for long days under the sun.

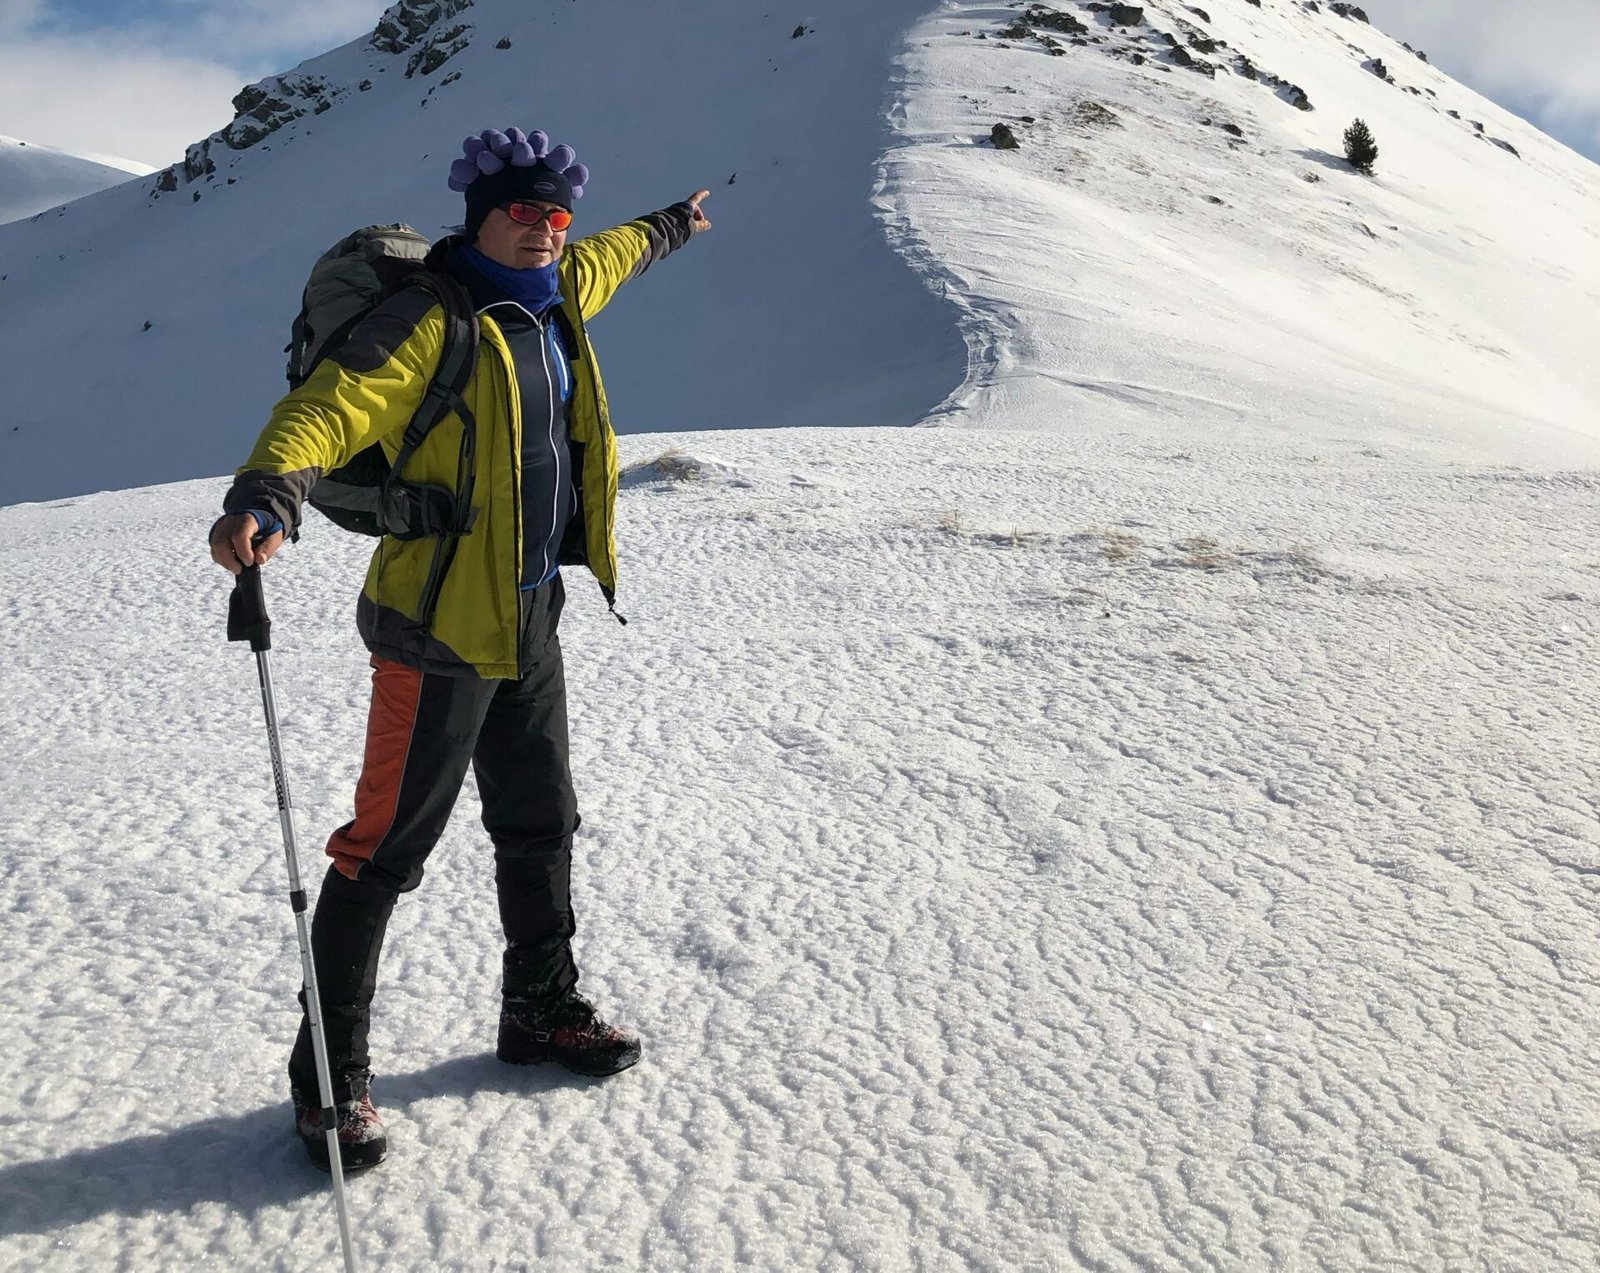
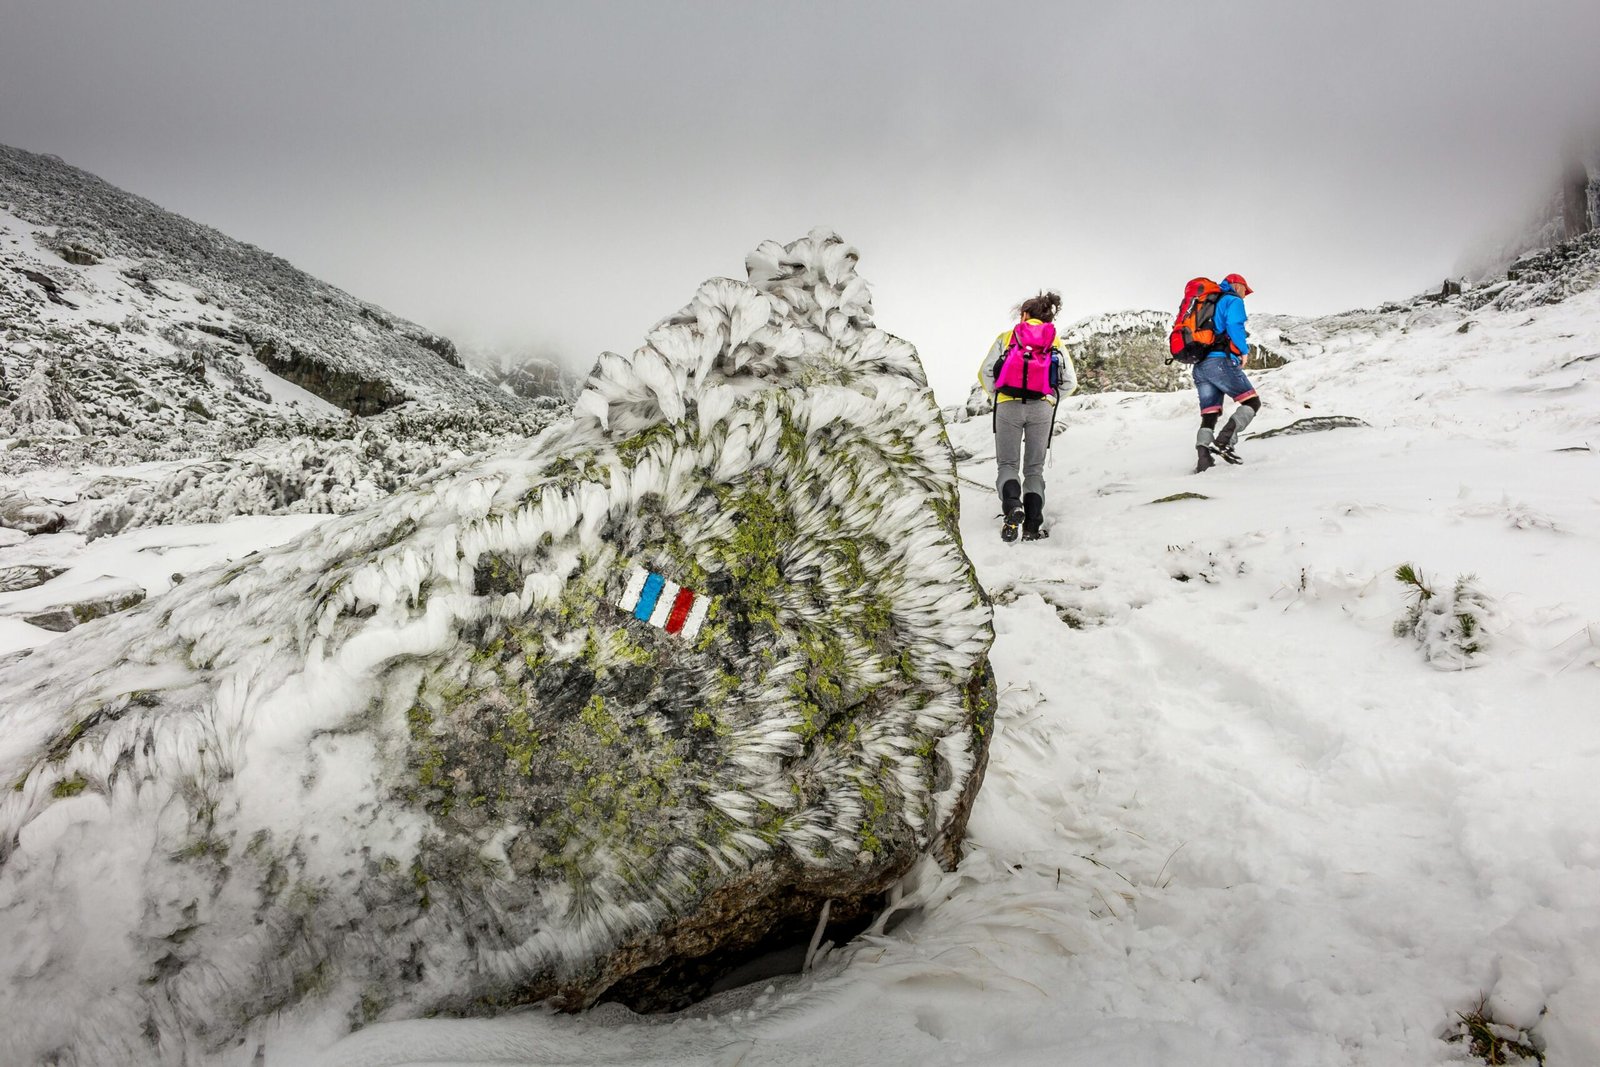
    In wet conditions, waterproof hiking shorts help you stay dry. You can cross streams without worry if your shorts can handle it. For cold climates, layer your shorts. Start with snug thermal wear and top them with your shorts for extra warmth.

    Shorts must fit the outing’s demands. In woods with thorns or rough rocks, durable fabric can protect your legs from scrapes. For high movement, like climbing, look for stretch fabric hiking shorts. They offer the flex you need.

    So, choose wisely. Good shorts handle sweat, water, and heat while keeping you shielded. Whether scaling cliffs, crossing rivers, or soaking up sun, there’s a pair of hiking shorts for every adventure.

    Which Brand Offers the Best Hiking Shorts for My Outdoor Adventures?

    What are the best hiking shorts? The best hiking shorts balance comfort, durability, and style. Patagonia and The North Face lead the pack, with their Baggies and Class V shorts being top choices for trail goers. Patagonia’s Quandary range and REI’s Sahara quick-dry shorts also rate highly for comfort and functionality.

    Both Patagonia and The North Face use materials that endure the wear and tear of outdoor activities. For a mix of style and utility, consider Wrangler’s performance shorts or stylish options that double for fashion and function. Amazon reviews can guide you to top-rated hiking shorts that meet your needs.

    Brands now focus on eco-friendly trail shorts too. This is great for hikers who care about their environmental impact. When it comes to specific activities like climbing or water sports, look for shorts that offer flexibility and quick-dry features. The North Face Exploration and Class V are excellent in this regard.

    The fabrics used by these brands often include quick-dry nylon, some with stretch. Pocket placement, gusseted crotches for mobility, and reinforced seams are common. This season, look for stylish hiking shorts that blend these technical features with contemporary trends. Consider comfort, activity type, and material when choosing the best hiking shorts for your outdoor adventures.

    Can Shorts Provide Adequate Protection and Utility on the Hiking Trail?

    What material should hiking shorts be? Hiking shorts should be durable, abrasion-resistant, waterproof, and have SPF protection. This means they can stand up to rough terrain, keep you dry in wet conditions, and block harmful sun rays.

    Is it OK to wear shorts when hiking? Yes, it is fine to hike in shorts. They should be sturdy and fit well to keep you safe and comfy.

    Shorts must hold up against the wear of nature. You need durable hiking shorts. Look for ones made of strong fabric. They must not rip easily on rocks or branches. Abrasion-resistant hiking shorts are vital for tough paths. They help keep your skin safe from cuts and scratches.

    Shorts with waterproof features are good for crossing streams or getting caught in the rain. They keep you dry and prevent rashes from wet clothing. Shorts with SPF protection shield your legs from sunburn on bright days. For climbing, get hiking shorts that let you move freely. For extra tough hikes, choose tear-resistant hiking shorts.

    A snug fit is key for avoiding slips and falls. Adjustable waist hiking shorts give you a custom fit. This helps prevent accidents on the trail. On long walks, anti-chafe hiking shorts can keep your hike pain-free. They prevent sore skin from long hours of walking.

    When you choose your shorts, think about the hike you’ll take. For a casual day, flat-front walking shorts can be enough. But for rough and tough adventures, you want shorts made of thick material for maximum protection. Remember, the right shorts can make or break your day on the trail.

    How Can Trendsetters Blend Outdoor Functionality with Contemporary Style?

    What is a hiking short? It’s clothing designed for trekking activities. Yes, shorts are fine for hikes in suitable weather. Now, let’s break it down.

    Today’s trendsetters want to look as good as they are prepared. They need stylish hiking shorts that don’t skimp on fashion or function. These shorts are more than just clothes. They’re a statement on the trail. Think of bold prints and vivid colors. They shout personality. It’s about expressing yourself with every step.

    Tailoring matters too. It plays into how well the hiking shorts fit. A snug pair of tailored shorts can enhance comfort and avoid snags. It ensures ease and safety as you climb, jump, and trek.

    But let’s not forget sustainability. Modern hikers care about the planet. They love fashion-forward hiking shorts that use sustainable materials. Eco-friendly is the new cool, and it matters even in what you wear.

    You might wonder if these shorts are only for the wild. Not anymore! Athleisure shorts cross over from trail to town. It’s about versatility.

    Lastly, innovation is key. Updated fabrics offer hi-tech features while keeping your look fresh. These innovative fabric shorts let the skin breathe and wick away sweat. They blend contemporary style lines with the rugged demands of trail life.

    So, yes, you can have it all. Think colors, patterns, and a fit that turns heads and tackles the trail!

    Conclusion

    In this post, we tackled hiking shorts from all angles—what makes them comfy, stylish, and right for every woman or man on the trail. We looked into materials that dry quickly and fit all shapes. We saw cargo pockets can be helpful, and that the right waistband makes a difference.

    We learned shorts can be tough yet comfy and that they can protect you from the sun and water. We found stylish options for keeping up with trends without losing function. And we discovered the top brand picks for every outdoor adventure. The right hiking shorts make all the difference, so choose wisely for your next trek!

    Loading


  • A fearless hiker conquering treacherous mountains, protected by durable hiking gloves.

    What Features Should Hiking Gloves Have to Protect You?

    Hiking gloves are essential for protection and grip; find the best fit for every season and trail challenge here.

    • Hiking gloves protect against cold, UV rays, and scratches, and improve grip.
    • For summer hikes, choose lightweight, breathable gloves with UV protection and a snug fit.
    • Waterproof gloves have a water-blocking layer and sealed seams; care for them with gentle cleaning and air drying.
    • Fingerless gloves offer a balance of dexterity and protection in mild weather but aren’t suitable for cold, rough hikes.
    • Durable gloves feature insulation, grips, thermal/windproofing, reinforced areas, and strong stitching.
    • Extreme cold weather gloves should be made from materials like fleece or neoprene, possibly with room for liners to increase warmth.

    Hey outdoor lover! Ever wonder what gloves you should grab for hitting the trails? You need the right pair to keep your hands safe and comfy while you trek. The best hiking gloves do more than you might think. They protect you from cold, cuts, and sunburn.

    They help you hold on tight when you scramble over rocks. And guess what? Gloves aren’t just gloves. Some are for kids, others fit everyone, and yeah, there are even mittens. Stick with me, and I’ll walk you through what makes a pair of hiking gloves a must-have for your next adventure. Let’s get our hands on some know-how and ensure you choose the best protection for your outdoor journeys!

    Why Are Gloves Important for Hiking?

    What gloves are good for hiking?
    The best hiking gloves shield your hands, keep your grip firm, and aid in holding gear.

    Gloves protect against cold, cuts, and sunburn. They also help you grab things safely. For hikes, you want gloves that avoid harm and let you move your fingers well. Hiking gloves with dexterity are key. They must fit well and keep your hands safe.

    Why do hikers wear gloves?
    They wear gloves to guard against weather and injuries.

    In the cold, gloves are a shield from frostbite. Gloves also prevent scratches and blisters. On sunny paths, they can protect skin from harsh UV rays. A good pair of unisex hiking gloves works for anyone.

    When picking gloves, remember kids need them too. Hiking gloves for children should be snug but not tight. They should keep little hands warm and safe on the trail.

    Some hikers choose hiking mittens. Mittens keep hands warm but limit finger use. Gloves give more freedom to use fingers. This makes gloves better for most hiking needs.

    A unisex design can fit all hikers well. This makes buying gloves easier. Look for gloves that fit your hiking needs and keep your hands safe from harm.

    What Should You Look for in Summer Hiking Gloves?

    When it comes to summer hiking gloves, what matters most? Think light, cool, and comfy. Lightweight hiking gloves are key. They should not add extra hand weight. Instead, they keep you moving with ease. Summer hikes often mean sun up above. Your hands need protection from those rays. Look for sun protection gloves for hiking to shield your skin.

    What material are hiking gloves? For summer, pick breathable fabrics. These let air flow and prevent sweat build-up. Materials like mesh or thin synthetics usually do best for summer. They keep your hands dry and cool while you tackle the trail.

    UV rays can damage skin over time. Summer hiking often exposes you more. So, the gloves you choose must block harmful UV light. This feature keeps your hands safe on sunny treks.

    Size and fit also matter. Gloves too tight can make your hands feel trapped. Too loose, and they may slip or cause blisters. Aim for a snug yet comfy fit. This ensures full hand motion without restrictions. It also helps you maintain a good grip and dexterity.

    Remember these traits when you shop. Lightweight, breathable, and UV-protecting features are best. Always try them on to confirm the fit. Then, hit the trails knowing your hands are ready for the journey.

    How Do Waterproof Hiking Gloves Keep You Dry?

    Waterproof hiking gloves keep water out. They are different from water-resistant gloves. Waterproof gloves have special materials that block water. Water-resistant gloves slow water down but can’t stop it completely. The best waterproof hiking gloves use tech to keep hands dry. They will have features that shed water fast.

    For dry hands on trails, look for gloves with these features. They must have a waterproof layer. This can be a coating or a membrane. The layer keeps water away while letting sweat go out. Gloves for hiking in the rain should also have sealed seams. This stops water from seeping in. These gloves are often called quick-drying gloves for trails. They have fabric inside that pulls sweat away, so your hands stay dry.

    To care for waterproof gloves, follow these tips. Always clean them according to the label. Let them dry naturally. Do not put them near high heat. This can damage their waterproof parts. Do not forget to treat the gloves with water repellent if needed. This will keep their waterproof power strong after lots of use.

    When hiking, your hands face rain, snow, and rivers. Stay ready with the right gloves. They will help your adventure in the wild go smoothly.

    Can You Hike Comfortably with Fingerless Gloves?

    Yes, you can hike with fingerless gloves. They offer a snug fit and help you grip things well. You feel the breeze on your skin but still keep control of your poles. In warm weather, they let your hands breathe and stay cool.

    When you pick fingerless gloves for trails, look for sturdy, cool fabrics. Nylon and spandex are good. They are tough and dry fast. Look for gloves with padded palms. This helps you hold your trek gear tight without slipping.

    In mild, dry weather, fingerless gloves work great. They are also good when you need to use your fingers a lot. For tasks like using your phone or opening a snack, they are perfect. You won’t need to take them off every time.

    But in the cold or during long, rough hikes, full gloves are often better. They cover all of your hands. This keeps you warm and safe from scrapes. In the end, the choice between fingerless and full gloves depends on the weather and your hike. Choose what fits the trip and what feels right to you.

    Which Features Enhance the Durability and Functionality of Hiking Gloves?

    Are insulated hiking gloves important? Yes, they keep your hands warm. Insulated gloves trap heat. This keeps your fingers from going numb. In cold weather, this is a lifesaver. Look for gloves that have insulation. But make sure they don’t feel too bulky. You still want to move your fingers easily.

    The grip is also key for trekking terrains. Think about rough paths and rocky climbs. You need gloves that help you hold on tight. Many gloves have rubber or silicone pads. These pads give you a better grip. They help you hold hiking poles and climb safely.

    Thermal hiking gloves and windproof features matter too. Thermal gloves keep your hands warm on chilly days. Windproof gloves block cold air. So, your hands stay warm even in strong winds. Pair these with insulation and grip. You’ll have gloves that can handle most trails.

    What makes gloves last longer? Look for tough materials. Leather or synthetic fabrics can take more wear and tear. Reinforced palms and fingertips add to glove life. These spots wear out the quickest. So, extra material there helps.

    Stitching matters too. Double or triple stitching means stronger seams. It stops the gloves from falling apart. A good fit also adds to durability. Tight gloves stretch and tear more easily. But gloves that are too loose can snag and rip. Find gloves that fit just right. They’ll last longer and keep you safer on your hikes.

    How to Choose Hiking Gloves for Extreme Weather Conditions?

    What gloves are the best for extremely cold temperatures? It would help if you had gloves built to handle the chill, such as extreme cold weather hiking gloves or winter hiking gloves. These types keep hands warm in snow and ice.

    For hard-core winter hikes, materials make all the difference. Fleece gloves are great for warmth. They feel soft and hold heat. Then, there are neoprene gloves for hiking. Neoprene keeps the cold out, even when wet.

    Let’s dive into the details. Fleece gloves for the outdoors are cozy. They’re perfect for dry, cold days. But fleece might not do the job when it’s wet or super windy. That’s where neoprene comes in handy. It’s the stuff wetsuits are made from, so it can handle wet, windy weather like a champ.

    Now, fleece and neoprene have their perks. But in the worst conditions, you might want more. Consider gloves that have room for liners. This way, you can add extra warmth if needed. Also, layering is smart. Start with a thin liner, then wear heavier gloves on top. This works well because you can adjust on the go.

    To sum it up, look for gloves made from the right stuff. Fleece is for dry, cold hikes, and neoprene is for wet, wild ones. And remember, layers and liners can be lifesavers when the weather goes from cold to extreme. Stay warm and safe out there.

    Conclusion

    We covered a lot about hiking gloves, from summer sun protection to cold-proofing your hands. Picking the right pair means you can climb, grab, and stay safe on trails. Remember, mittens keep you warm, gloves give you grip, and for kids, look for tough fits. In rain, go for waterproof, not just resistant. If you want some finger freedom, fingerless might be your pick. For tough paths, durability matters, and in extreme cold, insulation is key. Get gloves that meet your needs and happy trails!

    Loading


  • A determined hiker conquering a snow-covered peak in a customized cold weather outfit.

    How Can You Personalize Your Cold Weather Hiking Outfit for Optimal Comfort?

    Brace for winter trails with essential cold weather hiking boots features and care tips.

    • For cold-weather hiking, prioritize clothes that offer warmth, dryness, and suitable fit, whether unisex or gender-specific.
    • Layering is essential: use moisture-wicking base layers, add insulating fleece, and top with a windproof, waterproof jacket. Adapt summer gear with thermal liners and heavier coats for freezing temps.
    • Protect your skin with strong sunscreen and UV-blocking sunglasses; higher altitudes increase UV risks, so cover up and use sunscreen generously.
    • Select hiking pants made for cold weather, prioritizing materials and designs that offer insulation without restricting movement.
    • Choose winter-specific hats that cover ears and are wind-resistant, and use waterproof gloves with thermal liners for hand warmth.
    • Always hike with an emergency communication device, like a phone or satellite messenger, for safety.

    Bracing the chill on a trek doesn’t mean sacrificing comfort. In “How Can You Personalize Your Cold Weather Hiking Outfit for Optimal Comfort?”, we’ll guide you through choosing gear that fits and warms, specifically yours. From must-have boots that keep your toes toasty to pants that let you move freely, we’ve got insights to tackle the cold head-on. Get ready to layer up and step out with confidence, no matter how icy the trail gets!

    How Can You Personalize Your Cold Weather Hiking Outfit for Optimal Comfort?

    When it’s cold and you plan to hike, your clothes must keep you warm and dry. For women who hike in winter, find the best hiking pants that match your body shape. Pants should let you move and not be too tight. They need to protect you from the cold and wet but also let sweat out so you stay dry.

    Next, think about whether you want clothes made for all or clothes made just for women or men. Unisex gear often fits differently but can work well. Yet, some women find that women’s specific winter hiking apparel fits better. They say it helps them move freely and stay warm.

    Your head loses a lot of heat, so get good hiking headwear. Look for hats that cover your ears and stay on in the wind. A hat that blocks the wind can make a big difference in how warm you feel.

    Your hands need special care too. Try waterproof gloves for trekkers when you hike in snow or rain. Some hikers wear thermal liner gloves under other gloves for extra warmth. This trick lets you take off the top glove if you get too hot.

    Remember, your comfort depends on your clothes. Every person feels the cold differently. Test in cold weather to see what works for you. Take care of your clothes, so they keep you warm hike after the hike. Choose what fits, whether it’s unisex or gender-specific, to enjoy your winter adventures.

    How to Equip Yourself for Changing Winter Hiking Environments?

    Hiking in the cold needs smart gear choices. Picking gear for different winter temps is key. You need layers that you can add or take off. Start with your summer gear. Then add things for more warmth. Avoid the sun’s harsh rays. Even when it’s cold, they can harm your skin. Be safe at high spots with strong UV rays. Bring a device to call for help if you need it.

    Adjusting your gear for hikes in moderately cold (40-50 degrees) vs. freezing temperatures

    For a cold hike, dress in layers. This is the best plan. Always bring more warmth than you think you’ll need. It’s okay to layer summer clothes. Just add a warm hat, gloves, and a jacket. When it’s super cold, pick heavier coats. And don’t forget insulated pants. These keep legs warm.

    Tips for converting existing hiking gear for winter use

    You can use your summer gear in the cold. Just be wise about it. Put a warm fleece under your lighter jacket. Add thermal leggings under pants. Bring gear to protect your face and ears too.

    The importance of sun protection even during winter hikes

    The winter sun can still burn your skin. Always use a strong sunscreen. Wear sunglasses to guard your eyes. Keep your skin safe.

    Assessing and mitigating UV exposure risks at higher altitudes

    The higher you climb, the stronger the sun hits. Even in the cold. Pack gear that covers the skin and use sunscreen. Keep your eyes safe behind UV-blocking glasses. Stay safe from the sun as you climb higher.

    Essential emergency communication devices to carry on winter hikes

    Always hike with a way to call for help. Bring a phone or a radio. Make sure batteries can handle the cold. A device that sends your spot to rescue teams can be a lifesaver. Carry it for that ‘just in case’ moment.

    How Do You Select the Best Hiking Pants for Cold Weather?

    When hiking in cold weather, pants are key. You need to choose them well. For insulation and comfort, check the material and design of winter hiking pants. Softshell pants offer flexibility and breathability. They are a solid choice for active hikes in cold, but not too wet climates.

    Hardshell pants are your pick for harsh weather. They provide top protection from wind and water. Insulated trekking pants keep your legs toasty when the mercury drops. In chilly weather, fleece-lined trousers are a sure win. They trap heat close to your body. If the forecast says wet, add waterproof overpants to stay dry. Always tweak your choice based on weather and trail needs. Remember, the right pants can make your hike comfy and fun.

    How Can You Personalize Your Cold Weather Hiking Outfit for Optimal Comfort?

    When hiking in the cold, each piece of gear matters. For women, getting the best hiking pants for cold weather women’s style can mean a world of difference in comfort and mobility. These pants should fit well and allow you to move without feeling held back.

    Women’s specific winter hiking apparel often includes design touches that suit their body shapes better. This can be in the pants’ hip and waist areas or jackets tailored at the waist. The fit is not just about comfort but also about keeping warm air close to your body.

    Now, is unisex gear good enough? Sometimes, yes. If the fit is right and the gear keeps you warm, it might work perfectly. But women’s gear is made for women’s bodies. That can mean a better fit, more warmth, and more comfort on the trail.

    Let’s talk about your head. When it’s cold, you lose a lot of heat from your head. So, you need great hiking headwear for cold climates. Hats should cover your ears and stay snug on windy trails. They can also be a fun way to show your style!

    Your hands need attention too. Choose waterproof gloves for trekkers to keep your hands dry. Adding thermal liner gloves underneath gives more warmth. The liners can also work alone when you need to do tasks that require more finger flexibility.

    Remember, personalizing your outfit is about what works best for you. Mix and match until you feel ready for any chill the trail might throw your way.

    How Can You Personalize Your Cold Weather Hiking Outfit for Optimal Comfort?

    You want your outfit to work for you when hiking in the cold. Start with pants that let you move and keep you warm. The best women’s hiking pants for cold weather are the ones that fit well and shield you from the chill.

    Girls, look for clothes made just for you. They will fit better and keep you comfy. Take time to pick your pants. They are key for both warmth and easy hiking.

    Not all gear fits every person the same. You might like gear made for all, or gear made just for men or women. See what feels right for you.

    Your head and ears can get very cold fast. Choose a hat or beanie that covers well and keeps the heat in. Pair it with waterproof gloves for trekkers and you’ll be ready.

    Cold can sneak in fast. Keep it out with gloves that stay dry and have a warm layer inside. This way, you can wave goodbye to numb fingers on your hike.

    By using the right clothes, you make sure each hike is fun, not a freeze-fest.

    Choosing women’s specific apparel for cold weather hiking

    Women’s bodies are different from men’s, so it’s smart to pick clothes made just for ladies. This means jackets, pants, and base layers shaped to fit a woman’s curves. Better fit leads to better warmth and movement.

    The importance of selecting the right hiking pants for comfort and mobility

    The best hiking pants for cold weather women’s needs are both warm and allow you to move freely. They should have insulation but also stretch so you can climb and walk without feeling held back.

    Deciding between unisex and gender-specific outdoor clothing

    Unisex gear is okay, but it may not be as comfy. Gender-specific gear is tailored, fits better, and keeps you warmer. So, go for women’s specific winter hiking apparel when you can.

    Selecting headwear for adequate protection against cold climates

    Keep your head warm with hats made for cold hikes. Look for ones that cover your ears and block wind. Hiking headwear for cold climates is key to your overall comfort.

    Waterproof and thermal glove options for maintaining hand warmth

    Hands get cold fast, so choose the right gloves. Waterproof gloves for trekkers keep snow and rain out. Add thermal liner gloves beneath for extra warmth. This duo will keep your fingers toasty.

    Remember, comfort starts with the perfect fit and layers you can adjust. With these tips, your cold-weather hike will feel just right.

    How to Equip Yourself for Various Winter Hiking Scenarios?

    How do you hike in 30-degree weather? Dress in warm layers and keep dry. In moderately cold weather, like 40 to 50 degrees, you may want less insulation than you would for hiking in freezing temperatures. Start with a moisture-wicking base layer that pulls sweat away. Then, add an insulating layer like fleece for warmth. Top it off with a windproof and waterproof jacket. For colder, freezing hikes, consider thermal underwear and heavier insulation.

    You can use gear from summer hikes in winter. Add warm liners to gloves and socks for extra warmth. Turn a rain jacket into a wind barrier over a thick sweater. Zip in a fleece lining to a summer sleeping bag for winter camping.

    Even in winter, the sun can harm you. Wear sunglasses that block UV rays and apply sunscreen to exposed skin. Remember, snow can reflect sun rays and increase UV exposure, especially at high altitudes.

    At high places in the cold, UV risks grow. UV rays are stronger up high, and snow reflects them onto your skin. So, it’s key to protect every bit of skin with clothing and sunscreen. This even means getting a face mask or buff when the sun’s rays shine bright.

    Never skip on emergency devices while out in the winter wilds. Carry a whistle, a waterproof mobile phone, or even a satellite messenger. These can help a lot if you ever need to call for help.

    Remember, adjusting for various winter temps keeps you safe and comfy. Dress smart, protect your skin, and carry safety gear – enjoy your winter hike without worry!

    Conclusion

    In these posts, we learned key tips for staying warm and safe while hiking in cold weather. We looked at choosing the right boots, layering clothes, and picking the best pants. We covered winter hiking for beginners and safety practices. Always think about your health when hiking in the cold. Be ready for different winter hikes by picking the right gear. Remember, prepare well, and enjoy your adventure safely.

    Loading


  • A hiker conquering a remote mountain peak, taking a refreshing sip from their hiking water bottle.

    How to Choose the Right Hiking Water Bottle?

    Choosing a hiking water bottle? Unveil the best options for hydration on your next trek.

    • Hydration is essential for hiking to maintain muscle and brain function, control body temperature, and prevent fatigue.
    • A 1-liter water bottle is generally a good balance for average hikes; consider sources to refill on the trail.
    • BPA-free plastics and stainless steel are preferred for being lightweight and durable.
    • Nalgene and Smart Water bottles are popular for their ruggedness, weight, and chemical-free properties.
    • Hydro flasks are suitable for their ability to maintain beverage temperatures, though heavier.
    • Water bottle innovation includes integrated filtration, collapsible designs, smart hydration reminders, and improved toughness.
    • Clean your water bottle after each use with warm, soapy water, and avoid mold by drying properly.
    • Hydration packs allow for easy sipping but can be harder to clean, while bottles are simpler but require stopping for a drink.
    • For safety, use filters or purification tools for drinking natural water sources when hiking.
    • Collapsible bottles and soft flasks are the lightest options for long-distance treks.
    • Use carabiners or side pockets for easy water bottle access; weigh the pros and cons of internal versus external storage.
    • Special bottle features like built-in compasses, storage compartments, and noise reduction can enhance the hiking experience.
    • Choose a water bottle that reflects your outdoor style and meets the specific demands of your hikes.
    • For short treks, a smaller bottle may suffice, but longer or hotter hikes require larger or additional bottles; half a liter per hour is a good drinking guideline. Always carry a little extra as a precaution.

    Your backpack’s ready, and your boots are tied, but is your water bottle up to the task? Out on the trail, water is not just a thirst quencher—it’s your lifeline. Keeping hydrated means keeping alive. A good hike can turn tough if your body begs for water. So, what’s crucial? Knowing which hiking water bottle won’t let you down. Let’s unpack the must-haves for your hydration hero. Keep reading to find out how to pick a winner!

    Why Is Hydration Crucial for Hiking?

    Staying hydrated is key when you hike. Water keeps your body working right. It helps your muscles move and your brain think. If you don’t drink enough, you might get tired fast and feel bad. This is bad for your hike.

    Why do you need water on the trail? Your body needs it to work well. When you walk, run, or climb, your body gets hot. Water cools you down. Without it, you cannot hike far or feel good.

    If you get dehydrated, you might feel dizzy, get headaches, or feel very thirsty. These are signs your body needs water fast. Your heart also has to work harder if you’re dry. This is not good when you’re hiking up a mountain!

    When you’re high up, it gets harder to drink enough. The air is thinner and drier. You might not feel as thirsty, but your body uses more water. So, you must drink more to stay safe.

    So remember, when you pack your bag for a hike, always think about how much water you’ll need. It’s not just about how long you’ll walk. Think about how hard the hike is too and if you’ll be up high. This way, you can stay safe, enjoy your hike, and see great views without worry!

    How Do I Choose the Right Size for My Hiking Water Bottle?

    What size water bottle should you hike with? In ounces, aim for 32. That’s a 1-liter water bottle for hiking. This size balances weight and meets average needs. Hike duration and how hard you push yourself to set your personal water needs. Long, tough hikes call for more water. But remember, big bottles can be heavy.

    Small bottles are light but might not hold enough for your trip. A good hike calls for about half a liter of water per hour. So, for a 2-hour hike, a 1-liter bottle works well. For all-day treks, consider high-capacity water bottles for hiking. But, how do you balance weight with enough water?

    Think about the trail ahead. Will there be streams or lakes to refill your bottle? If yes, you could bring a smaller bottle. If not, go for a big one. Keep in mind, that a full high-capacity bottle is heavy. It can tire you out faster than a small one. Your choice can make your hike a breeze or a big task.

    Always think about safety first. Never cut back on water to save on weight. It’s better to carry a bit more than to run short. Your body needs water to work well, especially when you’re pushing it on a hike. Think about the space in your pack, too. Make sure your bottle fits snugly and is easy to grab when you need a drink.

    In the end, it’s about what fits your hike. Look at the trail, think about your thirst, and pick a bottle that meets both needs. This way, you can enjoy your hike without worries.

    What Are the Best Materials for Hiking Water Bottles?

    What type of water bottle is best for hiking? Go for BPA-free and eco-friendly options. These materials ensure your hydration is safe and good for nature. Let’s compare plastics, stainless steel, aluminum, and glass.

    Plastics like BPA-free allow for light carry. They often come in high-quality forms that last long. But beware! Some have harmful chemicals like phthalates. Always check labels to steer clear of these.

    Stainless steel wins on durability and health safety. It’s tough and keeps your drink free from BPA. Many hikers choose steel for its strength against drops and hits.

    Aluminum bottles are light and tough too. But, they might need a liner to stop taste and BPA. So check if it’s labeled as having an inner coating.

    Glass is great for taste but falls short in survival. It’s heavy and can break if you take a tumble. That’s not good when you’re far from home.

    Weight does matter when choosing. More weight can slow you down. So match your choice to your hike length and load. The right pick keeps your bag light and your body full of water.

    Look for bottles that mix lightweight materials with toughness. This way, you can hike without worry. Stainless steel and BPA-free plastics are often the top picks for their balance of durability and weight. Remember, your health is key, so aim for water containers that promise a clean sip, every time.

    Hikers like Nalgene bottles for their toughness. Many hikers use smart water bottles because they are light. Nalgene bottles have a strong name and last a long time. They can take a hit and still not break or crack. This is key when you’re moving through rough places. Smart water bottles are loved because they weigh very little. When you pack for a hike, every ounce counts, so a bottle that weighs less is a good pick.

    Both kinds of bottles keep the water’s taste just right. They are free from bad chemicals like BPA. This means you can drink without worry of yucky stuff from the bottle getting into your water. They come in all sizes but many hikers like the one-liter size. It’s big enough to hold a lot of water but not so big it’s hard to carry.

    Features that help hikers include the wide mouth of a Nalgene bottle, which makes it easy to fill up. Smart water bottles fit well in pack side pockets. This makes it simple to grab a drink without having to stop and dig through your bag.

    These bottles also show how much water you have left. This helps you plan when to fill up again. You can find both bottles almost anywhere, from big stores to small shops. They are common on trails because they just work so well. Think about where you’re going to hike and how much water you need. Then, pick a Nalgene or Smart Water bottle that fits your needs. They’re both tried and true choices for staying hydrated and happy on the trail.

    Are Insulated Bottles Like Hydroflasks Suitable for Hiking?

    Are Hydroflasks good for hiking? Yes, they are.

    Insulated drink bottles, like Hydroflasks, keep drinks hot or cold for hours. This matters a lot when you’re out on the trails. You want your cold drinks to stay chilled and your coffee to stay warm. Thermal regulation water containers help with this.

    However, these bottles can be heavier than non-insulated ones. That extra weight comes from the insulation materials used to keep your drinks at the right temperature. You have to decide if the weight is worth it.

    An insulated bottle is perfect for hikes in extreme heat or cold. It’s where they shine most. For shorter walks, or in mild weather, you might pick a lighter bottle.

    When comparing Hydroflask to other insulated options, look at how long they keep liquids hot or cold. Also, check the weight and how tough they are. You want one that holds up against drops and dings.

    Remember, when picking the right bottle for your next hike, think about how long you’ll be out and what the weather will be like. If you’re going far or expect harsh temperatures, an insulated bottle could be your best friend. Just make sure you’re okay with the extra weight in your pack. Choose wisely, and stay hydrated out there!

    What Innovations Make Water Bottles Better for Hikers?

    Hikers need tough gear. This includes water bottles. New designs help a lot. Fun fact: Did you know some bottles now filter water? That’s right! You can fill up from a stream and drink safe, clean water. This is thanks to integrated filtration systems.

    Another cool thing? Bottles that squish down to save space. These collapsible and space-saving designs are great. You use your drink, squish the bottle, and stuff it away. Your pack stays light and easy to carry.

    What’s more, we now have bottles that can remind you to drink. They have tech that tracks how much water you’ve had. If you forget to sip, they’ll let you know. Those smart hydration reminders and tracking are like a friend who cares if you’re drinking enough.

    And we haven’t even said how strong they are! Today’s bottles are built to last. They have durability and ergonomic enhancements. That means they can take a hit without breaking. And they are shaped to fit your hand well. Super handy!

    Looking at these new features, it’s clear that innovative water bottle designs for hikers aren’t just about looking good. They really help out on the trails. Hydration technologies for hikers keep getting better, making sure we stay safe and hydrated on our adventures.

    How Can I Maintain the Quality of My Hiking Water Bottle?

    To keep your water bottle like new, wash it after each use. For this, warm, soapy water works best. Scrub it inside out with a brush to reach all corners. For a deep clean, you can use a mix of baking soda and water. Rinse the bottle well when done.

    Dry your bottle upside down to avoid water spots. Storing it with the lid off prevents mold and bad smells. If any mold shows up, a mix of vinegar and water can help. Fill the bottle with this mix and let it sit for a night. Then, scrub and rinse it clean.

    For bottles made of steel, stay away from bleach. Instead, use mild cleaning agents. Following these steps can make your bottle last years. Remember to clean your bottle regularly to prevent germs.

    Stay safe out there, and keep hydrating with a fresh, clean bottle every time!

    What Are the Pros and Cons of Hydration Packs vs. Bottles?

    When it comes to drinking water, hydration packs let you sip without stopping. Bottles need you to slow down or stop. Hydration packs have more room to carry water. They hold water in a bladder with a hose for easy access. Bottles, however, can be simple to refill and share with others.

    Hydration packs spread the weight across your back. This can help balance and comfort on long walks. But bottles may cause your pack to feel uneven. Some find water bottles easier to grab and replace as they walk.

    Keeping your drink gear clean is a must. Hydration packs need more work to keep clean. Hoses and bladders can grow bacteria if not cared for right. But bottles are often simpler to wash out.

    In the end, picking between hydration packs or bottles depends on your needs. Think about how long and where you will hike. Are you okay with stopping to drink or do you want to sip and go? Packs give easy water while moving. Bottles are less of a fuss to clean and refill.

    For those who hike a lot, owning both could be wise. Use a water bottle for short walks. Pick a hydration pack for longer trails. Keep both clean and switch based on your hike. Trust your gut and choose what feels best for you. Your body will thank you for staying well-hydrated on the move!

    How Can I Ensure Safe Drinking Water When Hiking?

    Safe water matters a lot on hikes. Always know where to find it. Portable filters or UV purifiers help. If water looks dirty or unclear, do not drink it. You might get sick from stuff you can’t see. So, always bring tools to clean water.

    Some choose chemicals like iodine for cleaning water. This kills germs but may change the taste. Filters can make water taste better. They take out bad stuff without adding any new tastes. Choose what you like best to make sure you enjoy your water on the trail.

    Plan for long trips. Know where you can get more water. Check maps for streams or lakes. Remember, they may not always be safe. Always use your filter or purifying tools on these sources.

    Staying healthy and hydrated means enjoying hikes more. Take the right steps. Make sure your thirst doesn’t lead to trouble. Now, step out confident you’ll have the safe water you need.

    What Are the Lightest Water Carrying Options for Long-Distance Treks?

    When you’re in for the long haul, every ounce counts. What bottles are the lightest? You want to look at materials and minimal design. Plastic often wins for being light, but you can do even better. Enter the world of collapsible bottles and soft flasks. These gems fold down when empty, saving space and weight.

    Now, don’t risk dehydration to cut down weight. Instead, take enough water but pick the right gear. Collapsible options like HydraPak or Vapur let you carry the water you need without the bulk. There’s also the magic of multi-use items. Some gear like cooking pots can double as water containers.

    Think about your route, too. Will there be streams or lakes? Plan it right, and you can carry less. You just refill more often using a light filter or purifying tablets.

    Don’t forget, a bottle’s weight isn’t just about the bottle. It’s what’s in it. Choose smart, stay safe, and keep sipping all the way to your next grand view!

    How Should I Attach My Water Bottle to My Pack for Easy Access?

    When you hike, you need quick access to your water. This keeps you moving and hydrated. To keep your water close, attach a bottle with a carabiner to your pack. A carabiner clip is an easy way to secure a bottle outside your backpack. This clip is like a hook. It opens and closes. Attach it to a loop or strap on your pack.

    Some hiking packs come with pockets for bottles. These pockets are on the sides. They let you grab your water without stopping. You just reach back and take a sip.

    You can also use holsters or slings made for hiking. These are like special pockets that you wear. They hold your bottle snugly and in reach.

    Let’s talk about the pros and cons of both ways. If you put your bottle inside your pack, it keeps it safe. It won’t fall and won’t get dirty. But, it’s harder to reach when you want a drink. If it’s on the outside, you can grab it fast. But, it might bounce around or hit things.

    So, think about what works best for you. Would you rather it be safe but hard to get? Or easy to reach but may swing around? You decide and hike on with water always at hand.

    What Unique Water Bottle Features Can Benefit Hikers?

    Do you need a water bottle with a built-in compass? Yes, it helps you stay on track. Having a compass on your bottle means one less thing to carry. Plus, it’s always in sight, so you can check your direction quickly. This feature is perfect for when you’re deep in the woods or facing rough terrain.

    What about storage? Yes, it is useful! A multipurpose water bottle with storage lets you stash keys or snacks. This way, your hands stay free, and you don’t have to dig through your bag for small items.

    Reflective materials – are they important? Absolutely! They make you visible at dusk or dawn. They catch the light, so others, like bikers or runners, can spot you. Safety comes first, and anything that makes you more visible can prevent accidents.

    Should you get a water bottle with interchangeable lids? Yes, they’re handy. Different lids mean you can switch from a sip-friendly lid to one better for pouring. This versatility is great for different types of drinks or sharing water with a buddy.

    Is noise a big deal? Yes, for animals. Noise-reduction features keep the peace in nature. They help you stay quiet, so you don’t scare wildlife away. Being considerate of our forest friends is key to a true adventure-ready water bottle.

    When you hit the trail, every feature on your gear should help you out. Choose a bottle that does more than just hold water. Find one that fits your hike, keeps you safe, and respects wildlife. It’s a small detail, but it can make your hike much better.

    How Can I Match My Water Bottle to My Outdoor Style and Needs?

    When choosing a water bottle, think about where you’ll hike. Will it be hot deserts or cool forests? Pick one that fits these spots. Like colorful bottles? Many come with cool designs and stickers to show your style. Love nature? Some bottles support parks and the planet. When you hike, your bottle is your friend. It holds the water you need. So make it fun and fit your needs. Choose a tough bottle for rocky places. Go for a light one if you climb hills. Think about how it looks and what it does for you. It’s more than just a bottle. It’s part of your hiking gear and shows who you are. Make sure it can handle the wilds and makes you smile. Remember, the best bottle is one you love to take along on every hike.

    How Do I Choose the Right Size for My Hiking Water Bottle?

    What size water bottle do you need for a hike? It depends. Before a hike, think about how much water you’ll drink. If you go for short, easy walks, a small bottle may work. A small bottle holds less but is light to carry. A 1-liter water bottle for hiking is a common choice. It offers enough water but not too much weight.

    But, for long hikes or in hot weather, you might need more water. High-capacity water bottles carry more but add weight to your pack. To stay safe, drink about half a liter per hour of moderate activity. For long treks, plan your refills to balance weight and hydration needs. Always carry a bit more water than what you think you need. This way, you’re ready for the unexpected. Remember, running out of water on the trail can be risky.

    When picking the right size, think about hike length and your thirst level. A hike can be hard and sweat can be heavy. You will need water to stay sharp and keep walking. The right bottle size means less trouble and more fun on the trails. So, choose with care, drink with joy, and hike on!

    Conclusion

    Water is key for any hiker. Without enough, your body struggles and your hike gets tough. Know how much to take, and pick the right bottle to help you drink up and stay sharp. Look for light ones, with smart features like filters, to make sure you’re safe and hydrated. Choose a bottle that fits your hike and style, and take care of it so it’s always ready for adventure. Stay hydrated, stay safe, and keep exploring!

    Loading


  • An intrepid hiker conquering a snowy mountain peak with determination and expertise.

    When Should You Use Hiking Crampons on Your Trek?

    Looking for hiking crampons? Understand essential features, compatibility, and when to strap them on for safe outdoor adventures.

    • Hiking crampons feature longer spikes for challenging terrain, while microspikes are for less-steep ice and packed snow.
    • Crampons must fit your boots properly; use a compatibility chart and ensure stiff soles for attachment.
    • Use crampons on icy or packed snow trails; avoid using them on rock or soft ground to prevent trail damage and wear.
    • Key safety tips: learn to walk in crampons, check for damage before hikes, and only use on appropriate surfaces.
    • Maintain crampons by drying after use, avoiding rust, and tightening loose parts.
    • For different hiking scenarios, select from hybrid, step-in, or strap-on crampons based on terrain and boot compatibility; semi-rigid for uneven ice.
    • Always prioritize safety when choosing and using crampons on hikes.

    Embark on treks with confidence; know when to strap on those hiking crampons! Whether scrambling over icy trails or crossing glaciers, the right grip can make or break your adventure. In this post, we’ll uncover when crampons trump microspikes and ensure your boots are set for whatever lies ahead.

    Get ready to conquer diverse terrains with essential tips on using crampons for peak safety and performance. Ready to step up your hiking game? Let’s dive in!

    What Are the Essential Features of Hiking Crampons?

    Hiking crampons are more than just ice-walking accessories. They have unique features for various landscapes. The main difference between crampons and microspikes is in their spike length and build. Crampons are built with longer spikes and are designed for more challenging ice and mixed terrain. Microspikes have smaller spikes, and connecting chains, and are suited for packed snow and less steep ice.

    Hiking crampons should have points that stick into the ice to help you not slip. These points should be strong enough to grip ice but light so they don’t tire you out. For different places, you need crampons that match. Rocky paths need tough, rigid types. Snowy trails need ones with anti-balling plates to stop snow from sticking.

    Crampon types vary, so pick the right one for your trek. Mountaineers use ones with lots of points, while less techy hikers use ones with fewer points. Look for hiking crampons that can handle diverse terrains because you might face more than just ice. You’re on your way to grips that don’t give up and can cross lands that others can’t. Always think about the ground you’ll be on. That way, you’ll bring crampons that keep you safe and moving no matter the trek.

    How to Select the Right Crampons for Your Hiking Boots?

    Can you use crampons with regular hiking boots? Yes, but check if they fit right. Hiking boots and crampons must work together. Use a hiking boot and crampon compatibility chart to see what matches. Make sure the boots have stiff soles and can handle the crampon attachment methods.

    First, look at your boot’s sole. It needs to be tough to hold a crampon. A good fit is key to keeping you safe and stopping the crampon from slipping off. Test the crampon on your boot to make sure it attaches properly.

    Next, use the chart to find what kind of crampon you should get. There are different types, like those with straps or clips. They should be simple to put on and hold tight on your boots.

    Think about where you’ll hike. For rocky trails, look for strong crampons that won’t break. For snow, get ones that have big spikes for better grip. A step-by-step guide can show you how to try them on your boots. It can help you see if they’re a good match or not.

    If you run into trouble, troubleshoot the fit. Check for gaps or parts that pinch. Your crampons should not wobble on your boots. If they don’t seem right, get help or try a different pair.

    Picking the right crampons keeps you safe on ice and rocks. Take your time to choose well, and enjoy your hike without worry!

    When Should You Use Crampons During Your Hike?

    Are crampons good for hiking? Yes, they are when you’re facing icy or snowy trails. Crampons offer great grip and can stop you from slipping. They add spikes to your boots that dig into ice and snow. This means you stay safe on those slick paths.

    Identifying ideal conditions for crampon use on hikes

    The best time to wear crampons is when you hike on ice or packed snow. Look at the ground as you go. If you see ice coating the rocks and ground, it’s crampon time. This gear helps you cross glaciers, climb icy slopes, or trek across old snow fields.

    Advantages of crampons for ice and snow traction

    Crampons have metal spikes. These spikes sink into icy surfaces and keep you steady. No more slipping or sliding around. They fit over your hiking boots. This makes them easy to put on when you hit a tough spot.

    Scenarios where microspikes are preferred over crampons

    You don’t always need the big guns. For less tough ice and soft snow, microspikes work better. They are lighter and less sharp. They are great for trails that are icy but not too steep. This means you can walk with less weight on your feet.

    Assessing terrain to determine the need for crampons

    Always check out the path before you go. If it has steep ice or hard snow, bring crampons. If you’re not sure, it’s safe to take them just in case. It’s better to have them and not need them, than to need them and not have any.

    When you’re about to hit the trails, asking “When not to use crampons?” is key. Skip them on rock or soft ground. They can hurt the trail and wear down fast. Save them for when you have no choice but to cross ice or hard snow.

    What Are the Safety Precautions for Hiking with Crampons?

    When should you not use crampons? You shouldn’t when there’s no ice or snow. Now, let’s dig into this a bit more. You might think crampons are good for every winter hike. But that’s not true. On trips without ice or deep snow, they can be more harmful than helpful. They could even damage trails or your gear. So, what are the key safety tips?

    First off, learn how to walk in them before hitting the trail. It feels strange at first, like having claws on your feet. You must lift your feet higher to avoid tripping over the points.

    Next, always check your crampons before each trek. Look for any wear or damage. Make sure they still fit snugly on your boots, and the straps are not frayed. You want to trust them on slippery slopes.

    Never forget that crampons are for ice and hard-packed snow. They give great grip in freezing conditions. But in mud, rocks, or soft ground, leave them off. They won’t help and may cause a fall.

    Have a list of winter hiking needs ready too. Alongside crampons, pack warm clothes, food, and tools for navigation. Always have a first-aid kit.

    Remember, safety isn’t just about using crampons. It’s about knowing when they’re the right tool for your hike. If the trail asks for them, strap them on and enjoy the surefootedness they give. If it doesn’t, keep safe and crampon-free. Stay smart, and your hikes will be safe and stunning!

    How to Take Care of Your Crampons for Longevity and Performance?

    Routine maintenance for crampons? Yes, it keeps them ready for the trails. Dry them well after each hike. Keep them out of damp places to stop rust. Check spikes before and after use. Tighten loose parts, and replace worn spikes. This care makes your crampons last and ensures a secure grip on icy paths.

    When you get back from a hike, knock off any dirt first. Then, rinse your crampons in fresh water. To dry, place them in a warm, well-aired room but out of direct sunlight. Sun can harm the straps. Once dry, store crampons in a breathable bag. Avoid plastic bags that trap moisture.

    To prevent rust, and damage, treat your crampons with care. Look at them as you would a loyal pet. They keep you safe on your icy adventures, so give them the respect they deserve. For longer life, use a light coat of oil on the metal parts. But use oil that won’t harm the environment.

    Little checks like these can save you from a slip at the worst time. Be sure to look closely at the points for any sign of bending or dulling. If you see damage, it’s time for a fix or even a new set. Being on top of maintenance means you’ll never worry about your grip when you’re high up on a frosty peak. Keep your trusty spikes sharp, and they won’t let you down.

    What Crampon Systems Are Available for Various Hiking Scenarios?

    Can you use hybrid crampons for versatile hiking conditions? Yes, you can. Hybrid crampons are great because they fit different boot types. They have a heel lever and a toe strap, making them good for many hikes. For climbing ice or mixed terrain trails, go for step-in crampons. They need boots with a heel welt and offer the best hold.

    Strap-on crampons also have their spot in your gear closet. They use straps, so you can put them on most boots or shoes. Just be sure to get a snug fit. For the toughest trail days, pick semi-rigid crampons. They give more support and stability. These are less bendy than the flexible kind and help when you’re on uneven ice.

    When you’re picking crampon systems for hiking, think about where you’ll go. For varied ground, hybrid crampons are good. For ice walls or tough climbs, step-in designs give the firmest grip. Got no welts on your boots? Strap-on crampons are your friend. Keep in mind the firmness you need, too. Semi-rigid crampons are for sure-footed steps on tricky paths.

    So, there you have it. Choose your crampon system based on your hike’s needs. Safety always comes first. Rock those trails, and have epic adventures!

    Conclusion

    In this post, we covered key points about hiking crampons. You learned the essentials, from knowing when to pick crampons over microspikes to fitting them right on your boots. We explored the types of crampons for varied terrains and showed how to keep them sharp and ready. Remember, safety comes first when using these ice grippers. Choose the right system for your adventure. Happy trails and stay safe on icy paths!

    Loading


  • A mountaineer braving extreme cold, protected by an advanced sleeping bag.

    How Do Cold Weather Sleeping Bags Perform in Frigid Conditions?

    Need tips on selecting a cold weather sleeping bag? Get the best advice on insulation, shape, and features essential for warmth.

    • Choose a mummy-style sleeping bag with the right fit for cold weather; it should be snug to trap heat.
    • Opt for a bag rated for temperatures lower than you expect to encounter.
    • Down insulation is lightweight and warm but performs poorly when wet; synthetic insulation is heavier but retains warmth when damp.
    • Select bags with draft collars, hoods, and other features to trap heat.
    • For backpacking, consider the weight and packability of the bag.
    • A sleeping bag liner can add extra warmth.
    • Use a proper sleeping bag liner material for added insulation, such as fleece or thermal.
    • Ensure the bag is not too big or too tight and utilize a hood and pillow for additional warmth.
    • Prioritize innovations like advanced baffle design, zipper construction, and foot box design for better performance.
    • For extreme cold, look for bags with a high fill power (at least 600) and suitable warmth ratings (zero degrees or lower).
    • Regularly maintain your sleeping bag by storing it loosely keeping it dry, and cleaning it according to the manufacturer’s instructions.

    Brace yourself for the chills; picking the right cold-weather sleeping bag can mean the difference between a cozy night under the stars and a shivering ordeal. Every frosty night adventurer knows it’s not just about staying warm—it’s about conquering the cold. I’ll guide you through what to look for, from insulation battles to snug fits, ensuring you’re geared up to face even the most frigid conditions.

    What Should I Look For When Selecting A Cold Weather Sleeping Bag?

    What type of sleeping bag is best for cold weather? To start, mummy-style bags offer the best cold resistance. Their snug fit helps keep the heat close to your body all night. Now, let’s dive in and look at what makes these bags so cozy.

    Understanding Insulation Types: Down vs. Synthetic

    First off, you’ve got two choices: down or synthetic. Down is light and holds heat well, but it won’t help much if it gets wet. Synthetic keeps you warm even when damp and dries fast.

    The Importance of Sleeping Bag Shape and Fit

    Shape matters too. Mummy-style sleeping bags are the best winter sleeping bags, hugging you tight to shut out drafts. Make sure the bag fits well; a tight fit means better warmth.

    Deciphering Sleeping Bag Temperature Ratings

    Let’s talk numbers. The temperature rating shows the lowest temperature at which the average sleeper stays warm. So choose a bag rated for temps colder than what you expect to face.

    Features That Lock in Warmth: Draft Collars and Hoods

    Remember, details like draft collars and hoods make a big difference. They trap heat around your head and neck, crucial spots for staying warm.

    Weight and Packability Considerations for Backpacking

    If you plan to haul your bag around, think about weight and how small it can pack. Lighter and more compressible bags are easier to carry, so consider those if you’re trekking far.

    The Role of Sleeping Bag Liners for Additional Warmth

    Lastly, for some added warmth, a liner works wonders. It slips inside your sleeping bag, offering an extra layer that can up the heat on really frosty nights.

    With these tips, you’ll find ergonomic and trusty sleeping gear to keep you toasty through the coldest camping trips.

    How Do Different Materials Affect The Performance of Cold Weather Sleeping Bags?

    Can you use a 20-degree sleeping bag in the winter? Yes, but only if the weather stays above 20°F. For colder times, you’ll need a warmer bag.

    Down-filled sleeping bags for winter are light and easy to pack. They trap heat well but lose their warmth if they get wet. Synthetic insulation camping sleep systems are heavier. But, they still work even when damp. Weather-resistant fabrics in sleeping gear help stop wind and water. They keep the insulation dry and you warm.

    Pros of down include warmth for its weight and easy packing. But it costs more and fails when wet. Synthetic fills are cheaper and work when wet. The downside is they’re bulkier and not as warm.

    Understanding shell materials is key. They protect the insulation inside. A tough shell fights off tears and abrasions. It also shields against harsh winds and keeps out water.

    Water resistance in sleeping gear is a must-have. It keeps melting snow or tent condensation away from insulation. That means you stay warm all night long.

    Your gear must fit the climate you’re sleeping in. The right bag can mean a good night’s sleep or hours of shivering. Sort out the materials, and you’re set for a cozy sleep, even in deep freeze.

    What Are The Best Practices For Using And Maintaining A Cold Weather Sleeping Bag?

    Yes, there are 4-season sleeping bags. These bags are sturdy and warm for year-round use. To keep your key winter gear in top shape, you need to care for your cold-weather sleeping bag. Storing your bag right keeps it fluffy and warm. Stuff it loose, not tight. Use a large cotton or mesh bag, not the small sack it came in.

    To stop condensation, keep the inside dry. Wipe off any moisture you might bring in. Use a waterproof bivy or tent to block dampness. And pick spots that keep water away.

    For cleaning, follow the bag maker’s advice. Usually, less wash is best to protect the fill. Spot clean small messes. Wash it full when it’s really needed. Use a gentle cleaner made for sleeping bags. Air dry it or use a large dryer on low heat. Avoid harsh soap and high heat – they ruin bags.

    A squished bag loses loft, which means less warmth. Don’t keep it squashed for too long. For cold trips, a bag that packs small helps. But at home, let it breathe.

    Your bag is part of your sleep system. A pad underneath adds warmth. Your wear matters too. Dry, clean clothes keep you and the bag dry. Together, these tips keep you cozy and keen for more adventures.

    Can Additional Accessories Enhance My Cold Weather Sleeping Experience?

    To stay warm on cold nights, yes, you must use the right accessories. Liners can make your bag warmer. Pillow and hood add-ons offer extra comfort and heat. How gear fits matters too; a snug fit boosts warmth.

    Selecting the Right Liner Material for Extra Insulation

    Choose a liner that suits your needs for more warmth. Fleece and thermal materials offer the most heat. Silk and cotton can feel good but don’t always add as much warmth.

    The Added Warmth and Comfort of Sleeping Bag Accessories

    For more warmth, get a hood and a good pillow. They keep your head and neck warm. Hugging a pillow helps, as cold air can enter your bag when you move.

    Maximizing Warmth: Understanding the Efficiency of Sleeping Bag Fit

    A well-fitted sleeping bag traps heat better. Too big, and you lose warmth. Too tight, and you might cut off blood flow, making you cold. Find one that’s just right for your size.

    How Do Design Innovations Impact The Performance of Cold Weather Sleeping Bags?

    Cold-weather sleeping bags can handle minus 40 degrees. That’s the coldest temperature most are rated for. These bags keep you warm at such low temperatures with new designs and tech. Let’s dive into how these innovations work.

    Baffle design is key in trapping warm air. Innovative baffle design in arctic sleeping bags creates tight compartments. These hold down or synthetic fill even and stop cold spots. Think of baffles like the walls in your home. They keep warmth where you need it – inside.

    Zipper construction matters too. A good seal keeps the cold out. Cold-proof sleeping bags often use zippers with special guards. These guards block wind and trap heat. Zippers might seem small, but they are mighty in fighting the freeze.

    Footboxes in sleeping bags are not just a space. Foot box design for cold weather sleeping bags gives toes extra room to move. This boosts warmth and comfort. Your feet can stay toasty even when it’s icy outside.

    Tech helps sleeping bags fight the cold. New materials and designs make sleeping bag technology advancements for colder climates. We now have bags that are lighter and warmer than ever before. Sleeping outdoors in the winter is tough. But, thanks to these advances, your bag won’t let you down.

    Remember, when the snow flurries dance outside, and the world is held in winter’s grip, your sleeping bag is your cocoon of warmth. It relies on smart design from head to toe, ensuring you’re ready for whatever cold comes your way.

    How Can I Ensure My Sleeping Bag is Suitable for Extreme Cold Weather Conditions?

    Extreme cold calls for extreme gear. Let’s talk ultra-warm sleeping bags. They must fit the bill for zero degrees, be it a mountain top or a snowy forest.

    Now, what’s fill power?

    It’s how much space an ounce of down takes up.

    Picture tiny, fluffy feathers. They trap warm air well, the higher the fill power, the warmer you’ll be. You’ll want a fill power of at least 600 for those icy nights. Good down can get you through a cold night snug and cozy.

    Next up, we dive into sleeping bag warmth ratings. Think of these as a survival cheat sheet for the cold. They tell you the lowest temps your bag can take. It’s like your bag’s superhero power against the cold.

    Zero degrees is what you’re aiming for here.

    But wait, extreme weather survival sleeping bags have more tricks up their sleeve. They team up with what you wear to bed, so don’t skimp on the layers. Add a thermal liner or a fleece jacket when it gets really cold.

    Feel like a winter warrior yet? Stick to these tips, and the cold won’t stand a chance.

    Conclusion

    Choosing the right cold-weather sleeping bag matters. You want one that keeps you warm through chilly nights. Remember, insulation type and sleeping bag shape are key. Look for features like draft collars and hoods to lock in the heat. Don’t forget, that materials and designs can boost warmth too. Proper care will make your bag last. And hey, add a liner or a hood for extra snug. Always check the bag’s temperature ratings for your coldest adventures. Stay warm, stay safe, and happy trails!

    Loading


  • A hiker conquering rugged terrain with durable gaiters, symbolizing protection and comfort.

    Are Hiking Gaiters Worth It? Benefits and Uses of Gaiters

    Exploring the advantages of hiking gaiters for trail protection and comfort. Essential tips on selection, use, and care.

    • Hiking gaiters are fabric covers for the lower legs and shoes, protecting from dirt, rocks, water, and insects.
    • They vary in material for different climates—waterproof for wet/snowy conditions and breathable for hot environments.
    • Gaiters offer protection from snake bites and ticks and improve comfort by preventing debris from entering shoes.
    • Right gaiters should be chosen based on durability, fit, and compatibility with your footwear and terrains.
    • Key features to consider include waterproofing, breathability, and strong closure mechanisms.
    • Gaiters are worn by wrapping around the leg and securing them firmly to the footwear with hooks or tabs.
    • Maintenance includes regular cleaning, avoiding harsh chemicals, storing dry, and carrying a repair kit.
    • Specialized gaiters cater to mountaineering, desert trekking, and sports.
    • Innovations in gaiters focus on eco-friendly materials, lighter and stronger designs, and integration of smart technology.

    Ever wonder if your ankles deserve better on hikes? Hiking gaiters are the unsung heroes for your legs, keeping you safe from pesky rocks, mean plants, and bad bites.

    They might just be the game-changer you need. Let’s dive into how they level up your trekking game, whether they’re worth the hype, and what makes them tick for every climate. Get ready to gear up and step out with confidence!

    What Are Hiking Gaiters and Why Use Them?

    Are hiking gaiters worth it? Absolutely! They offer numerous benefits. Hiking gaiters are fabric covers that wrap around your lower leg and shoes. Their purpose is to prevent dirt, rocks, and water from entering your shoes. No matter the climate, gaiters prove to be useful. In snowy conditions, they keep your legs dry, while in desert environments, they protect against sand and dust. It’s important to note that there are different types of gaiters designed for various settings.

    Since different climates require different gaiters, it’s crucial to choose the right ones. Waterproof gaiters are ideal for cold and wet places, whereas breathable gaiters are perfect for hot climbs. When it comes to height, hiking gaiters are available in high and low options. High gaiters reach up to your knee, while low gaiters simply cover your ankles. Regardless of the height, both types effectively block small stones and twigs from entering your boots, ensuring your comfort and safety while walking.

    Gaiters are beneficial for all hikers. New hikers will appreciate how they prevent blisters, while experienced hikers will enjoy the added safety they provide in rough terrains. By choosing high-quality gaiters and properly maintaining them, they can last for a long time.

    They act as an extra layer of protection between you and the wilderness, allowing you to hike for longer periods. If you’re considering hiking, it’s worth thinking about investing in gaiters. They could be the essential gear you need to enhance your hiking experience.

    How Do Gaiters Provide Protection on the Trail?

    Can gaiters prevent snake bites? While they can act as a barrier, it’s important to note that no gaiter is entirely snake-proof. However, snake protection gaiters are essential for safe hiking in snake-prone areas. It’s still necessary to exercise caution on the trail.

    Do gaiters offer protection against ticks? Absolutely! Gaiters help keep ticks away from your skin by covering the gap between your pants and shoes. This effectively prevents ticks from climbing up your legs, making gaiters a crucial component of tick prevention in outdoor environments.

    Gaiters also provide shielding against brush, rocks, and debris, ensuring that unwanted materials don’t find their way into your shoes. This helps keep your feet clean and prevents blisters.

    Another advantage of gaiters is their ability to waterproof your footwear. Whether you’re crossing streams or hiking in wet conditions, gaiters keep your feet dry, allowing for a comfortable hiking experience regardless of the surrounding moisture.

    Furthermore, gaiters offer protection to your ankles and lower legs when traversing rough trails. Whether you’re stepping over logs or moving through thick grass, gaiters act as guards, preventing cuts and scrapes and allowing you to focus on the breathtaking views rather than worrying about your ankles.


    How to Choose the Right Pair of Gaiters?

    When selecting the perfect gaiters, the material should be your first consideration. Are they strong enough to withstand tears and handle sharp rocks and sticks? Ensure that they are durable and resilient. Additionally, for a snug fit, check if the gaiters are compatible with your hiking boots. They should be tight enough to keep unwanted elements out, but not so tight that they cause discomfort.

    Next, pay attention to size and fit. Your gaiters should cover your ankle and extend to the top of your boot. They should provide adequate coverage without squeezing your legs, while still staying securely in place. Gaiters are available in small, medium, and large sizes to accommodate hikers of all sizes.

    Now, where can you find the best hiking gaiters? Look for reliable reviews and tips from fellow hikers. Trustworthy reviews can inform you about gaiters that are durable and perform well. Many hikers share their experiences and preferences on websites and forums, discussing which gaiters are user-friendly and maintain their strength after numerous hikes.

    Remember, good gaiters keep you dry and protect you from rocks, snow, and sand. Take the time to find gaiters that fit properly, have a long lifespan, and are suitable for the specific terrain you’ll be hiking. Excellent gaiters enhance your hiking experience and enable you to stay on the trail for longer periods.

    What Features Should You Look For In Gaiters?

    Are hiking gaiters waterproof? Yes, many of them are. When it comes to hiking, it’s crucial to seek out waterproof gaiters. This feature protects your legs from getting wet. Additionally, it’s important to choose breathable gaiters, allowing air to flow in and keeping you cool during warm hikes. Durability is also a key factor to consider. You want gaiters that are built to last.

    Durable hiking gaiters often utilize strong materials like nylon, which can withstand sharp rocks and tough brush. After all, you don’t want your gaiters to rip the first time you hit the trail, right? Look for sturdy materials that can handle the rigors of hiking.

    When it comes to closures and hooks, ensure they provide a secure hold. They should not come loose as you walk. It would be unfortunate to lose a gaiter mid-hike due to a flimsy hook.

    So, when selecting gaiters, consider the type of terrain you’ll be hiking in. Will it be wet, dry, hot, or cold? Different types of gaiters are designed for each environment. Opt for waterproof gaiters for snowy mountains or wet trails, and choose breathable ones for desert hikes to keep you cool.

    Remember, the right features can make a significant difference in your hiking experience. They will keep you comfortable and safe during your outdoor adventures.


    How to Properly Wear and Attach Gaiters?

    To wear gaiters correctly, start by opening them wide. Place the front of the gaiters on your shin and wrap them around your leg. Ensure that the top of the gaiter fits snugly to keep debris out. Next, fasten the Velcro or zipper that runs up the front of your leg. Then, hook the bottom loop or lace hook onto your boot’s laces to secure them in place. Finally, adjust the strap under your boot to keep the gaiters properly positioned.

    For trail runners, lightweight gaiters are recommended. They have a different attachment method, often using a simple strap or stick-on tabs that connect to your shoes. These gaiters help keep rocks and dirt out while you run.

    You might be wondering, “What are Dirty Girl gaiters?” They are a popular gaiter brand known for their comfort and unique designs. They are perfect for trail runners or hikers who want to add some flair to their gear. They are easy to use: simply attach them to your shoes with the tabs, and you’re ready to go.

    Knowing how to attach gaiters to different types of boots can greatly enhance your hiking experience. It’s worth taking the time to learn the proper attachment method for maximum comfort and protection. When worn correctly, gaiters allow you to hike through mud and snow while staying dry and safe. Gaiters can turn a good hike into a great one.


    How Can Gaiters Impact Your Hiking Experience?

    Gaiters make hiking better by keeping your legs dry and safe. When they fit right, they up your comfort and shield you from harm. High gaiters are great for deep snow and rough spots. They cover your legs up to your knees. Light gaiters are best for long trips with your backpack. They keep you quick on your feet. In the rain, gaiters stop water from soaking your socks. This is key to a good hike.

    For a good fit, check that they hug your legs but don’t pinch. Think of them as a trusty sidekick for your boots. Proper fit means no slips or trips. Knee-high types are must-haves for snowy trails. They stop snow from sneaking into your boots. Plus, in tough spots, they guard against scrapes and bites. Fancy a long hike? Grab lightweight gaiters. They save energy and space.

    Light as air, they still do the tough work of keeping nasty bits out. In wet weather, gaiters are heroes. They work like a raincoat for your shoes. Say goodbye to soggy socks! With gaiters on, you can plow through puddles and light rain with dry feet. They’re simple but mighty. They turn a hike from good to great. They block all the bad stuff. And that means you enjoy the wild more. Plus, if you pick them well, they last for ages. So get some gaiters and hit the trail with a smile!

    How to Maintain and Care for Your Gaiters?

    To keep your gaiters in good condition, it’s important to clean them after each hike. Carry a small repair kit with you for on-the-trail fixes. When storing your gaiters, make sure they are dry to prolong their lifespan. Avoid using harsh cleaners and oils that can damage the fabric.

    Cleaning hiking gaiters involves removing mud, dust, and grit accumulated during use. Use a soft brush or cloth with cool water. For tough stains, a mild soap may be necessary. When drying them, hang them out to air dry, but avoid direct sunlight as it can weaken the fabric.

    Having a repair kit on hand can be useful if your gaiters develop a rip or a buckle breaks while hiking. Being prepared allows you to sew a small hole or replace a broken buckle, saving your hike and keeping you on the move with minimal disruption.

    To ensure the longevity of your gaiters, store them properly. Ensure they are completely dry before storing them to reduce the risk of mold or fabric rot. Find a cool and dry spot for storage.

    Certain substances can compromise the fabric and waterproofing of your gaiters. Avoid using bleach, strong detergents, or fabric softeners, as they can break down the materials and diminish their protective capabilities.

    With proper care, high-quality gaiters will serve as some reliable gear on numerous trips. They will shield you from the elements of nature and provide stability with every step.


    What Are Some Specialized Uses for Gaiters?

    Gaiters are versatile gear that has a practical application in various adventurous pursuits. They are designed to fit over your boots and lower legs. Here are some specific uses for gaiters:

    • Cold and snowy environments: Gaiters are particularly useful in high mountains and during winter mountaineering. They serve as a protective barrier, keeping you warm and dry by preventing snow from entering your boots. Dry feet are crucial for maintaining warmth and ensuring a safer climb.
    • Hot and dusty deserts: Gaiters also prove valuable in hot desert conditions by shielding your shoes and pant legs from sand and dust. They effectively keep these irritating particles out of your boots, allowing for a more enjoyable trek through sandy trails.
    • Popular among hikers: Gaiters are widely embraced by hikers around the world. Whether they are occasional weekend adventurers or experienced backpackers, many hikers consider gaiters an essential part of their gear. They select gaiters based on weather conditions and the terrain they will encounter. The right pair of gaiters enhances comfort and safety with every step.

    Gaiters offer specialized features and protection, making them a valuable companion for outdoor enthusiasts across different landscapes and activities.

    What Innovations Are Shaping the Future of Hiking Gaiters?

    Innovation is propelling gaiter design into the future, with exciting developments on the horizon. Here are some key trends that are shaping the future of hiking gaiters:

    • Eco-friendly Materials: Gaiters are now being crafted using eco-friendly materials, promoting sustainability while exploring nature. Brands are incorporating recycled fabrics and natural fibers, allowing you to protect the environment as you venture through it.
    • High-Tech Features: Cutting-edge gaiters are equipped with smart features, some even capable of connecting to your phone. These advancements enhance functionality and convenience, making your hiking experience more seamless and connected.
    • Style and Culture: Gaiters are not just practical; they also reflect your style. Cultural influences are shaping gaiter aesthetics, enabling you to showcase your individuality and flair while on the trail.

    These innovations are driving advancements in hiking gaiters, offering numerous benefits:

    • Enhanced Durability: New materials are making gaiters stronger and more resilient, better equipped to withstand the rigors of the trail. They can withstand impacts from rocks and branches, providing long-lasting protection.
    • Lightweight Design: Innovations in design are resulting in gaiters that are lighter in weight. Carrying less weight on your hikes reduces fatigue, allowing you to cover greater distances with ease.
    • Environmental Consciousness: Eco-friendly gaiters align with sustainable practices. By choosing gaiters made from recycled materials and natural fibers, you contribute to waste reduction and support environmentally friendly manufacturing.
    • Smart Technological Integration: Gaiters with smart features offer added functionality. They may incorporate sensors to track your steps or even enable control of your phone, adding an extra layer of convenience and connectivity to your hiking experience.

    As gaiters continue to evolve, they transcend their role as mere trail gear. They become a smart, stylish, and eco-conscious choice for hikers. Embrace the exciting changes in the gaiter world and embark on hikes knowing that your gear not only supports your feet but also contributes positively to the planet.

    Conclusion

    Gaiters play a pivotal role in ensuring comfortable hikes. They provide essential protection, keeping your legs safe and dry in any terrain. Whether you encounter wet or dry conditions or traverse flat or steep paths, gaiters enable you to trek effortlessly. Choosing durable and well-fitting gaiters enhances your hiking experience to its fullest potential. With proper care, they will accompany you on countless trails in the future.

    Stay ahead of the game by exploring the latest advancements in gaiter technology. Embrace the new and exciting features that enhance their functionality and performance. With innovative gaiter options available, you can embark on your hiking adventures fully equipped and ready to conquer any challenge that comes your way.

    May your trails be filled with joy and satisfaction as you venture forth with the reliable companionship of your gaiters. Remember to care for them diligently, and they will remain faithful partners for many trails ahead. Embrace the evolving world of gaiters and experience the wonders of hiking with the utmost comfort and confidence. Happy trails!

    Loading


  • A captivating photo showcasing essential day hiking gear in a picturesque mountain setting.

    What Are the Day Hiking Essentials?

    Essentials for day hiking—what to pack for safety and convenience. Find your complete gear guide here.

    • Essential day hiking gear list: “Ten Essentials,” extra clothes, water, snacks.
    • “Ten Essentials” include: navigation, headlamp, sun protection, a first aid kit, a knife, a fire starter, shelter, extra food, water, and clothes.
    • Gear varies by location; map and boots for mountains; bug spray and compass knowledge for forests.
    • Pack light with essentials for safe hiking; map, water, snacks, jacket, and basic first aid kit.
    • Choose a small, comfortable backpack (10-30L) for day hikes and balance the load.
    • Include high-energy snacks like nuts, seeds, dried fruit, and energy bars.
    • Layer clothing based on weather; synthetics or wool over cotton, proper shoes/boots.
    • Carry water via bottle or hydration pack; essential sun protection includes a hat, sunglasses, and sunscreen.
    • First aid kit: bandages, tape, antiseptic, scissors, tweezers, CPR shield, signaling device.
    • Wildlife prep: avoid strong-smelling food, excess gear, and noise; use repellents and be aware of your surroundings.
    • Navigation: use map and compass as primary tools, know how to read and use them alongside GPS.
    • Emergency gear: shelter, whistle or mirror, fire starter, and knife/multi-tool; know how to use them.

    Heading into the wild for some day hiking? Don’t just wander off. Every savvy hiker knows that a solid day hiking gear list is your best trail buddy. I’m here to share key must-have hiking items to tackle nature with confidence. From survival essentials to smart gear that saves space, let’s pack right for your next outdoor trek. Whether it’s your first hike or you’re a trail regular, my beginner-friendly guide will ensure you’re ready for anything the great outdoors throws your way. Now, let’s dive into the essentials that should make it to your backpack!

    What Should Be Included on a Day Hiking Gear List?

    What do you need for day hiking? You need the “Ten Essentials,” extra clothes, water, and snacks. These items are a must-have on everyday hiking gear list. They can save you in a pinch and make your hike safe and fun.

    The “Ten Essentials” help keep you ready for whatever comes your way. These include navigation tools, a headlamp, sun protection, first aid, a knife, fire gear, shelter, extra food, water, and clothes.

    Your gear list may change based on where you’re going. Are you heading up a rocky mountain? You’ll want strong boots and a map of the trails. Spending time in a forest? Bring bug spray and learn how to use a compass.

    If you’re new to hiking, keep it simple. Pack light but bring enough to stay safe. I suggest a good map, water, snacks, a jacket, and a basic first aid kit for starters.

    Some gear does more than one thing. A bandana can cool you off, clean a wound, or filter debris from water. Light and space are precious, so think smart when you pick your gear.

    Items like a whistle or a mirror can be lifesavers if you ever get lost. They’re key for any beginner hiker necessities list.

    Pack smart, and have fun out there! Remember, being ready lets you relax and enjoy your hike.

    How to Choose and Pack Hiking Backpack Essentials?

    To pack light for a day hike, choose a small backpack. Arrange items to balance the load. Put clothes in waterproof bags. Pack an extra layer for warmth.

    A daypack for hiking is your best friend on the trail. It holds your snacks, water, and gear. When picking one, think of the length of your hike. A pack with 10 to 30 liters of space usually fits all you need. Make sure it feels good on your back and the straps don’t rub your shoulders.

    Once you have your pack, it’s time to load it up. Put heavy things low and close to your back. This makes carrying the load easier. Put things you need often, like a map, in pockets where you can get to them fast.

    Waterproof your gear, especially electronics, and clothes. Rain can show up without warning. A dry bag or even a strong zip-top bag can keep key items dry.

    What about extra clothes? Yes, you need them. Weather can change fast when you’re outside all day. Bring a light jacket or a sweatshirt even if it’s warm when you start. If you get too hot, you can always take a layer off. Clothes made of wool or synthetic fabric are best as they keep you warm even if they get wet.

    Remember, the goal is to have a fun and safe hike. Picking the right pack and packing it well matters a lot. With a well-stocked and balanced backpack, you’re ready to hit the trail with confidence. Stay light on your feet, keep your gear dry, and dress smart for the perfect hike!

    What Are Some Essential Trail Snacks and Food Suggestions?

    When planning food for a day hike, maintaining energy is key. Choose snacks that are easy to carry and don’t slow you down. Trail snacks should balance nutrition and energy needs. The best hiking foods keep you going strong. What kind of food keeps hikers energized? The answer is high-energy snacks like nuts, seeds, and dried fruit. They pack a punch and take up little space.

    Dense energy bars are also great. They combine carbs, protein, and fat in one bite. High-energy hiking foods should not weigh you down. Avoid items that are hard to digest. Items like candy bars might give you a quick burst. But they don’t help much in the long run. Foods with fiber and protein are better for long-lasting pep.

    Remember, a snack that works for one might not suit another. Listen to your body’s needs. Some people need small bites often, while others like a big meal halfway. Keep water nearby to wash down your snacks and keep you hydrated. This way, you meet your body’s needs without unwanted breaks. Pack smart to ensure endurance and a fun day on the trail.

    Which Clothing and Footwear Items Are Considered Appropriate Hiking Attire?

    When choosing hiking clothes, look for comfort and weather fit. For footwear, seek shoes that suit the terrain. Layering helps adjust to weather changes.

    What should you look for in hiking clothes? Find materials that wick moisture, dry quickly, and move with your body without chafing. Avoid cotton, as it holds moisture and can chill the body. Instead, opt for synthetics or wool, which keep you dry and warm. The right footwear depends on the hike. Low trails ask for light shoes, but rocky paths need tough boots. Layering is key for warmth and dealing with changing temps. Start with a base layer that wicks sweat away. Add an insulating layer to keep you warm, and top it off with a waterproof shell to fend off rain or wind.

    Dressing in layers allows you to adapt to changing conditions throughout the hike. Each layer has a purpose: a base layer manages moisture, a middle layer insulates, and an outer layer shields from wind and rain. This system not only keeps you cozy but also prevents overheating or getting too cold.

    For hot weather, look for light colors and breathable fabrics. In colder settings, make sure you have a warm hat, gloves, and layers you can add or remove as needed. Always consider the weather forecast and be ready for unexpected changes. Your feet are your best friends on the trail, so give them the care they deserve. Trail shoes are great for most day hikes, but varied terrain might call for sturdier boots. Make sure they’re well-fitted and broken in to prevent blisters.

    Remember, the right attire makes the hike more enjoyable and safe, so invest in quality clothing and footwear. They’re as important as your trail snacks or hydration pack.

    What Types of Hydration and Sun Protection are Best for Hikers?

    When you go hiking, how do you carry water? You can use a bottle or a hydration pack. A hydration pack lets you drink hands-free. A water bottle is simple to use and refill. Both work, so pick what’s easy for you.

    What’s better, a hydration pack or a water bottle? Packs are handy, but a bottle can be easier to refill. It depends on the hike length and your comfort.

    Now, let’s talk sun protection. A hat, sunglasses, and sunscreen are musts. Light long sleeves help too. They block the sun’s rays and keep you cool.

    How do you know if you’re dehydrated or sunburnt? Thirst, headache, and dizziness are bad signs. Sunburn can sneak up on you, so cover up and wear sunscreen.

    Hiking hydration tips to remember are to drink often and before you’re thirsty. Use sun protection products like SPF lip balm to prevent burns.

    So, when you hit the traremember keep these hydration and sun protection me mind. Drink water, shield yourself from the sun, and you’ll enjoy a great hike!

    What Should Be Included in a First Aid Kit for Hikers?

    A hiker’s first aid kit should have bandages, tape, antiseptic, scissors, and tweezers. These are the basic supplies you need. Your kit should help stop bleeding, close small wounds, and deal with blisters, which are common on hikes. For training, take a course in basic first aid and CPR. This training can save lives on the trail.

    Knowing how to use a CPR shield is vital. Place it over the person’s mouth when giving breaths during CPR. This can help prevent the spread of disease. You should carry a CPR shield in your first aid kit. It’s small and could be a big help in an emergency.

    Always learn how to spot a serious injury. If someone is hurt and can’t walk, or they’re in a lot of pain, get help. Don’t move someone with a bad injury. Staying put and calling for rescue is often the best choice. Make sure your first aid kit includes a whistle or mirror to signal for help. These tools can alert rescuers when you’re in trouble.

    In short, your first aid kit should be ready for cuts, falls, and CPR. Have it stocked and know how to use it. Do this, and you’ll be set to handle most trail troubles.

    How Should Hikers Prepare for Wilderness and Wildlife Encounters?

    Wild encounters can be a real thrill, but safety comes first. When you hit the trails, know what to do if you bump into wildlife. Getting ready means you’ll enjoy your trip without harm to you or the animals.

    What not to take on a day hike? Avoid food with strong scents, excess gear, and anything that makes noise that could startle wildlife. Spotting wildlife is a treat. Stay alert and watchful. If you see an animal, keep your distance.

    Ticks can latch on. Wear light clothes to spot them. Tuck pants into socks. Use tick repellent and check often for these pests. To remove one, use fine-tipped tweezers. Grab it close to the skin. Pull up, steady and even.

    Some natural threats are less obvious. Learn before you go. Watch for signs of changing weather and know your trail. Stay on marked paths to dodge hazards.

    Letting critters know you’re near can stop surprises. Sing, clap, or talk loud. Carrying bear spray can help too, but know how to use it. Read up on wildlife encounter tips for how to handle animal meets and stay safe.

    Keep these ideas in mind and your adventures will be full of good memories, not close calls.

    What Are the Best Navigation Tools for Day Hikers?

    Maps and compasses are vital for hikers. They keep you on track when trail signs are scarce. A GPS can help, but it may fail without a signal or power. Always carry a map and compass to navigate.

    Modern tools like GPS devices are handy. Yet, knowing the basics of map and compass use is crucial. It ensures you stay safe, even if your tech fails you. Trail markers guide you, but not all paths have them.

    Learn to read your map, and practice using a compass before you hit the trails. This skill remains your best guide when you trek into the unknown. With a comprehensive hiking checklist, include navigation tools. Ensure you know how to use a GPS device. But remember, GPS should add to, not replace, your fundamental navigation skills.

    Which Emergency Items Should Be In Every Hiker’s Backpack?

    Must-have emergency gear items for hiking include a shelter, signaling device, fire starter, and a knife or multi-tool.

    To stay safe, a compact and light emergency shelter is key. This can be a space blanket or a bivy. They make sure you stay warm and dry in case of bad weather or if you get stuck overnight.

    For signaling, a whistle or mirror works well. They don’t rely on batteries, so they’re ready to use when you need help. Bright colors or reflective surfaces also help others see you.

    Waterproof matches, lighters, or a spark rod can all start a fire. You need one of these to keep warm, cook, or signal for help. They should be simple to use even when it’s very wet or windy.

    A good knife or a multi-tool is a must. They can cut, carve, or repair gear if needed. Look for one that fits well in your hand and does not weigh much.

    Remember, these items could save your life. Make sure they are always in your pack before you head out. Choose gear that is tough and reliable. It’s worth getting the best you can afford. Your safety could depend on it one day.

    Conclusion

    In this guide, we walked through what to pack for safe, fun hiking trips. Remember, bring the “Ten Essentials” and tweak your list based on where you’re going. Beginners need simple yet useful gear. Choose multipurpose items to save space. Select the right backpack, and pack smart for comfort and emergency. Don’t skimp on food; pick snacks that keep you energized. Wear the right clothes and shoes. Stay hydrated, use sunblock, and know the signs of too much sun. Have a first aid kit ready, and know how to use it. Keep safe from wildlife and know your way around. And always carry emergency items for unexpected situations. Hit the trails ready and relish your adventure!

    Loading


  • A group of beginners navigate a treacherous mountain trail, emphasizing hiking safety.

    Hiking Safety Tips: How Can Beginners Ensure Their Safety?

    Hiking safety tips for beginners: essentials of safe treks, staying informed, and gear choices at RuggedRoll.com.

    • Beginner hikers should focus on navigation, hydration, and pacing for safety.
    • Utilize a compass and map, bring ample water, and set a maintainable pace.
    • Preparation includes checking the weather, informing someone of your hike, and packing essentials like food, water, and a first-aid kit.
    • To avoid wildlife encounters, make noise, hike in groups, and carry bear spray where necessary; for bear encounters, stay calm and back away slowly.
    • Health precautions include a first-aid kit, staying hydrated, and knowing how to react to issues like hypothermia or snake bites.
    • Navigation skills involve using maps, compasses, GPS, and emergency signaling with a whistle or mirror flashes.
    • For night hiking, use a headlamp and trekking poles for stability, know the trail well, share your plans, and carry emergency contacts.
    • In all cases, planning and awareness are key to a successful and safe hiking experience.

    Heading out on the trails? Hold up! Your safety as a beginner hiker is key. Let me guide you through the must-know tips to avoid trouble and enjoy nature without worry. We’ll cover how to prep, understand trail levels, and master essential skills like finding your way, staying hydrated, and pacing yourself. It’s not just a walk in the park – it’s your adventure done right. Ready to hike safely and smartly? Let’s dive in!

    What Should Every Beginner Hiker Know About Safety?

    When you start to hike, you should know the basics of staying safe. The three basic skills in hiking are navigation, hydration, and pacing. These ensure you can find your way, stay healthy, and match the hike’s demands with your ability.

    Know the trail before you go. Look at maps and read about the trail. Understand the hiking difficulty levels. These tell you how hard a hike will be. Choose a level that is right for you. Not too easy, not too hard.

    Learn to use a compass and map. These tools help you stay on track. A compass points you in the right direction. A map shows you the trail ahead. Knowing how to use both means you won’t get lost.

    Carry enough water. You need water to stay strong while you hike. Without it, you could get sick or even pass out. Bring more water than you think you’ll need.

    Set a good pace. Don’t rush. Start slow to warm up. Keep a pace that you can hold for a long time. This lets you hike longer and enjoy more.

    Remember: Properly preparing for a safe hike matters a lot. Start with a well-planned trail prep and the rest will fall into place. With these steps, you can enjoy the outdoors without worry. So gear up, skill up, and step out into the wild with confidence!

    How Can I Prepare for a Safe Hike?

    To safely go hiking, check the weather first. Next, tell a friend where you’re going. Review trail info and closures. Pack ten essentials for emergencies.

    Why do these steps matter? First, weather changes can turn a trail dangerous. The right forecast helps you dress and pack right. Informing someone ensures that if you don’t come back on time, they know to get help. They need to know which trail you pick and when to expect your return. Also, trails may close for repairs, bad weather, or other risks. Checking this before you head out stops you from walking into trouble. And what if something goes wrong? That’s when your ten essentials turn vital. They are your lifeline in an emergency. These include water, food, warm clothes, a light, and first aid among other key items.

    Safety tips for trail outings teach us to plan. Your actions before the hike can save you from harm’s way. Essential safety measures while trekking start before you hit the trail.

    You’ve got to review more than the path ahead of you. Dig into trail maps and guidebooks. Know the length, and terrain types. Some trails are simple walks; others are rough climbs. Don’t guess. Know your trail.

    In the world of outdoor adventure, a good plan beats a good day’s walk. Weather forecast checking pre-hike keeps you off the path when storms brew. And if you don’t come home? Those informed about your hike plans will know. They can direct rescuers your way.

    Plan, check, inform, and pack. Do these, and you’re set for a safer hike.

    How Do You Protect Yourself from Wildlife Encounters?

    To protect yourself on a hiking trail, stay aware and make noise. Carry bear spray in areas with bears. To avoid wildlife encounters, hike in groups, stick to trails, and avoid times when animals are most active, such as dawn and dusk. If you encounter a bear, stay calm, speak in a firm voice, and slowly back away; do not run.

    For safe wildlife photography, keep your distance. Use zoom lenses to snap photos. Respect the animals and their homes. With these steps, you can enjoy a safe hike with little risk from wildlife.

    When out in the wild, being smart about animals is key. Many want to get a close photo or see them up close, but this is not safe or kind to the animals. Stay far off, use your camera’s zoom, and you will not only protect yourself but also the wildlife. Remember, we are guests in their home. Respect these rules and your hike will be both safe and fun!

    What Health and Emergency Precautions Should You Consider?

    To stay safe on a hike, pack a basic first-aid kit. This kit should have band-aids, tape, and medicine. You’ll also need to know how to use what’s inside. To stop dehydration, take lots of water and drink often. Watch for signs like a dry mouth or feeling weak. Both mean you must drink more water.

    For hypothermia, keep warm and dry. Wear layers and pack extra clothes just in case. Always check the weather before you leave. If a snake bites you, stay calm and get medical help right away. Don’t try to suck out the poison or cut the bite.

    A first-aid kit can fix small cuts and scrapes. But even more, it gives you peace of mind on your hike. Knowing how to react to more severe issues is key as well. Take time to learn about first aid and what to do in different cases. For instance, if you spot a bend in a river, that’s often a cooler spot. Staying aware can help you avoid both dehydration and hypothermia.

    Last, learn about the animals you might see on your hike. If you know what to do, fear won’t take over if you see a snake or bear. Remember, stay calm, and slowly back away from wildlife. Following these tips can keep a small problem from turning into a big one. Keep safe and enjoy your hike!

    What Are Crucial Navigation and Signaling Skills for Hikers?

    What are the 3 basic skills in hiking? You need to know how to read maps and use a compass, understand GPS, and signal in emergencies.

    Maps and compasses are your best friends on the trail. They work without batteries and signal. Learn to find your way even when paths are not clear. GPS devices are helpful too. They tell you where you are with just a push of a button. But they should not be your only tool. Batteries can die, and signals can fail.

    Now, let’s talk about when things go wrong. If you get lost, you need to ask for help without a phone. Emergency signaling techniques are a must. Use a whistle: three blasts are a call for help. You can also use a mirror to flash sunlight to attract attention. Knowing these skills keeps you safe if you lose your way.

    Always practice before you hit the trail. Understand your tools and signals. Tell others where you go and when you will be back. Nature is beautiful but does not take chances. Be smart, be prepared, and you’ll set yourself up for a safe and awesome hike.

    How Can I Ensure My Safety While Hiking at Night?

    What should I prepare for a night hike? Bring the right gear, know the trail, and tell someone where you’re going. Gear up with a headlamp and spare batteries. Pick a trail suited to your skill level, one you have hiked during the day if possible. Always tell a friend or family member your plans.

    Hiking at night needs extra thought. It’s not just a day hike in the dark. You must see where you step to stay safe. A bright headlamp lights the way. Pack an extra just in case. This simple tool keeps your hands free. Free hands are good for balance and catching yourself from falls.

    Know whom to call if you get in a bind. Checking trailhead emergency contact numbers is key. Write these down before you leave home. Keep them in a safe spot. If you get lost or hurt, help can just be a call away.

    Are trekking poles useful at night? Yes, they offer stability when you can’t see the ground well. Using trekking poles is smart. They are like an extra set of legs. In low light, they let you feel the path before you step. They help you stay up, not face-down, eating dirt.

    Tough paths get tougher at night. Rocks and roots seem to jump out of nowhere. Trekking poles can poke around to find them before your feet do. This helps you hike without a fall. Plus, poles can take some work off your legs. This keeps you fresh and ready for more trail time.

    Remember, night hikes offer fun and beauty. But they also ask for respect and care. Gear up, know your trail, tell a friend, and step smartly. Your night on the trail is sure to be a hit.

    Conclusion

    In this guide, we explored crucial safety tips for beginner hikers. We covered how to pick the right trails and the skills you need, like navigation and pacing. Remember to check the weather, tell someone your plans, and pack emergency gear. If you meet wildlife, stay calm and know what to do. Keep a first-aid kit and know how to use it. Learn to prevent dehydration and hypothermia. Always have a map, a compass, and a GPS can help too. If hiking at night, prepare and carry trekking poles. Stay safe and enjoy the trail!

    Loading


  • A hiker with a perfect hiking stick conquering challenging terrains effortlessly.

    Do Hiking Sticks Really Help? How to Choose the Right Hiking Stick | Expert Guide

    Finding the benefits of hiking sticks? Get balance, knee support, and more from trekking poles.

    • Hiking sticks improve balance, reduce knee strain, and aid arthritis sufferers.
    • They provide a mild upper-body workout and can come with a single or pair depending on preference.
    • When choosing a stick, consider height, adjustability, ergonomic grips, weight, and material such as carbon fiber or aluminum.
    • Hiking sticks have variations like collapsible, monopods, and wood crafted for traditional style.
    • They can feature multifunctional tools like compasses, camera mounts, or survival gear.
    • Using hiking sticks improves posture and walking efficiency by keeping the back straight and reducing the strain on the spine.
    • Walking canes offer added stability and a four-leg stance for seniors.
    • Maintain hiking sticks by keeping them dry, cleaning them, storing them properly, and frequently inspecting them for damage.

    Out on the trails, you might wonder if hiking sticks are truly your ally. “Do Hiking Sticks Really Help? How to Choose the Right Hiking Stick | Expert Guide” takes you through the solid perks of trail sticks. From keeping your balance on rough paths to easing knee pain, we lay out why trekking poles might be a game-changer for your adventures. Plus, stick around as we guide you through picking one that’s just right for you.

    What Are the Benefits of Using Hiking Sticks?

    Do hiking sticks really help? Yes, they do. Hiking sticks aid walkers and hikers. They make moving on trails easier, boost balance, and support your knees. Let’s dive into how they help you on your trails.

    Trekking poles offer great balance, especially on uneven ground. They act as extra legs. When you walk over rocks or roots, they keep you steady. This means less risk of falling and more confidence as you hike. Trail sticks for balance are a key help here. You should have them on rough paths.

    Knee pain bothers many hikers, but a walking stick offers knee support. It takes some weight off your legs. This can lessen pain and make hikes less tough on your joints. For long downhills, this is very vital. Here, pressure on the knees goes up a lot. A stick helps control the impact.

    For those with sore joints, hiking poles for arthritis are a blessing. They let you move more naturally. This reduces the strain on your joints which can flare up arthritis pain. Poles also give you a mild upper-body workout. This can help keep joint stiffness at bay.

    Do you need 1 or 2 hiking sticks? It depends on your needs. Two sticks offer more stability and support. Yet, for some, one stick is enough. It can free up a hand for other tasks. So, think about your hikes and choose what suits your style.

    In all, hiking sticks are not just a tool, they are a hiking partner. They support you, keep you stable, and make hikes more enjoyable. Whether on a tough trail or a simple walk, they’re always ready to help.

    How Do I Choose the Right Hiking Stick?

    Choosing a good hiking stick starts by considering key factors. Pick one that fits your height. The stick should reach your wrist when you hold your arm straight down. An adjustable walking stick is best. It fits any height and is great for uphill and downhill walks.

    Get a stick with ergonomic grips. Your hands and wrists will thank you. Comfort matters, especially on long hikes. Without an ergonomic grip, you could get blisters or feel sore.

    You’ll want a hiking stick that’s lightweight, too. A light stick makes hiking easier and you can move more freely. Heavy sticks tire you out. Not what you want on a long trail!

    Look for lightweight materials like carbon fiber or aluminum. They offer a good balance of durability and lightness.

    Now, you’re set with some basic tips. Enjoy finding the perfect hiking stick for your next adventure!

    What Are the Different Types of Hiking Sticks Available?

    A hiking stick is often called a trekking pole or a walking staff. Different materials like carbon fiber, aluminum, and wood are common. Carbon fiber hiking sticks are light and stiff. Aluminum ones are strong and a bit heavier. Wooden hiking staffs show fine craftsmanship.

    Collapsible hiking sticks can fold or slide into a shorter length. This makes them easy to carry. Non-collapsible models are sturdy but less portable. Some sticks double as monopods or have camera mounts. Others serve as walking canes. Wooden staffs look great with their natural look and detailed handwork.

    When looking at carbon fiber versus aluminum trekking poles, pick carbon fiber for less weight, and choose aluminum for more strength at a slight weight increase. Collapsible sticks are great for travel, while wooden hiking staff craftsmanship may appeal to those who value tradition and style in their hiking gear. Unique features like camera mounts can turn your stick into a handy tool on trails.

    Remember, the type of stick you choose should fit the hiking you like best. Light, strong, and fancy or simple, the right stick feels good in your hand and supports your adventures on the trail.

    How Can Hiking Sticks Be Incorporated as Multifunctional Tools?

    Hiking sticks are not just for walking. They can do much more. A trekking stick with a camera mount lets you take steady photos. In tough times, survival tools in trekking poles are life savers. Plus, many accessories can turn sticks into multifunctional trekking poles.

    Yes, a compass on a stick gets you through unknown paths. It sits at the top of your staff. You look at it and know which way to go. No more fears of getting lost.

    A camera mount on a trekking pole is cool too. You fix your camera on it. Then snap! You get pictures that are not shaky. Friends will think you had a tripod.

    In survival situations, a trekking pole is a key tool. It might have a sharp tip or a built-in knife. These can help you in the wild, like for making shelter or finding food.

    Then there are all kinds of add-ons for sticks. You can have mirrors, lights, or even flasks. Each one gives your stick a new trick. Enjoy your hike and be ready for surprises.

    Hiking sticks are your friends out in nature. They help in so many ways. Never think they are just there to lean on. They guide, they capture memories, and they might just save your day.

    Can Hiking Sticks Improve My Posture and Walking Efficiency?

    Walking sticks help you stand tall while hiking. They keep your back straight. This reduces stress on your spine. As a result, your posture improves.

    For seniors, a hiking pole is a key aid. It helps with balance and support. A hiking pole can make walks safer and more enjoyable.

    Walking canes offer extra stability. They are especially useful on uneven terrains. With a cane, you’re less likely to trip or fall.

    Hiking sticks help you keep a good walking rhythm. With each step, they help you move forward efficiently. They can even make your hike faster.

    Let’s delve deeper. Walking sticks for posture help align your body. This alignment is critical for a safe and effective hike. A straight posture also helps you breathe better. This can make a long hike feel easier.

    Hiking poles can be a game-changer for seniors. They allow for less strain on the legs and hips. This means you can explore trails without fear of falling.

    Walking canes offer two points of contact with the ground. This gives you a “four-leg” stance, making you much more stable. They can be vital on tricky paths. They are like a friend’s steady hand across rough patches.

    Hiking sticks give you a natural push with each step. This helps in maintaining a steady pace. With good rhythm, you walk better and tire less.

    Walking sticks, hiking poles, and canes improve your hikes. They help with your posture, support, stability, and pace. Make sure your next adventure includes one of these hiking allies!

    How Do I Ensure the Durability and Long-Term Use of My Hiking Stick?

    Hiking stick durability starts with the right care. For wood, keep it dry and oiled. Carbon fiber and aluminum need less care. Just wipe them clean.

    Keep your stick safe when not in use. Store it in a cool, dry place. For collapsible poles, keep them free from dirt before folding.

    Adding a custom design to your stick can make it last longer. Think about adding a tough tip or a grip that fits your hand.

    Make checking your stick a habit before you hike. Look for cracks, splinters, or loose parts. Fix any issues right away to stay safe on the trail.

    To sum up, caring for your hiking stick means choosing the right storage, checking it often, and fixing problems fast. This will make your stick last for many hikes to come.

    Conclusion

    We’ve explored how trekking poles are key for safe, comfy hikes. They help with balance and ease the stress on knees, especially for those with arthritis. When picking one, adjustability and lightweight matter. Different materials and types, like carbon or collapsible, have their ups and downs. We also saw how these sticks have cool extra uses, like for cameras or survival gear. They even boost your walk and can last long if you care for them right. Stick to these tips for great hikes and solid gear. Keep exploring and stay steady on the trails!

    Loading