Category: Hiking

  • Awe-inspiring solitude and untouched wilderness - a lone hiker gazes upon nature's beauty.

    Solo Overnight Hiking: How Do I Plan My Itinerary?

    Embarking on solo overnight hiking? Get tips for planning, packing, and safety for your adventure.

    • Carefully plan your solo hiking itinerary, including trail selection, navigation, campsite identification, permits, and informing someone about your plans.
    • Pack essential gear for safety, navigation, shelter, food, and hydration, focusing on weight and utility.
    • Ensure safety with appropriate night gear, bear spray, a personal locator beacon, and knowledge of emergency procedures.
    • Stay hydrated by carrying enough water, choosing a purification method, and mapping water sources beforehand.
    • Choose a lightweight and easy-to-set-up tent, a suitable sleeping bag, and a pad, and consider bivouac shelters or hammocks for alternate sleeping systems.
    • Navigate trails confidently with a map, compass, GPS, and by recognizing trail markers; practice navigation skills in familiar settings.
    • Mentally prepare for solo hiking by coping with fear and loneliness, practicing mindfulness, and ensuring proper mental conditioning.
    • Adjust meal planning for balanced nutrition, high-calorie foods, and essential cooking gear, including a first aid kit with hydration and nutrient replenishment supplies.

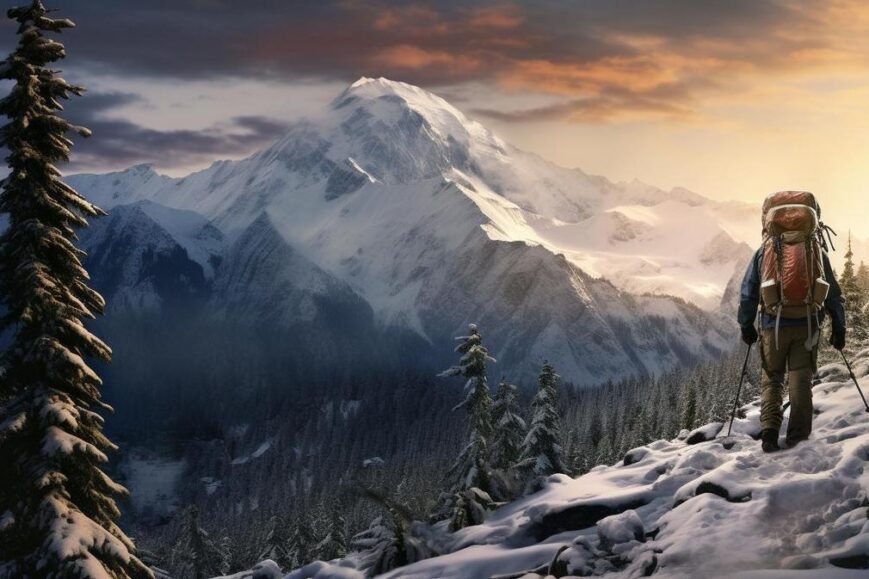
    Ready to tackle the trails on your own but not sure where to start? Setting up a solo overnight hike can feel daunting, but I’ve got your back. From picking out trails to snagging permits and letting folks know your plans, I’ll guide you through it. Pack your gear—a big solo adventure awaits!

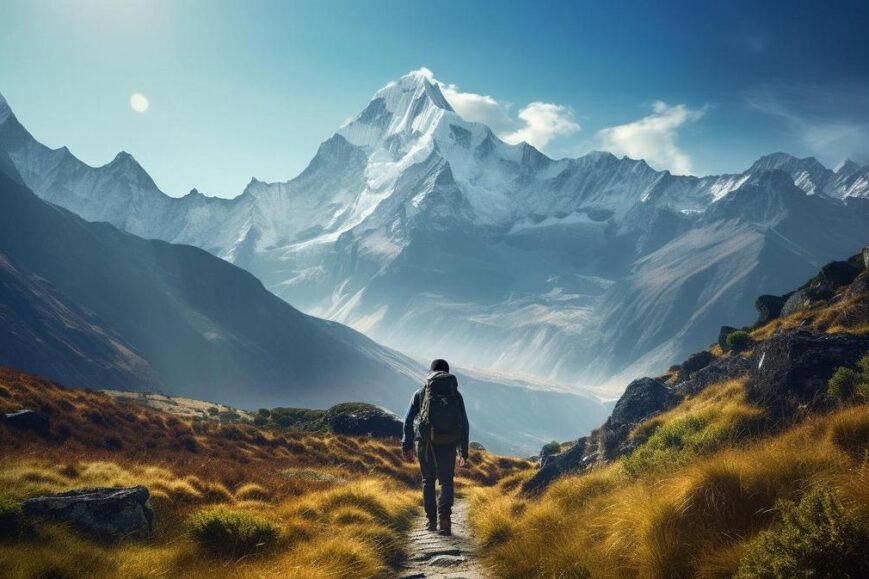
    How Do I Plan My Solo Overnight Hiking Itinerary?

    Is it OK to go hiking alone? Yes, if you plan well. First, pick your trail. Look for a route that fits your level of skill. Choose one that won’t be too tough. Make sure you check the weather too.

    Where do hikers sleep while hiking? We find spots called campsites. Some trails have shelters for you to use. Others let you pick your spot. Just be sure it’s safe and allowed.

    Start by choosing your destination and trail. Think about the views you want and what challenges you’re ready for.

    Next, estimate how much time you’ll need. Think about how far you can hike each day. Don’t forget to include time for breaks and setting up camp.

    Then, identify spots for camping and if they have shelters. This is key to a safe night’s sleep. Use tools like trail maps to find these spots ahead of time.

    Getting permits and reservations can be a must. Some places need you to book spots to camp or hike. Do this early to make sure you get a place.

    Last, tell someone about your hike and your full plan. Let them know when you plan to be back. This step could be a lifesaver in an emergency.

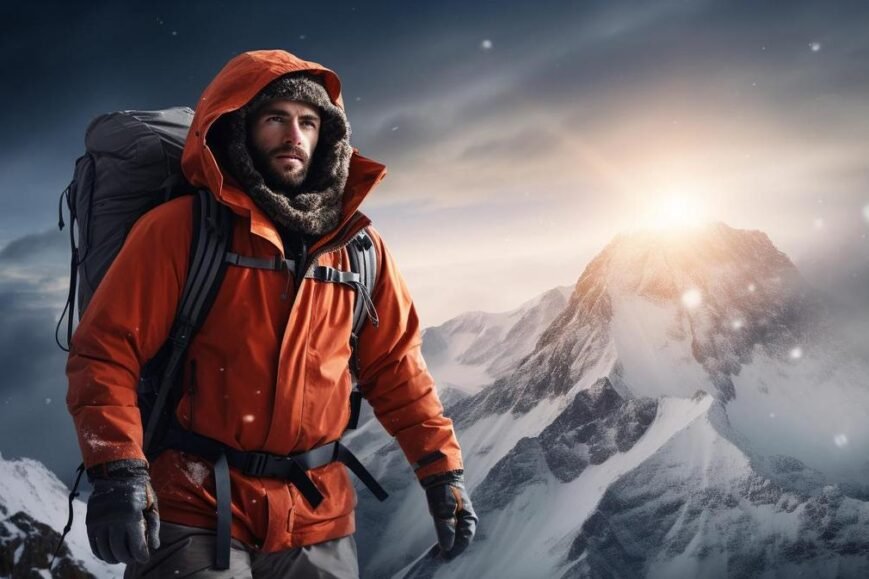
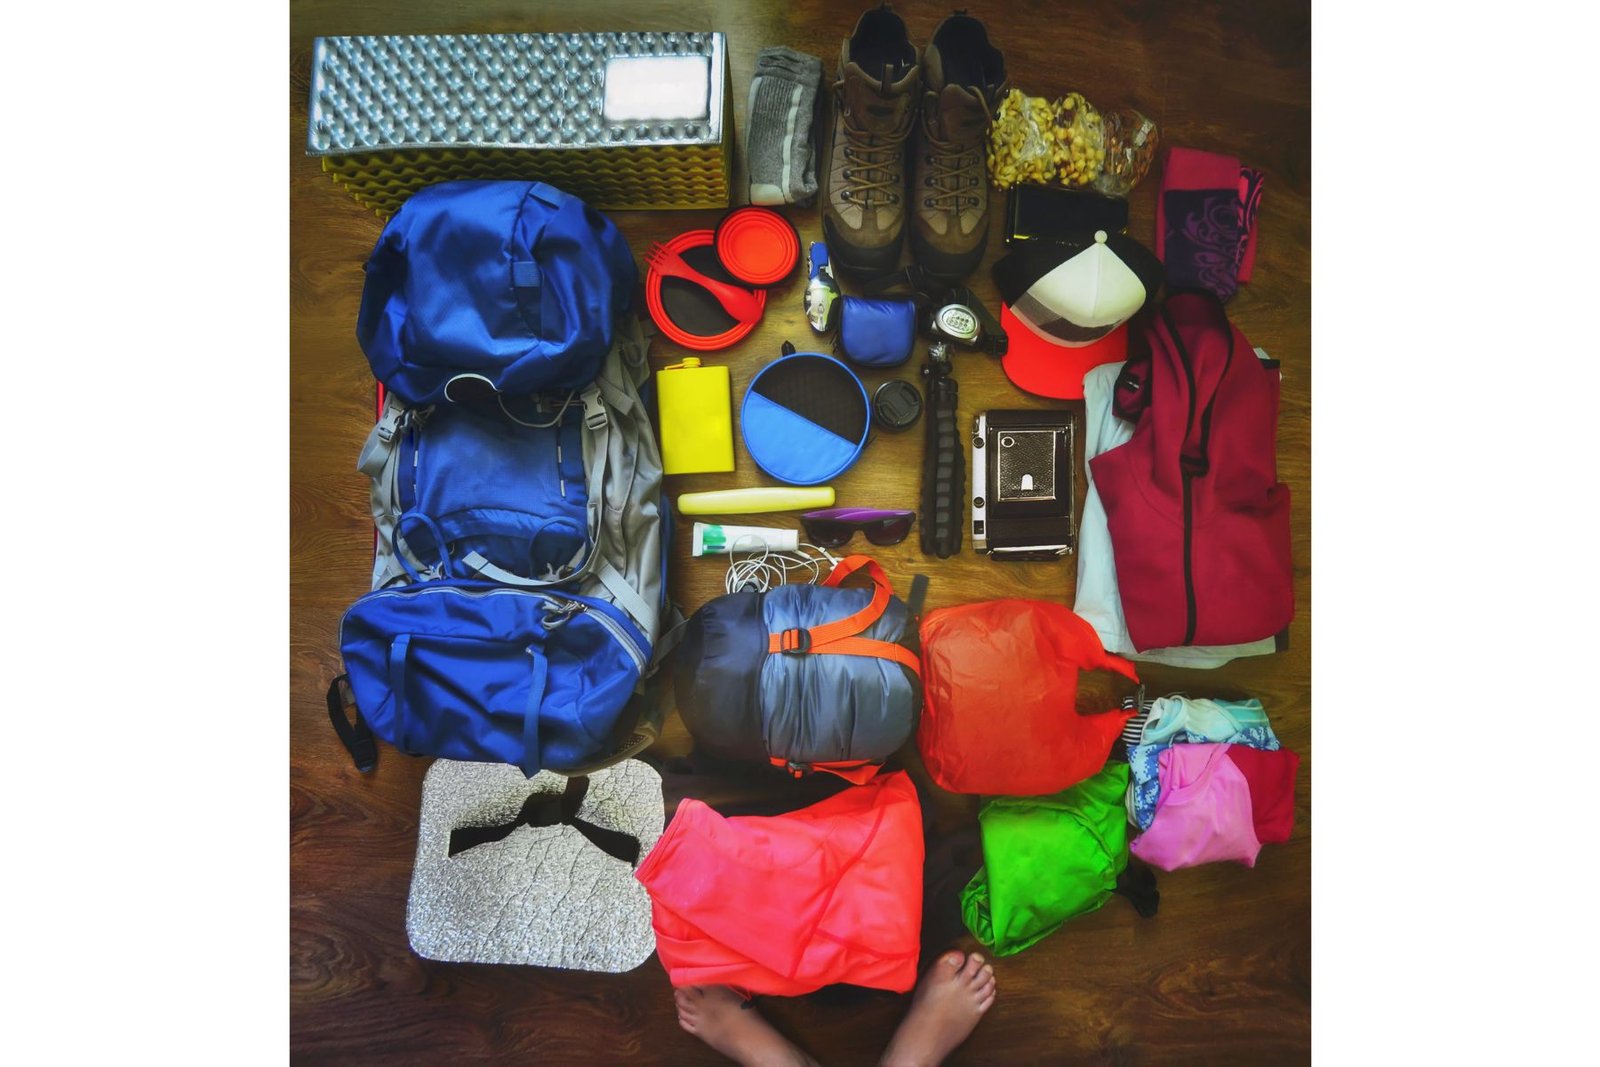
    What Should Be on My Packing List for a Solo Hike?

    What to take on a solo overnight hike? You’ll need gear for safety, comfort, food, water, and the right clothes.

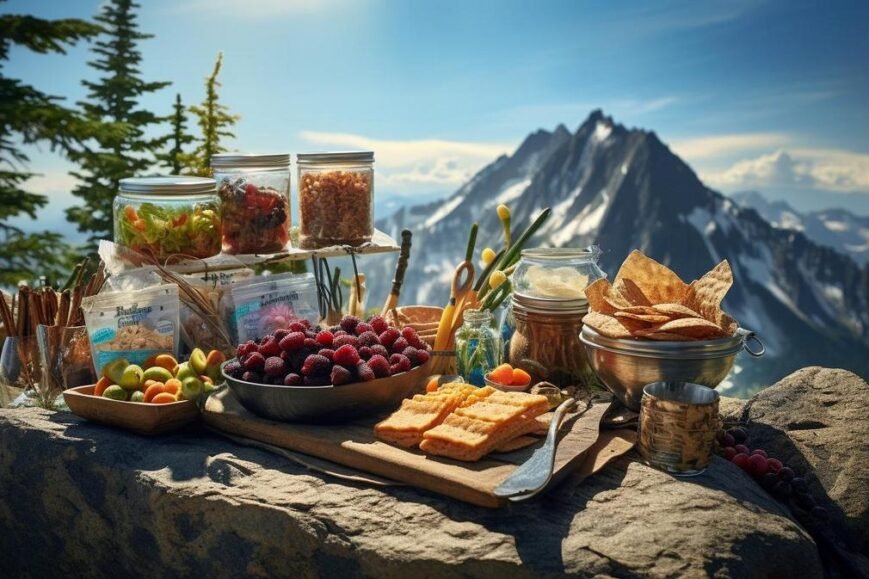
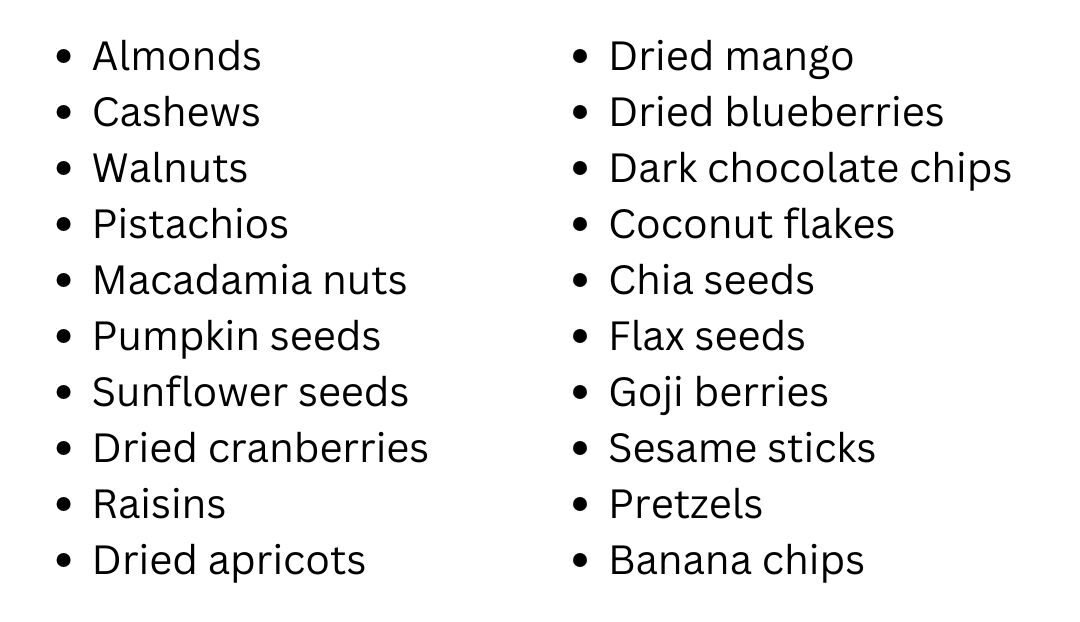
    First, figure out what you’ll eat and drink. Pack snacks that give you quick energy and meals that are easy to make. Don’t forget to bring enough water and tools to purify more from streams.

    Next, think about tools to find your way. A good map and a compass are must-haves. Sometimes, trails can be tricky, so knowing how to use them is key.

    Your bag should be light but fit all you’ll need. Picking the right backpack is vital to keep you moving with ease. Clothing should be just right for day and night temps.

    Don’t forget other basics like a light tent, a warm sleeping bag, and something to cook with. Plus, a first aid kit is a big deal for those ‘just in case’ times.

    As an outdoor adventure enthusiast, I suggest planning with a solo hiking gear guide. This can help you make sure you don’t miss a thing. Simple hacks can have a big impact. For instance, knowing how to pack can keep your bag light. This helps you hike longer and feel better at the end of the day.

    Each item in your pack should serve a purpose. Think, “Do I really need this?” Keep your pack as light as you can. This means a better and safer hike for you.

    Happy trails and pack smart! Keep it simple and think safety, but remember to savor the journey ahead.

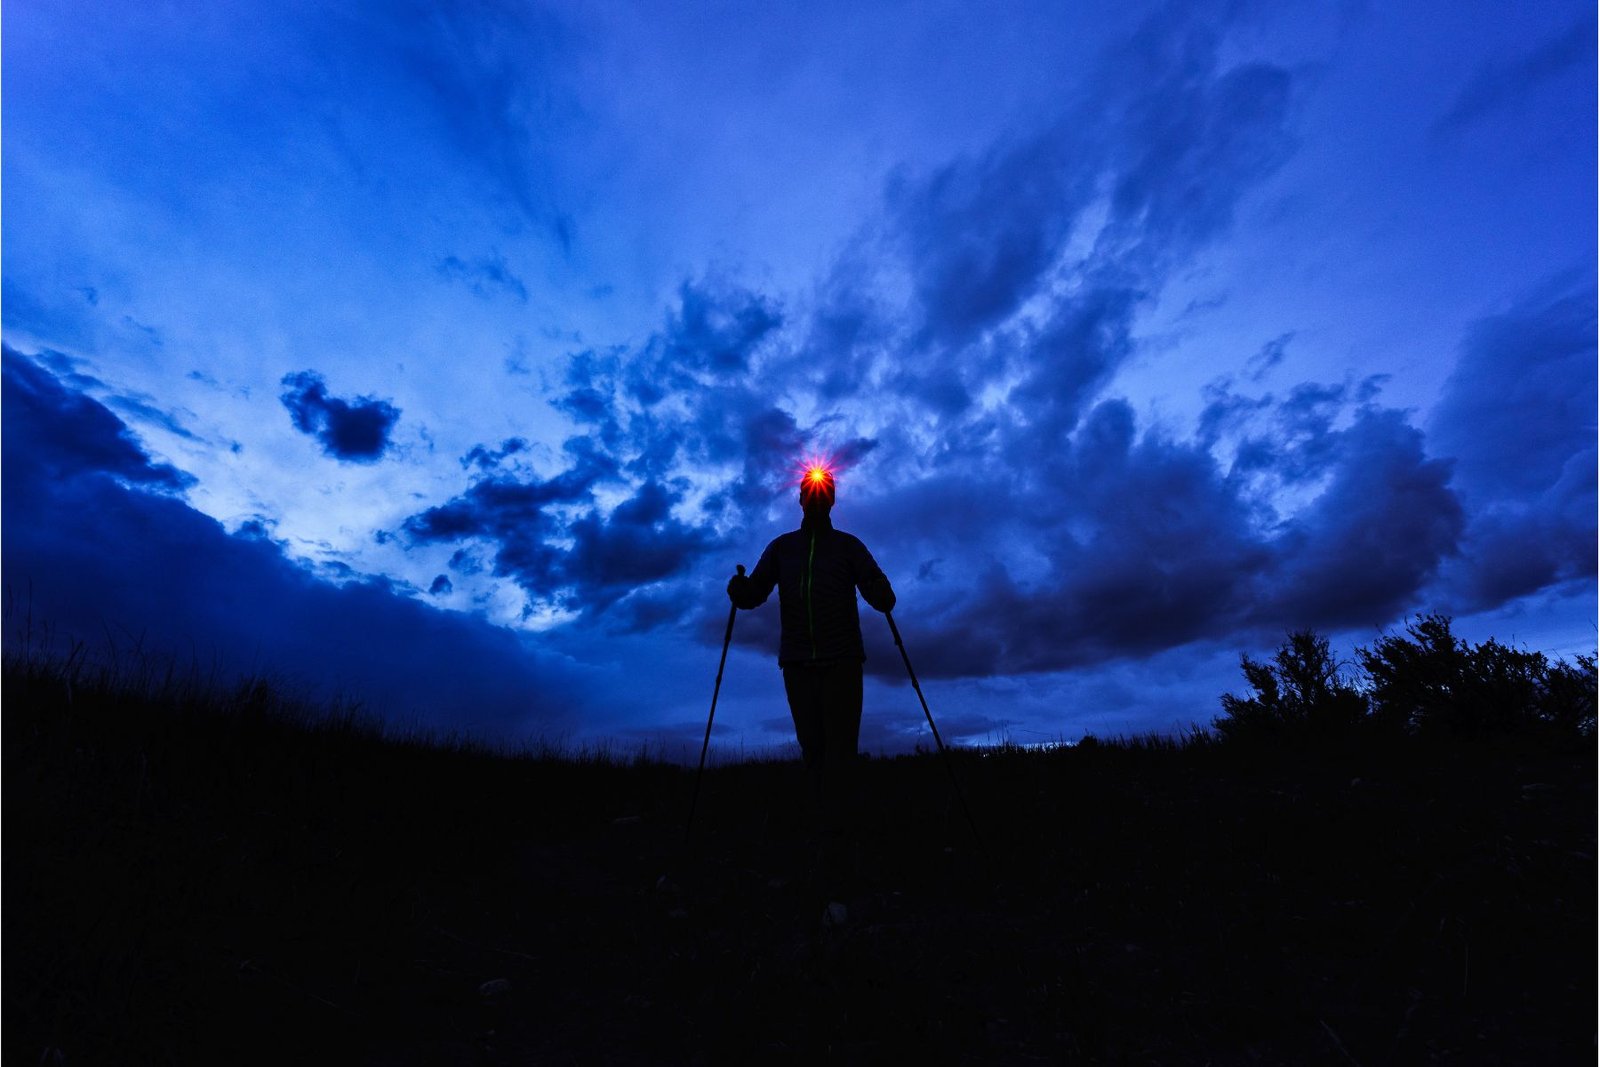
    How Can I Ensure Safety on My Solo Overnight Hike?

    Is it a good idea to go hiking at night? Yes, but you must take the right safety steps. When hiking alone at night, always use a strong headlamp. Stick to marked paths to avoid getting lost and watch out for tripping hazards. Be aware of wildlife that is active after dark, and know how to react if you encounter any.

    What about wildlife encounters when hiking solo? Know the animals you might meet. Read up on how to stay safe with bears, snakes, and others. Make noise while you walk to alert animals to your presence. Carry bear spray where it is allowed and know how to use it.

    Should you use personal locator beacons for hikers and other safety devices? Yes, absolutely. A personal locator beacon is key when you hike alone. It sends out a signal if you need help. Consider also taking a whistle, a mirror, or a flare to signal for help in emergencies.

    What emergency protocols for hikers are important? Learn basic first aid before you set out. Write down your plan and share it with a friend or family member. Know the signs of common health issues like dehydration or hypothermia. Practice how to stay calm if things don’t go as planned. Remember, calm thinking can save the day if you face trouble.

    By planning for wildlife, taking key safety gear, and knowing emergency steps, your solo hike can be both safe and fun. Your gear and knowledge are your best pals out in the wild. They keep you safe so you can focus on the beauty of the night sky and the peaceful trail ahead.

    How Should I Approach Water Purification and Hydration?

    How to stay hydrated on a solo overnight hike?

    You need to select a water purification method and map water sources. It’s vital to carry enough water, renew your supply, and use hydration systems.

    Water is key when you pack for a solo overnight hike. First, pick a way to clean water. Think about tablets, filters, or boiling. Each method has its pros and cons. Tablets are light and easy but take time and can taste odd. Filters clean quickly but can break and weigh more. Boiling is sure but needs a stove and fuel.

    Stay safe by knowing where to find water. Look at maps and plan where you can fill up. Check reports for water source information. If you can’t find water, carry more and keep an eye out for signs of streams or lakes.

    Next, think about how to take water with you. Hydration packs let you drink while you walk. Water bottles are simple to use and fill. Some hikers use a mix of both.

    Stick to these tips to stay hydrated and enjoy your hike. Remember, water is life when you’re out on the trail.

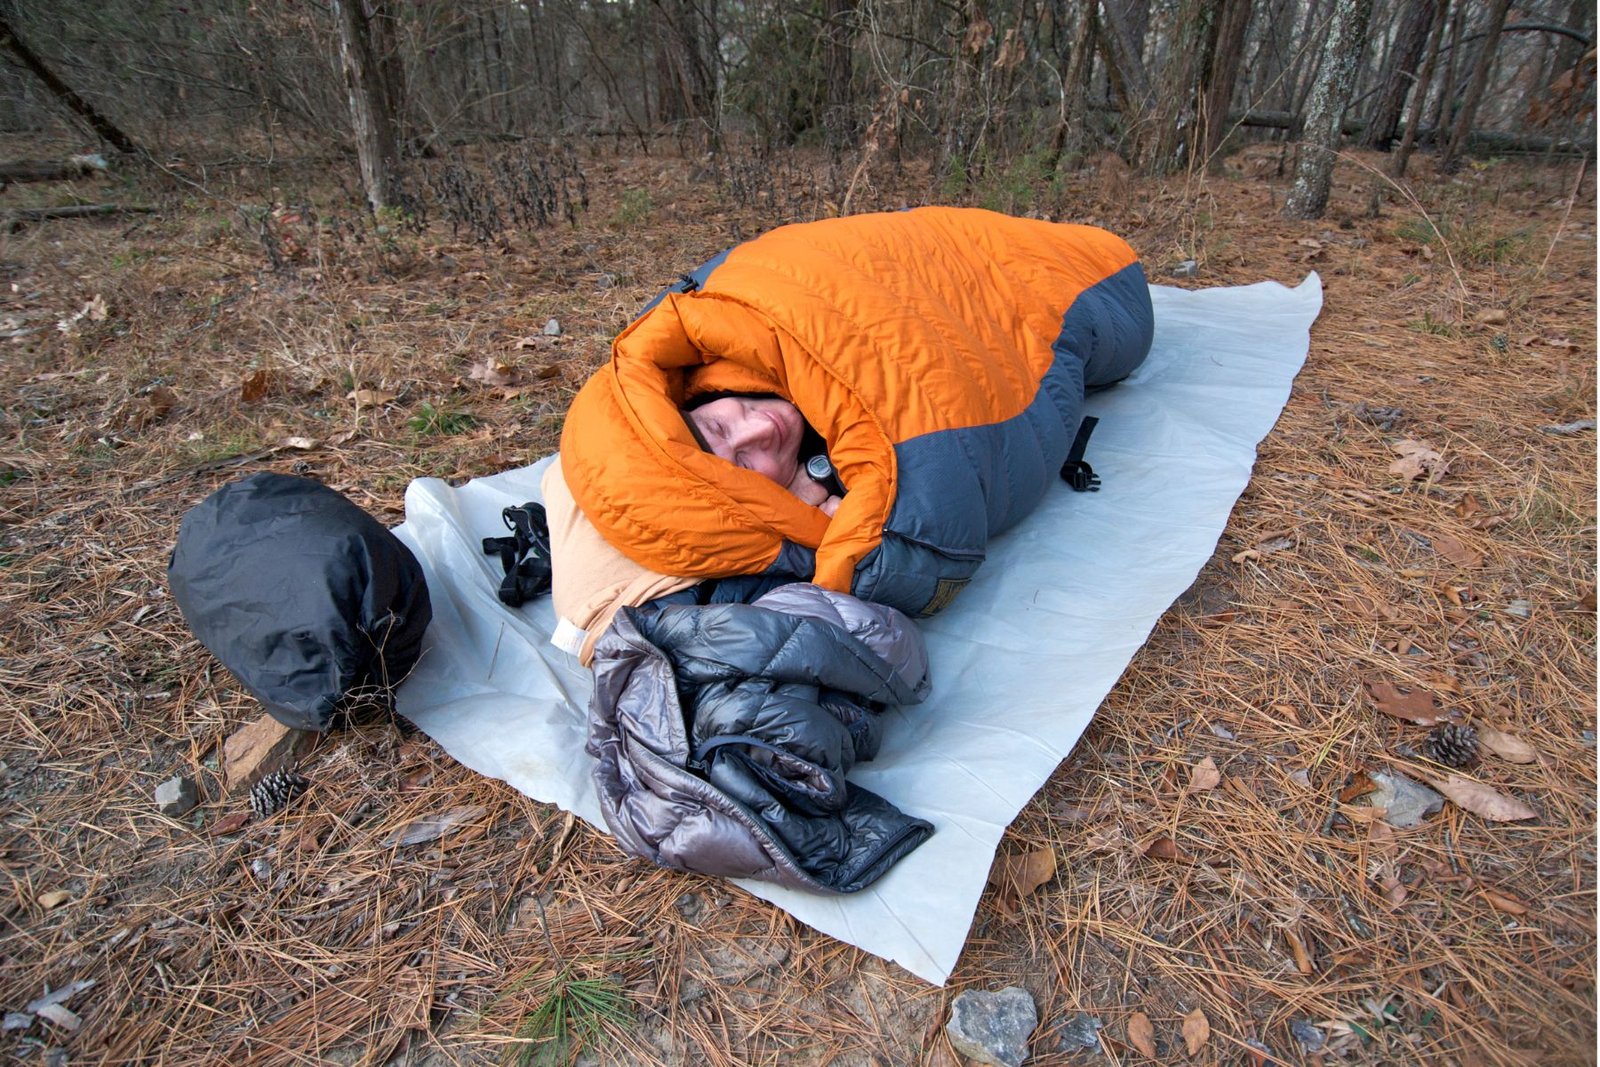
    What Are the Best Shelter and Sleeping Systems for Solo Hikers?

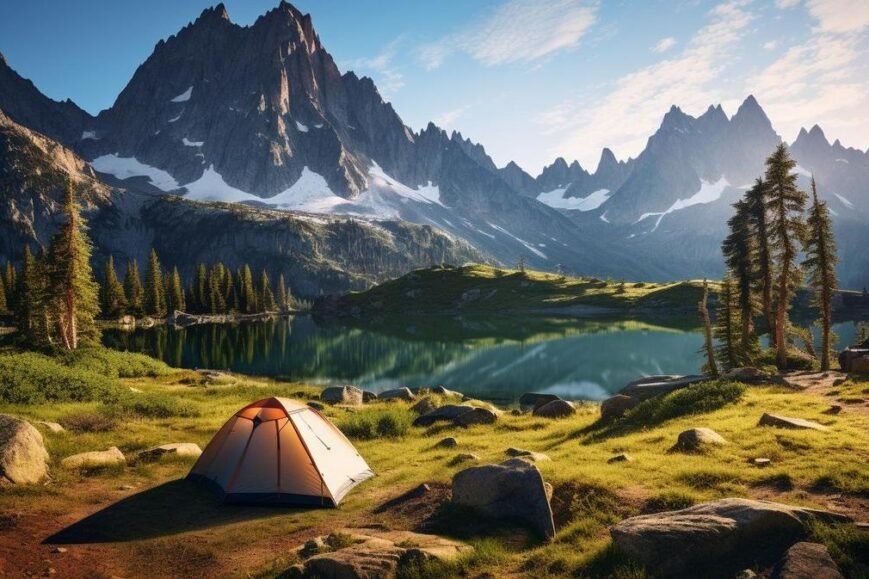
    When heading out on a solo overnight hike, where you will sleep is key. You need the right tent and sleep gear to stay safe and warm. The best tents for solo hikers must be light but strong. They should protect from rain, wind, and cold. You will find one-person hiking sleeping systems perfect for this.

    Selecting a suitable tent for solo hikers is about more than just size. It’s also about easy set-up. As a solo hiker, you must do everything by yourself. You want a tent that you can pitch fast if a storm comes. Start by looking for “best tents for solo hikers” online. This will show tents that fit just one person and are simple to use.

    Sleeping bag and pad considerations matter too. They keep you cozy when temps drop at night. Pick a sleeping bag rated for the coldest weather you expect. Your pad should be thick enough to cushion you from the hard ground. Make sure both items are light. Hauling a heavy load is not fun when you’re by yourself.

    Some solo hikers like to utilize bivouac shelters or hammocks. A bivvy is a small, waterproof cover that fits over your sleeping bag. It’s perfect when you want to sleep under the stars. A hammock lets you sleep off the ground. It’s best in places without lots of bugs or when you don’t need warmth from the ground.

    Evaluating the best spots to set up camp is your last step. Look for flat, dry ground away from trails and water sources. High spots are good because cold air sinks. But stay away from cliffs and ridges that could be windy. Ensure your spot is safe from falling trees or rocks. Most of all, pick a spot where you can enjoy the peace of nature and have a good night’s rest!

    Solo overnight hiking can seem tough at first. But choose the right tent and sleep system, and you’re on your way. And don’t let being a solo overnight hiker worry you. Many women enjoy these adventures safely. Plan well and enjoy the stars!

    How Can I Navigate Trails Alone Safely and Efficiently?

    To safely navigate trails alone, use a map and compass. GPS helps too. Know how to read trail signs. Do not lose your way.

    When I hit the trails by myself, my top skill is map reading. Before I even step out, I study my route. I mark important spots like water sources and shelters. It keeps me on track and safe.

    I also pack a sturdy compass. It’s my trusty sidekick when electronics fail. I pair it with my map to find my way through the wild.

    But, GPS has its place, I admit. I load the route on my device. I check it helps me stick to my path. Still, I keep my map close. Device batteries can die.

    Trail markers are like breadcrumb trails. I look for colored blazes or stacked rocks. They guide me like a friend. They tell me, “This way” or “Not that way.”

    Here’s a pro tip: Practice at a local park. Get a feel for your map and compass before you tackle big, wild places.

    If you think you might have a knack for navigating trails alone, staying on the right path is key. You’ve got this! Just make sure you’re familiar with your solo wilderness navigation tools before you set out. Your adventure awaits!

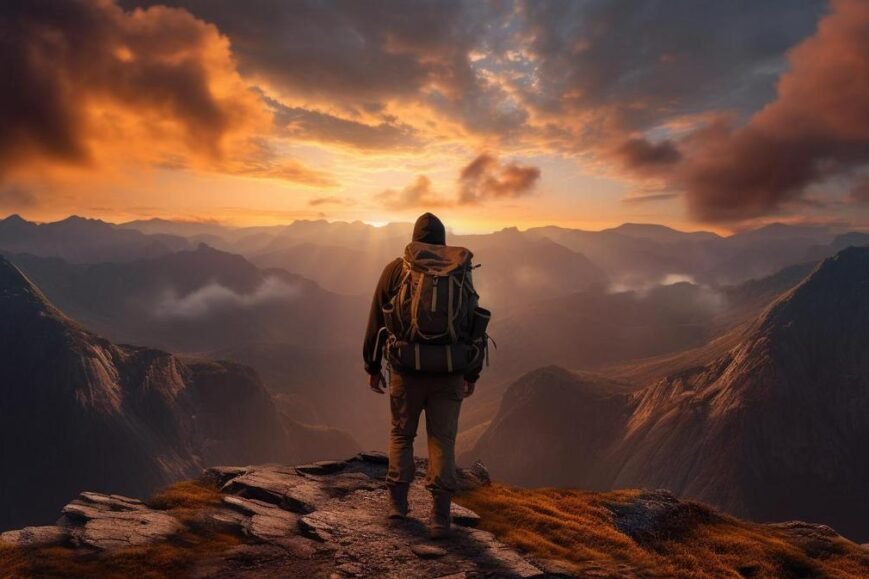
    What Solo Hiking Mental Preparation Techniques Are There?

    Is it OK to go hiking alone? Yes, it is OK to hike alone if you prepare well. Fear and loneliness can be big challenges when you set out for a solo hike. Have a plan to manage these feelings before you hit the trail. Being alone in nature can make you feel small or lost at times. But with the right mindset, you can enjoy the peace that comes from hiking alone.

    How to cope with the mental challenges of hiking solo? You can manage fear by learning about the trail and its risks. Know what animals or weather you might face. Prepare for these with the right gear and knowledge. Dealing with loneliness is about finding joy in your own company. Mindfulness can help here. Take in the sights, sounds, and smells around you. They can boost your happiness and keep your mind off being alone.

    Strategies for enjoying solitude include taking pictures or writing in a journal. These activities keep your mind busy. They also give you something to share when you return. Plan breaks as well—a moment to rest and enjoy the view can remind you why you started the hike.

    Preparing mentally for solo hiking also means knowing your limits. Don’t plan a hike that’s too hard for you. Build up to bigger hikes as you gain strength and confidence. Always tell someone where you’re going and when you plan to return. This way, someone knows to look for you if there’s trouble.

    Mindfulness and mental health bonuses come with hiking solo too. Nature can calm and refresh your mind. You learn about yourself, too. Every hike teaches what you can do and what you enjoy. This builds confidence that goes beyond the trail.

    How Do I Adjust My Meal Planning for Solo Trekking?

    What are the nutritional considerations for solo hikers?

    Solo hikers need enough calories and a balanced diet. They must eat and pack smart. Here’s how:

    • Pack high-calorie food that won’t weigh you down.
    • Use small, easy-to-use stoves for quick meals.
    • Pick foods from all groups for good health.
    • Have a first aid kit with items to treat dehydration and nutrient loss.

    Plan Your Meals with Care

    When you hit the trail alone, your body works hard. You need food that gives you power and helps you move. Bring food rich in protein, fat, and carbs. Think about nuts, dry fruit, energy bars, and ready-to-eat meals. They can keep you going for a long time.

    Cook Smart, Eat Well

    Out there, alone with nature, you can’t bring your home kitchen. But you can still eat tasty food. Solo backpacking stoves are small and easy to use. They’re perfect for boiling water fast. You can make hot food that warms your body and soul. Simple meals like instant oatmeal, soup, and noodles work great.

    Balance on the Menu

    When you plan your meals, think about colors. Try to eat different colors of fruits and veggies. This way, your body gets all kinds of good stuff. Add seeds, nuts, and whole grains too. A good mix of food keeps your body strong on the trail.

    First Aid Food

    Your first aid kit is not just bandages and antiseptic. You need to think about your belly too. Pack rehydration salts or powder. Include some vitamins if you walk for many days. And don’t forget a water filter or purification tablets. Clean water is key to good health.

    When you carry all on your back, each item counts. Pack smart and eat right. Happy trails, solo hikers!

    Conclusion

    Planning a solo hike takes skill. You learned how to pick trails, manage time, and find sleep spots. Permits, gear, and telling a friend are key. Pack right for safety and comfort. Stay safe with the right gear and know-how to handle wildlife.

    Keep hydrated with good water sources. Choose a tent, sleep system, and where to set up. Know how to use maps and tech for trail navigation. Get your mind ready to be on your own. Plan meals to keep your energy up. Remember, solo trips need smart prep to be safe and fun!

    Loading


  • Solo hiker conquers majestic peak, showcasing determination and self-reliance amidst untamed wilderness.

    What Are the Essential Items for Solo Hiking?

    Solo Hiking essentials guide: core items, lightweight tents & waterproof footwear tips for your adventure.

    • Solo hikers should pack essential gear: map, compass, sun protection, extra clothing, headlamp, first aid, fire starter, repair tools, extra food/water, and an emergency shelter.
    • Choose lightweight, strong tents; waterproof, grippy footwear according to terrain.
    • Plan simple, high-energy, nutritious meals with non-perishables; carry water and purification methods.
    • Carry a whistle, bear spray for safety; know first aid, and inform someone of your hiking plan.
    • Connect with solo hiking communities for shared experiences and tips.
    • Mental prep includes knowing your skills, setting a positive mindset, and gradual confidence-building.
    • Start on well-known, safe, beginner-friendly trails; use online resources for research.
    • Carry personal locator beacons for emergencies, especially for solo female hikers.
    • Tents, waterproof boots, satellite communication devices, and GPS tech are recommended gear.
    • Evaluate wilderness first aid and emergency knowledge; carry a fitting first aid kit, stay calm, think, and act accordingly.
    • Solo hikers enjoy emotional benefits like peace, self-reflection, and challenges.

    Stepping out into the wild alone? Mastering solo hikes means packing smart. Before you hit the trail, knowing the must-haves can make or break your adventure. My goal? Get you geared up with the right stuff. From choosing a tent that won’t weigh you down to selecting boots that keep your feet dry, I’ve got the essentials covered. Ready to pack? Let’s dive into the critical items every solo wanderer needs.

    What Are the Essentials for Solo Hiking?

    What is a solo hiker? A solo hiker is someone who hikes alone. To be one, choose trails matching your skill, plan well, and always stay safe. Bring items that keep you safe and healthy on your solo hike.

    Pack these core items: a map and compass, sun protection like hats and sunscreen, extra clothing to keep warm, and a headlamp or flashlight. Don’t forget first aid supplies, a fire starter like matches, repair tools, and extra food and water. An emergency shelter is also key, just in case.

    What lightweight tents for solo hikers are best? Choose one that’s light but strong. It should keep bad weather out and be easy to set up by yourself.

    For footwear, get waterproof hiking boots or shoes that suit where you’re hiking. If your path is rocky, go for good traction. Is it often wet? Pick those that keep feet dry. The right boots make hiking safer and more comfy.

    Pack smart, hike safe, and enjoy every step!

    How Should You Plan Your Meals When Hiking Alone?

    When you hike solo, keep meal plans simple and light. Focus on high-energy and nutritious foods like nuts and dried fruits for snacks.

    How do you plan meals for long solo hikes?

    Plan with non-perishable, simple-to-cook items. Dehydrated meals are light and need only water. Carrying a compact stove will help you cook these foods.

    For breakfast, consider instant oatmeal or energy bars. Lunch can be nut butter on whole grain bread. Dinners can include pre-packaged dehydrated meals.

    Pack your food in zip-lock bags to save space. Try out meals before your hike to ensure you like them and they sit well with you.

    How do you pack light for long treks?

    Choose foods with the best energy-to-weight ratio. Avoid canned goods. Balance your meals across carbohydrates, fats, and proteins.

    What are the best hydration strategies for solo hikers?

    Always carry water and a way to purify it from natural sources. Electrolyte tablets can help. They are small and easy to use.

    Do not rely on finding water sources. Plan your route with known water points if possible. Never go without water for long periods.

    In short, for solo hike meal planning, focus on foods that provide maximum nutrition with minimum weight. Hydrate well to ensure a safe and enjoyable hike.

    What Are Crucial Hiking Safety Tips for Solo Adventurers?

    People solo hike to find peace, challenge themselves, and enjoy nature. Yes, it is fine to go hiking alone if you prepare right and stay safe. To ensure safety, carry a map, and compass, and know how to use them. Learn first aid. Leave your plan with someone and check in often. For wildlife, stay calm, make noise, and keep your distance. Back away slowly if you see animals.

    For self-defense, carry a whistle or bear spray where allowed. Know how to use it. Take a self-defense class. Trust your gut. If something feels wrong, it likely is.

    Being smart and ready is key to a fun, safe solo hike. Always think ahead, stay alert, and enjoy your adventure with care.

    Why Choose to Hike Alone and What Are Its Emotional Benefits?

    Why do people solo hike? Many find joy and peace when they hike by themselves. It gives them time to think and soak in nature. Solo hiking lets you set your pace and make all the choices. This can be a big boost to your mood and self-belief.

    The benefits of hiking alone include feeling strong and free. You get to know yourself better. You can find your limits and push beyond them. This is a big win for your mind and heart.

    To fight loneliness on the trail, try to enjoy your own company. Play music or podcasts to keep your mind busy. Or you can use this time to think deep thoughts. It’s great to feel OK being by yourself. This is one of the emotional benefits of solo hiking.

    So, getting out there alone can be great for you. You grow inside while you climb outside. Every step you take alone can make you feel more at home with yourself.

    How Can Female Solo Hikers Ensure Their Safety on the Trails?

    Safety measures specific to solo female hikers

    What can female hikers do to stay safe on solo trips? Always let someone know your plan. Carry a whistle, and bear spray, and know how to use them.

    The role of personal locator beacons in enhancing safety

    How do personal locator beacons help female hikers stay safe? They send your location to rescue teams in danger. It’s a must-have for emergencies.

    Finding and joining solo female trekking groups

    How can you find groups for solo female hikers? Use social media and local outdoor clubs to connect. Hiking with these groups builds safety and community.

    What is a solo hiker? A solo hiker travels alone, enjoying nature at their own pace. For these adventurers, picking the right gear and tech is crucial. You need items that will keep you safe and connected. Here’s a must-have gear checklist for any solo trek.

    Bring good solo trekking gear to stay comfy and safe. A tent you can carry and set up by yourself is vital for overnight stays. Pick a lightweight tent that goes up easy. This will be your home away from home, so make sure it’s tough against wind and rain.

    Waterproof hiking boots are your best pals on the trail. They protect you from wet feet, which can lead to blisters, and give a solid grip on slippery paths. Don’t go for heavy boots; choose ones that are light but still keep your feet dry and cozy.

    Satellite communication devices can save lives. In emergencies, you can call for help even if your phone has no signal. Carry one always, and learn how to use it before you start your hike.

    Modern trail navigation technology is a smart way to stay on track. GPS apps can run on phones and watches, making it hard to lose your way. But always have a map and compass too. Batteries die, but these old-school tools won’t let you down.

    Remember, solo doesn’t mean unsafe. With the right gear and tech, you’ll have a blast exploring trails and making memories all by yourself.

    How to Prepare Mentally for a Solo Backpacking Adventure?

    How do you become a solo hiker? You start with your mind. Set it strong, free, and ready for the trek. It takes mental preps to tackle solo treks. To win over solo hike fears, know the trail, your skills, and your limits. You must trust yourself. This trust grows with each small step you take alone on the trails. Getting ready in your head is top priority for a calm, cool solo hike.

    Let’s dig in. First, think of why you want to hike solo. Is it for peace? For a challenge? Your reason will guide your prep. Next, picture yourself on the trail. This helps brace you for real-life hiking. Reading stories from others who hike solo can boost your courage. Now, about the fears. It’s normal to feel scared a bit. But with each solo hike, you’ll fear less. You’ll face unknowns and find you can deal with them all.

    To get into solo hike psychology, work on your thoughts. Stay positive and be patient. Nature is there for you to enjoy, not to rush through. Take deep breaths. Meditate. Use these to cool down your nerves before and during your hike. They help keep your head clear.

    This prep is for both solo hiking newbies and old hands alike. Each trek is fresh, and each trail is different. Be kind to yourself. Rest when you need it. Drink water and look around. You hike alone, but you’re never truly alone. Nature’s company is strong. Remember—prep your mind as well as your bag, and solo treks will be the joy you seek again and again.

    What Should You Know About Wilderness First Aid and Emergency Situations?

    Is it OK to go hiking alone? Yes, it is, if you’re well-prepared. When you plan to hike solo, knowing some wilderness first aid is key. It helps you take care of scrapes or bites until you can get more help. You also need to know how to handle bad surprises like weather changes or getting lost. Being able to think straight and know what to do keeps you safe.

    For first aid, carry a kit. Make sure it fits the trip’s length and where you’re going. Your kit should have bandages, tape, and items for splints. Don’t forget meds for pain and items to clean cuts. Learn how to use everything in your first aid kit.

    When a crisis hits, stay calm. Panic won’t help. Think about what you know. Use your skills to fix the problem or stay safe until you’re not alone anymore. If you are in an area with no people, it might take time for help to come. That’s why knowing first aid and having a plan for emergencies is so important.

    Trek responsibly and think about what could happen. It’s not just for you; it’s for the place you’re visiting too. Walking softly means you leave no trace, and you keep the wild as it is for the next person. This is part of your duty as a hiker who cares about nature.

    When you are ready and know how to deal with things going wrong, you can enjoy your hike more. Stay safe and have fun out there!

    How to Choose Starter Trails for Solo Hiking?

    When starting out, pick trails well-known for safety. Check online for solo hiking spots near you. Trails with lots of hikers work great. This means help is nearby if needed. Look for ‘beginner solo hiking destinations’ or ‘best US destinations for solo hiking’ online. Beginner trails should be short with clear paths. They should not have steep climbs or tricky spots. Good trails also have clear maps and signs. This helps you stay on the right path.

    For your first solo hike, find a place with other people around. Choose a trail under five miles. This lets you test your skills without much risk. Use sites like AllTrails to find the right path. They list details like trail length, climb, and reviews. Reviews are gold! They tell you what to expect from other hikers’ views. Read these to find out about trail conditions and tips. Always check the weather before you go. Good weather makes for a safer hike. Remember, the best hike for you will match your skill level. It should also let you enjoy the beauty of nature alone.

    How Can Solo Hikers Connect and Share Their Experiences?

    Join solo hiking meetups to make new trail friends. They let hikers meet and share stories. Check out local outdoor clubs or online listings for these gatherings.

    Find solo hiker community forums online to join in discussions. Places like Reddit’s solo hiking communities can be a great resource. You can ask questions, get trail advice, and learn from other’s experiences.

    When sharing your solo hiking tales, be honest and real. People love to hear both the joys and the tough parts of hiking alone. Share photos and details that tell the story of your journey. This helps others feel the trail through your eyes. Keep your audience in mind. Think about what you wish you knew before you started solo hiking and pass that on.

    Remember, solo does not mean alone in spirit. You become part of a wider group that loves the freedom of solo trails. A tip? Always leave trip details with someone you trust. This keeps you connected, even when you’re out in the wilderness.

    What Are the Essential Items for Solo Hiking?

    Before you go solo hiking, you need the right gear. You should always have a map and a compass. They’ll help you find your way if you get lost. Your phone has a map, but it might not work in the woods.

    You also need a good backpack. It should hold all your stuff and fit well. A first-aid kit is a must. It’s for any cuts or bites you might get on the trail. Bring a knife or multi-tool. They are handy for fixing gear or cutting food.

    Water is super key. Have a water filter or treatment tablets with you. This way, you can drink from streams or lakes. Pack enough food for your trip, plus some extra. Choose energy-rich snacks like nuts and bars.

    Bring a lightweight tent if you plan to sleep outside. A good tent keeps you dry and safe at night. Look for one that’s easy to carry and set up.

    Wear the right clothes too. Layer up so you can stay cool or warm. Your boots are important. They must be sturdy and waterproof.

    Don’t forget a flashlight or headlamp. And have extra batteries just in case. A whistle can help others find you if you need help.

    Lastly, make sure to tell someone where you’re going and when you’ll be back. Safety is most important when hiking alone.

    With the right stuff, you’ll be set for an amazing adventure!

    Conclusion

    In this guide, we covered what you’ll need for solo hiking. We looked at vital gear, from tents to boots, and how to plan your meals. Keeping safe, including dealing with wildlife and self-defense, was key. We also talked about why hiking alone is good for you and how to connect with others who love it too. Always be ready, from the right mindset to handling emergencies. Choose a trail that fits your skill, and share your stories when you return. Safe travels!

    Loading


  • A stunning, untouched wilderness captured in a hyperrealistic photograph: "Leave No Trace."

    Leave No Trace: What Is the Meaning and Philosophy?

    Understanding Leave No Trace ensures environmental stewardship and outdoor ethics are upheld during adventures.

    • Leave No Trace is an environmental philosophy advocating for outdoor enjoyment without damaging nature, originating in the 1960s.
    • The philosophy encompasses 7 principles: plan ahead, travel on durable surfaces, dispose of waste properly, leave nature as you find it, minimize campfire impacts, respect wildlife, and be considerate of others.
    • To respect wildlife, observe from a distance, don’t feed them, keep noise low, and minimize impact on their habitats.
    • Waste disposal involves packing out all trash, using eco-friendly products, safely managing campfires, and discreetly handling human waste.
    • Education about Leave No Trace is done through trainer courses, engaging learning tools, and hands-on community activities.
    • Environmental stewardship and volunteerism align with Leave No Trace by involving community efforts in maintaining natural areas.
    • High-use recreational areas benefit from Leave No Trace by preserving trails, protecting water sources, and implementing solutions for overcrowded sites.
    • Integrating Leave No Trace with outdoor skills training enhances responsible exploration and ensures minimal impact on the environment.

    Hey adventurers! Ready to trek smart and leave no footprints? We’re diving into the Leave No Trace philosophy. It’s not just about keeping places nice. It’s big—we’re talking about respecting nature, being good stewards of the environment, and being outdoorsy without a trace. Want the scoop on how to explore without harm? Keep reading and become a nature ninja!

    What Is the Leave No Trace Philosophy?

    What is the meaning of Leave No Trace? It’s about caring for nature. It tells us to enjoy outdoor spaces without harming them. To respect the wild, we keep it clean and unharmed by our visit. This means we take out all trash and stay on trails. We also camp in the right spots and are kind to plants and animals. When we leave, we want it to look like we were never there.

    The Leave No Trace philosophy began in the 1960s. Back then, more people started to visit wild places. They saw areas getting harmed and knew they must act. Groups like the US Forest Service took the lead. They shared ideas on how to care for the wild. Over time, these ideas grew into a bigger movement.

    Respecting nature is a big part of Leave No Trace. When we go outside, it’s our job to protect it. That way, plants, animals, and future visitors can enjoy it too. Leave No Trace helps us do this. It is our guide to loving the wild in the right way.

    Leave No Trace is not just a set of rules. It’s also about caring for the earth every day. We call this environmental stewardship. It means we all help to look after nature. We fix trails, clean up lakes, and teach others how to be outside in good ways. This is how we show that we love the earth and keep it safe for everyone.

    How Can You Practice the 7 Principles of Leave No Trace?

    What are the 7 principles of Leave No Trace? The seven principles are:

    1. Plan ahead and prepare
    2. Travel and camp on durable surfaces
    3. Dispose of waste properly
    4. Leave what you find
    5. Minimize campfire impacts
    6. Respect wildlife
    7. Be considerate of other visitors

    These principles guide our outdoor behavior to keep nature clean and safe.

    How do these principles guide sustainable outdoor activities? They teach us to enjoy nature while making sure it stays nice for others. If we all follow these rules, we keep the wild places we love in good shape for the future.

    • Overview of the 7 principles

    These seven rules help us make less impact when we hike and camp. They show how to protect the animals and plants, and also respect other folks enjoying nature.

    • Practical tips for minimal-impact hiking

    When we walk through woods or mountains, we should stick to trails. Staying on the path keeps plants around it safe. Also, we should carry out all our trash so we do not make a mess.

    • Guidelines for Responsible Camping Practices

    If you set up a tent, do it on hard ground or places people have camped before. Keep your campsite small. After you leave, no one should tell you were there.

    • Incorporating outdoor ethics into everyday wilderness activities

    Every time we go outdoors, we should think about these rules. Whether we are walking, fishing, or just hanging out, these seven rules help us leave nature as we find it. That way, the next person can enjoy it too.

    Why Is Wildlife Respect and Protection Integral to Leave No Trace?

    How does the Leave No Trace philosophy promote wildlife respect and protection? It pushes us to enjoy animals from a distance. We do not disturb or scare them. This means we get to watch animals act in their normal way. Plus, they stay safe and keep doing what helps them live.

    Leave No Trace shares how we can respect wildlife. We should not feed animals. Our food can harm them, and they might then depend on people for meals. Who wants wild animals to expect snacks from us? Not me!

    We also should stay quiet. Loud noises can scare animals away. They need to focus on finding food, not running from loud hikers.

    What are specific ways to reduce environmental impact on wildlife habitats? We pick campsites far from where animals live and eat. It stops our camps from hurting their homes.

    Keep campfires small or use a stove instead. Big fires can wreck the ground. They scare wildlife and can burn their homes.

    Always clean up. Our trash is ugly. It can also be really harmful to animals.

    We can look after wildlife, and leave their homes just as we found them. Then they can go on living their wildlife, and we can enjoy watching them do it.

    How Does Leave No Trace Address Waste Disposal in the Outdoors?

    What methods does Leave No Trace suggest for disposing of waste properly? Leave No Trace tells us to pack out our trash.
    That means we take home everything we bring to nature. This includes trash, leftover food, and litter. We use trash bags to carry it all out. We never leave waste behind because it can hurt the land and wildlife. It’s like making sure not a single piece of garbage is left on the ground.

    When we camp, we aim to leave the spot just like we found it, or even better! That’s part of eco-friendly camping. We use products that don’t harm the land. For example, we choose soap that won’t pollute the water. And we avoid plastic and pick items that will break down in nature without a trace.

    We also work on minimizing campfire impacts. This means we make fires in a safe spot. We use only small sticks that can break by hand. Plus, we put out the flames fully when we’re done. No smoke or hot ashes left!

    How does minimizing campfire impacts contribute to cleaner campsites? Following these steps means no burnt wood or black marks are left. Our campsites stay natural and clean, just like we want them.

    Lastly, we use low-impact techniques for dealing with “nature’s call” in the woods. We dig small holes away from water and trails to go to the bathroom. Then, we cover them up so nobody can tell we were there.

    By doing all this, we help keep nature beautiful. We make sure plants, animals, and other people can enjoy it too. Always remember, when you’re outside, it’s your job to care for the land. Let’s keep adventures green and clean!

    What Are the Best Ways to Educate About Leave No Trace?

    To become a Leave No Trace educator, take a trainer course. It’s the first key move. The Leave No Trace trainer course plunges you into hands-on learning. In it, you harness ways to share the Leave No Trace ethics. Master educator certification is a step up. It shapes you into an ambassador for outdoor responsibility.

    Materials that click with learners are crucial for environmental education. Use engaging tools such as videos, interactive activities, and real-life scenarios. They help bring Leave No Trace ethics to life.

    Share these best practices by being a lively example. Show how to treat our wild places with respect. Invite questions and lead dynamic discussions.

    To raise awareness about outdoor responsibility, turn lessons into action. Host clean-ups or nature walks. Engage others in role-playing or fun games. Such activities anchor the essence of Leave No Trace in people’s minds.

    In teaching, balance facts with storytelling. Show, don’t tell. When you personify nature, learners connect deeper. They remember the do’s and don’ts more clearly.

    By nurturing a culture of Leave No Trace, we guard the planet we cherish. We build a community rooted in caring for the wild.

    How Do Environmental Stewardship and Volunteerism Align with Leave No Trace?

    One can engage in conservation volunteering by joining local clean-ups and trail maintenance efforts. These activities reflect the core of Leave No Trace principles. They keep natural spaces clean and protect them for future visitors. Local groups often host such events, and they need people who love nature to help out.

    Community involvement is key in caring for public lands. People in the community help keep these places safe and clean. It’s like how friends look after each other’s backyards. When everyone pitches in, the land stays beautiful and healthy. Groups come together to remove trash, fix trails, and share knowledge about the wilderness.

    Environmental stewardship means we all take care of nature. It’s like being a good neighbor to the forests, rivers, and mountains. When we volunteer for conservation, we show love for the Earth. We also teach others how important it is. This helps make sure our wild places stay wild.

    Volunteering can also lead to new chances to learn about nature and outdoor skills. It’s a chance to work with others who also care about the Earth. Together, we learn to manage lands using Leave No Trace. This means doing things like setting up camps with little harm and knowing how to see wildlife without causing trouble.

    So, taking action and helping out is a big part of Leave No Trace. It brings folks together to care for the land. It shows a promise to help nature stay clean and quiet for all to enjoy. It’s how we show we’re all in this together, ready to protect our awesome wild spaces.

    What Are the Implications of Leave No Trace in High-Use Recreational Areas?

    Reducing recreational impact can protect high-use areas by lessening harm to nature. For instance, when lots of people use a park or trail, plants, animals, and water can suffer. This is where Leave No Trace comes in. It teaches us ways to cut down on the damage we cause.

    One approach is sticking to marked trails. This is trail preservation, and it helps a lot. It keeps people from trampling all over plants and making the ground bare. This means Mother Nature can keep doing her thing.

    Another key point is guarding outdoor water sources, like rivers and lakes. We need to keep them clean because animals and people all need water to live. So, it’s super important to not mess them up with trash or soap.

    Finally, we must find answers to the tough parts of visiting places that see a lot of foot traffic. That includes fixing trails that are torn up and cleaning up trash that might hurt the land.

    Every step we take to cut down on our impact makes a big difference. The great outdoors stays beautiful, and safe for every living thing. Plus, we can all keep enjoying our favorite places for years to come.

    How Can Leave No Trace Be Integrated into Outdoor Skills Training?

    Leave No Trace makes outdoor skills training even better. It teaches us to enjoy nature without hurting it. By learning these principles, folks can do fun outdoor stuff responsibly. This way, nature can stay beautiful and safe for everyone.

    Outdoor skills training helps people learn how to explore the great outdoors. When you mix it with Leave No Trace, it becomes super powerful for keeping nature awesome. You get to learn cool stuff like setting up tents and hiking, all while making sure you don’t harm the environment.

    Outdoor skills training covers many things. You learn how to pack gear, cook food, and find your way in the woods. Adding Leave No Trace into this teaches you to do all this without leaving a mess behind. Step one: Plan ahead and know what you’ll face. This way, you can bring only what you need. Less stuff means less trash.

    For eco-conscious travel, backcountry etiquette is key. It’s like good manners for when you’re outdoors. Always stick to trails to protect plants and soil. Be quiet so you don’t scare wildlife. And never, ever take things from nature.

    Remember, these skills are not just for keeping the outdoors neat. They’re also about protecting animals and plants. With better skills, we can all help nature stay healthy and magical. This way, the next adventurers can also have a blast outdoors, just like we do!

    When you want to roam the wild, think about the mark you leave. Training in outdoor skills with a Leave No Trace twist means you’re ready for adventure without doing any harm, and that’s something we can all be proud of! Now go and enjoy the great outdoors the right way!

    Conclusion

    Leave No Trace is key to loving the outdoors right. We learned what it means and how it started. It teaches us to respect nature and keep the wild clean. There are seven simple rules to follow, so we can hike and camp without hurting nature. We discovered ways to watch wildlife safely and keep their home safe. And, we know how to handle trash and campfires without harm. To spread the word, we can teach others and join as volunteers. This all helps, especially in busy spots outside. Learn the rules and live them to keep our adventures green. Let’s lead the way and care for our wild places!

    Loading


  • Dog-friendly hike through vibrant trail, showcasing nature's beauty, joy, and adventure.

    Dog Friendly Hike: How Do I Find Local Trails for My Pet?

    Planning a Dog Friendly Hike? Tips for trails & safety for you & your pup’s next outdoor trek. Perfect for pet-loving hikers.

    • Search online or local resources for dog-friendly hiking paths; use apps like AllTrails for filters.
    • Consult local park websites for pet policies; ensure trails match your dog’s fitness and beware of leash laws.
    • For scenic walks in California, consider areas like Runyon Canyon Park and coastal paths with water features.
    • When planning an outing, consider your dog’s fitness, and weather conditions, pack essentials, and observe Leave No Trace principles.
    • Pack for your pet’s needs including water, snacks, dog booties, and pet first aid; follow hiking etiquette.
    • To find water-friendly trails, seek local parks with lakes/streams, consult online maps, and ensure safe water access.
    • Train your dog for recall if hiking off-leash, and always be mindful of local wildlife and fellow hikers.

    Ever wondered where to enjoy hikes with your pooch? Look no further! I’m here to guide you toward paw-perfect trails that welcome furry friends. From sniffing out local dog-friendly spots to ensuring your pup’s safety, let’s uncover the best hikes for you and your buddy. Grab the leash – adventure awaits!

    How Do I Find Dog-Friendly Hiking Paths in My Area?

    You can find dog-friendly hiking paths by exploring local resources. Look at maps online or use apps that show dog hikes. Talk with other dog owners for tips. Check the rules at parks near you to see if they allow pets.

    Exploring local resources for pet owners

    Ask at your local pet store or check community boards. They often know about dog-friendly spots. Visit your city or county website too. They list parks and trails where dogs can go. Some places have special areas just for dogs to play and walk.

    Utilizing online mapping tools and apps for dog hikes

    Use the internet to find trails. Search for “dog-friendly hikes near me” to see what pops up. Websites like AllTrails are great for finding paths where dogs can walk. They let you filter for dog-friendly hikes. This way, you only see places where your pet can join.

    Networking with fellow dog owners for personal recommendations

    Chat with people at the dog park. They may know hidden gems for pet walks. Join a local dog owner’s group to get more ideas. People love to share their favorite spots. They can tell you the best trails for a hike with your dog.

    Checking local park rules and regulations regarding pets

    Before you go, know the rules. Not all trails allow dogs, and some have special rules. Dogs might need to stay on a leash, or there could be areas where they can’t go. Check online or call ahead to avoid any trouble. This helps make sure you and your dog have fun safely.

    What Are the Best Trails for Dogs and Their Safety Requirements?

    When seeking the best trails for dogs, safety must be top of mind. Start by evaluating a trail’s difficulty to ensure it matches your dog’s fitness. Some trails might be too steep or have rough terrain not suitable for a dog’s paws. Always check your trail guide for dog-friendly options. Next, make sure you understand the local leash laws. Many areas require dogs to be on leashes for their safety and the safety of wildlife. However, you might find some trails that offer off-leash areas. Still, keep your dog under control and within sight. It’s also critical to know about any hazardous wildlife or plants on the trail. Before you head out, research the area or ask local experts about any potential dangers. You want a safe trail for pet walks, free from harmful plants or animals. Lastly, be ready for emergencies. Pack a first aid kit that includes items for both you and your dog. Learn basic pet first aid and know how to get help if you need a rescue. By keeping these points in mind, you’ll ensure a good time on safe trails for your pet walks. Remember, the goal is a happy and healthy hike for you and your furry friend.

    How Can I Ensure an Enjoyable Leash-Free Hiking Experience with My Dog?

    Finding fun leash-free hiking areas starts with a good search. Look online for “leash-free hiking areas near me” or “off-leash nature excursions”. Many parks and trails allow dogs to roam free. Always check the rules first. Training your dog is key for a safe off-leash trip. Before you go, teach your dog to come when called. This skill could save their life and keep wildlife safe. Also, be polite to others on the trail. Keep your dog by you if others are close. Respecting wildlife is a must. Wild animals live where we hike. Keep your dog close so they don’t bother the animals. Practice recall and obedience skills often. Doing this at home first can help a lot. Then, try these skills in areas with few people and animals. Taking these steps will help you and your pup have tons of fun outside, without the leash.

    Which Canine-Friendly Nature Parks Offer the Most Scenic Walks with Dogs?

    Are you looking for the best spots to enjoy scenic walks with your furry friend in California? There are many picture-perfect trails that both you and your pet will love. To find scenic walks with dogs in California, seek out places known for stunning views or unique landscapes that stand out. For the best experience, here are some must-consider tips:

    Highlighting top scenic trails and the views they offer

    When you’re after a view to remember, look for trails that offer panoramic vistas. Think rolling hills, deep forests, or coastal paths where every turn gives you and your pup a fresh, Instagram-ready shot.

    Seasonal considerations for picturesque nature walks

    The time of year can really change how a trail looks and feels. Spring and fall often bring out the best in nature, with blooming wildflowers or colorful leaves. Summers give long, warm days while winter hikes can lead to serene, frost-touched scenery.

    Including water features in your scenic hike planning

    Trails with water features like lakes, rivers, or waterfalls not only add to the beauty but also give your pup a chance to splash around and cool down. Keep in mind the need for dog-friendly access and safety near water.

    Sharing Instagram-worthy spots for pet photography

    Capture the joyful moments when your pet is having a blast outdoors. Look for that sunset shot by the lake or your dog’s adventurous spirit as it bounds along the trail. Share these moments with friends, family, and of course, fellow pet lovers online who appreciate scenic walks with dogs. When searching for the perfect scenic hike in California, be sure to check out dog-friendly spots such as Runyon Canyon Park in Los Angeles, the trails in Griffith Park, or the coastal paths along Carmel Beach—they all offer stunning and varied landscapes for you and your dog to enjoy. Remember to respect the environment and follow the trail rules to keep these parks beautiful and accessible for everyone.

    What to Consider When Planning an Outdoor Adventure with Your Dog?

    When planning an outdoor adventure with dogs, think about your dog’s fitness level. Young pups and old friends might not handle long walks well. Always match the hike length and toughness to what your dog can enjoy. Next, think about the weather and the ground. Hot days need more water for your pet. Very cold times can hurt their paws. On rough paths, little dogs may need help. Large dogs might do better. Plan and bring the right gear for these times. Don’t forget food, water, and a comfy rest spot for your pet. They will get hungry and thirsty just like you. They also need a good spot to sleep if you hike for more than a day. We must all take care of nature. This means following Leave No Trace rules on trails. Do not leave food or dog waste behind. Help keep the wild clean for everyone. Keep your dog on a leash when needed, and let others enjoy the trail too.

    How to Prepare for Nature Excursions with Your Pet?

    Getting ready for nature trips with your pup takes some planning. A pre-hike checklist is key. Know what your dog will need and pack it. Check that your pet’s tags and chips are current. This ensures they can come home if they get lost. Learn about the local creatures you might see. Keep a safe distance to watch them. Start slowly to get your dog ready for long hikes. Short walks first, then gradually longer ones. This builds up their stamina. Think about the path you choose. Ensure it’s okay for your dog’s paws and fitness level. Also, remember some areas have special rules for dogs. Know them before you go. This way, you both have fun and stay safe on the trail.

    What Essentials Should I Bring on Dog Hikes?

    You need stuff to make hiking fun and safe for your pup. The most needed gear? A sturdy leash, water bowl, and snack. Always bring enough water for you and your pet. Dogs can’t tell you when they get thirsty. Keep water handy so you both stay hydrated. Don’t forget the poop bags. It’s important to keep trails clean for others. You should always pick up after your dog. Meeting others on the path? Keep your dog close and be polite. That way everyone can enjoy their hike. When you get ready, think about your dog’s needs, like paw protection. Some trails are rough and can hurt your dog’s feet. A good pair of dog booties can help with that. Also, a pet first aid kit can save the day. If your dog gets hurt, you’ll be glad you have it. Just in case, have your vet’s number on your phone. It’s better to be safe than sorry. And if the sun gets too strong, a dog-safe sunscreen can protect sensitive skin areas like the nose. Take a quick class on hiking with pets etiquette if you can. It can teach you the right way to share the path with others. Remember to check the trail rules too. Some spots ask to keep dogs on leashes all the time. Others might have areas where they can roam free. Every hike with your dog is a chance to have a big adventure. Just plan ahead so you can keep the fun going. With the right stuff, you’re all set for a great time out in nature.

    How Can I Locate Water-Friendly Dog Walks?

    Water is a great friend on dog walks. It keeps your pup cool and adds fun. To find trails with safe water for your dog, you can:
    • Look for local parks with lakes or rivers.
    • Ask other pet owners where they go.
    • Use online maps that show trails by water.
    Identifying trails with safe water access for dogs How can I tell if a trail has safe water access for my dog? Check online or call the park office. Make sure the water is clean and the current is safe. Once you find a good spot, help your dog get used to water slowly. Start on the shore and let them explore. Bring a toy for them to play with. Keep an eye out for tiredness. Your dog might pant more or slow down when tired. It’s also smart to check your dog for fleas or ticks after walks near water. Water can hide bugs that bother your pet. A quick check can keep your friend safe and happy. In short, finding water-friendly walks needs a bit of research. With the right spot, your dog can splash and play to their heart’s content. Remember to watch for signs of tiredness and keep them safe from water bugs. Now, get out there and make a splash with your four-legged friend!

    Conclusion

    In this post, we covered how to find the perfect trails for your dog. We looked at tools and tips to spot dog-friendly hikes. Safety for dogs on trails was key. We also discussed leash-free fun and picking scenic spots for a memorable walk. Planning is vital: think of your dog’s needs, the weather, and packing right. Always keep trails clean and remember water safety. Go out and explore the best with your furry friend!

    Loading


  • "Scenic mountain trail with nourishing trail foods and refreshing water bottles displayed on picnic table."

    Trail Food: What Are Good Options for Hiking?

    Essential nutrients for hiking? Our blog covers protein, calories, and vitamins for the best trail food choices.

    • Essential for long hikes: macronutrients (protein, carbs, fats) and micronutrients (vitamins, minerals).
    • High-calorie foods like nuts, seeds, energy bars, jerky, and trail mix are excellent for sustained energy.
    • DIY energy bars and trail mix can be made at home with oats, nuts, honey, fruit.
    • Opt for lightweight, high-energy foods for backpacking; prepare with dehydration and portion control.
    • Vegan and vegetarian hikers should focus on protein-rich foods like nuts, beans, and whole grains.
    • Use sustainable packaging and preserve foods via dehydration for multi-day hikes.
    • To avoid wildlife encounters, use bear canisters and proper food hanging techniques.
    • Budget-friendly meals include pasta, rice, oats, homemade granola bars, and buying ingredients in bulk.
    • No-cook meals and soaking methods like cold-soaking oats or lentils are practical for trails.

    Hungry on the trail? Choosing the right food can make or break your hike. You need meals that pack energy, taste good, and won’t weigh you down. Whether you’re crossing steep hills or long distances, your body craves nutrients to keep going. In this guide, I’ll share top trail food picks that are both delicious and nutritious, ensuring every step you take is fueled by the best. Let’s dive in and transform your backpack into a hiker’s pantry that caters to adventure!

    What Are Essential Nutrients Needed for Long Hikes?

    When you pack food for long hikes, think nutrition. You need protein-rich foods, carbs, and fats. These are called macronutrients. They give you the power to climb hills and walk far. Things like nuts, seeds, and energy bars can help. For proteins, take jerky or nut butter. Want a quick boost? Try calorie-dense hiking snacks like trail mix or chocolate.

    Understanding Macronutrients: Proteins, Carbs, Fats

    Proteins build muscle. Carbs give quick energy. Fats give long energy. Your body needs all three when you hike. Choose snacks that mix these well. For carbs, dried fruit or oatmeal bars are great. For fats, pack some cheese or almonds. This combo keeps you strong on the trail.

    Importance of Micronutrients: Vitamins and Minerals

    Your body also needs things like vitamins and minerals. They help keep you healthy. Foods like fruits and veggies are full of them. But on the trail, you can’t always take fresh stuff. So, dried fruits or veggie chips can be good. They are light to carry and last long.

    Calorie Requirements for High-Energy Activities

    Hiking needs lots of energy. You burn more calories when you are active. So, eat more than you do on a usual day. This means more nuts, grains, and cheese. Packing calorie-dense hiking snacks means you get more fuel without more weight.

    Breakfast Ideas to Start Your Hiking Day Strong

    Your day starts with breakfast. It sets you up for hours of walking. High-energy breakfasts for hikers can be like oatmeal with nuts and honey. It’s tasty and fills you up. Add some dried berries for extra flavor and a vitamin boost.

    Remember, packing smart means you get to hike strong!

    How Can You Make Your Own Trail Mix at Home?

    Selecting the Right Ingredients for Energy

    Here are some of our favorite ingredients for homemade trail mix, most of them being natural foods.

    Steps for Making Homemade Energy Bars

    Mix oats, nuts, honey, and fruit. Press, chill, cut. Now you have DIY energy bars for hiking!

    Ingredients:
    • 1 cup rolled oats
    • 1/2 cup almond butter
    • 1/4 cup honey or maple syrup
    • 1/4 cup chopped nuts (such as almonds, walnuts, or cashews)
    • 1/4 cup dried fruits (such as raisins, cranberries, or chopped dates)
    • 1/4 cup seeds (such as chia seeds, flax seeds, or sunflower seeds)
    • 1/4 cup unsweetened shredded coconut
    • 1/2 teaspoon vanilla extract
    • A pinch of salt
    Instructions:
    1. Preheat your oven to 350°F (175°C) and line a square baking dish with parchment paper.
    2. In a large mixing bowl, combine the rolled oats, almond butter, honey or maple syrup, chopped nuts, dried fruits, seeds, shredded coconut, vanilla extract, and a pinch of salt. Mix well until all the ingredients are evenly combined.
    3. Transfer the mixture to a lined baking dish and press it down firmly using the back of a spoon or your hands to create an even layer.
    4. Place the baking dish in the preheated oven and bake for about 15-20 minutes, or until the edges turn golden brown.
    5. Remove the baking dish from the oven and let it cool completely. Once cooled, transfer the dish to the refrigerator and let it chill for at least 1-2 hours to allow the bars to firm up.
    6. Once the bars are chilled and firm, remove them from the refrigerator and carefully lift the parchment paper to remove the whole batch from the dish.
    7. Place the batch on a cutting board and use a sharp knife to cut it into individual bars of your desired size.

    Storage Tips for Homemade Trail Snacks

    Store the homemade energy bars in an airtight container or wrap them individually in plastic wrap for easy grab-and-go snacks. They can be kept at room temperature for up to a week or stored in the refrigerator for longer freshness.

    Customizing Recipes for Dietary Restrictions

    You can always add or leave out some ingredients to suit your own needs. And, there are plenty of diet-specific substitutes available, many of them being natural and just as healthy for you.

    Since everyone has their own very specific needs, the best way to go is to do a little of your own research to make sure the ingredients you use are compatible with your dietary needs.

    What Portable Backpacking Recipes Require No Cooking Equipment?

    What to cook on trail? Best backpacking meals need no heat, just ingredients. For quick, easy meals, think about no-cook recipe ideas for backpackers. You can use simple foods that are ready to eat or need little prep.

    No-Cook Recipe Ideas for Backpackers

    Try nut butters, like peanut or almond, on whole grain bread. It’s easy and full of good energy. Or wrap cheese and veggies in a tortilla. You get calories and taste without cooking.

    The Art of Cold-Soaking Meals on the Trail

    Did you know some hikers soak food in water to “cook” it? This cold-soaking method works for oats, couscous, and lentils. It’s simple: mix food and cold water in a jar, then wait. After a few hours, it’s ready to eat!

    Tips for Preparing and Packing No-Cook Foods

    Pick foods that won’t spoil, like dried fruits, nuts, and seeds. They’re light to carry and keep you going. Pack them in zip bags or containers to stay fresh. And always remember to bring clean water or a way to filter it.

    Hydration-Focused Recipes for Long Hikes

    Water is key on any hike. For tasty hydration, add fruit bits to your water bottle. Choose oranges or berries for a natural sweet drink. And keep an eye on how much you drink, to stay safe and healthy all day.

    How Do You Choose and Prepare Lightweight Hiking Foods?

    What are the best trail foods? Foods that are light, high in energy, and easy to pack. Look for snacks that won’t weigh you down but will keep you going strong on the trail.

    Criteria for Selecting Lightweight Foods

    Choose dry foods since they’re less heavy than wet foods. Go for high-calorie foods to help you stay energized. Whole-grain pasta, rice, and jerky are great. Nuts, seeds, and dried fruits are perfect for a quick energy boost.

    Preparing and Dehydrating Your Meals

    Dry your own meals to cut weight and save space. You can dehydrate meats, fruits, and veggies. Dehydrated foods last long and rehydrate well on the trail. This also lets you know exactly what’s in your food.

    Meal Planning for Ultralight Backpacking

    Need a 7-day backpacking meal plan? Pick meals you can cook with one pot. Pasta, oatmeal, and instant rice save space and fuel. Write down your meals to make sure you have enough food. Remember to plan for extra snacks.

    Portion Control and Packing Strategies

    Measure your food for each meal. This ensures you pack enough without extra weight. Repack food into zip-top bags. They’re lighter than original packaging and help with portion control. Label each meal for convenience.

    In your quest for lightweight hiking foods, aim for high-calorie, dry items. Prepare by dehydrating your meals and planning carefully. Portion control is key – it saves space and weight. Use these tips for a lighter pack and a happier hike.

    What Are the Best Vegan and Vegetarian Options for Trekking?

    Good trail foods for vegans and vegetarians have plenty of protein. Think nuts, seeds, and beans. You can make creative vegan meals for your hike easily. Tasty wraps with hummus, veggies, and brown rice are one example. They are full of energy and taste great cold.

    Protein is key for vegetarian backpackers. You can find it in foods like lentils, chickpeas, and quinoa. Mix these with other foods to make complete proteins. This means they have all the amino acids your body needs.

    When packing plant-based foods, keep them cool and dry. This helps them last longer. An insulated bag can help, especially for fresh produce.

    If you have food allergies, plan ahead to make allergen-free meals. Use separate containers for different foods. This avoids cross-contamination. You can enjoy a safe, allergy-friendly trek.

    Remember, good food means a better hike. Eat well and enjoy the trail!

    How Do You Preserve Trail Food for Multi-Day Hikes?

    When you’re on a multi-day hike, keeping your food good is key. One way is dehydrating food for trails. This pulls moisture out so food weighs less and lasts longer. Fruits, veggies, and meats work well for this. You can even make full meals that just need water on the trail.

    Here’s how you dehydrate food: First, cut it into small pieces. This helps dry it out fast. Spread these on a dehydrator tray, set your dehydrator to the recommended temp, and wait. It’s done when it feels hard and no wet spots show.

    Pack dehydrated foods in tight, waterproof bags or containers. This keeps air and moisture out. For preserving homemade trail food, vacuum sealing is best. It locks in freshness and fights off bacteria.

    Take calorie-dense hiking snacks too. Nuts, seeds, and dried fruit give you quick energy without taking up much room. Look for snacks with lots of calories in small amounts. These help fuel you for those tough trail climbs.

    Keep all your food safe by storing it right. Use bear-proof containers in bear areas and hang food up high when you rest. Always seal it up tight to keep animals and bugs away. Following these steps can stop food spoilage and keep you safe on the trail.

    What Sustainable Packaging Options Are Available for Trail Food?

    Good trail foods are meals and snacks that boost energy and are easy to carry. To pack these foods, choose materials that won’t harm our earth. Use containers that you can use many times. Buy in large amounts to cut down on trash. Hike with care for nature, and always clean up your mess.

    Reusable food containers are great for the planet. They can be steel boxes, cloth bags, or tough plastic that lasts. We can use them again and again for many hikes. This cuts down on waste and keeps our trails clean.

    It’s smart to prepare lots of meals at once. This means buying less packaging overall. It’s easier to hike without trash, and better for the world too. When we pack our food in bulk, we save time and help the earth.

    We must hike without leaving a trace. That means taking all our trash home. Use food packs that don’t make much mess. We need to keep the wild places wild and clean. This is part of the Leave No Trace Principles. Remember these ideas for a fun and green hike!

    How Can You Safely Store Food to Prevent Wildlife Encounters?

    Safety tips for trail food? Use bear canisters and hang food high above ground. These practices keep snacks safe from wild animals. Always store food away from your sleeping area. This can stop animals from sniffing around your tent. On multi-day hikes, storing food right matters a lot. It can keep bears and other critters at bay.

    For storing food, choosing the right bear canisters is key. They are like a safe for your snacks. Bear-proof bags are lighter but still strong. Canisters and bags keep smells in so bears can’t find your food. Before your hike, find out what works best in the area you’ll be hiking in.

    Hanging food is a smart move in bear country. Use a rope to lift your food bag between trees. Aim for 12 feet up and 5 feet from tree trunks. This way, bears can’t reach or pull it down.

    Making your food smell less is smart too. Use odor-proof bags when you pack. These help hide smells that can lure animals. Check that every bit of food is inside before you hit the trail.

    Remember these steps and you’ll sleep sound knowing your food – and you – are safe from curious bears and other wildlife.

    What Are Some Budget-Friendly Backpacking Meal Options?

    When planning for a hike, budget-friendly backpacking meals are key. They save you cash and make sure you have enough food. Look for meals that cost less but still give you the energy you need.

    Cost-Effective Meal Planning for Hikers

    The best trail food is both cheap and filling. Think pasta, rice, and oats. These pack light and won’t cost much. You can buy them in big bags to save even more. Add spices or dried veggies to make them tasty.

    Kid-Friendly Trail Food That Won’t Break the Bank

    Kids need food they’ll like that’s good for them too. Peanut butter, granola bars, and trail mix are great. They are the best trail food for kids because they’re tasty and won’t spoil fast. Plus, making them at home can help you cut costs.

    Nutritious and Affordable Homemade Meals

    What to cook on trail? Use simple ingredients to make your own meals. Mix dried beans, rice, and seasonings for a simple but power-packed dish. Homemade means you know what’s in your food, and it’s often cheaper than store-bought.

    Smart Shopping Tips for Trail Food Ingredients

    A good budget backpacking nutrition plan starts with smart shopping. Look for sales on dried fruits, nuts, and whole grains. Buy in bulk if you can. This will save you money and you can use them in lots of different meals. Remember, eggs and potatoes are also cheap and full of nutrients.

    When you hit the trail with these meals, you’ll hike without the worry of high food costs!

    Conclusion

    We’ve walked through key tips to keep your fuel tank full on long hikes, from tasty breakfasts to make-ahead trail mixes. Remember, energy-packed ingredients are your friends on the trail. Prep meals ahead and choose lightweight options to make your load lighter. For those avoiding meat or dairy, we provided plant-powered picks too. Keep meals fresh and safe with smart packing tricks. And don’t forget to store food right to avoid furry visitors. With these ideas, not only will you save money, but you’ll also enjoy delicious, nutritious bites every step of your adventure. Happy trails!

    Loading


  • A group of hikers respectfully traverse a spectacular mountain trail, showcasing hiking etiquette.

    What Are the Dos and Don’ts of Hiking Etiquette?

    Hiking etiquette ensures trails stay enjoyable for everyone. Explore proper behavior and respect nature’s sanctity. Keep it green and serene.

    • Stay on marked paths, respect signs/rules, and practice ‘Leave No Trace’ to protect the environment.
    • Uphill hikers have the right of way; to step aside on stable ground, communicate when passing, and use caution around bikers and equestrians.
    • Wear appropriate gear, know navigation and first aid, and follow the Leave No Trace principles.
    • Pack out trash, avoid trail erosion by staying on the path, and do not disturb wildlife or plants.
    • Camp responsibly, manage fire properly, respect private land, and observe wildlife from a distance.
    • Share multi-use trails by staying on your side, passing on the left, and communicating with others.
    • When hiking with pets, keep them leashed, plan ahead, and be considerate of other hikers and wildlife.
    • Foster inclusivity on trails by inviting diverse groups, respecting indigenous lands, and being supportive of all hikers.

    Hey, fellow hikers at RuggedRoll.com! Are you stepping onto the trail with the right foot? Whether you’re a newbie or a seasoned walker, knowing the dos and don’ts of hiking etiquette is a must for any outdoor adventure. Let’s dive into the basics of proper trail behavior, share tips on keeping our beautiful environment clean, and learn to show respect to fellow nature lovers. Stick with me and let’s ensure our treks are safe, enjoyable, and eco-friendly for everyone!

    What Is Proper Trail Behavior?

    Understanding and practicing the basics of trail behavior

    Hiking with care starts with knowing the basics. Pay attention to signs. Stay on marked paths. Take breaks off the main trail. Respect trail signs, rules, and closures.

    Prioritizing environmental stewardship on hikes

    Hikers should leave no trace. That means packing out your trash and keeping nature clean. Care for plants and animals by not feeding or disturbing them.

    Recognizing the most important rule of hiking etiquette

    Stay right, pass left. This is key for a smooth trail experience for everyone.

    Learning the fundamental dos and don’ts on the trail

    Do greet fellow hikers. Don’t play loud music. Do control your pet. Don’t damage live trees or plants. Respectful hiking habits make the trails better for us all.

    How Do You Stay Safe While Yielding on Hiking Paths?

    Who should step aside when meeting others on the trail? Uphill hikers have the right of way. This means if you’re going downhill, you should step aside. They’re working hard to climb and need to keep their rhythm. But there are more details to safe yielding.

    The right way to yield is not just about stepping aside. Make sure to find a stable spot to stand. This way, you’re safe and the path is clear. Sometimes you’ll see bikers or folks on horseback. They can find it hard to stop, so it’s on you to move to the side.

    Why give uphill hikers the right of way? It’s about effort and safety. Climbing up a steep path can be tough. If uphill hikers stop, restarting can be a big challenge. The person coming down has it easier. They can stop and go with less fuss.

    How do you pass hikers without putting anyone at risk? First, call out or ring a bell if you have one, so they know you’re there. Then you wait for a safe spot and let them know which side you’ll pass on. Always pass on the left if you can. It keeps things simple for everyone. Remember, a smile and a kind word can make the trail better for us all.

    What Are Essential Outdoor Ethics for Hikers?

    The dress code for hiking should keep you safe and comfy. Core skills help you respect nature. Always think about Leave No Trace and how to care for the wild.

    Outdoor ethics matter a lot. They keep our trails and nature nice for everyone. We must know what to do and what not to do. Leave No Trace has seven rules. They help us take care of the wild.

    Wear the right gear when you hike. Make sure your shoes have good traction. Dress for the weather, and always bring a hat and sunglasses. Clothes should let you move and keep you warm or cool.

    Know the three big skills in hiking. Navigation, first aid, and Leave No Trace are key. They keep you safe and help you take care of the land. Good hikers plan their trip and pack right.

    We need to care for our trails and leave them clean. Being kind to others on the trail is just as important. Think about the wildlife and plants. Love the outdoors? Show it by how you act out there.

    Keeping nature nice is up to us. So hike with care and help others do the same. It’s in our hands to set a good tone for all outdoor fans.

    How Should You Manage Waste and Preserve the Environment While Hiking?

    Why is it important to handle waste properly on hikes? It keeps nature clean and safe. Not managing waste can harm wildlife and spoil the outdoors for others. It also can taint water sources that animals and humans need.

    Principles of ‘Pack It In, Pack It Out’ for waste management on trails
    Carry all your trash out of the forest when you hike. That means wrappers, food, and any other garbage. Don’t leave it behind. Even if it seems small, it adds up when every hiker does it. Nature can’t handle this stuff like we can.

    Techniques to prevent trail erosion and protect the hiking paths
    How can hikers avoid contributing to trail erosion? Stay on the path. When you walk on the edge or make new paths, it can break down the soil. Soil holds the trail together. Without it, trails wash away and hurt the habitat around them.

    Efforts to preserve natural habitats and species while outdoors
    To keep animals and plants safe, stick to the trails. Also, look but don’t touch. Even small changes can upset nature’s balance. This means the home for critters and green stuff stays as it should.

    Best practices for minimizing a hiker’s environmental footprint
    Use gear that lasts. Avoid bringing more than you need. Buy from brands that care about the planet. Every small choice you make adds up to a big difference in keeping nature wild and free.

    What Etiquette Should Be Considered When Camping or Encountering Wildlife?

    When out in the wild, stay kind and safe. Here’s how.

    In a group, stick together and keep the noise down. Respect the wild. Keep camps tidy and quiet. Do not enter private areas.

    See wild animals? Stay calm and back off. Watch from a distance. Do not feed animals. It keeps them and you safe. It also helps them stay wild.

    Camping close to trails? Choose spots without much impact. Leave places as you found them or better. Keep away from private land.

    Making a fire? Only do it where it’s okay. Keep fires managed and small. Put them out cold to the touch. This keeps the woods safe for all.

    Every step counts. We can enjoy nature, and protect it too. Let’s camp and hike the right way, every time.

    How Should You Navigate Shared Trails and Communicate with Other Trail Users?

    What are multi-use path rules? Multi-use path rules are guidelines that ensure safety and respect among all trail users.

    Trails are for everyone, and that means we need rules. Whether you walk, bike, or ride a horse, know how to share. Stay on your side, pass on the left, and give a clear “hello” when overtaking someone.

    Now, how do you communicate intentions and presence to other trail users? Speak up or ring a bell when passing and make eye contact at crossings.

    When you hike or bike, you share the path. It’s simple: yield to those going uphill and talk to folks you meet. Let others know when you pass, and keep control of your bike. Sharing trails with cyclists means staying alert. Be ready to move over, and don’t block the path.

    Communication with other hikers isn’t just polite; it’s smart. Say a friendly hi to let them know you’re near. If you’re lost or need help, other trail users can be your best resource. Keep your ears open for others, and never wear both earbuds.

    Safety comes first for everyone on the trail. Be clear about where you’re going, and watch for signs. Remember, a smile or nod can go a long way on a hike. It’s not just about enjoying nature, but also enjoying each other’s company safely.

    What Are Considerations for Trail Safety and Courtesy With Regards to Hiking With Pets?

    How should you hike with pets responsibly? Keep them on a leash. When hiking with pets, controlling them is key. This ensures their safety and respect for other hikers on the trail.

    Guidelines for hiking state that pets should be on leashes. Not all hikers or pets are comfortable with each other. A leash helps prevent run-ins with wildlife or other hikers. It’s a simple, yet powerful way to hike without worry.

    What preparations are necessary for trail safety? Always plan ahead. Prepare for the unexpected. Carry water, food, and a first-aid kit for both you and your pet.

    Before you head out, check if pets are allowed on the trail. Some trails have strict rules against pets. If pets are allowed, keep them close. Bring bags for waste and pack it out. Consider boots for their paws if the trail is rough.

    How do we balance pets with consideration for others? Be mindful. Pets can be unpredictable. Their barks or movements may startle other trail users. Take a moment to step aside and let others pass in peace.

    When on the trail, not everyone will love your furry friend. Some people are scared of animals. Others might have allergies. Give fellow hikers space. Ensure your pet’s actions don’t ruin someone else’s trail time.

    What about group hiking with pets? Good manners matter. One person should handle pet-related tasks. This person keeps the pet on a leash, cleans up after it, and ensures it stays quiet.

    Hiking with a pet creates joy and brings challenges. Knowing the dos and don’ts of hiking with animals makes for a great day out. Keep your pet under control. This makes the hike safe for everyone – both two and four-legged!

    How Do You Foster Respect and Inclusivity on Trails?

    To make hiking more inclusive, invite people of all backgrounds. Respect is key when hiking on indigenous land; always get permission and follow guidelines. Team spirit helps make the trail culture supportive for everyone. When hiking in groups, make sure to include everyone and share the trail kindly.

    The hiking world is great when we make room for everyone. We show we care by asking others to join our outdoor fun. We learn about different cultures and share trails in peace. Hiking together with respect, no matter who we are, makes every trip better.

    Conclusion

    We covered a lot in this post. Right from trail basics to safety with pets, we hit every hiking rule. Remember, it’s all about respect— for nature, others, and rules. Keep trails clean, safe, and fun. Hike smart and take care of the outdoors. That way, we all win. Happy trails!

    Loading


  • A hyperrealistic mountain camping scene that captures the essence of adventure and solitude.

    What Essentials Do I Need for Mountain Camping?

    Essentials for mountain camping? Get the ultimate checklist and survival tips for your next adventure.

    • Essential mountain camping gear: weatherproof tent, cold-resistant sleeping bag, sturdy backpack, map/compass/GPS, layered clothing, boots, power banks/solar chargers, water purification, whistle, mirror, and bear spray.
    • Campsite selection tips: Seek flat ground, avoid sharp objects, use natural windbreaks, opt for seclusion, check for permits, consider RV parks for amenities, and use online maps for best spots.
    • Safety measures: Prepare for altitude sickness, bear-proof food storage, smart camp setup away from hazards, equipped first aid kit, keep a safe distance from wildlife, and adhere to fire safety rules.
    • Cooking advice: Use durable cooking tools, plan easy-to-make and hearty meals, be ready for sudden weather changes, choose appropriate stove fuel, and wear layers for warmth.
    • Must-visit Smoky Mountains attractions: Clingmans Dome, Cades Cove, trails with panoramic views, lakes for fishing, natural hot springs, mountain caves, and hammock-friendly trees.
    • Eco-conscious camping: Follow Leave No Trace principles, reduce waste, use established campsites, source firewood responsibly, and engage in trail preservation volunteering to protect the environment.

    Heading out to the mountains? Don’t start your adventure without a solid plan! In this must-read guide, I’ll share essential tips to make sure you have all the gear for a safe and awesome mountain camping trip. From the checklist to the gear, you’ll learn what you need to pack, how to stay hydrated, and how to keep safe. Get your boots ready and let’s dive into what you need to make your mountain escape unforgettable!

    What Essentials Are Needed for Mountain Camping?

    Let’s dig into the crucial gear for mountain camping. First off, what should you not leave without? You need a proper tent, a sleeping bag suitable for cold nights, and a sturdy backpack. Throw in a map, compass, or GPS device for good measure. This stuff is your lifeline out there.

    The Comprehensive Mountain Camping Checklist

    A thorough mountain camping checklist is step one. It should include your tent, sleeping gear, food supplies, and tools. Don’t forget a first aid kit—accidents happen. Always double-check your list before heading out.

    Selecting Weatherproof Camping Equipment for High Altitudes

    Gear that stands up to wind and rain is vital for high places. Aim for a tent that says “weatherproof” on the label. It means cozy nights instead of wet, windy ones.

    Essential Alpine Camping Gear: What to Pack

    High up in the mountains, the air gets thin and cold. Your gear needs to handle this. Pack layers of clothes, and make sure your boots can grip rocky trails.

    Off-grid Camping Essentials for Self-sufficiency

    Going off the grid? Power banks and solar chargers are a must. Bring water purification tools too. You need to drink safe, clean water to stay sharp.

    Hydration Tips for Camping at Elevation

    At high elevations, your body loses water fast. Drink often, even if you’re not thirsty. Use streams and lakes to refill, but always purify the water first. Dehydration is a real danger up high.

    Survival Tips: Staying Safe in the Wilderness

    When out in the wild, let someone know where you’ll be. Learn how to signal for help. Pack a whistle, mirror, and bear spray just in case. These items are small, but they can save your life.

    Backpacking Gear Essentials for Mountain Terrain

    Quality backpacking gear should be light but tough. Your pack, poles, and shoes carry you forward. They should be up to the challenge of rough mountain trails. Choose gear that feels like part of you. This way, the mountain feels less like an obstacle and more like home.

    Remember, any adventure starts with being well-prepared. Your gear is your best friend on the mountain, so pick wisely and respect the wilderness you’re stepping into. Happy trails!

    How Do I Choose a Campsite in the Mountains?

    Can you camp in Colorado’s Rocky Mountains? Yes, you can! But you need to know how to pick a good spot. To set up a good wilderness campsite, look for flat ground. You need space to sleep and eat without tipping over! Check the ground for sharp things or big rocks. You don’t want a stick poking you at night. Are there trees around? They can block the wind. That makes your fire safe and keeps you warm.

    Choose secluded mountain campsites for quiet and peace. Look online or ask local hikers where you can find them. You might hike a bit more, but it’s worth it!

    For family fun, find places with clean water and space for games. If you plan to stay in a national park, you might need a camping permit. Get it early so you don’t miss out. Visit park websites or call their offices for help on how to apply.

    RV parks have nice stuff like showers and toilets. But they can be busy. Wilderness spots have less noise but fewer comforts.

    If you want to make sure you have privacy, don’t camp right on the trail or too close to others. Hide your tent with bushes and trees if you can.

    Use mountain camping maps to help you find the best spots. Online maps can show where to find these places and how to get there. They give you a lot of useful info.

    There you have it. Picking the right spot is big in making your camp trip great. Remember, good camps have flat ground, are nice and quiet, and keep you safe. Happy camping!

    What Safety Precautions Should I Take When Mountain Camping?

    When mountain camping, safety is key. Prepare for possible sickness due to high heights. Getting sick from thin air can happen fast. Look for headaches, dizziness, or trouble with sleep. These signs mean you need to take it easy. Start at lower heights and slowly climb. Drink water and rest well too.

    Protect yourself in bear lands. Learn what to do if you see bears. Make noise when you hike. Carry bear spray. Keep food safe in bear-proof boxes. Never keep food in your tent. Store it far away from where you sleep. This will keep the bears from coming close to you.

    Set up camp safely and smart. Choose a place away from lone trees. Storms can make them a risk. Look for flat ground. Keep clear from paths that water could flow through. This will help keep your tent dry if it rains hard.

    Always have a first aid kit. Fill it with bandages, gauze, tape, and creams for cuts. Painkillers can help with sore muscles. And don’t forget things for tummy troubles. A good kit can fix many problems.

    Watch wildlife from a safe spot. Do not get too close. Use binoculars to see animals from far away. Stay in groups. Most wild animals will stay away from big groups of people.

    Be smart with fires. Only use fire rings in camping spots. Put out fires with water until the ashes are cool. Follow rules about when and where you can make fires. This helps to stop wildfires.

    Bears want your food, so you must store it right. Use bear boxes, poles, or canisters to keep your food safe. Bears can’t get in them. This keeps both you and the bears from harm.

    How Do I Cook and Eat Properly in a Mountain Environment?

    You might ask, “Can you camp anywhere in the Smoky Mountains?” The short answer is no. You must camp at designated sites or shelters.

    Cooking in the mountains needs the right tools and food. You’ll want campfire cooking essentials that can handle open flames. This means a sturdy grill grate, pots, and pans made for the heat. Don’t forget a metal spatula and tongs!

    Mountain camping cuisine can be both tasty and simple. Think of meals that are filling and can fuel your hikes. Quick pasta, beans, rice, and canned veggies work well. They’re light to carry and easy to cook.

    Some campsites have barbecue facilities that you can use. Be sure to clean up after so you leave it ready for the next person! And always check fire rules before you light up that grill.

    Mountain weather can switch fast. You need to be ready to cook in wind, rain, or cold. A windshield for your stove can be a lifesaver. Pack for all weather to stay comfy while you cook.

    The right clothing helps a lot, especially in cold weather camping. Layers work best so you can put on or take off as needed. A warm hat and gloves can make cooking outside nicer.

    What about your stove? The type of fuel is key. Some work better in cold or high places. Propane and isobutane are good choices for many trips. They are easy to find and use.

    So, gear up, plan your meals, and get ready for a mountain feast!

    What Are the Must-Visit Natural Attractions for Mountain Campers?

    When you camp in the Smoky Mountains, you find many natural draws. The best natural attractions for campers in the Smoky Mountains include Clingman Dome and Cades Cove. Clingmans Dome stands as the highest point in the park, where you can see over 100 miles on clear days. Cades Cove offers lush valleys, wildlife viewing, and historic buildings. Aside from these, you might want to try out a few other must-visits:

    Top Smoky Mountains Natural Attractions for Campers

    Here, you’ll see tons of trees and feel like you’re on top of the world. There are also spots to fish, hike, and take photos you’ll never forget.

    Discovering Peaceful Mountain Vistas

    Look for trails that lead up high—it’s worth it. You’ll find spots so quiet, it’s just you and the sound of the wind.

    Ideal Spots for Scenic Photography: Peaks and Panoramas

    Search for peaks like Mount LeConte. They give you wide views perfect for those epic sunrise and sunset shots.

    Lakes like Abrams or Fontana are full of trout. Get there early or at dusk for the best fishing.

    Etiquette for Enjoying Natural Hot Springs

    If you find hot springs, always keep them clean. Waiting your turn and being quiet lets everyone enjoy the peace.

    Exploring Mountain Caves: Recommendations

    Caves tell stories of the mountains. Alum Cave and Tuckaleechee Caverns are great spots. Don’t forget your light and helmet.

    Best Locations for Hammock Camping Among the Trees

    Trees are everywhere, so it’s easy to find two perfect ones for hammock camping. Just make sure your hammock doesn’t harm the trees.

    Nature gives us these spots to enjoy but remember to treat them right. Pack out your trash, leave what you find, and keep the noise down so these places stay beautiful for all.

    How Can I Be Eco-Conscious While Camping in the Mountains?

    Camping in the mountains is great. But we must think about nature too. We can camp without hurting the land. How? Let’s dig in.

    Embracing Eco-Friendly Camping Practices

    First, leave things as you find them. Do not make new spots for tents. Use what is already there.

    Implementing Leave No Trace Principles

    To leave no trace, take all trash with you. And do not take things from the wild. Keep nature clean and pure for others.

    Engaging in Sustainable Camping Initiatives

    Next, help protect the wild. Join groups that keep camping green. They do great work to save our lovely outdoors.

    Responsible Firewood Sourcing: Do’s and Don’ts

    Be smart with firewood. Do not cut living trees. Use dead wood or buy it locally. This keeps forests healthy and safe.

    Best Practices for Campsite Waste Disposal

    For waste, have a plan. Pack it out so nothing is left behind. Carry bags for trash and recycle what you can.

    How to Get Involved in Nature Trail Preservation Volunteering

    Want to do more? Help mend trails. Giving time keeps paths clear and saves plants along the way. It’s good for you, too.

    We can all camp the right way. Let’s keep the mountains great. Little acts make a big change. Let’s do this together!

    Conclusion

    In this post, we explored key tips for mountain camping, like picking the right gear and staying safe. We covered everything from creating a solid camping checklist to cooking in the wild. We also looked at how to find great spots and keep nature clean. Remember, good prep is key to enjoying the mountains safely and responsibly. Use what you’ve learned here to make your next outdoor adventure the best one yet!

    Loading


  • Mesmerizing photo of a hiker equipped with winter gear navigating icy trails.

    Winter Hiking Safety: What Are the Non-Negotiable Essentials?

    Struggling with winter hiking safety? This guide details essentials, tips for beginners, and how to stay secure in the cold.

    • Winter hiking essentials: warm layers, signaling devices (whistles, mirrors), navigation tools (map and compass), and modified first aid kit (with thermal blankets, and hand warmers).
    • Preparation includes checking trails and weather, creating an itinerary, and getting physically fit.
    • Prevent hypothermia by dressing in layers, staying dry, and eating high-calorie foods; prevent frostbite by keeping skin covered and warm.
    • Navigation: use a map, compass, and GPS (with spare batteries), be aware of reduced visibility from winter darkness, and inform others of your plan.
    • Ice hiking: wear the right footwear (with crampons) and walk carefully.
    • Hydration/nutrition: drink regularly (using insulated flasks) and eat high-calorie snacks that won’t freeze.
    • Layering clothing: moisture-wicking base, insulating middle, wind-blocking outer layer.
    • Wildlife: maintain a distance and understand animal tracks; avalanches: know the risks and survival techniques.
    • Signaling in emergencies: visual (flares) and audio (whistles) devices, consider rescue insurance.
    • Advanced survival skills: fire-starting, shelter building, maintaining body heat, staying active, and consuming high-energy food and water.

    Are you ready to brave the chill and conquer the trails this winter? Before you step into the snowy wonderland, gear up with non-negotiable winter hiking essentials! Learn to layer like a pro, signal for help in emergencies, and navigate through icy landscapes. Here’s your guide to staying safe and enjoying every frosty step. Let’s get you prepped for an adventure where only the essentials make the cut!

    What Should You Include in Your Winter Hiking Safety Essentials?

    What are the non-negotiable items for winter hiking safety?
    The must-haves are warm layers, signaling devices, navigational tools, and a winter-ready first aid kit.

    Can beginners learn about winter hiking safety essentials?
    Yes, beginners can learn about winter hiking safety essentials with proper research and guidance.

    Learning to dress in layers is key. Start with a base layer that wicks sweat away. Add an insulation layer to keep warmth in. Top it off with a shell to block wind and wet. Materials like wool or synthetics work best as they keep you warm even when damp.

    Always carry a signaling device. This can be a whistle or a mirror, which you use to alert rescuers if you get lost.

    Bring navigational tools. A map and a compass are must-haves because GPS can fail in cold or remote areas.

    Change your first aid kit for winter. Add items like thermal blankets and hand warmers to deal with the cold. Don’t forget about extra meds and bandages as well.

    Be wise and well-equipped. It can make all the difference when braving the cold, wild outdoors.

    How Do You Prepare for a Winter Hike?

    Before a winter hike, you must check the trail and weather. Make sure to make an itinerary. You need to be fit and strong to hike in the cold.

    To answer “What should be done before embarking on a winter hike?” — know the trail, look up the weather, plan your route, and train your body. A winter hiking checklist should include gear for warmth, safety, and navigation.

    For a solid start, study the path you’ll take. Trail conditions can change fast in winter. Ice and snow may cover the ground. This makes it hard to walk. Knowing this, you can bring the right gear, like snowshoes or crampons.

    Always keep an eye on the weather forecasts. This can help you dodge bad storms. When the sky turns mean, it’s time to pack extra warm gear or change your plans.

    Your trip plan — or itinerary — is key. You should know how long you will hike each day. Let someone know this plan. If trouble hits, they will know where to look for you.

    And don’t forget your body needs to be ready. Winter hiking is tough. Start getting fit now with walks and strength training. This way your muscles can handle the extra work of hiking in the snow.

    So gear up, plan well, and get fit! This way you stand the best chance against Old Man Winter’s tricks.

    What Techniques Can Prevent Hypothermia and Frostbite?

    The best practices to prevent hypothermia include dressing warmly, staying dry, and eating high-energy foods. For frostbite, keep the skin covered and warm.

    Now, let’s jump into the details. Hypothermia prevention is critical. It happens when your body loses heat faster than it can make it. This can make your heart and nervous system shut down. To stop this, layer up. Start with a moist-wicking fabric close to your skin. Then add an insulating layer, like fleece, to trap warmth. The outer layer should block wind and wetness. This could be a waterproof, breathable jacket.

    For frostbite first aid, you need to act fast if your skin looks white or numb. Gently warm the area in warm water, not hot, for up to 30 minutes. Don’t rub the skin or walk on frostbitten feet, if that’s the case. After warming, wrap the area in a clean cloth for protection. If frostbite seems bad, get to a doctor as soon as possible.

    Thermal regulation techniques are key to staying safe. Move around to keep blood flowing but don’t sweat too much, as it can make you cold later. Drink plenty of fluids to stay hydrated. This might seem odd in the cold, but it’s vital. Eat energy-rich foods like nuts and energy bars. These foods help your body make heat.

    Remember, in cold weather, drink water and munch on snacks often. Keep your energy up so you stay warm. Use these tips to stay toastier out in the wild winter!

    What Are the Best Navigation Strategies in Winter Conditions?

    Navigation aids you should rely on during a winter hike include a map and compass, as well as GPS devices. Winter darkness affects trail navigation by reducing visibility, which makes it hard to stay on track.

    Let’s break that down. Always carry a map and compass. Know how to use them in case your tech fails. GPS devices are good but not perfect. They need power and a signal to work. Learn the land before you go. Marks on trees or big rocks can help when trails vanish under snow.

    Darkness comes early in winter. This means less time to hike in daylight. Good lights can help you see the trail in the dark. Still, it’s best to plan hikes to finish before night. Or know the trail well if you must hike in dark hours.

    Remember, tech can break or lose power in the cold. Carry spare batteries to stay safe. Always let someone know your hike plan too. This way, they can help if you get lost. Be ready for whiteouts. These are snow storms you can’t see through. If caught in one, find shelter. Wait until you can see well again before moving on.

    Using the right tools and knowing your limits keeps you safe. Stay on top trails and enjoy winter wonders with care.

    What Are the Necessary Ice Hiking Techniques?

    How can one safely hike over ice? Walk flat-footed and use gear that grips. To safely hike over ice, you need the right footwear and careful steps. It’s like you’ve got a secret power against slips. Ice hiking techniques include knowing how to walk and using tools for extra grip. A crampon usage guide helps a lot.

    What is the proper use of crampons and other ice hiking gear? Attach them snugly and step with care. Crampons need to fit your boots just right. You strap or clip them on so they won’t slip off. Once they’re on, you take slow, steady steps. Slip-resistant footwear for ice helps, too. Boots with deep grooves bite into the ice. They keep you standing when the ground tries to trip you up.

    To make sure you stay safe, always check if the ice is solid enough to walk on. For crampons, follow a step-by-step guide. It’s super important to get them on right. For footwear, choose boots made for ice. Look for ones with great grip and that keep your feet warm. Remember, safe ice hiking is all about being steady and prepared.

    How Can You Stay Hydrated and Nourished During Winter Hikes?

    What are the risks and solutions for hydration in cold weather? In cold weather, you don’t feel as thirsty. But you still need water to keep warm and energized. The answer is to drink often, even if you’re not thirsty. Use an insulated flask to keep your water from freezing.

    What food should be consumed on winter hikes? Choose high-calorie snacks. They give you energy and help your body stay warm. Foods that won’t freeze are best, like nuts or energy bars.

    Hydration is key when you hike in the cold. Your body loses water through sweat and breath. It can trick you because you might not feel like drinking. However not drinking enough can lead to dehydration. That’s why it’s important to take breaks and sip water, even when not thirsty.

    Insulating your water bottles or using containers designed for winter can keep your water in liquid form. Pack hot drinks in a thermos, and take sips regularly to add warmth and energy to your body.

    Now, let’s talk eats. What you scoff down during your hike can make or break your day. Winter hiking food ideas circle around high-calorie snacks. We need these calories to fuel our bodies in the cold. Think nuts, seeds, cheese, and chocolate. They pack a lot of energy and are less likely to freeze.

    Planning meals? Go for simple-to-make and eat foods. Good choices could be peanut butter sandwiches or pasta that can stay edible even in cold temps. Remember, food can stiffen or freeze. So, pack items that you can eat without much fuss, even when cold.

    To keep your food from freezing, store it close to your body. Body heat helps. Also, choose packaging that is easy to open with gloves on. You don’t want to struggle with tiny zips in the cold.

    Hydration and proper food are non-negotiable. They keep you going strong on winter trails. Remember, cold weather hydration and munching on those high-calorie snacks could save your hike and your health. Drink up, chow down, and hit the snowy trails with confidence.

    What Clothing Layers Are Essential for Winter Hiking?

    How should hikers layer for winter conditions? In short: with care. Use moisture-wicking base layers to keep sweat off your skin. Pick wool or synthetic materials. They work best. Add insulation layers to trap body heat. Use fleece or goose down for this. Your wind chill protection layer matters too. It keeps biting winds at bay.

    Base layers work like a second skin. They should pull sweat away from your body. This keeps you dry and warm. Materials like polyester or merino wool are top-notch choices for base layers. Why? Because they’re super at managing moisture and keeping you toasty.

    Now, let’s talk about the middle layer. It’s all about trapping air to keep you warm. For milder days, a light fleece works. When the mercury drops, you’ll want heavier insulation. Think puffy, insulated jackets.

    Wind chill can turn a hike into a risky business. That’s where your outermost layer comes in. It must block wind and let sweat escape. This way, you keep the chill out without getting damp from inside. Jackets with vents are great. They offer an extra way to control your body’s warmth.

    Remember this: Dressing right is your first step to a safe winter hike.

    How to Deal with Wildlife and Stay Safe in the Snow?

    The best way to deal with wildlife in winter is to watch from afar. Give animals space. To avoid avalanches, look for signs and follow trails. Animal tracks in the snow tell you what’s nearby.

    Safety tips for common wildlife encounters in snowy regions

    Always watch wildlife from a safe spot. Do not try to feed them. Loud noises can help scare them away if they get too close. Know which animals live in your hiking area. Some might be sleeping in winter, but others are still out.

    Basic avalanche safety measures every hiker should know

    Avalanches are serious. Learn about them before your hike. Check local reports for risk levels. Hiking in groups is safer. Avoid risky areas like steep slopes. If caught in an avalanche, try to swim to stay on top.

    How to identify and interpret animal tracks in the snow

    Animal tracks in snow share tales of who passed by. Look for clear, fresh tracks to see recent activity. Deer tracks have two parts and are pointed. Bear paw prints are big with claw marks. If you see many tracks together, it might be a group, and you should be careful. Remember, some tracks lead to food, but it’s not ours to take. Always keep your own safety in mind.

    What Emergency Signaling Should You Carry in Snow?

    What emergency signaling should you carry in the snow? Always have both visual and audio signaling devices. Flares and whistles are key.

    Snow hides you well. If you get stuck, you need a strong signal. A flare can be seen from afar. It tells people where you are. The bright light stands out against the snow. But flares are not toys. Only use them in real trouble. They show you need help fast.

    Carry a whistle, too. Sound travels far in quiet snow. Three short blows mean you’re in danger. Keep blasting, someone should hear.

    Is it worth getting rescue insurance before a winter hike? Yes, it’s smart. Rescue insurance can save your money and life. If a rescue team must come, the cost is high. Insurance pays for that. Always hope you don’t use it, but be glad if you do.

    Rescue teams work hard in bad snow. They help injured or lost hikers. When you have to call for help, you won’t have to worry about money. Your focus stays on staying safe. That peace of mind is worth the fee.

    What Advanced Winter Survival Skills Should a Hiker Know?

    The key survival skills for winter hiking are fire-starting, shelter-building, and maintaining body heat. To stay warm during activities in freezing temperatures, keep moving. This helps your body make its own heat.

    Fire-starting in wet conditions can be tough. But it’s key to warm up and dry clothes. You’ll need waterproof matches or a lighter, and dry kindling. In the snow, build a platform with logs. This stops the fire from sinking.

    For shelter, dig into the snow. A snow cave keeps you warm and out of the wind. Use a tarp and branches to make a quick lean-to. Always block the wind and stay dry.

    Building stamina for winter hikes means being active. Start with short hikes and go longer as you get stronger. Work on your legs and core. It makes hikes easier and keeps you warm. Always eat high-energy foods and drink water. Even if it’s cold, your body needs it to make heat and energy.

    In summary, master fire-making, build a strong shelter, stay active, eat well, and keep hydrated. These skills will keep you safe and warm on winter trails.

    Conclusion

    In this post, we’ve dug deep into what you need for safe winter hikes. Layer your clothes, carry a map, compass, and GPS for those tricky trails. Know how to spot frostbite and keep warm. Got crampons? Learn to use them right, and choose boots that grip the ice. Pack foods that give you power and won’t turn into ice blocks. Keep water handy so it doesn’t freeze. Meet wildlife? Stay calm and know your safety steps. And don’t forget, signal devices and rescue insurance—they’re big deals. Out there, with the right skills and gear, you’re set to enjoy and conquer the cold!

    Loading


  • A mesmerizing photo capturing the health benefits of hiking in nature's grandeur.

    What Are the Health Benefits of Hiking Regularly?

    Explore the Benefits of Hiking: Heart health, weight loss, muscle growth, and joint care, all from hitting the trails.

    • Hiking strengthens the heart, lungs, muscles, joints, and bones.
    • It can reduce stress, enhance mental well-being, and improve sleep quality.
    • Offers social and community benefits through solo or group hikes, promoting personal growth and friendship.
    • Contributes to longevity and preventive health by managing diabetes, providing vitamin D, and lowering risks of serious illnesses.
    • Forest bathing during hikes offers a form of ecotherapy, leading to environmental stewardship.
    • Improves daily functional abilities and mind sharpness.
    • Outperforms the gym for full-body toning and functional strength, beneficial for endurance and cross-training for athletes.

    Strap on your boots and hit the trail to a healthier you! Hiking regularly isn’t just a way to get fresh air – it’s a total body booster..beginPath(Heart health skyrockets, weight melts away, and muscles get that good firm feel. Who knew tackling those trails could oil your joints and solidify bones too? Let’s dive into why those scenic steps are more than just a pretty view. Ready to feel awesome inside and out? Keep reading to discover the top-notch health perks of persistent treks!

    What Are the Top Health Benefits of Hiking?

    Did you know hiking works your heart out? When you hike, your heart pumps more to move oxygen-filled blood. This gives you a strong heart and better lungs. Each step you take helps fight off heart disease.

    Doctors say walking is the best workout for your ticker. And hiking means walking plus hilly trails. This is why hiking is good for you. It gives your heart a boost and breathes life into your steps.

    Now, let’s talk weight. Hitting the trails burns calories. A lot of them! So, if you keep hiking, you might see your pants get loose. It’s a fun way to lose those extra pounds.

    But there’s more. Do you want to feel strong? Carry a pack on a hike. Your muscles will thank you. They get stronger each time you hike up a hill. Your legs, hips, and core firm up. You’ll feel it when you carry bags or play games with pals.

    What about your joints? They love hikes too! Moving them keeps them healthy. When you hike, your joints move and stay slick. It helps you squat and jump without a hitch. So, hike to keep those knees nimble!

    Last, let’s talk bones. They need to be tough. Hiking helps with that. When you walk or run, your bones get stronger. This means fewer breaks as you age.

    To sum it up, hiking is a power-up for your body. It keeps your heart, weight, muscles, joints, and bones in top shape. Plus, it’s fun! So, lace up those boots, hit the trail, and feel your body thank you with every step you take.

    Can Hiking Reduce Stress and Enhance Mental Well-being?

    Yes, hiking can reduce stress and boost mental health. People feel calmer and clearer in their minds after nature walks. It can make your mood better and help with sleep too. Hiking helps you think sharp and could make your brain work better over time.

    A walk in the woods can melt your stress away. Trees and fresh air make you breathe deeply and feel peace. Nature makes your brain happy. When you hike, you forget your worries and just enjoy the moment.

    Hiking can also make you sleep like a log at night. After a good hike, your body feels right and ready for rest. Plus, you get a mind break that helps you drift off to dreamland fast.

    When you climb hills or dodge roots, your brain kicks into high gear. It plans each step. This boosts your smarts and keeps your thoughts sharp. So, hiking is like a workout for your brain too.

    Your mood gets a lift when you step outside. Sun, sky, and dirt paths can make you smile. Even on hard days, a quick hike can turn things around and make you feel better.

    So, next time life feels too much, hit the trail. You’ll come back with a happy heart and a clear head. That’s the magic of hiking for you!

    What are the Social and Community Benefits of Hiking?

    Solo hiking lets you know yourself better and grow. When you hike alone, you learn to rely on your own decisions and enjoy the quiet. But group hiking has its own perks. You meet new people and make friends on the trail. On group hikes, everyone shares the journey. This helps you bond with others and feel like you’re part of a team.

    Hiking with others can make you feel better inside. When you hike, you talk and share stories. This boosts your mood and helps you feel less alone. It’s like getting a big, warm hug from nature and friends all at once. Group hikes let you share the ups and downs of life, just like the trails. It makes you strong inside and out. When things get tough, you remember how you pushed through on a hike. This helps you deal with the hard stuff in life.

    Hiking is a way to take care of yourself. It’s not just about getting fit. It’s also about feeling good with friends outdoors. It helps your head and heart, not just your muscles. So next time you head out, think about joining a hiking group. You might just find your new best friends and a happier you.

    How Does Hiking Contribute to Longevity and Preventative Health?

    Regular hiking can add years to your life. How? It gets your heart pumping and works your muscles, helping you stay fit as you age. First, let’s dive into the longevity benefits of regular hiking. Studies show that hiking can lead to a longer life. So yes, hitting the trails can keep you around for more birthdays.

    For folks with diabetes, finding a good way to exercise is key. Hiking for diabetes management checks this box. It’s a low-impact exercise that still makes a big impact. By walking those paths, you could keep blood sugar levels in check.

    Now, about soaking up that sun. Hiking means you’re outside, right? That’s great for grabbing some natural vitamin D acquisition from hiking. Your body needs this to keep bones strong and help your immune system.

    What about all ages? Sure thing! Hiking is a great pick for youngsters to the young at heart. It’s a low-impact exercise that keeps you moving without too much strain. Whether you’re 9 or 90, trails are open to everyone.

    Lastly, let’s not skip the preventive health advantages of hiking. Cancer, heart disease, stroke – hiking helps lower the risk of these big health scares. When you’re cruising through the woods, along the beach, or up a mountain, you’re doing your body a solid favor. Keep lacing up those boots; your body will thank you for it.

    What Are the Less Known Advantages of Hiking in Nature?

    Forest bathing is more than just a walk in the woods. It’s a mindful way to heal. When you soak in the sights, sounds, and smells of the forest, you start to feel at peace. This is the power of nature acting on your body and soul.

    “Hiking is my form of ecotherapy,” someone might say. They mean that simply being outside, moving through the trees and greenery, helps them think clearly. People feel less stressed and more relaxed after time spent in nature.

    Many find that nature walks work like meditation. With each step, the busy world fades. Thoughts quiet down, and a sense of calm takes over. This is how hiking can be a journey, not just to places, but within oneself.

    Hiking often means you build a bond with nature. The more you hike, the stronger that bond grows. You see the beauty and learn about the land. That’s when you also learn to care for it deeply.

    This care turns into action. Hikers often become keen protectors of the environment. They teach others, clean trails, and fight to save wild places. Hiking makes us guardians of nature through a love that evolves with every trek.

    What Are the Practical Benefits of Hiking for Everyday Life?

    Does hiking improve daily functional abilities? Yes, it does. Hiking helps fight off the harm of sitting all day. It gets you moving and boosts your fitness. It also trains your body to balance better. This happens as you walk over rocks and roots. Hiking can even sharpen your mind. You learn to find your way on trails and react fast to changes. This sharp mind helps in your daily life too. It makes tasks like planning and focusing much easier. So, pull on your boots and hit the trails. Your body and brain will thank you!

    What Are the Health Benefits of Hiking Regularly?

    Is hiking better for you than running? Yes, in many cases, especially for full-body toning. Hiking is great for your muscles because it pushes your body in ways flat ground can’t. You use more muscles climbing hills and balancing on uneven paths. It’s a full workout. Your legs, core, and even your arms get in on the action, especially if you use poles.

    Is hiking or the gym better for toning? Hiking can be better than the gym for toning your body. It’s like the gym’s machines but outside. Nature’s gym! With hiking, you get resistance training just like in the gym, but with fresh air and views.

    Now, let’s dive deeper into those muscles and how hiking shapes them. When you hike, you work out your whole body. You feel your legs push you forward. Your core keeps you steady. If you use poles, your arms join the workout too. Does hiking tone your body? Absolutely! With each step, you’re building muscle.

    Let’s talk about how hiking keeps your heart and lungs strong. Building endurance on hikes is easy. You breathe deeper, your heart beats faster, and your blood moves faster too. It’s a big win for your stamina. It’s so good for your heart. Hikers often have strong hearts because they make them work hard.

    Next up, hiking is not just about being strong. It’s about being able to use that strength in real life. Hiking for functional strength means you can lift, carry, and move better in your day-to-day life. Not just at the gym. It’s about real-world uses. Like carrying groceries or moving furniture. That kind of strong.

    Finally, let’s not forget about athletes. They love hiking too. Why? Hiking as cross-training for athletes is smart. It helps them use their muscles in new ways. This can make them better at their main sport. It gives their bodies a break from their usual routine while still getting a great workout.

    So, lace up your boots! Each hike is a step toward a stronger, toned body ready for all life throws your way.

    Conclusion

    Hiking gives so many wins for your health. From a stronger heart to better sleep, it checks all boxes. It’s good for your mind, too, chopping stress and boosting your mood. You even build muscle and balance! Plus, you step into a world where you find new friends and care for nature. Hiking means more than just walking trails; it’s a step towards a better, fuller life. Keep lacing up those boots and hit the trail for a fitter you in a happier world.

    Loading


  • Alt Text: "Experience the ethereal beauty of snow-covered trails, a winter wonderland awaits."

    Winter Hiking: What Should I Know Before Attempting a Winter Hike?

    Embark on winter hiking safely with essential gear and expert tips to conquer the cold.

    • Winter hiking involves cold weather and snow, requiring fitness, planning, and safety awareness.
    • Gear up with insulated, waterproof boots, layered clothing, and essentials to manage the cold.
    • Layering system: moisture-wicking base layers, insulating mid-layers, and protective outer layers.
    • Navigate safely with a map, compass, GPS, and avalanche knowledge; pack a first aid kit for cold injuries.
    • Prevent water from freezing by keeping it close to your body and eat high-energy foods regularly.
    • Use trekking poles with ice tips, minimize breaks, dress in layers, and show environmental respect.
    • Master winter skills like snowshoeing, hypothermia prevention, and frostbite treatment.
    • Choose hiking destinations that suit your skill level, with safe trails and beautiful scenery.
    • Physically prepare with leg-strengthening exercises, cardiovascular training, and cold acclimation.

    Remember always to prioritize safety, know your limits, and be prepared for weather changes.


    Hey outdoor lovers! Ready to hike when it’s cold? Before you go, know this: winter hiking is not just a walk in the snow. It’s a whole new game! You need the right gear, a plan, and to stay safe. Keep warm, have fun, and let’s get into winter hiking without a hitch!

    What Should I Know Before Attempting a Winter Hike?

    Is it okay to hike in the winter? Yes, it’s great for tough hikers. What is the meaning of winter hiking? It means trekking in snow or cold weather.

    Before you lace up your boots and head out, know that winter hiking is no joke! It’s tougher than summer hiking because paths are slick, days are short, and it’s really cold. You’ve got to be ready for this big leap.

    Ask yourself, am I fit enough? Do I know what to do if I get caught in a storm or face an icy patch? If you’re new to hiking in the snow, it’s smart to start with short, less risky trails. Build up to those big, breathtaking mountain hikes.

    Planning is key, and a solid itinerary is a must. Know where you’re going and how long it’ll take. Check the weather before you head out. It can change fast and turn your hike into a really risky trip. Stay on marked trails, even if you think you know a shortcut. Getting lost in cold conditions is scary and dangerous.

    Safety is huge when you’re out in the wild. Learn about dangers like avalanches if you’re in the mountains. It might save your life.

    So, get set up with the right gear, take time to make a good plan, and be safe out there. Winter hiking is tough, but man, it’s worth it! There’s nothing like the peace of the snowy woods and the crisp, fresh air. Just remember, know before you go, and stay safe so you can enjoy every step.

    How Do I Choose the Right Winter Hiking Gear?

    What should be on your winter trekking gear list? Start with good boots. They must grip ice well and keep your feet cozy. Add in insulated footwear for snowy trails. Go for boots that stop you from slipping on icy paths.

    Layer your clothes right to stay warm. It’s smart to check your gear’s limit. Think about how cold it might get. Pick gear that can handle the lowest temps.

    Here’s more detail on picking your gear. For boots, waterproof hiking shoes are key. They keep your feet dry. Dry feet stay warmer, trust me.

    On your gear list, count essentials first. You’ll need a strong outer layer. It cuts the wind and keeps out wet. For inner layers, go for warmth but make sure they breathe well. You don’t want sweat freezing on you.

    Lastly, what temperature is too cold for hiking? It varies for each person. But be careful below 20°F. That’s when frostbite can set in fast. Always watch the weather and know your cold limit. Stay safe and warm out there!

    What Should Be in My Winter Hiking Clothing and Layering System?

    The base layer keeps you dry by moving sweat off your skin. You need base layers that grab sweat and send it away from your body. This keeps you warm and dry. Pick ones made of wool or synthetic stuff, not cotton. It pulls sweat away and dries quickly.

    Mid-layers keep you warm. They trap air to keep body heat in. Fleece or down works great for this layer. It should fit snugly but not tight. This way, you stay toasty even when it’s freezing out.

    The outer layer protects you from wind and snow. It should block wind and wet stuff, but let sweat out so you don’t get damp. Go for a shell jacket or pants that fight off water and wind. You can check out jackets and pants online from outdoor shops.

    For pants, choose thermal insulation hiking pants. They should fit well over base layers but still give you room to move. They keep your legs warm when temperatures drop.

    Layers are the way to go for winter hikes. Each layer has a job to do. Base layers move sweat, mid-layers keep heat, and outer layers block bad weather. With the right gear, winter hiking is fun and safe. Choose gear that fits the weather and your hike. Enjoy the cool air and silent, snowy trails!

    How Can I Ensure Safety on Winter Mountain Treks?

    Winter hikes are much harder than your normal trail walks. You must deal with cold, ice, and often deep snow. These change how you plan your trek. Let’s explore how you can hike safely in winter mountains.

    When you walk snowy trails, you need to know where you are going. Navigating snowy trails is not easy. The snow can hide the path. It’s vital to have a map and compass. If you can, bring a GPS device. Mark the track ahead of time. This way you won’t lose your way when the trail seems gone.

    Avalanche awareness is key for hikers. Before you hike, learn about the current risks. Check the avalanche forecast. Know safe paths and danger signs. A slope can look okay but may not be safe. Get to know the layers in the snow. Pack gear like a beacon, probe, and shovel. These can save lives if an avalanche hits.

    Packing an emergency first aid kit for cold injuries is a must. Add items for frostbite and hypothermia. Carry a space blanket and hand warmers. If someone gets too cold, these can help fast. It’s worth taking a first aid course too. That way, you will know what to do in a pinch.

    For those going alone or in groups, follow some simple safety tips. Tell someone your plan, including when you should be back. Stay on marked tracks when you can. Dress in layers. Take breaks out of the wind. Share the weight of gear in a group. That way, no one gets too tired.

    By getting smart about these things, your winter mountain trek can be both safe and fun.

    What Should I Know About Winter Hiking Footwear?

    Winter hiking boots must keep feet dry. Waterproof hiking shoes are vital. For snowy trails, pick insulated footwear. Use anti-slip boots for safety. Boots with built-in insulation are best for extreme cold. Make sure new boots fit right. Wear them a lot before a long hike so they feel comfy. If you hike on ice, you need crampons. Crampons or spikes help you stay upright. Use them carefully and learn how to fit them right. Choosing the right pair can make a big difference on slippery surfaces. With good footwear, you’re ready for winter trails!

    How Do I Maintain Proper Hydration and Nutrition on Winter Treks?

    How do you keep water from freezing on winter hikes? Store it close to your body. To keep water from freezing on winter hikes, carry your water bottle in an insulated case. Tuck it inside your coat if it’s extra cold. Use wide-mouth bottles; they’re less likely to freeze shut.

    On cold hikes, your body burns a lot of fuel to stay warm. Eat snacks often to keep your energy up. Choose foods high in fat and protein. These will help you stay warm and last longer. Nuts, cheese, and chocolate are great picks. They won’t freeze and are easy to eat on the move.

    Is it important to eat regularly during winter hikes? Yes, eating regularly is crucial. In cold weather, you might not feel thirsty, but your body still needs water. Drink often to avoid dehydration. It’s the same with food. You have to eat before you get hungry. That way, your body has the energy it needs to generate heat.

    One smart move is packing meals that are hearty and can warm you up. Think about hot soups in a thermos or oatmeal packets you can mix with hot water. You should bring a small stove for this. It’s light and can make a world of difference. Hot food can boost your spirits and body temp faster than you think.

    When you work hard on a hike, your body wants calories. In the cold, it needs even more. Your goal should be to preserve your energy levels. That means avoiding breaks that are too long. Your body cools down when you stop moving, so keep rest times short. After you eat, get moving again to help your digestion and keep you warm.

    Staying on top of your hunger and thirst is key. This helps you keep warm and happy on the trail. Remember, your winter adventure is as much about enjoying the stunning, frosty views as it is about reaching the end. So take care of yourself out there, and the hike will take care of you.

    What Are the Best Practices for Hiking in Winter Conditions?

    When hiking in snow, use trekking poles with ice tips. They help you keep balance on icy trails. During rest stops, keep warm with layers and move around. To snow hike right, do not harm plants or animals. Step lightly and leave no trash. In deep snow, snowshoes can help. They stop you from sinking deep into the snow. Zip up your coat, wear a hat, and use gloves to stay warm. Keep your water bottle close to your body to stop it from freezing. This keeps your drink ready when you need it. Remember, caring for nature means we can enjoy it for longer. Let’s keep our trails clean and safe for all!

    What Are Some Essential Winter Hiking Skills and Techniques?

    • Proper use of snowshoes in deep snow
    • Special skills for icy and snowy trails
    • Ways to stop hypothermia while hiking
    • How to spot and treat frostbite

    When you strap on snowshoes, move your feet wide apart. Walk with your knees slightly bent. This makes sure you don’t trip over your gear.

    In a snow-filled land, survival skills matter a lot. Always carry a map and compass. Know how to use them. If caught in a storm, build a snow shelter to stay warm.

    Stay warm to avoid hypothermia. Dress in layers and keep dry. Eat energy foods and move to keep your body heat up.

    See white, hard skin? Feel numb hands or toes? Could be frostbite. To treat, get to a warm place. Warm the spot with body heat, not direct heat. That can harm the skin.

    Keep your head clear and your body ready. That’s how you win at winter hikes.

    How Can I Find the Best Winter Hiking Destinations?

    To find a top winter hike spot, you need to know what makes one stand out. Popular trails are good, but not always best for you. Look for places fitting your skills and likes. A great winter hike location is safe, has good views, and matches your ability.

    Ask yourself what kind of hike you want. Do you seek peace and quiet? Maybe a serene snow hiking destination is for you. Fancy a bigger challenge? Check out famous European winter trekking spots. Some local winter hiking circuits can offer both ease and beauty. Bigger names like the frosty peaks of the Rockies or Alps draw many. They are known for their stunning views and well-kept trails.

    Learning about each place is key. Online forums, websites, books, and hiker chats can give great tips. They can tell you what trails fit your level. Beginner? Look for shorter trails with less rise. Want more of a challenge? Aim for tracks with climbs and maybe snowshoeing.

    Remember, safety matters most. Check the weather and trail news before you go. This makes sure you have a fun, safe time outdoors.

    So start your search with what you want from a hike. Then match that with a place that ticks all the boxes. And always prepare for winter’s surprise moves!

    How Should I Train and Prepare Physically for Winter Hiking?

    To train for winter hiking, start with exercises that build leg power and stamina. You might ask, “What exercises and routines will help?” Lunges and squats are great for strengthening your legs. For stamina, try a mix of running, biking, and swimming. These activities raise your heart rate and improve your endurance.

    Get ready for the cold next. Spend time outside on chilly days. This helps your body get used to the cold. Before your hike, take short walks or jogs in colder weather. This is crucial for pre-hike acclimation.

    Mental prep is also key. Winter trails can be tough. You may face deep snow or icy paths. Think about these challenges as you train. This will ready your mind. Knowing what could happen keeps you sharp and focused.

    What about when you face a real obstacle? On a winter trail, you might hit thick snow or ice. If the snow’s deep, take smaller steps and use your legs to lift rather than push through. On ice, slow down. Move carefully to keep your balance. Your training will pay off. You’ll feel strong and ready for what the trail offers.

    Keep working on these skills. Winter hikes are about fun and safety. Happy trails!

    Conclusion

    In our journey today, we dove into winter hiking, tackling how to prep, gear up, and stay safe. Remember, the right plan and equipment are crucial. So is the skill to use them. Master layering to keep warm, pick the best boots for the environment and definitely don’t skimp on safety steps. Staying fed and hydrated is just as vital. With the correct skills and knowledge, icy trails turn into epic tales. Before hitting the snow, train your body, pick a spot, and soak in every moment out there. Now, you’re set to embrace the cold and make your winter hiking adventure one for the books. Safe trails!

    Loading