Author: Brian

  • Hiker ascending steep trail with water bladder-equipped backpack in serene mountain landscape.

    Hiking Backpack with Water Bladder: What Are the Benefits?

    Hiking backpack with water bladder essentials: maximize your trail time with hands-free hydration & tips for choice and care.

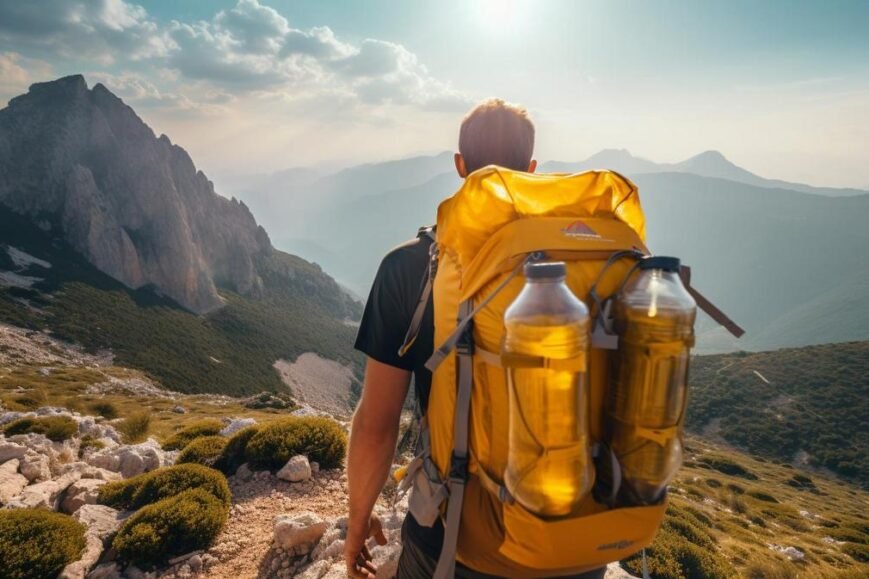
    • Hiking backpacks with water bladders allow for hands-free drinking, carrying more water, and staying hydrated with frequent sips.
    • They can be added to any backpack, though specifically designed packs offer better stability and weight distribution.
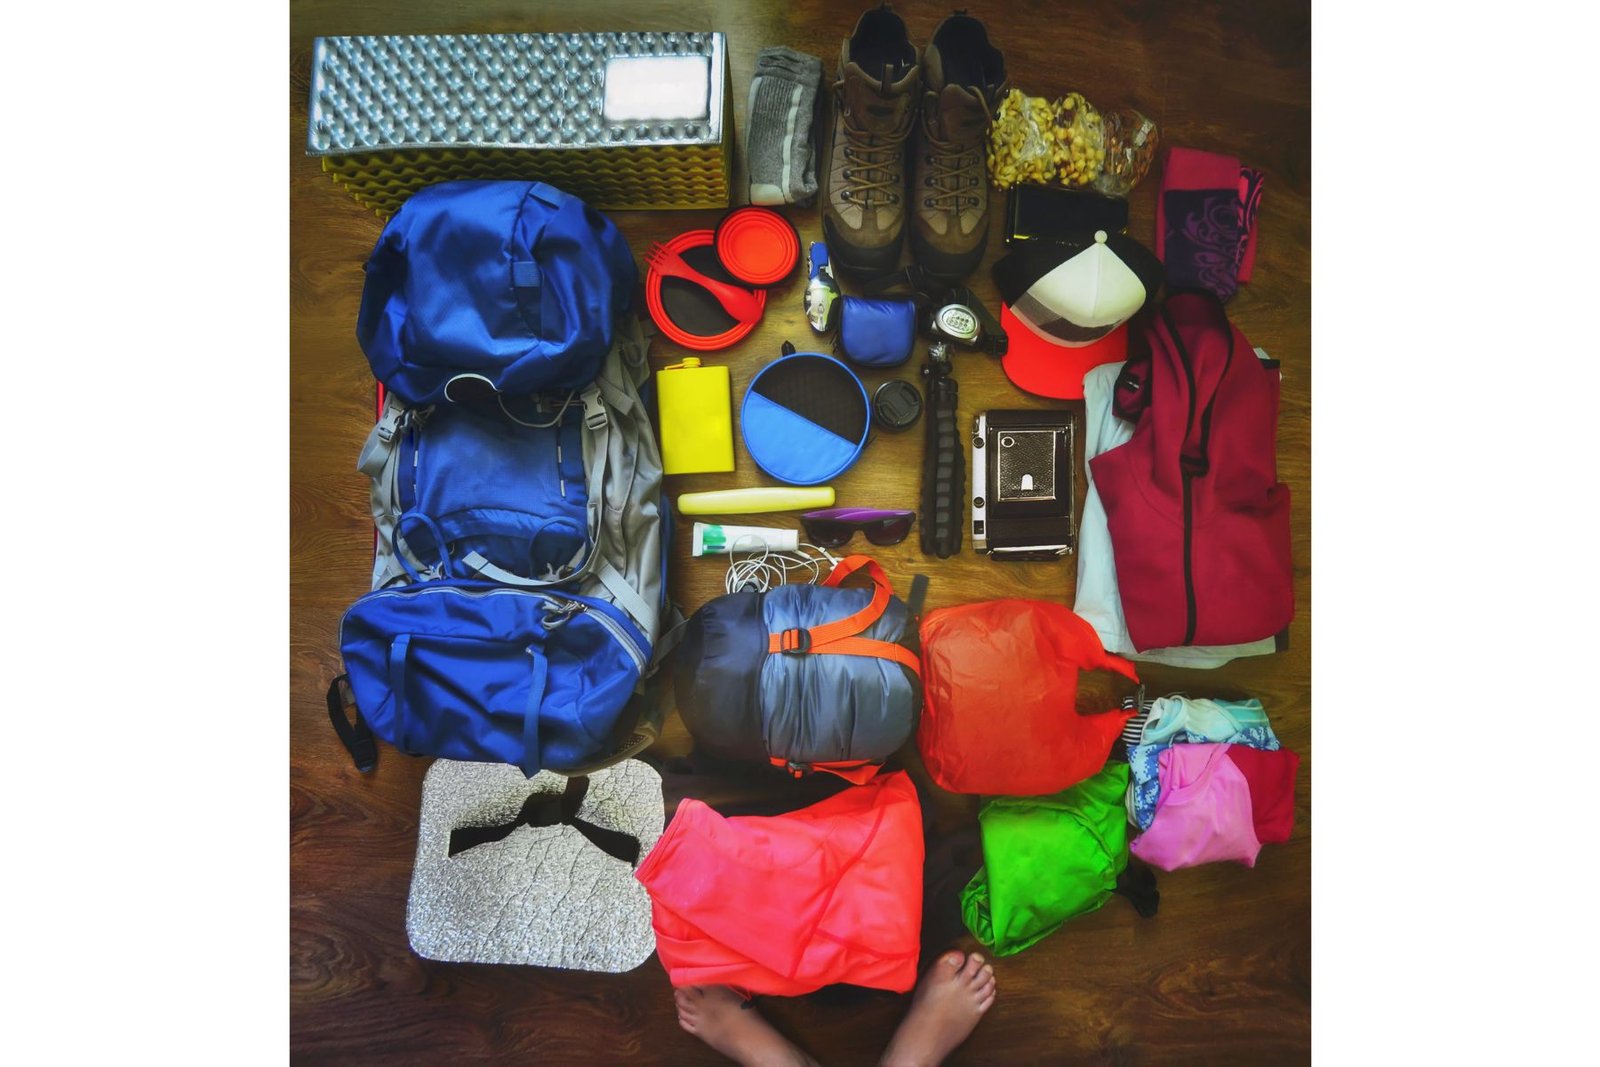
    • Choose a hydration pack based on fit, capacity, durability, ease of cleaning, and convenience in using the water bladder system.
    • Maintenance is critical for longevity and safety; clean and dry the bladder regularly and check for wear.
    • Specialized hydration backpacks exist for running, biking, and long hikes, each optimized for a specific activity.
    • Find the best deals and selection for hydration packs online for variety and pricing, or at local stores for expert advice and fitting.
    • Compare options, read user reviews, and consider expert recommendations for quality and performance.

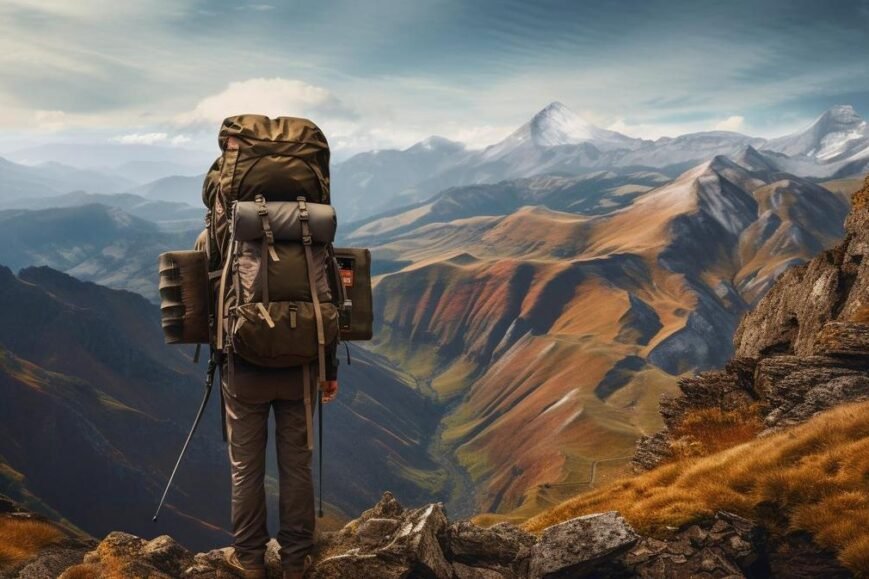
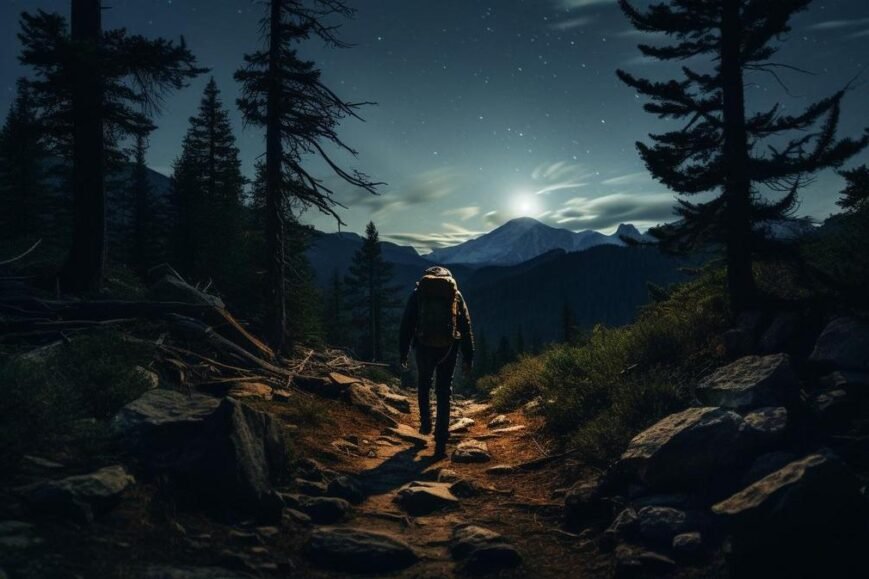
    Imagine hiking with sips of water whenever you want, no stopping, no fumbling with bottles. That’s the simple magic of a hiking backpack with a water bladder. Stay hydrated hands-free, carry more water easily, and keep moving with comfort. Whether you’re a man, woman, or anywhere in between, this smart hydration move can change your hike. Dive into the wonders of bladders over bottles, and let’s find the perfect backpack that quenches your thirst for adventure!

    What Are the Benefits of Using a Hiking Backpack with a Water Bladder?

    Are water bladders good for hiking? Yes, they are.

    Water bladders let you drink hands-free while you walk. This means you don’t have to stop and search for your water bottle. Just bite and sip from the hose. A hydration pack holds more water than a bottle. This is great for long hikes. You won’t need to refill as much.

    Best hiking backpack with water bladder? It fits well and is comfy.

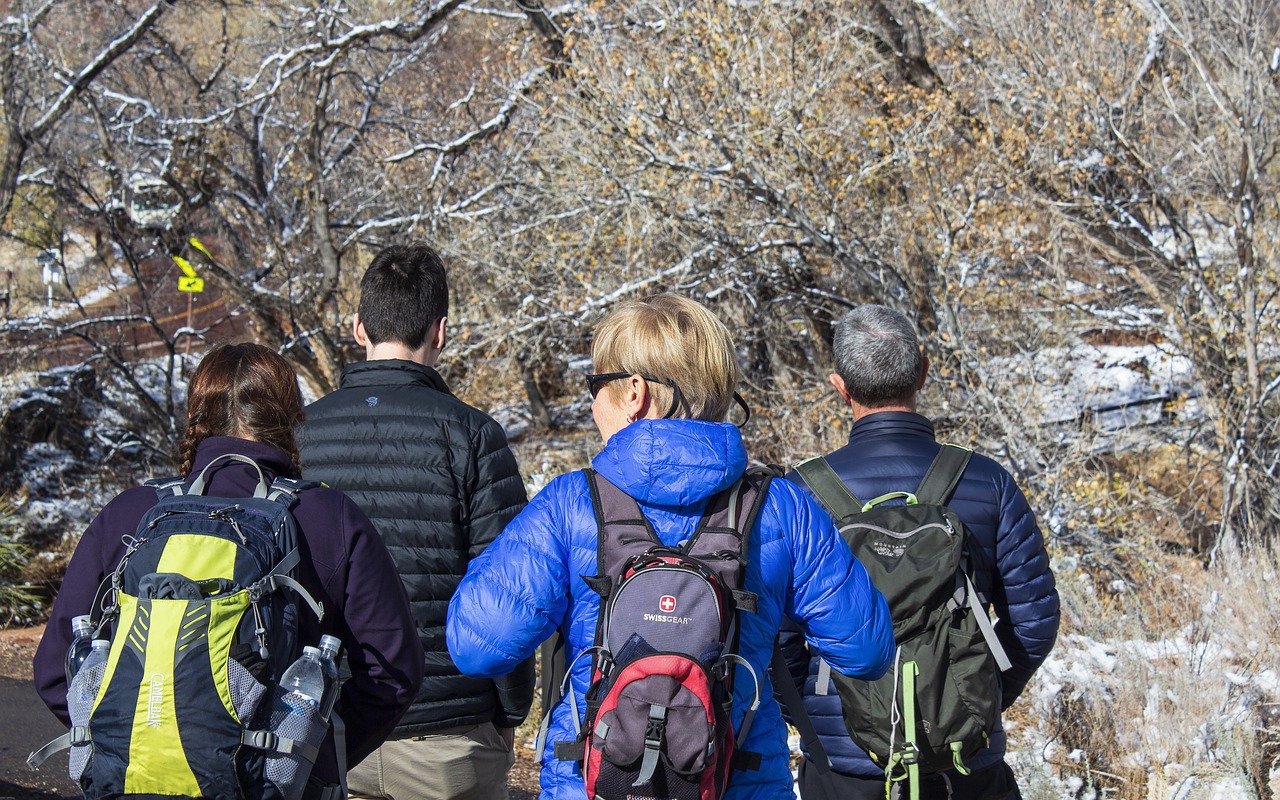
    A good fit is key, so it won’t shift while you move. Women’s, men’s, and unisex packs are all different. So, make sure you find one that’s right for your body.

    Women’s hiking backpack with water bladder? It’s designed for a woman’s shape.

    Women’s packs often have shorter back lengths and straps shaped for curves. This means a better fit, making hikes comfier.

    Trail hydration systems help you drink more water. It’s easier to sip often with the hose close by. With a bottle, you might wait until you’re thirsty. But with a bladder, you can sip a bit all day. This keeps you well-hydrated and full of energy on the trail.

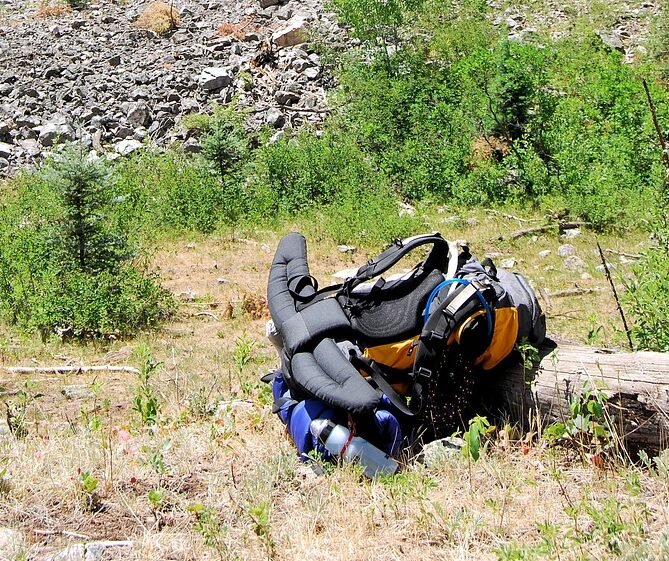
    Daypacks with hydration sleeves are handy. They’re great for short hikes or everyday use. Not all packs have space for a water bladder, but these do.

    A hiking backpack with a water bladder is a game-changer. It lets you drink without using your hands. You can carry more water, and it’s easy to use. This all helps you to drink more and stay hydrated.

    How Do Water Bladders Compare to Traditional Water Bottles?

    Can you put a water bladder in any backpack? Yes, but it might need some tweaks. Some backpacks have a special spot for a water pouch. Others don’t, but you can add one with a bit of work. You want it snug and secure so it won’t move around as you walk.

    Water bladders tip the scales in favor of light travel, unlike bulky bottles. They slip into your pack, leaving more room. Water bladders are much easier to carry than different water bottles that can be heavy. And the weight distribution is different on your back with a bladder.

    When you need to fill up, bladders stand out again. In the wild, filling a bladder can be simpler than screwing a cap on and off. Streams and lakes are no problem. You just dunk, fill, and seal. No juggling bottles or losing caps. And when you’re on the go, drinking through a hose is so much easier than fumbling with a bottle.

    Now let’s talk taste and safety. Bladders have come a long way. They’re often free from bad chemicals that can make water taste weird. They’re made from safe stuff that keeps your water tasting like water should.

    If you have a trusty old pack, you might wonder if you can slap a bladder in there. It’s possible! It might not be perfect, but you can make it work. You can secure the bladder inside, route the hose for easy access, and hit the trail.

    Compact hydration backpacks, bladder backpacks for hikes, and hiking water pouch options are out there. They beat the old bottles on weight, ease of sipping, and how little space they take. This makes them champs for thirsty hikers who love to keep moving.

    What Should You Look for When Choosing a Hiking Backpack with a Water Bladder?

    When picking a water backpack, look for capacity and fit first. Is it big enough for your stuff? Will it sit right on your back? Yes, these should be your first checks. The Camelbak mountain pack is a great example. It has a design that lets you pack lots of items. And it makes sure the weight spreads out well. This matters a lot for a good hike.

    Then check how tough it is and what it’s made of. It needs to last and handle whatever your hike throws at it. Now, the Osprey hydration technology is known for its strong materials. This can take on rough use and still hold up.

    Don’t forget about the bladder. Can you reach it easily? Is it a pain to clean? You need to think about this. The best packs let you drink with no hands. They also make filling and cleaning simple. Packs like Camelbak and Osprey have these features. They save you time and hassle.

    So, when choosing, think about:

    • The size and how it deals with weight.
    • If it feels good on you.
    • If it will last long and keep your things safe.
    • How you will use the water bladder.

    Make these your main checks. Happy trails with your new hydration buddy!

    How Can You Maintain Your Hydration System for Longevity and Safety?

    Water can stay in a backpack bladder for a few days. Yet, you should not leave water in a bladder for more than two days. After each use, clean your bladder. This keeps it safe and makes it last longer. Use warm water and mild soap to clean the system. Don’t forget to scrub the inside well. Use a long brush that can reach every part inside. Make sure you rinse it well to remove all soap.

    Dry the bladder completely before you store it. This helps prevent mold and bad smells. Hang it up with the cap off so air can flow inside. For the tube, blow air through it to clear out all the water. Storing the bladder in your freezer can also stop mold growth.

    Check your hydration system often, especially the mouthpiece and hose. Look for wear or damage. Replace parts as needed to keep your bladder in good shape. Remember to keep it clean and dry when you’re not using it. This will help your water system last for years. Take care of your gear, and it will take care of you on your adventures!

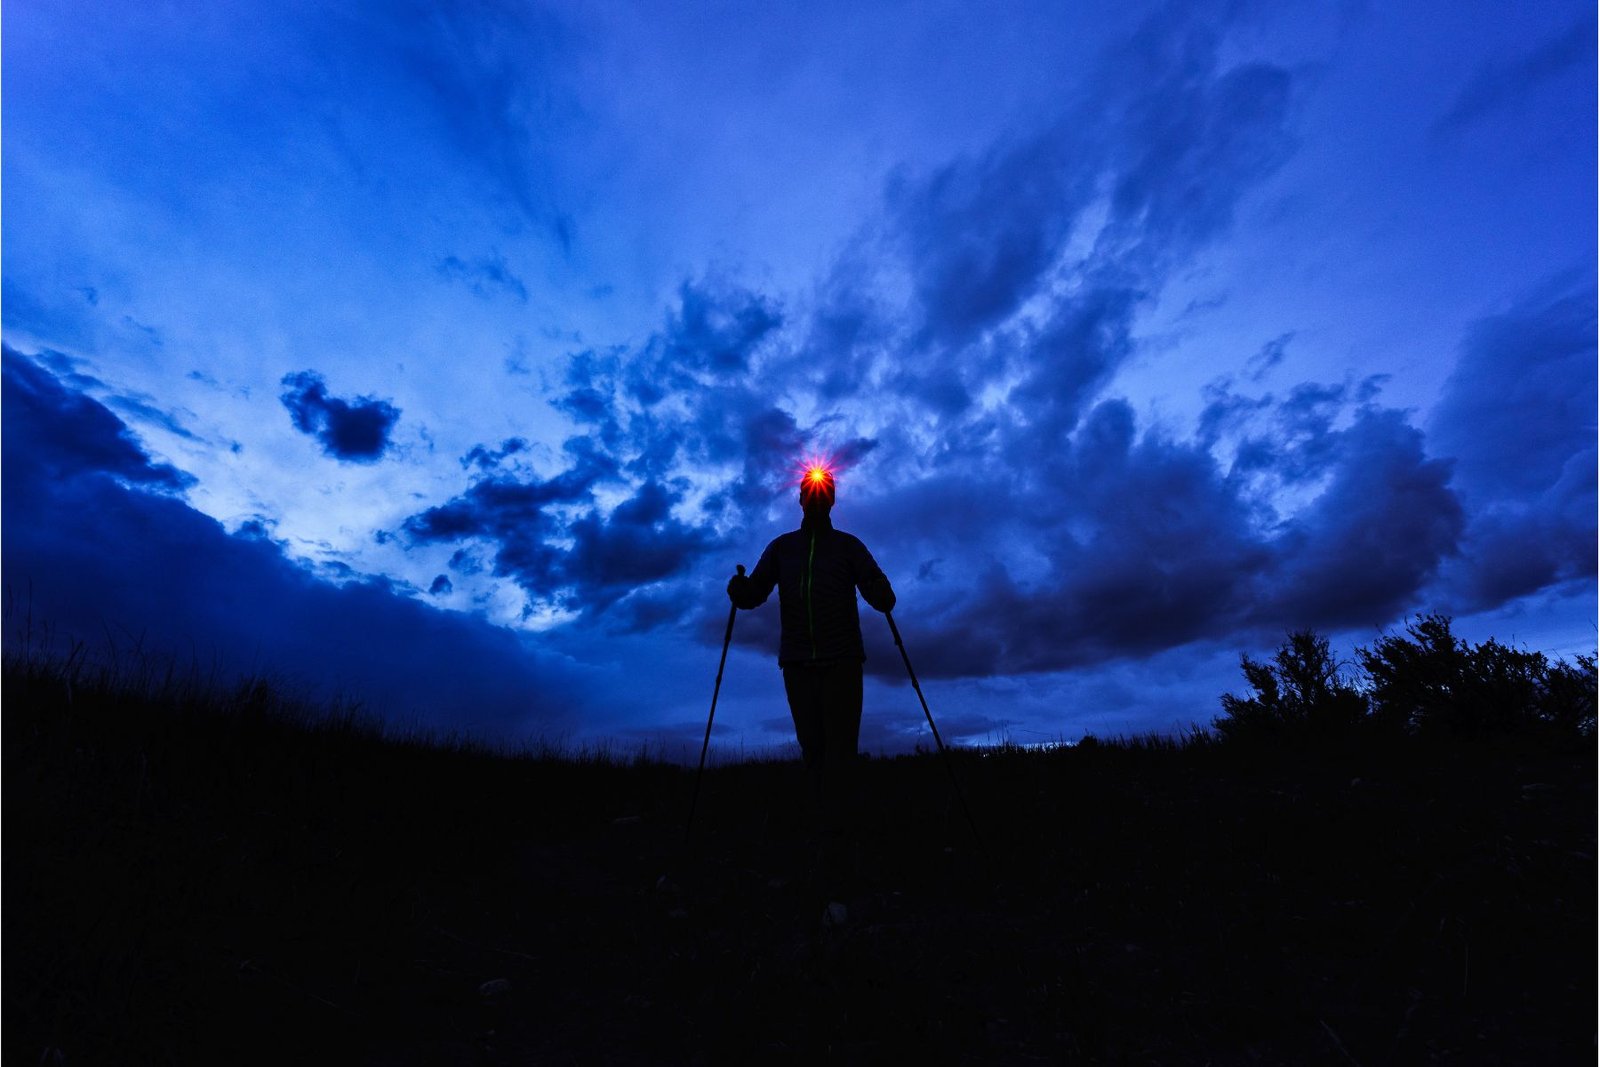
    Are There Specialized Hydration Backpacks for Different Outdoor Activities?

    Yes, there are specialized hydration backpacks for different activities such as running, biking, and long hikes. These packs come with features that suit each sport. Runners use special running hydration solutions. They have light, snug-fitting designs. These let them drink with ease while on the move. Bikers use biking essentials with a water pack. These packs offer stability during rough rides.

    Ultra-lightweight trekking rucksacks suit long trails. They have just enough space for a water bladder and key items. This makes them ideal for treks where every ounce counts. All these packs adjust for weather and land changes, using materials that can withstand various conditions.

    Are hydration backpacks worth it, you ask? Absolutely! For each outdoor sport, there’s gear that fits well, keeps up with your pace, and helps you drink water easily. Specialized hydration gear for runners fits close to the body. This lets them focus on their stride without a backpack bouncing around. Cycling hydration strategies and packs focus on aerodynamics and ease of access so cyclists can drink without slowing down.

    Your pack material must handle the demands of the sport and changes in weather. For instance, harsh sun or rain calls for durable, water-resistant materials. The right backpack won’t just carry water—it enhances the outdoor experience for each activity.

    Where Can You Find the Best Deals and Selection for Hydration Backpacks?

    Are you questing for hydration backpacks but don’t know where to start? Let’s dive in! Start by checking online marketplaces and local outdoor stores to find the best hydration backpack deals. Shopping in these places often gives you a wide selection to pick from. But hang on, should you go digital or local?

    Online stores beat local shops in variety and often, price. For instance, if you’re researching hydration packs on Amazon, you’ll find countless options at your fingertips. Look out for sales, especially during outdoor seasons or holiday events. That’s when you score sweet deals for less cash!

    Local stores are gems for those who need to try before they buy. Staff at these shops know their stuff and can help you pick the right fit. Plus, when you need gear in a hurry, local is your best bet.

    Want the wisest choice? Compare options and check user reviews. People who’ve tackled trails with their packs tell it like it is! They’ll catch you up on the pros and cons fast.

    Expert recommendations add to that user feedback. They put packs to the test and highlight the best. Use this info to make a smart pick for your next adventure. Remember, a good deal isn’t just about price. It’s about quality and how well the pack quenches your thirst on the trail.

    So there you have it, trail buddies. Research online, visit local stores, and don’t skip the reviews or expert tips! Your perfect hydration pack awaits.

    Conclusion

    We’ve looked at how a backpack with a water bladder beats old-school bottles. Hands-free sipping and carrying more water make hikes better. Whether you’re a man or woman, there’s a perfect fit. We’ve seen how to pick, use, and clean your pack. We also compared specialty packs for running or biking. Want the best deal? Check out both online shops and local stores. Drink up and hike on!

    Loading


  • A captivating photo of a hiker on a long-distance thru-hike, showcasing majestic mountains and colorful nature.

    What Are Thru-Hiking Essentials for a Long-Distance Hike?

    Thru hiking essentials guide: pack smart with ultralight gear, footwear tips & safety must-haves. Perfect for trekkers readied for adventure.

    • Thru-hiking essentials include navigation tools (map, compass, GPS), lightweight and layered clothing, ultralight tent, comfortable shoes, basic hygiene products, first-aid kit, safety gear (whistle, light), and appropriate food and water solutions.
    • Prepare for long distances by training, setting a consistent pace, arranging food/water resupply, securing permits, and incorporating rest days.
    • Financially budget a few thousand dollars, pack high-energy food, purify all water, and plan resupply points for securing food and water.
    • Gear management involves selecting a comfortable backpack, weather-appropriate sleeping bag, light tent, efficient packing methods, and a clear itinerary.
    • Emotional well-being can be affected by solitude and physical challenges, but also offers a sense of achievement and creates strong social bonds.
    • Crucial considerations for planning include knowing the trail, arranging transportation to/from trailheads, preparing for varied weather, obtaining necessary permits, and knowing emergency exit points.

    Ready to tackle a long-distance hike? Get this straight: thru-hiking is no walk in the park. It’s an epic adventure that demands serious prep and the right gear. Stick with me, and I’ll show you the must-haves for your pack, the best boots for your feet, and how to stay safe out there. From ultralight tents to first-aid musts, let’s dig into what it truly means to be trail-ready for the long haul.

    What Should I Include in My Thru-Hiking Essentials?

    Thru-hiking means to walk a long path from start to end. It can be very hard. You face tough trails for many days. For such a long walk, your pack must have only the most key items. Let’s talk about those must-haves.

    You need tools to find your way, like a map and a compass. A good GPS can help too. For what you wear, think of layers. A shirt that dries fast. A warm layer. A raincoat. All light. All able to fit in your pack with ease.

    An ultralight tent will be your shield at night. Pick one that fights the wind and rain but is light as a feather. Shoes are just as key. Find the ones that fit best. They must take on rocks and mud yet be kind to your feet. Read up on thru-hike footwear recommendations to choose well.

    Do not forget soap and a toothbrush. They are small but help keep you clean. A first-aid kit is a must. It must have band-aids and meds in case you get a cut or feel sick. Your safety gear should not stay behind. Things like a whistle and a light. Add a warm hat and gloves too.

    All these are your thru-hiking needs. They’ll help you face long days on the path with more joy and less weight. Remember, each item must earn its place in your pack. Take less, and adventure more!

    How Can I Prepare for Long-Distance Hiking Trips?

    Let’s say you’re gearing up for a hike that spans months. How long does it take to be a thru-hike? Most take about five months, but it depends on your pace.

    Start your thru-hike preparation checklist well before you lace up those boots. Think of what you’ll need every step of the way. Your long-distance hiking tips should include maps, clothes, and a tent. Don’t forget the little things like a toothbrush.

    Building trail endurance is key. You’ve got to train your body. Make it strong. Start with short hikes. Add miles each week. Soon, you’ll be hiking longer without feeling spent. It’s like building a muscle. The more you work it, the stronger it gets.

    Are you pacing for long-distance hikes? Important! Setting a pace and keeping to it helps you go far without burnout. Start slow to warm up, find a comfy pace, and stick to it. Don’t race. It’s not about speed; it’s about distance.

    Another thing to nail down is your food and sleep along the way. Learn about trail resupply strategies. Where can you pick up more food? How often? You need enough energy to keep going. Planning this keeps your pack light and your stomach full.

    Also, think about things like permits and tech tools. You might need special permission for some places. Make sure you get these sorted out earlier. Gadgets can help you stay safe and on track. Think GPS and emergency beacons.

    Then, there’s downtime. It’s not about pushing through no matter what. You need rest days. Listen to your body. It tells you when to stop and heal. It’s a must to pencil in breaks for your mind and legs.

    Take time to learn and get ready. With the right tips and a solid checklist, your hike can be the amazing adventure you’re dreaming of.

    What are the Best Strategies for Securing Food and Water on a Thru-Hike?

    You need enough money to cover food, gear, and permits for a thru-hike. The exact amount varies, but plan for a few thousand dollars. This should include funds for high-calorie foods and a water filter or purification tabs.

    For trekking nutrition, figure out how many calories you’ll burn each day. This could be between 3,000 to 5,000 or more. Choose foods high in energy, like nuts and dried fruit. Pack lightweight, calorie-dense eats to save space and weight.

    Water is crucial, so learn how to find and make it safe to drink. Use maps to find streams and lakes. Always purify water with a filter, UV light, or boiling. Never drink straight from a natural source, as this could make you sick.

    Pack your food in a way so it won’t get crushed or wet. Use bags that seal tight. This also helps keep bears and critters out.

    On some trails, you might be able to fish or pick berries. Check the rules first though. You might need a permit for that.

    Resupply points are spots where you can get more food on your hike. Leave boxes with supplies at these points before you start. Or have a friend send them to you there.

    Use a map and compass to find your way to water sources or towns. This is vital if you get lost or run out of food or water. Always have an emergency plan and let someone know it. They can help if you don’t check in when you should.

    Remember, planning is key for a happy and safe thru-hike. Always have enough food and a way to get clean water. This way you can focus on the amazing views and adventure that await!

    How Do I Choose and Manage My Gear for a Multi-Month Thru-Hike?

    What gear do you need for a thru-hike?

    Backpack
    • A sturdy and comfortable backpack with a capacity suitable for carrying all your gear.
    Hiking Boots/Shoes
    • Quality footwear that provides support, protection, and comfort on various terrains.
    Clothing
    • Moisture-wicking and quick-drying shirts, pants, and underwear.
    • Insulating layers (fleece jacket, down jacket) for colder temperatures.
    • Rainproof/waterproof jacket and pants.
    • Hats, gloves, and socks suitable for the expected weather conditions.
    Sleeping Gear
    • Tent or shelter: Lightweight and durable, suitable for the expected weather conditions.
    • Sleeping bag: Rated appropriately for the expected temperatures.
    • Sleeping pad: Provides insulation and comfort while sleeping.
    Navigation
    • Topographic maps or trail guides of the area.
    • Compass and/or GPS device for navigation.
    • Whistle or signaling device for emergencies.
    Water and Hydration
    • Water bottles or hydration bladder with enough capacity for your needs.
    • Water filtration system or purification tablets for obtaining safe drinking water from natural sources.
    Food and Cooking
    • Lightweight stove and fuel.
    • Cooking pot and utensils.
    • Lightweight, high-calorie, and easy-to-prepare food.
    • Bear canister or bear bag for storing food and preventing wildlife encounters.
    • Ziplock bags or food storage containers for organization.
    Lighting
    • Headlamp or flashlight with extra batteries.
    • Lantern for campsite illumination.
    First Aid Kit
    • Bandages, gauze, adhesive tape, and antiseptic wipes.
    • Pain relievers, allergy medicine, and any necessary prescription medications.
    • Blister treatment supplies.
    • Tweezers, scissors, and a thermometer.
    Personal Care Items
    • Sunscreen and lip balm.
    • Insect repellent.
    • Toilet paper and hand sanitizer.
    • Toothbrush, toothpaste, and biodegradable soap.
    Emergency Gear
    • Emergency blanket or bivy sack.
    • Fire-starting tools (lighter, matches, fire starter).
    • Whistle or signaling mirror.
    • Multi-tool or Swiss army knife.
    Miscellaneous
    • Trekking poles for added stability and reduced strain on joints.
    • Duct tape or repair kit for gear.
    • Extra set of batteries.
    • Cash and identification.
    • Camera or smartphone for capturing memories.
    • Trash bags for carrying out waste.
    • Zip ties and cord for gear repairs or other uses.

    How to manage gear weight and volume?

    Pick light items and learn to pack smart. Fit everything you need, nothing more.

    Selecting a backpack for comfort and capacity is a start. Your back will thank you for a pack that fits well and can hold all your stuff. For choosing a sleeping bag for thru-hikes, think about the weather. You need one that keeps you warm or cool, depending on when you hike. Pads are a must too. They help you sleep soundly and are light to carry.

    For a home away from home, lightweight tent options matter. A heavy tent drags you down. A light one makes hiking easier.

    Trail-specific training routines are your secret weapon. Get your body used to long treks before you start. It helps a lot. Practice hikes are a must.

    Tips for packing efficiently help too. Roll your clothes. Use bags to keep things tight and tidy. A well-packed bag makes a big difference.

    Your multi-month hiking itinerary is your plan of action. It shows you where you’re going and when. Make sure your gear fits your plan.

    Remember, the right gear and knowledge are your best friends on the trail! Keep your pack light, your gear right, and your spirit bright, and you’re set for the trek of a lifetime.

    Can Thru-Hiking Have an Impact on Emotional Well-being?

    Thru-hiking can deeply affect your emotional health. It can lead to joy and a sense of achievement. Yet, the long days alone can also bring loneliness. You learn to cope with your own company and find strength inside. This resilience grows each time you face and beat the trail’s tests. Along the way, you join a band of fellow hikers. These bonds can last a lifetime. As you hike, your day-to-day life changes. You get used to a new routine centered on the path ahead. By dealing with each day, you slowly become part of the trail and its rhythm.

    Coping with the emotional challenges of solitude is not easy. At first, the silence can be deafening, your thoughts too loud. But one learns to listen to the sounds of nature, to find peace in the quiet. Kind words or a warm meal shared with other hikers becomes precious, a simple joy we often forget in our busy lives.

    Overcoming thru-hike challenges comes in many forms. A steep climb or stormy weather can test the body. However, it’s the inner battles, like doubt or fear, that weigh the most. Pushing past them, one step at a time, strengthens the mind.

    The social aspects of thru-hiking are unique. You become a part of a traveling community that understands the ups and downs of the trail life. These connections fuel your journey when your legs can’t.

    Hiker’s adaptation to trail life takes time. At home, mornings may start with the news or coffee. On the trail, they start with the sunrise and a map. Slowly, what felt like chaos becomes a comforting routine, and the trail becomes home.

    What Are Crucial Considerations for Thru-Hike Planning and Logistics?

    To plan a successful thru-hike, you need a good trail map and details on resupply. Choose a trail that matches your skills and the time you have. The Appalachian Trail and Pacific Crest Trail are top picks. Each has its own challenges and sights. You must know the landmarks and towns along your route. This info will guide your resupply spots and where to take breaks.

    Starting and ending your hike means getting to and from trailheads. Look into buses, trains, or shuttles that go to these spots. The weather can change fast. Be sure to plan for rain, cold, and heat. You may hike through many weather patterns.

    Some trails need you to have permits. Check the rules before you start. This saves you from trouble on the trail. Always know where you can leave the trail fast if you must. Your safety comes first.

    So, what are the key steps for trail planning? Pack good maps, plan for food and gear drops, and learn the route. Look into how you’ll get to and from the trail. Bring gear for all kinds of weather. Get any permits you might need. Know where you can exit the trail in case of emergency. This careful planning will help make your thru-hike a great one!

    Conclusion

    In this post, we’ve covered key thru-hiking essentials, from gear to food, and the impact on mental wellness. Remember, smart packing and preparation make your adventure safe and fun. Now, get out there and take on the trails with confidence!

    Loading


  • A determined hiker explores challenging terrain with lightweight waterproof boots.

    Are Lightweight Waterproof Hiking Boots Essential for Outdoor Enthusiasts?

    Looking for essential hiking footwear? Consider lightweight waterproof hiking boots for endurance and comfort. Explore the best lightweight waterproof hiking boots for women and what sets them apart. Understand how men’s and women’s lightweight trail boots differ in support and design to enhance their hike. Discover the key waterproof materials in ultralight backpacking boots for a dry outdoor experience. Learn how advanced waterproofing technologies add value to your hiking boots, keeping your feet dry. Find comfortable hiking shoes that adapt to changing weather conditions for optimal in-trail comfort. Seek eco-friendly options? Dive into the world of waterproof outdoor gear, including sustainable boots. Grip is vital for slip-resistant trail boots. See how sole design ensures safety on tricky trails. Choosing waterproof hiking boots for long distances? Focus on fit and endurance for an enjoyable trek. Waterproof hiking footwear isn’t just for trails. See their diverse uses for all outdoor adventures. Maximize your boots’ life with effective tips on maintaining waterproof hiking boots over time. When buying hiking boots for all terrains, prioritize fit, waterproof rating, and grip for safety. Waterproof hiking boot features vary; compare brands and models to find your perfect match.

    • Lightweight waterproof hiking boots are essential for reducing fatigue, comfort, and foot health during hikes.
    • Best women’s hiking boots should fit well, be durable, offer good traction, and manage moisture effectively.
    • Men’s and women’s boots differ in fit and design due to different foot shapes and needs.
    • Gore-Tex is a popular waterproof material in boots, offering breathability and protection.
    • Advanced waterproofing technologies in boots improve comfort and longevity.
    • For varying conditions, comfortable hiking shoes should offer breathability, insulation, a snug fit, and cushioning.
    • Eco-friendly waterproof boots are available, using sustainable materials and methods.
    • Grip and traction are crucial for slip-resistant boots, with sole design playing a key role.
    • Long-distance hiking boots need durability, a snug fit, and support.
    • Waterproof hiking footwear is versatile, and suitable for multiple outdoor activities.
    • Maintain waterproof hiking boots by cleaning, drying, and applying waterproof treatments as needed.
    • All-terrain hiking boots should be tough, have a high waterproof rating, and rugged outsoles for grip.
    • Features of hiking boots differ by brand and model, with variations in technology and specific benefits offered.

    Marching across wet trails and unpredictable terrain, a hiker’s best ally is often their boots. Are lightweight waterproof hiking boots essential gear? You bet they are! In every step, the right boots keep your feet dry and comfortable and support you for miles. Let’s lace up and dig into why cutting the weight without skimping on protection can level up your outdoor game. From conquering long distances to ensuring your foot health, discover the undeniable benefits that lightweight waterproof hiking boots bring to your adventures. Ready to trek smarter, not harder? Follow me.

    Why Are Lightweight Waterproof Hiking Boots Essential for Outdoor Enthusiasts?

    Why are hiking boots so heavy? They pack materials to tackle tough trails. But heavier boots can tire you out faster, especially on long hikes. This is where lightweight waterproof hiking boots shine.

    Are lighter hiking boots better? Yes, for many hikers, lighter boots mean less fatigue and more comfort. When boots are light, your feet won’t feel as heavy. This can make a huge difference when you’re miles deep on a trail and have miles to go.

    Why is it important to have lightweight hiking boots? Light boots can help you hike longer without tiring. They also mean less strain on your feet, ankles, and knees. This keeps you at ease and your feet in better shape.

    Lightweight boots for long-distance hiking matter a lot. Hiking is not just about the distance. It’s also about the energy you spend. Less boot weight lets you use that energy to explore more. You get to enjoy the journey without sore feet.

    The impact of boot weight on hiking and endurance is big. Less weight lets you move easier and quicker. You can cover more ground with less work. Your feet will thank you after a long day out in the wilds.

    The benefits of a lighter boot on foot health and comfort are huge. You put less pressure on each step. This cuts down the risk of blisters and other foot pain. Like a good friend, your boots should help you, not hurt you, as you trek through nature.

    So, as an outdoor lover, picking essential hiking footwear is key. Choose boots that keep you dry, light on your feet, and ready for the next hill. Happy trails await with your trusty lightweight boots!

    What Features Define the Best Women’s Lightweight Waterproof Hiking Boots?

    Good hiking boots keep feet dry and comfy on the trail. The best women’s lightweight waterproof hiking boots fuse several important traits to keep you moving. What qualities should you look for? Start with a snug fit tailored to women’s feet. A boot that fits will guard against blisters and provide the support you need.

    Next, consider durability. Long-lasting boots save money and time. You want a pair that can take a beating on rocky paths. Look for tough materials that won’t give out when the trail gets tough.

    Grip and traction are also key. Women’s hiking shoes with good traction can save you from slipping on wet rocks or muddy banks. This makes hikes safer and more fun. Seek out deep treads and soles that grab the ground.

    Lastly, the boots must breathe while blocking water. This means your feet stay dry from outside wetness and don’t stew in sweat. This dual task – keeping water out and letting moisture escape – is central to comfort. When you’re miles into a hike, your feet will thank you for boots that manage moisture so well.

    Overall, go for boots that offer a secure fit, can handle wear and tear, provide solid traction, and handle moisture like a champ. With these features, you’ll power through puddles and scale slopes, keeping your focus on the beauty around you, not the boots on your feet.

    How Do Men’s and Women’s Lightweight Trail Boots Differ?

    Men’s and women’s trail boots differ in design. Men’s hiking boots often have wider soles. Women’s boots tend to have narrower heels and higher arches. The weight of a lightweight hiking boot is usually less than two pounds.

    Brands craft boots for men and women differently. They know that men and women have unique foot shapes and needs. Men’s feet are usually broader, especially at the toes and forefoot. Because of this, men’s lightweight trail boots often come with a roomier fit. This also impacts the way these boots support the foot, with the extra room being essential for comfort during long hikes.

    In contrast, women’s feet tend to be smaller with a higher instep and arch. This means that gender-specific hiking boot design is not just about size. It’s about crafting a shoe that follows the contour of the foot. That’s why women’s boots often include more arch support. A good fit is absolutely vital for proper performance. If a boot fits well, it can help prevent injury and discomfort.

    Both men and women need well-fitted shoes for hiking. If a boot doesn’t fit right, it can rub and lead to blisters or worse. Proper fit helps ensure you get the most from your boot. It can boost your balance, support your feet and ankles, and keep you going for miles.

    Good boots make a difference for hikers of all genders. They support your feet and help you tackle the trails with ease. Whether you need men’s or women’s boots, the right pair with the right fit is out there waiting for your next adventure.

    What Waterproof Materials are Key in Ultralight Backpacking Boots?

    Which hiking boots are most waterproof? The most waterproof boots often have Gore-Tex linings. This material keeps feet dry even in heavy rain.

    Waterproof materials for boots vary, but Gore-Tex is a top player. It’s a thin, strong layer that stops water from getting in. Air can still pass, so feet don’t sweat too much. Boots with Gore-Tex linings are great for keeping feet dry. But, this material can be warm in hot weather, and sometimes pricey.

    Vegan waterproof hiking boots use different stuff. They avoid animal products like leather. They might use synthetics or plant-based materials. These boots can be waterproof too. But they may not last as long as leather or Gore-Tex boots.

    Ultralight backpacking boots aim to protect without the bulk. Gone are the days of heavy, soaking boots that tire you out. Now, the focus is on materials that keep feet cozy, give support, and stop water. The key is in the blend of materials. A boot might have a waterproof, breathable membrane like Gore-Tex. It could also have a sturdy outer made of synthetic leather, nylon, or rubber.

    These materials have been a game-changer. With them, hikers can trek further. They can explore more, without worrying about wet feet. It’s not magic, it’s science – and it’s at the heart of today’s best hiking gear.

    How do Advanced Waterproofing Technologies Improve Hiking Boots?

    Which hiking boots are most waterproof? Boots with advanced waterproofing technology rank highest. Modern waterproof tech keeps feet dry and comfy. Makers mix these into boots for tight, dry wear.

    How do advanced technologies enhance boot waterproofing? They lock out water while letting air flow. This helps feet breathe and stops them from getting soaked. Innovative tech makes boots a shield against wet trails but still cool inside.

    Boots today must use smart waterproofing to be top-notch. Makers like Gore-Tex lead with materials that beat water every time. They mix their tech into the boot fabric. For the long haul, this means dry feet on wet treks.

    Hikers know boots must stay dry to last. Good care can keep the advanced tech working like new. After each hike, clean your boots well. Let them air out to stay fresh. This way, the waterproof magic keeps going. Remember, a boot that combats water adds joy to every trail you tackle.

    What Makes for Comfortable Hiking Shoes in Varying Conditions?

    What features contribute to a hiking shoe’s comfort in different weather conditions? The most important features are breathability, insulation, and cushioning.

    When it’s hot, your feet sweat. You need breathable summer hiking boots for comfort. They let air in and keep your feet cool. Taking it up a notch, good ventilation is key. It stops blisters and keeps your feet dry.

    In cold weather, your feet need to stay warm. Insulated waterproof hiking boots are a must here. They trap heat and block the cold. This way, your toes stay toasty all day long.

    But that’s not all. The fit has to be right. Too tight and you get pain. Too loose and you might trip. The right fit will hug your foot just enough. And let’s not forget about soft cushioning. It helps absorb shocks when walking. It’s like each step lands on a soft pad.

    In summary, we want comfy, snug shoes that handle all kinds of weather. From sunny trails to snowy paths, your feet should feel just right. Remember, the right shoes make your hike comfy, no matter the weather. So, aim for breathable shoes for heat, and insulated ones for cold. Plus, always check for a cushy sole and a snug fit. They’re your key to happy hiking.

    Can Waterproof Outdoor Gear Include Eco-Friendly Hiking Boots?

    Are there eco-friendly options for waterproof hiking boots? Yes, there are! Today’s outdoor gear includes boots that care for our planet. They use recycled materials and nature-friendly ways to keep your feet dry. Brands are now making eco-friendly waterproof boots, taking big steps towards greener paths.

    Materials like organic cotton, recycled rubber, and even plants are in these boots. Makers skip the harmful chemicals to make them. This helps our earth. Plus, these materials still keep water out. When you pick boots, look for ones that say they’re made with care for nature.

    The top brands offering eco-friendly waterproof hiking boots are keen on saving the environment. These brands mix smart design with eco-friendly practices. They prove that you don’t need to harm nature for top-notch gear. They offer durable, weatherproof boots that stand up to the wild.

    But is there a catch? Sometimes. The trade-offs of eco-friendliness and durability can show in such boots. Eco-materials might not last as long as synthetic ones. Yet, many find that a small price for keeping our trails and forests clean and green. As an outdoor lover, supporting these innovations means you help our earth with every step.

    Why is Grip and Traction Crucial for Slip-Resistant Trail Boots?

    Are lighter hiking boots better? Yes, they help reduce fatigue. Lighter boots are better for hiking because they cause less strain on your legs and feet. This is especially true over long distances or when navigating through rough and tough terrain. But it’s not just about the weight. The design of the sole is vital for keeping you on your feet.

    How does sole design affect slip resistance? The patterns on the soles, like deep lugs and specific rubber compounds, provide better grip. Soles with deep lugs can bite into the ground and mud, giving a secure feel underfoot. They work like tire treads, shedding mud and water to maintain contact with the trail. Rubber compounds formulated for grip keep you steady on wet rocks. They make all the difference when you are miles from home.

    Boots for rough hiking trails must have grippy soles for slippery paths. Many popular brands balance weight and grip, offering slip-resistant trail boots that won’t weigh you down. For instance, in the slip-resistant category, various brands engineer their soles differently. Some use soft, sticky rubber for grip, while others develop complex lug patterns to channel water away and prevent mud build-up.

    Compare the grip performance across popular boot brands by looking at user reviews and ratings. See how brands like Merrell, Salomon, and Keen stack up. Consider the type of hiking you do the most when choosing. If your hikes involve lots of wet and uneven paths, pay extra attention to the sole design and materials.

    Remember, grip and traction can make or break your hiking experience. Choose wisely, and your boots will keep you moving forward safely.

    How to Choose the Right Waterproof Hiking Boots for Long Distances?

    What makes a hiking boot suitable for long distances? Durability, fit, and support.

    As an outdoor enthusiast, I understand the need for the right gear. When it comes to long hikes, your boots make a big impact. You need a pair that stands up to miles of wear. Beware of blisters and sore feet that come from bad shoes.

    When choosing waterproof hiking boots for long trails, consider a snug fit. Your heel should stay put when walking. The boots should give your toes room to move too. Make sure they’re built for distance. They should have a strong sole and enough cushion to ease your steps. The best lightweight waterproof hiking boots blend comfort, support, and weight. They help you go further with less effort.

    Look for boots with proper arch support and ankle stability. They are key for carrying loads over miles. A wrong fit can turn an adventure sour fast.

    A good boot review helps with this choice. Top-rated boots soar in fit, durability, and comfort. They gain the trust of hikers who test them on real trails. Long-distance waterproof boots have tough outsoles. They grip well on different grounds.

    So for your next long trail, don’t just pick any boot. Choose one with the right build and fit. This will make a big difference in how you enjoy the hike. Trust me, your feet will thank you for it.

    What Are the Diverse Uses for Waterproof Hiking Footwear?

    What are the versatile applications for waterproof hiking footwear? They serve many outdoor activities. You can wear them not just for hiking but also for walking, fishing, or even working in wet conditions. They protect your feet in any place where you might face rain, mud, or puddles.

    These boots are multi-use hiking boots. They are a key piece of outdoor adventure gear waterproof. They are boots suitable for hiking and walking over long distances. Plus, they keep your feet dry and comfy all day. Ever stepped in a stream and gotten your sock wet? Yeah, waterproof boots stop that.

    Situations where waterproofing is crucial outside of hiking include camping trips, outdoor jobs, and any adventure where water may be an issue. You might be thinking, “But aren’t they heavy?” Not anymore. We’ve got lighter options that still do the job well. We want tough boots that can handle a day in the rain without feeling like bricks on our feet.

    When picking these boots, make sure they won’t let you down in quality. They should last, fit right, and keep water out every step of the way. Trust me, having dry feet can make a big change in your outdoor fun. So yes, waterproofing is key for not just hikers, but for anyone who loves being outside.

    How Can You Ensure Your Waterproof Hiking Boots Remain Effective?

    To keep your waterproof hiking boots working well, clean and dry them often. This stops damage and keeps water out. The lacing system is key for a tight seal. So, use it right and check for wear. Boots can be fixed to last longer. Use patches or sealants for small holes or tears.

    Parts of boots that often need care are the soles and seams. These spots can let water in if they wear out or split. When lacing your boots, make sure they fit snug but comfy. This helps the waterproof seal do its job well. Also, reapply waterproofing spray or wax when the boots start to absorb water instead of repel it.

    If your boots begin to leak or the soles wear thin, look into repair options. Some boots are made to be fixed and not thrown away when damaged. You can have a cobbler replace the soles or fix the waterproof membrane. This can make your boots last much longer.

    Remember these tips:

    • Clean mud or dirt off right after each hike.
    • Let boots dry naturally away from direct heat.
    • Tighten laces for a good fit and seal.
    • Treat with waterproofing products regularly.
    • Check for repairs if leaks start.

    Boots that get care stay dry inside and hold up to lots of hikes. They save you money and keep your feet happy on the trails!

    What Should You Look For When Buying Hiking Boots Suitable for All Terrains?

    What factors should be considered for all-terrain hiking boots? Look for a tough build, a solid waterproof rating, and rugged outsoles. These boots need to handle rocks, mud, and more. Good all-terrain waterproof footwear stands up to many kinds of ground. It keeps your feet dry too.

    Let’s dive deeper. To take on all terrains, boots must be sturdy. Durable leather or synthetic materials make them last. They need a waterproof rating that you can trust. The higher the rating, the better. This keeps water out. It’s key for crossing streams or hiking in the rain. Have you seen terrain-gripping boot outsoles? They are a must. They can grip well on wet rocks and slippery mud.

    Why does this matter? Terrain can change fast when you are out hiking. One minute you’re on a dry, dusty path. The next, you’re stepping through a puddle or climbing a rocky hill. Good boots keep you moving. They keep you sure-footed. They protect your feet. They can make your hike a fun day out, not a tough slog.

    Remember, when you pick boots, think grip, water protection, and toughness. That way, you’re ready for any adventure thrown your way!

    How Do Waterproof Hiking Boot Features Differ Across Brands and Models?

    When asked how features vary by brand, I say, each label has its magic touch. Salomon hiking boots, for instance, often have a sleek design and aggressive tread for grip. Other brands might focus on ultra-light materials or special cushioning for comfort.

    A direct comparison of lightweight hiking boots reveals a mix of traits. Some brands may favor support and durability, while others prioritize weight reduction and flexibility. It’s common to find boots boasting waterproof membranes like Gore-Tex for dryness without added bulk.

    Top-rated waterproof boots have earned their status by balancing key features. These include waterproofing, weight, durability, and comfort. Reliable traction is a constant among the best. Each offers distinct benefits and sometimes, unique technology aimed at outdoor buffs.

    When you look at various boots, you often see their standout features first. Like, some might have a unique lacing system that promotes a snug fit. Others might be made of eco-friendly materials, appealing to the green-hearted hiker. Brands like Salomon are known for integrating advanced features into their boots. They craft designs that provide stability, protect, and maintain comfort across many terrains.

    I dig deep into reviews and ratings to grasp what makes each boot shine. This doesn’t just show what’s popular but also indicates which features stand out across different environments and usage scenarios. I lean heavily on detailed reviews that get into the nitty-gritty. These often reveal how well boots hold up under pressure and what unique elements each pair brings to your trek.

    In a nutshell, waterproof hiking boot features are numerous and varied across brands. Understanding the nuances of each can be crucial for finding the perfect pair. It’s all about matching your hiking style and needs with the specialized features of renowned brands.

    Conclusion

    To wrap up, choosing the right lightweight waterproof hiking boots matters. We’ve seen how they keep your feet dry, support long treks, and give you a good grip. Good boots bring comfort and support on all trails. They vary in design, fit, and technology, but the goal is the same: protect your feet and boost your hiking game. Remember, the best pair suits your feet and your adventure. Get boots that last, feel great, and handle any path. Happy hiking!

    Loading


  • Waterproof hiking boots conquer rugged terrain, ensuring safe and enjoyable outdoor adventures.

    Are Waterproof Hiking Boots Essential for Outdoor Adventures?

    Exploring why waterproof hiking boots are crucial for your adventures: durability, foot health, and comfort. Explore factors for choosing the right waterproof hiking boots across varied terrains for optimal performance. Delve into materials revolutionizing waterproof hiking boots: GORE-TEX to vegan options for ideal comfort. Considering lightweight vs. heavier waterproof hiking boots? Understand the performance and benefits. Women, seek waterproof hiking boots that offer design, comfort, and fit specifically for you. Trace how men’s waterproof hiking footwear has advanced, focusing on leading brands like Columbia. Unravel the significance of ankle support in waterproof boots for stability across different hiking terrains. Preserve your waterproof hiking boots with proper care, cleaning, and storage for lasting durability. Find the top-rated waterproof hiking shoes for any weather with the best traction, fit, and hiker approval. Tips to determine your waterproof hiking boot size for the ultimate fit, comfort, and trail readiness.

    • Waterproof hiking boots prevent wet, cold feet, offering durability and comfort.
    • They should be chosen based on terrain, prioritizing grip, support, and breathability.
    • Gore-Tex is a top material for waterproof boots due to its durable, breathable membrane.
    • Lightweight boots provide balance and are effective with the right design and materials.
    • Women should look for boots designed for their foot shape; ankle support and comfort matter.
    • Men’s waterproof hiking footwear has evolved with better materials and dry-keeping technology.
    • Boots with ankle support offer stability and safety on rough terrain.
    • Maintaining boots requires routine cleaning, appropriate storage, and periodic water-repellent treatments.
    • Top hiking boots have great durability, comfort, breathability, and traction.
    • Accurate sizing of hiking boots is crucial, with foot measurements and testing requiring attention.

    Ever stepped in a puddle and spent the day with soggy socks? Let’s face it, wet feet can ruin any hike, making waterproof boots a game-changer. Are you on the hunt for boots that keep you dry and on the move? My guide on why #waterproofhikingboots are essential will point you in the right direction. Trust me, your feet will thank you. Read on to unlock the secrets to dry, happy hiking!

    Why Are Waterproof Hiking Boots Essential for Outdoor Adventures?

    Are hiking boots supposed to be waterproof? Yes, they are. Good hiking boots keep your feet dry. They stop water from getting in. When your feet stay dry, your hike is much better. You don’t have to worry about wet, cold feet.

    Now, are any walking boots really waterproof? Many are, but not all. Boots with a water seal are key. They stop water but let your feet breathe. Over time, water can break down many boot materials. But waterproof ones last longer.

    Keeping feet dry is super important. Wet feet can lead to blisters and other foot problems. Dry feet means happy feet. Happy feet means a happy hiker.

    Waterproof boots can help your foot health and comfort. They keep out moisture. This way, your feet stay comfy during long walks. They often have soft linings too. This adds to the comfort when you’re on the trail for hours.

    Waterproof and non-waterproof boots?

    They’re not the same. Non-waterproof boots might be okay for a dry day. But when it rains, or if you cross a stream, your feet might get wet. Waterproof boots have special materials. These keep the water out, no matter the weather. They are a must-have for hiking in all conditions.

    Waterproof boots offer more than just dry feet. They provide peace of mind. Knowing you’re ready for any weather makes your adventure worry-free. Remember, reliable waterproof hiking gear is a game-changer. It can turn a tricky trail into an amazing story. So next time you lace up, make sure your boots are ready for anything.

    How to Choose the Right Waterproof Hiking Boots for Different Terrains?

    Which hiking boots are most waterproof? Boots with Gore-Tex are often the top picks. To select the right hiking boots, you must consider the terrain. For mountain hikes, boots need good grip and ankle support. For flat trails, look for comfort and lightweight.

    When adventure takes you across different landscapes, each step can test your gear. The best-rated women’s hiking boots and waterproof hiking boots for men come packed with features. You have to match these to the ground below. The goal? To stay safe and dry no matter where you trek.

    On rocky climbs, traction is a must. It keeps you steady as you face steep paths or loose stones. You may want boots with sturdy soles and deep lugs. The best boots will hug the rocks and dirt, boosting your confidence with every step.

    Now, what about wet trails or soggy weather? Your boots must block water yet let your feet breathe. Innovations in hiking boot technology have made this possible. Hiking boots today do more than just cover your feet. They work hard to keep moisture out. This tech keeps your hike happy even when the skies turn gray.

    For trails with streams or snow, waterproofing is vital. It protects your feet from cold and sores. Waterproof hiking boots men and women wear have barriers like Gore-Tex. These barriers lock water out while letting air flow in.

    Remember, the right boots support your feet on any adventure. They help you push further and enjoy more. Get boots fit for your trip, and you’ll be ready for the path ahead.

    What Materials Are Used in Making the Best Waterproof Hiking Boots?

    Is GORE-TEX for hiking? Yes, it is one of the top materials used for waterproof boots. GORE-TEX hiking boots are famous for keeping feet dry. This technology wraps your feet in a membrane that keeps water out but lets sweat escape. This means no soggy socks from rain or streams. GORE-TEX also lasts long, resists wear, and comes in lots of boot styles.

    Other common waterproof materials include leather and synthetics treated with water-repelling coatings. Vegan waterproof hiking boots use man-made materials that are kind to the earth. They too work great to block water and still let your feet breathe.

    Breathable waterproof boots are key for comfort. You want to avoid wet feet as they lead to blisters and cold. Yet, you also don’t want boots that trap sweat inside. The materials today must balance both needs.

    So, let’s talk vegan about and eco-friendly options. They offer waterproofing without harm to animals. These are great for those who care about our planet. They can be just as tough and protective as non-vegan boots.

    As we adventure more and seek wild, wet trails, the tech for waterproof boots keeps getting better. If your boots can keep water out and still let air move, you stay happy on the trail. This makes picking the right material for your boots as important as the hike itself.

    Are Lightweight Waterproof Hiking Boots as Effective as Heavier Boots?

    Are lightweight trail shoes waterproof as effective as heavier boots? Yes, they can be. Light boots may offer a good balance between comfort and support. They use modern materials that keep weight down. This doesn’t mean they are less able to deal with water. Key features for a boot’s performance are design, materials, and build quality.

    Lighter boots help save energy on long hikes. They are easier to move in. Your feet won’t get as tired compared to heavy boots. This is important for hikes where agility is a must.

    Materials like Gore-Tex keep a boot’s weight low. They still keep out water. A mix of textiles and lightweight rubber can offer durability too. But, we have to think about what we trade-off when we choose light over heavy. Light boots may not give as much ankle support. They might not last as long on tough trails. Every hiker’s needs will differ.

    Take women’s hiking and trekking boots, for instance. They are made for a woman’s foot shape. This means they can provide comfort and function. This is true without being bulky. When you look for essential hiking boot features, consider your hikes. Will you climb rocky trails? Do you hike mostly flat paths? If you walk long distances, you might favor light over heavy. Always test boots to find the right balance for you.

    In short, lightweight waterproof boots can serve you well. But, make sure they fit your specific hiking needs. Choose wisely based on the type of hike, terrain, and your comfort needs.

    What Should Women Look for in Waterproof Hiking Boots?

    When you’re in the market for waterproof ladies’ hiking boots, consider the design. Women’s feet tend to be narrower with a different arch shape than men’s. Women’s-specific hiking boots account for these differences.

    Are gender-specific design considerations essential in women’s waterproof hiking boots? Yes, they are crucial. A boot designed for a woman’s foot provides better comfort and support.

    Support is key. Opt for boots that give ample ankle support while still allowing flexibility. Seek out the best beginner hiking boots women could start with. These often have comfort and ease of use in mind. They make hikes enjoyable, help prevent injuries, and are easier to break in.

    Size and fit are also vital. Your boots should fit snugly but not tightly. Make room for thick socks. A right fit keeps blisters away and aids in balance. Always try boots on toward the day’s end. This is when your feet are larger.

    In summary, look for a fit tailored to women, support, and comfort. This will make a world of difference on the trails. Choose well, and happy hiking!

    How Have Men’s Waterproof Hiking Footwear Evolved Over the Years?

    Did men’s waterproof hiking footwear get better over time? Yes. Men’s boots for hikes changed a lot. They’re now more able to keep feet dry. They must be tough for rough trails. Brands like Columbia made huge leaps in boot tech. Old boots were heavy and took a long time to dry. But those days are gone.

    Early boots were simple. They had leather and hard soles. But they were not great for wet paths. Over the years, new materials and tech have come into play. Men’s durable trail boots came to life. They have waterproof tech like sealed seams.

    Brands played a big role in this. Columbia is one such big name. They made boots that last and protect in rain and rivers. They understand that each trail calls for a special type of boot. These outdoor shoes must face mud, rocks, and snow.

    Performance hiking boots these days are smart. They come from years of science and outdoor tests. Comfort got better. So did grip and toughness. When you get these boots, you get years of hard work that went into making them. They let men take on nature with sure feet. With these, every step outside becomes a safe one.

    What Are the Advantages of Waterproof Boots With Ankle Support?

    Waterproof boots with ankle support help keep feet dry and safe. They provide stability on rocky or uneven trails. Ankle support is key when the ground is loose or slippery. It keeps your foot in place and prevents twists or sprains. This kind of support is needed on long hikes or rough terrain. For hikes with lots of climbing, you need boots that cover your ankles.

    Ankle-support hiking boots offer a balance between being stiff and flexible. They need to move with your foot but also hold strong when needed. High cHigh-cutproof boots give you this balance. Some popular models combine sturdy ankle support with top-notch waterproof tech. They keep your feet dry and protect your ankles on all sorts of hikes.

    To pick the best boots, think about where and how you plan to hike. For tough mountain trails, go for boots with strong ankle support. They should also have a waterproof layer to block water and mud. Sturdy waterproof boots are great for backpacking trips or long days on the trail. They help your feet handle heavy loads and many miles. Remember, happy feet make a happy hiker!

    How to Maintain and Care for Your Waterproof Hiking Boots?

    Maintaining waterproof boots keeps them durable. Cleaning them right is key. For various materials, proper methods differ. Restoring waterproofness boosts their life. For storage, keep them dry and cool. This extends their usability.

    Routine maintenance tips for waterproof boots:

    After each hike, brush off mud and debris. Use a mild soap and water for cleaning. Let them air dry away from direct heat.

    Cleaning practices for various waterproof materials:

    Leather needs a gentle cleaner. Synthetic materials can handle more vigorous scrubbing. Always follow the manufacturer’s instructions.

    Restoring waterproofness after wear and tear:

    Apply a waterproof treatment like wax or spray when they start to absorb water. It’s best to reapply this treatment periodically.

    Storage advice to prolong the life of waterproof hiking boots:

    Store boots in a cool, dry place. Avoid direct sunlight and heat as these can break down materials. Use a boot tree or stuff them with paper to hold their shape.

    Let’s keep those boots ready for action and our feet happy on the trails!

    What Are the Top Rated Waterproof Hiking Shoes for All Conditions?

    Best waterproof hiking boots? Look for kicks with great reviews that ace every test. They need to tick boxes for durability, comfort, and solid grip. The best boots for trails are the ones that hikers praise for keeping their feet dry and cozy, no matter the weather.

    Features that make a boot top-rated include, but aren’t limited to, its ability to fight off water while letting your feet breathe, a tough sole that grips even when it’s wet outside, and material that lasts a long trek. Top contenders for the best waterproof hiking shoes include those with Gore-Tex tech and a snug fit that stops blisters.

    When picking boots, think about where you’ll roam. Are there rocks, roots, and dirt, or slick spots and mud? All-weather hiking boots should make your journey safer and more fun. This means high-traction soles play a big role. They help you stay sure-footed in rain, snow, or shine.

    Some boots stand out and get the nod from many hikers. They keep racking up points for being trusty on trails and comfort that lasts all day. These all-stars are what you want to search for when you’re after the best waterproof boots for trails. And remember, a boot’s worth goes past just dodging puddles. It’s about making each step sure and sound so you can enjoy the wild without a care for your feet.

    How to Accurately Determine Your Waterproof Hiking Boot Size?

    Is finding the perfect fit in waterproof hiking boots crucial? Yes, it’s vital. The right fit means no blisters, slips, or foot pain. To start, you’ll need a good buying guide for hiking shoes. It explains how to measure your foot length and width. Always measure your feet in the afternoon; they swell during the day.

    For boot sizing and measurements, use a brand’s guide. Each one has its own. If you’re buying waterproof hiking shoe recommendations from a country abroad, learn how to convert boot sizes internationally. It’s often just a quick online search away.

    Here are some tips for trying on and testing hiking boots. Always wear the socks you plan to hike in. This ensures the fit is true to your hiking conditions. The boots should feel snug but not tight. There should be enough room to wiggle your toes.

    Give them a test walk. Make sure your heels don’t move much. This could cause blisters. Check if the boot bends where your foot bends. Your feet will thank you for this on the trail. Remember, the effort you put in to find the right fit will pay off. It’s the difference between a good hike and a great one.

    Conclusion

    We’ve explored why waterproof hiking boots matter—from keeping feet dry to boosting comfort. We’ve compared materials, like GORE-TEX, and designs that meet different hiking needs. Remember, the right boot supports your foot, resists water, and matches your trail type. It’s worth investing in good boots and caring for them to ensure they last. Happy trails!

    Loading


  • Backpacking under the starlit sky, capturing the allure of nocturnal adventure in nature.

    Is Backpacking at Night Safe? Essential Safety Tips to Know

    Understanding the risks of backpacking at night ensures safety. Read on for top nocturnal trek tips & wildlife measures.

    • Hiking at night requires preparation: know the trail, alert someone about your plans, carry navigation tools, and prepare for wildlife encounters.
    • Pack essential gear such as a headlamp, extra batteries, layered clothing, and navigation tools; make a checklist to not forget anything.
    • Nighttime hiking techniques include using night vision aids, maintaining a slow pace, taking frequent breaks, and practicing silent movement.
    • For wildlife and stargazing, visit national parks or remote areas; be ethical and don’t disturb animals.
    • Use landmarks, and maps, and practice setting up your tent to navigate and camp after dark effectively.
    • For packing, list all overnight gear, balance the weight, secure food, and keep essentials within reach.
    • Layer your clothing, choose suitable footwear, consider thermal imaging, and use a good headlamp for night hiking.
    • Stay hydrated, eat energy-rich foods, and use a red light for cooking without affecting night vision.
    • Technology like stargazing apps, reflective trail markers, GPS navigation, and online hiking groups enhance the night hiking experience.

    Hey, night owls and trailblazers! Think backpacking at night is a no-go? Think again. Embrace the dark with my key safety tips to keep your night hikes smart and secure. From sniffing out wildlife to shining bright with the right gear, get ready to discover how night-time trekking can be safe and sensational! Let’s light up the trail with knowledge and make your nocturnal adventure unforgettable!

    What Are the Essential Safety Tips for Backpacking at Night?

    Is hiking at night dangerous? Yes, without the right steps, it can be risky. To keep safe, know the trail, watch for wildlife, and have emergency plans.

    Understand the risks the trail may have when it’s dark. Paths can twist, turn, and have things like roots or rocks. Bring a map and compass. Learn how to use them before you go.

    Always tell someone where you are going. Use safety alarms and share your location. Bring a fully charged phone. Have an extra battery or power bank too.

    Wildlife acts differently at night. Make noise to avoid surprise face-to-face. Carry bear spray if you’re in bear country. Know how to store food so animals don’t get it.

    To sleep well while backpacking, pick a safe spot. Set up your tent on flat ground. Stay warm and dry. Use a sleeping pad and bag rated for cold nights.

    Remember, safety first, always. Enjoy the stars, but stay aware. Night backpacking can be fun. Just make smart choices and prep right.

    How Do I Create a Nighttime Backpacking Checklist?

    Night hiking gear—a must-have to stay safe at night. Is it a good idea to hike at night? Yes, with the right equipment.

    You’ll need items for seeing and being seen. Start with a strong headlamp or flashlight to light your path. Pack extra batteries or bring a solar charger, as light is your top tool at night. Temperatures can drop, so bring layers to keep warm and dry.

    Reflective gear is key for nocturnal treks. Reflective clothing and accessories catch the light, making sure others see you. This increases safety for group hikes and when near roads.

    Navigation tools guide your way under the stars. A GPS and map help you track your trail. Always carry backup power to keep your GPS running.

    Make a nighttime backpacking checklist with these items. Planning reduces risks and boosts your trek’s fun. This checklist keeps your adventure on track, even after dark. Enjoy the night safely, with every essential in your pack.

    What Techniques Can Enhance Nocturnal Hiking Experiences?

    Is it safe to trek at night? Yes, with the right gear and knowledge. First, use night vision tools and headlamps well. This gear helps you see and stay on the path. Silent movement matters too. It lets you hear the wild and keeps you safe. Use GPS and old-school maps when it’s too dark. They help you not get lost. Keep your night hiking slow and take breaks often. This keeps you fresh and alert.

    Night vision equipment helps trekkers a lot. It lets you see in the dark, away from city lights. Pair this with a strong headlamp and you’re all set. Pick headlamps with a red light mode. Why? It keeps your eyes used to the dark. For silent walking, heavy boots are out. Go light and feel the ground. Your other senses get better, like your hearing. This is a plus out in the woods at night.

    Knowing how to use GPS in the dark is key. But don’t rely on just tech. Carry a compass and map, always. And know how to use them. It’s a lifesaver if your gear dies.

    For a steady pace at night, walk slower than in the daytime. It lets you deal with the dark better. And, take breaks often, more than the day. Your body and mind will thank you.

    To sum it up, with these techniques, you can enjoy a safe nocturnal hike. Gear up, listen to nature, find your way, and keep the pace right. Night hiking can be a magical time. You just have to be ready.

    What Should I Know About Wildlife and Star Gazing Destinations?

    Are you keen on night hikes? You’ll love the nocturnal wildlife and clear night skies. Recommended destinations for nocturnal wildlife viewing include national parks and reserves. These spots often hold guided night tours to see animals active after dark. For star and moon gazing, seek out remote areas away from city lights. These places are often higher in elevation or dry climates with fewer clouds. Observing bioluminescence phenomena requires specific spots, like coastlines or wetlands. Always be ethical when encountering wildlife; never feed or disturb animals.

    When you set out to hike at night, engaging with wildlife takes care but can be magical. In designated parks, some animals only come out when the sun dips. You might see glowing eyes or hear the rustle of nocturnal creatures. For sparkling heavens, you can head to special star-gazing destinations. These are away from the glow of streetlights, offering a canvas of constellations. Dark skies are key for stargazing, so find places known for their clear night views.

    Those tiny lights you see on night trails might be bioluminescent critters. They light up to find mates or scare off foes. To see them, you’ll have to visit coastal areas or damp forests after dark. There, you’ll witness nature’s light show.

    Remember, keep noise low so as to not scare off wildlife. Do not touch or feed them, as this can harm their health. Stay on trails and use a light red filter to not disturb others. Plus, it’s safer for you and the wild friends you meet on your adventure.

    How Can I Ensure Effective Navigation and Camp Setup After Dark?

    Finding your campsite in the dark? Look for landmarks shared in descriptions. Use a map and compass or GPS to point you to the right spot. Once there, clear the ground of rocks and sticks to make a flat area.

    Need to put up a tent without light? Have a headlamp or hands-free light ready. Work step by step, and know your gear before you leave. This means practice setting up your tent several times in daylight.

    Worried about permits or rules? Check the trail’s website or call local rangers before you go. Get any needed permits, and know the do’s and don’ts for when you arrive.

    Thinking about staying safe at night? Choose campsites away from walk paths to avoid surprises. Hang food high to keep animals away. Have a whistle or bear spray nearby just in case you need to call for help or shoo a critter.

    Let’s dive deeper. When you set off, tell someone your plan and when you’ll check in. This keeps you safe if anything goes wrong. If you’re finding your site and it’s too tough, stay put until first light.

    For tents, color-code or label poles and stakes so setup is swift and stress-free. For safety, a circle of light around your site can stop you from tripping in the dark. Also, check the weather. A night of rain can mean a river right where you sleep!

    Remember, following these tips can make night backpacking fun, not scary. Stay safe, be prepared, and enjoy the peacefulness of the night outdoors!

    What Packing Strategies Should I Consider for Overnight Backpacking?

    How do you sleep while backpacking? You need a good packing plan.

    First, I make a list of overnight gear. This helps me remember each item. A sleep setup like a tent and a pad is key. A warm bag helps too for cold nights. I pack these first for quick access later.

    For evening hikes, balance belongings in the bag. Heavy stuff goes in the middle. This way, the pack feels light on my back. I feel less tired and can walk more.

    Food storage is another big deal. At night, critters come out looking for a snack. Keep food in secure containers. Hang them up in a tree if you can. Or use boxes that animals can’t get into.

    Each thing I pack has its spot. This is so I can get what I need fast. I use pockets and compartments. This way, when it gets dark, I know where everything is. My headlamp, gloves, and map are close by for easy grabbing.

    Valuables like my phone and wallet also need care. I tuck them away safe from both critters and pesky humans. I’m sure to pack my shelter and sleeping kit last. This way, it’s on top for setup at camp.

    Essential items I need for a good sleep include a thick mat, a warm sleeping bag, and a cozy pillow. This makes rest in the wild comfortable and restful. Comfort outdoors is all about smart packing and preparedness. With these tips at hand, night trekking and camping can indeed be safe and enjoyable.

    What Clothing and Gear Are Best Suited for Night Hiking?

    What should I wear for night hiking? Opt for layers. You’ll want clothing that keeps you warm as night temperatures drop. Start with a moisture-wicking base, then add insulation like a fleece jacket, and top it off with a windproof and waterproof shell to protect against the elements.

    For your feet, choose the best shoes for night hiking. They should be sturdy, with good grip and ankle support to prevent trips and slips. A proper fit is crucial to avoid blisters which can quickly ruin any night-time adventure.

    Is thermal imaging useful for hikers at night? Yes, it can be a game-changer. Thermal imaging lets you see the warmth of objects, making it easier to spot animals or people in the dark. Though it can be pricey, there are affordable options for occasional use.

    Finally, a good headlamp is non-negotiable. Your headlamp should be bright enough to light your path, yet not so heavy it strains your neck. Check battery life when choosing one, and consider headlamps with long-running times to avoid being left in the dark. Affordable headlamps are readily available, but make sure they offer sufficient brightness for safe navigation.

    Remember, when picking gear for night hiking, balance comfort with safety. It’s not just about staying warm and visible—it’s about being able to respond quickly and efficiently to whatever the night might bring.

    Hikers use red lights to keep their night vision sharp. This helps when they make food. You need to drink water often when you hike at night. Even if it’s cool out, your body loses water. So, sip water all through your hike.

    Before heading out, eat a meal rich in carbs and protein for lasting power. Think whole grains, nuts, and lean meats. For your hike, pack foods that are easy to eat and full of energy. Foods like trail mix, energy bars, and fruit work well. They give you a quick energy boost without much prep.

    You want snacks that blend ease and health. Fresh fruits and veggies, nuts, and seeds are great for a quick pick-me-up. When you want to prep a meal at night, use a headlamp with a red light. This will let you see without hurting your night vision.

    Taking the right food and water is key for safe and fun night hikes. Make sure you bring enough to stay strong and hydrated from start to finish. And remember, balance is everything. Choose snacks that give you energy and also taste good. This way, you’ll enjoy every step of your nocturnal adventure!

    How Do I Utilize Technology for Better Night Hiking Experiences?

    Is it a good idea to hike at night? Yes, if you’re well-prepared. Using technology, you can make night hiking fun and safe. Apps for stargazing help backpackers enjoy the night sky. These apps can show you stars and constellations. It’s like having a map of the sky in your pocket.

    You can use reflective or electronic trail markers too. They help you stay on the path and not get lost. Hike planning under moonlight becomes easier. You can see better, and it feels more natural.

    Using GPS navigation in the dark is also key. It guides you when you can’t see trails well. Always bring a charged phone or GPS device.

    You can even learn from others who hike at night. Online groups like those found on Reddit can give you tips. People share their own stories there. They may know the best spots for a night trek. Or they can warn you about places that are not so safe.

    Here’s a quick recap:

    1. Use stargazing apps to find and enjoy stars.
    2. Mark trails with things that shine or beep to keep you on track.
    3. Plan your hike with the moon’s light to make it more natural.
    4. Share with and learn from online hikers’ groups for good advice.

    Don’t forget, that safety always comes first. Happy hiking under the stars!

    Conclusion

    We’ve covered how to hike safely and smartly at night. Remember, gear upright, from reflective items to headlamps. Plan meals that fuel your trek and keep you going. Know your wildlife and starry skies above. Stick to trails with good markers, and always share your location. Happy night hiking!

    Loading


  • Awe-inspiring solitude and untouched wilderness - a lone hiker gazes upon nature's beauty.

    Solo Overnight Hiking: How Do I Plan My Itinerary?

    Embarking on solo overnight hiking? Get tips for planning, packing, and safety for your adventure.

    • Carefully plan your solo hiking itinerary, including trail selection, navigation, campsite identification, permits, and informing someone about your plans.
    • Pack essential gear for safety, navigation, shelter, food, and hydration, focusing on weight and utility.
    • Ensure safety with appropriate night gear, bear spray, a personal locator beacon, and knowledge of emergency procedures.
    • Stay hydrated by carrying enough water, choosing a purification method, and mapping water sources beforehand.
    • Choose a lightweight and easy-to-set-up tent, a suitable sleeping bag, and a pad, and consider bivouac shelters or hammocks for alternate sleeping systems.
    • Navigate trails confidently with a map, compass, GPS, and by recognizing trail markers; practice navigation skills in familiar settings.
    • Mentally prepare for solo hiking by coping with fear and loneliness, practicing mindfulness, and ensuring proper mental conditioning.
    • Adjust meal planning for balanced nutrition, high-calorie foods, and essential cooking gear, including a first aid kit with hydration and nutrient replenishment supplies.

    Ready to tackle the trails on your own but not sure where to start? Setting up a solo overnight hike can feel daunting, but I’ve got your back. From picking out trails to snagging permits and letting folks know your plans, I’ll guide you through it. Pack your gear—a big solo adventure awaits!

    How Do I Plan My Solo Overnight Hiking Itinerary?

    Is it OK to go hiking alone? Yes, if you plan well. First, pick your trail. Look for a route that fits your level of skill. Choose one that won’t be too tough. Make sure you check the weather too.

    Where do hikers sleep while hiking? We find spots called campsites. Some trails have shelters for you to use. Others let you pick your spot. Just be sure it’s safe and allowed.

    Start by choosing your destination and trail. Think about the views you want and what challenges you’re ready for.

    Next, estimate how much time you’ll need. Think about how far you can hike each day. Don’t forget to include time for breaks and setting up camp.

    Then, identify spots for camping and if they have shelters. This is key to a safe night’s sleep. Use tools like trail maps to find these spots ahead of time.

    Getting permits and reservations can be a must. Some places need you to book spots to camp or hike. Do this early to make sure you get a place.

    Last, tell someone about your hike and your full plan. Let them know when you plan to be back. This step could be a lifesaver in an emergency.

    What Should Be on My Packing List for a Solo Hike?

    What to take on a solo overnight hike? You’ll need gear for safety, comfort, food, water, and the right clothes.

    First, figure out what you’ll eat and drink. Pack snacks that give you quick energy and meals that are easy to make. Don’t forget to bring enough water and tools to purify more from streams.

    Next, think about tools to find your way. A good map and a compass are must-haves. Sometimes, trails can be tricky, so knowing how to use them is key.

    Your bag should be light but fit all you’ll need. Picking the right backpack is vital to keep you moving with ease. Clothing should be just right for day and night temps.

    Don’t forget other basics like a light tent, a warm sleeping bag, and something to cook with. Plus, a first aid kit is a big deal for those ‘just in case’ times.

    As an outdoor adventure enthusiast, I suggest planning with a solo hiking gear guide. This can help you make sure you don’t miss a thing. Simple hacks can have a big impact. For instance, knowing how to pack can keep your bag light. This helps you hike longer and feel better at the end of the day.

    Each item in your pack should serve a purpose. Think, “Do I really need this?” Keep your pack as light as you can. This means a better and safer hike for you.

    Happy trails and pack smart! Keep it simple and think safety, but remember to savor the journey ahead.

    How Can I Ensure Safety on My Solo Overnight Hike?

    Is it a good idea to go hiking at night? Yes, but you must take the right safety steps. When hiking alone at night, always use a strong headlamp. Stick to marked paths to avoid getting lost and watch out for tripping hazards. Be aware of wildlife that is active after dark, and know how to react if you encounter any.

    What about wildlife encounters when hiking solo? Know the animals you might meet. Read up on how to stay safe with bears, snakes, and others. Make noise while you walk to alert animals to your presence. Carry bear spray where it is allowed and know how to use it.

    Should you use personal locator beacons for hikers and other safety devices? Yes, absolutely. A personal locator beacon is key when you hike alone. It sends out a signal if you need help. Consider also taking a whistle, a mirror, or a flare to signal for help in emergencies.

    What emergency protocols for hikers are important? Learn basic first aid before you set out. Write down your plan and share it with a friend or family member. Know the signs of common health issues like dehydration or hypothermia. Practice how to stay calm if things don’t go as planned. Remember, calm thinking can save the day if you face trouble.

    By planning for wildlife, taking key safety gear, and knowing emergency steps, your solo hike can be both safe and fun. Your gear and knowledge are your best pals out in the wild. They keep you safe so you can focus on the beauty of the night sky and the peaceful trail ahead.

    How Should I Approach Water Purification and Hydration?

    How to stay hydrated on a solo overnight hike?

    You need to select a water purification method and map water sources. It’s vital to carry enough water, renew your supply, and use hydration systems.

    Water is key when you pack for a solo overnight hike. First, pick a way to clean water. Think about tablets, filters, or boiling. Each method has its pros and cons. Tablets are light and easy but take time and can taste odd. Filters clean quickly but can break and weigh more. Boiling is sure but needs a stove and fuel.

    Stay safe by knowing where to find water. Look at maps and plan where you can fill up. Check reports for water source information. If you can’t find water, carry more and keep an eye out for signs of streams or lakes.

    Next, think about how to take water with you. Hydration packs let you drink while you walk. Water bottles are simple to use and fill. Some hikers use a mix of both.

    Stick to these tips to stay hydrated and enjoy your hike. Remember, water is life when you’re out on the trail.

    What Are the Best Shelter and Sleeping Systems for Solo Hikers?

    When heading out on a solo overnight hike, where you will sleep is key. You need the right tent and sleep gear to stay safe and warm. The best tents for solo hikers must be light but strong. They should protect from rain, wind, and cold. You will find one-person hiking sleeping systems perfect for this.

    Selecting a suitable tent for solo hikers is about more than just size. It’s also about easy set-up. As a solo hiker, you must do everything by yourself. You want a tent that you can pitch fast if a storm comes. Start by looking for “best tents for solo hikers” online. This will show tents that fit just one person and are simple to use.

    Sleeping bag and pad considerations matter too. They keep you cozy when temps drop at night. Pick a sleeping bag rated for the coldest weather you expect. Your pad should be thick enough to cushion you from the hard ground. Make sure both items are light. Hauling a heavy load is not fun when you’re by yourself.

    Some solo hikers like to utilize bivouac shelters or hammocks. A bivvy is a small, waterproof cover that fits over your sleeping bag. It’s perfect when you want to sleep under the stars. A hammock lets you sleep off the ground. It’s best in places without lots of bugs or when you don’t need warmth from the ground.

    Evaluating the best spots to set up camp is your last step. Look for flat, dry ground away from trails and water sources. High spots are good because cold air sinks. But stay away from cliffs and ridges that could be windy. Ensure your spot is safe from falling trees or rocks. Most of all, pick a spot where you can enjoy the peace of nature and have a good night’s rest!

    Solo overnight hiking can seem tough at first. But choose the right tent and sleep system, and you’re on your way. And don’t let being a solo overnight hiker worry you. Many women enjoy these adventures safely. Plan well and enjoy the stars!

    How Can I Navigate Trails Alone Safely and Efficiently?

    To safely navigate trails alone, use a map and compass. GPS helps too. Know how to read trail signs. Do not lose your way.

    When I hit the trails by myself, my top skill is map reading. Before I even step out, I study my route. I mark important spots like water sources and shelters. It keeps me on track and safe.

    I also pack a sturdy compass. It’s my trusty sidekick when electronics fail. I pair it with my map to find my way through the wild.

    But, GPS has its place, I admit. I load the route on my device. I check it helps me stick to my path. Still, I keep my map close. Device batteries can die.

    Trail markers are like breadcrumb trails. I look for colored blazes or stacked rocks. They guide me like a friend. They tell me, “This way” or “Not that way.”

    Here’s a pro tip: Practice at a local park. Get a feel for your map and compass before you tackle big, wild places.

    If you think you might have a knack for navigating trails alone, staying on the right path is key. You’ve got this! Just make sure you’re familiar with your solo wilderness navigation tools before you set out. Your adventure awaits!

    What Solo Hiking Mental Preparation Techniques Are There?

    Is it OK to go hiking alone? Yes, it is OK to hike alone if you prepare well. Fear and loneliness can be big challenges when you set out for a solo hike. Have a plan to manage these feelings before you hit the trail. Being alone in nature can make you feel small or lost at times. But with the right mindset, you can enjoy the peace that comes from hiking alone.

    How to cope with the mental challenges of hiking solo? You can manage fear by learning about the trail and its risks. Know what animals or weather you might face. Prepare for these with the right gear and knowledge. Dealing with loneliness is about finding joy in your own company. Mindfulness can help here. Take in the sights, sounds, and smells around you. They can boost your happiness and keep your mind off being alone.

    Strategies for enjoying solitude include taking pictures or writing in a journal. These activities keep your mind busy. They also give you something to share when you return. Plan breaks as well—a moment to rest and enjoy the view can remind you why you started the hike.

    Preparing mentally for solo hiking also means knowing your limits. Don’t plan a hike that’s too hard for you. Build up to bigger hikes as you gain strength and confidence. Always tell someone where you’re going and when you plan to return. This way, someone knows to look for you if there’s trouble.

    Mindfulness and mental health bonuses come with hiking solo too. Nature can calm and refresh your mind. You learn about yourself, too. Every hike teaches what you can do and what you enjoy. This builds confidence that goes beyond the trail.

    How Do I Adjust My Meal Planning for Solo Trekking?

    What are the nutritional considerations for solo hikers?

    Solo hikers need enough calories and a balanced diet. They must eat and pack smart. Here’s how:

    • Pack high-calorie food that won’t weigh you down.
    • Use small, easy-to-use stoves for quick meals.
    • Pick foods from all groups for good health.
    • Have a first aid kit with items to treat dehydration and nutrient loss.

    Plan Your Meals with Care

    When you hit the trail alone, your body works hard. You need food that gives you power and helps you move. Bring food rich in protein, fat, and carbs. Think about nuts, dry fruit, energy bars, and ready-to-eat meals. They can keep you going for a long time.

    Cook Smart, Eat Well

    Out there, alone with nature, you can’t bring your home kitchen. But you can still eat tasty food. Solo backpacking stoves are small and easy to use. They’re perfect for boiling water fast. You can make hot food that warms your body and soul. Simple meals like instant oatmeal, soup, and noodles work great.

    Balance on the Menu

    When you plan your meals, think about colors. Try to eat different colors of fruits and veggies. This way, your body gets all kinds of good stuff. Add seeds, nuts, and whole grains too. A good mix of food keeps your body strong on the trail.

    First Aid Food

    Your first aid kit is not just bandages and antiseptic. You need to think about your belly too. Pack rehydration salts or powder. Include some vitamins if you walk for many days. And don’t forget a water filter or purification tablets. Clean water is key to good health.

    When you carry all on your back, each item counts. Pack smart and eat right. Happy trails, solo hikers!

    Conclusion

    Planning a solo hike takes skill. You learned how to pick trails, manage time, and find sleep spots. Permits, gear, and telling a friend are key. Pack right for safety and comfort. Stay safe with the right gear and know-how to handle wildlife.

    Keep hydrated with good water sources. Choose a tent, sleep system, and where to set up. Know how to use maps and tech for trail navigation. Get your mind ready to be on your own. Plan meals to keep your energy up. Remember, solo trips need smart prep to be safe and fun!

    Loading


  • Dog-friendly hike through vibrant trail, showcasing nature's beauty, joy, and adventure.

    Dog Friendly Hike: How Do I Find Local Trails for My Pet?

    Planning a Dog Friendly Hike? Tips for trails & safety for you & your pup’s next outdoor trek. Perfect for pet-loving hikers.

    • Search online or local resources for dog-friendly hiking paths; use apps like AllTrails for filters.
    • Consult local park websites for pet policies; ensure trails match your dog’s fitness and beware of leash laws.
    • For scenic walks in California, consider areas like Runyon Canyon Park and coastal paths with water features.
    • When planning an outing, consider your dog’s fitness, and weather conditions, pack essentials, and observe Leave No Trace principles.
    • Pack for your pet’s needs including water, snacks, dog booties, and pet first aid; follow hiking etiquette.
    • To find water-friendly trails, seek local parks with lakes/streams, consult online maps, and ensure safe water access.
    • Train your dog for recall if hiking off-leash, and always be mindful of local wildlife and fellow hikers.

    Ever wondered where to enjoy hikes with your pooch? Look no further! I’m here to guide you toward paw-perfect trails that welcome furry friends. From sniffing out local dog-friendly spots to ensuring your pup’s safety, let’s uncover the best hikes for you and your buddy. Grab the leash – adventure awaits!

    How Do I Find Dog-Friendly Hiking Paths in My Area?

    You can find dog-friendly hiking paths by exploring local resources. Look at maps online or use apps that show dog hikes. Talk with other dog owners for tips. Check the rules at parks near you to see if they allow pets.

    Exploring local resources for pet owners

    Ask at your local pet store or check community boards. They often know about dog-friendly spots. Visit your city or county website too. They list parks and trails where dogs can go. Some places have special areas just for dogs to play and walk.

    Utilizing online mapping tools and apps for dog hikes

    Use the internet to find trails. Search for “dog-friendly hikes near me” to see what pops up. Websites like AllTrails are great for finding paths where dogs can walk. They let you filter for dog-friendly hikes. This way, you only see places where your pet can join.

    Networking with fellow dog owners for personal recommendations

    Chat with people at the dog park. They may know hidden gems for pet walks. Join a local dog owner’s group to get more ideas. People love to share their favorite spots. They can tell you the best trails for a hike with your dog.

    Checking local park rules and regulations regarding pets

    Before you go, know the rules. Not all trails allow dogs, and some have special rules. Dogs might need to stay on a leash, or there could be areas where they can’t go. Check online or call ahead to avoid any trouble. This helps make sure you and your dog have fun safely.

    What Are the Best Trails for Dogs and Their Safety Requirements?

    When seeking the best trails for dogs, safety must be top of mind. Start by evaluating a trail’s difficulty to ensure it matches your dog’s fitness. Some trails might be too steep or have rough terrain not suitable for a dog’s paws. Always check your trail guide for dog-friendly options. Next, make sure you understand the local leash laws. Many areas require dogs to be on leashes for their safety and the safety of wildlife. However, you might find some trails that offer off-leash areas. Still, keep your dog under control and within sight. It’s also critical to know about any hazardous wildlife or plants on the trail. Before you head out, research the area or ask local experts about any potential dangers. You want a safe trail for pet walks, free from harmful plants or animals. Lastly, be ready for emergencies. Pack a first aid kit that includes items for both you and your dog. Learn basic pet first aid and know how to get help if you need a rescue. By keeping these points in mind, you’ll ensure a good time on safe trails for your pet walks. Remember, the goal is a happy and healthy hike for you and your furry friend.

    How Can I Ensure an Enjoyable Leash-Free Hiking Experience with My Dog?

    Finding fun leash-free hiking areas starts with a good search. Look online for “leash-free hiking areas near me” or “off-leash nature excursions”. Many parks and trails allow dogs to roam free. Always check the rules first. Training your dog is key for a safe off-leash trip. Before you go, teach your dog to come when called. This skill could save their life and keep wildlife safe. Also, be polite to others on the trail. Keep your dog by you if others are close. Respecting wildlife is a must. Wild animals live where we hike. Keep your dog close so they don’t bother the animals. Practice recall and obedience skills often. Doing this at home first can help a lot. Then, try these skills in areas with few people and animals. Taking these steps will help you and your pup have tons of fun outside, without the leash.

    Which Canine-Friendly Nature Parks Offer the Most Scenic Walks with Dogs?

    Are you looking for the best spots to enjoy scenic walks with your furry friend in California? There are many picture-perfect trails that both you and your pet will love. To find scenic walks with dogs in California, seek out places known for stunning views or unique landscapes that stand out. For the best experience, here are some must-consider tips:

    Highlighting top scenic trails and the views they offer

    When you’re after a view to remember, look for trails that offer panoramic vistas. Think rolling hills, deep forests, or coastal paths where every turn gives you and your pup a fresh, Instagram-ready shot.

    Seasonal considerations for picturesque nature walks

    The time of year can really change how a trail looks and feels. Spring and fall often bring out the best in nature, with blooming wildflowers or colorful leaves. Summers give long, warm days while winter hikes can lead to serene, frost-touched scenery.

    Including water features in your scenic hike planning

    Trails with water features like lakes, rivers, or waterfalls not only add to the beauty but also give your pup a chance to splash around and cool down. Keep in mind the need for dog-friendly access and safety near water.

    Sharing Instagram-worthy spots for pet photography

    Capture the joyful moments when your pet is having a blast outdoors. Look for that sunset shot by the lake or your dog’s adventurous spirit as it bounds along the trail. Share these moments with friends, family, and of course, fellow pet lovers online who appreciate scenic walks with dogs. When searching for the perfect scenic hike in California, be sure to check out dog-friendly spots such as Runyon Canyon Park in Los Angeles, the trails in Griffith Park, or the coastal paths along Carmel Beach—they all offer stunning and varied landscapes for you and your dog to enjoy. Remember to respect the environment and follow the trail rules to keep these parks beautiful and accessible for everyone.

    What to Consider When Planning an Outdoor Adventure with Your Dog?

    When planning an outdoor adventure with dogs, think about your dog’s fitness level. Young pups and old friends might not handle long walks well. Always match the hike length and toughness to what your dog can enjoy. Next, think about the weather and the ground. Hot days need more water for your pet. Very cold times can hurt their paws. On rough paths, little dogs may need help. Large dogs might do better. Plan and bring the right gear for these times. Don’t forget food, water, and a comfy rest spot for your pet. They will get hungry and thirsty just like you. They also need a good spot to sleep if you hike for more than a day. We must all take care of nature. This means following Leave No Trace rules on trails. Do not leave food or dog waste behind. Help keep the wild clean for everyone. Keep your dog on a leash when needed, and let others enjoy the trail too.

    How to Prepare for Nature Excursions with Your Pet?

    Getting ready for nature trips with your pup takes some planning. A pre-hike checklist is key. Know what your dog will need and pack it. Check that your pet’s tags and chips are current. This ensures they can come home if they get lost. Learn about the local creatures you might see. Keep a safe distance to watch them. Start slowly to get your dog ready for long hikes. Short walks first, then gradually longer ones. This builds up their stamina. Think about the path you choose. Ensure it’s okay for your dog’s paws and fitness level. Also, remember some areas have special rules for dogs. Know them before you go. This way, you both have fun and stay safe on the trail.

    What Essentials Should I Bring on Dog Hikes?

    You need stuff to make hiking fun and safe for your pup. The most needed gear? A sturdy leash, water bowl, and snack. Always bring enough water for you and your pet. Dogs can’t tell you when they get thirsty. Keep water handy so you both stay hydrated. Don’t forget the poop bags. It’s important to keep trails clean for others. You should always pick up after your dog. Meeting others on the path? Keep your dog close and be polite. That way everyone can enjoy their hike. When you get ready, think about your dog’s needs, like paw protection. Some trails are rough and can hurt your dog’s feet. A good pair of dog booties can help with that. Also, a pet first aid kit can save the day. If your dog gets hurt, you’ll be glad you have it. Just in case, have your vet’s number on your phone. It’s better to be safe than sorry. And if the sun gets too strong, a dog-safe sunscreen can protect sensitive skin areas like the nose. Take a quick class on hiking with pets etiquette if you can. It can teach you the right way to share the path with others. Remember to check the trail rules too. Some spots ask to keep dogs on leashes all the time. Others might have areas where they can roam free. Every hike with your dog is a chance to have a big adventure. Just plan ahead so you can keep the fun going. With the right stuff, you’re all set for a great time out in nature.

    How Can I Locate Water-Friendly Dog Walks?

    Water is a great friend on dog walks. It keeps your pup cool and adds fun. To find trails with safe water for your dog, you can:
    • Look for local parks with lakes or rivers.
    • Ask other pet owners where they go.
    • Use online maps that show trails by water.
    Identifying trails with safe water access for dogs How can I tell if a trail has safe water access for my dog? Check online or call the park office. Make sure the water is clean and the current is safe. Once you find a good spot, help your dog get used to water slowly. Start on the shore and let them explore. Bring a toy for them to play with. Keep an eye out for tiredness. Your dog might pant more or slow down when tired. It’s also smart to check your dog for fleas or ticks after walks near water. Water can hide bugs that bother your pet. A quick check can keep your friend safe and happy. In short, finding water-friendly walks needs a bit of research. With the right spot, your dog can splash and play to their heart’s content. Remember to watch for signs of tiredness and keep them safe from water bugs. Now, get out there and make a splash with your four-legged friend!

    Conclusion

    In this post, we covered how to find the perfect trails for your dog. We looked at tools and tips to spot dog-friendly hikes. Safety for dogs on trails was key. We also discussed leash-free fun and picking scenic spots for a memorable walk. Planning is vital: think of your dog’s needs, the weather, and packing right. Always keep trails clean and remember water safety. Go out and explore the best with your furry friend!

    Loading


  • "Scenic mountain trail with nourishing trail foods and refreshing water bottles displayed on picnic table."

    Trail Food: What Are Good Options for Hiking?

    Essential nutrients for hiking? Our blog covers protein, calories, and vitamins for the best trail food choices.

    • Essential for long hikes: macronutrients (protein, carbs, fats) and micronutrients (vitamins, minerals).
    • High-calorie foods like nuts, seeds, energy bars, jerky, and trail mix are excellent for sustained energy.
    • DIY energy bars and trail mix can be made at home with oats, nuts, honey, fruit.
    • Opt for lightweight, high-energy foods for backpacking; prepare with dehydration and portion control.
    • Vegan and vegetarian hikers should focus on protein-rich foods like nuts, beans, and whole grains.
    • Use sustainable packaging and preserve foods via dehydration for multi-day hikes.
    • To avoid wildlife encounters, use bear canisters and proper food hanging techniques.
    • Budget-friendly meals include pasta, rice, oats, homemade granola bars, and buying ingredients in bulk.
    • No-cook meals and soaking methods like cold-soaking oats or lentils are practical for trails.

    Hungry on the trail? Choosing the right food can make or break your hike. You need meals that pack energy, taste good, and won’t weigh you down. Whether you’re crossing steep hills or long distances, your body craves nutrients to keep going. In this guide, I’ll share top trail food picks that are both delicious and nutritious, ensuring every step you take is fueled by the best. Let’s dive in and transform your backpack into a hiker’s pantry that caters to adventure!

    What Are Essential Nutrients Needed for Long Hikes?

    When you pack food for long hikes, think nutrition. You need protein-rich foods, carbs, and fats. These are called macronutrients. They give you the power to climb hills and walk far. Things like nuts, seeds, and energy bars can help. For proteins, take jerky or nut butter. Want a quick boost? Try calorie-dense hiking snacks like trail mix or chocolate.

    Understanding Macronutrients: Proteins, Carbs, Fats

    Proteins build muscle. Carbs give quick energy. Fats give long energy. Your body needs all three when you hike. Choose snacks that mix these well. For carbs, dried fruit or oatmeal bars are great. For fats, pack some cheese or almonds. This combo keeps you strong on the trail.

    Importance of Micronutrients: Vitamins and Minerals

    Your body also needs things like vitamins and minerals. They help keep you healthy. Foods like fruits and veggies are full of them. But on the trail, you can’t always take fresh stuff. So, dried fruits or veggie chips can be good. They are light to carry and last long.

    Calorie Requirements for High-Energy Activities

    Hiking needs lots of energy. You burn more calories when you are active. So, eat more than you do on a usual day. This means more nuts, grains, and cheese. Packing calorie-dense hiking snacks means you get more fuel without more weight.

    Breakfast Ideas to Start Your Hiking Day Strong

    Your day starts with breakfast. It sets you up for hours of walking. High-energy breakfasts for hikers can be like oatmeal with nuts and honey. It’s tasty and fills you up. Add some dried berries for extra flavor and a vitamin boost.

    Remember, packing smart means you get to hike strong!

    How Can You Make Your Own Trail Mix at Home?

    Selecting the Right Ingredients for Energy

    Here are some of our favorite ingredients for homemade trail mix, most of them being natural foods.

    Steps for Making Homemade Energy Bars

    Mix oats, nuts, honey, and fruit. Press, chill, cut. Now you have DIY energy bars for hiking!

    Ingredients:
    • 1 cup rolled oats
    • 1/2 cup almond butter
    • 1/4 cup honey or maple syrup
    • 1/4 cup chopped nuts (such as almonds, walnuts, or cashews)
    • 1/4 cup dried fruits (such as raisins, cranberries, or chopped dates)
    • 1/4 cup seeds (such as chia seeds, flax seeds, or sunflower seeds)
    • 1/4 cup unsweetened shredded coconut
    • 1/2 teaspoon vanilla extract
    • A pinch of salt
    Instructions:
    1. Preheat your oven to 350°F (175°C) and line a square baking dish with parchment paper.
    2. In a large mixing bowl, combine the rolled oats, almond butter, honey or maple syrup, chopped nuts, dried fruits, seeds, shredded coconut, vanilla extract, and a pinch of salt. Mix well until all the ingredients are evenly combined.
    3. Transfer the mixture to a lined baking dish and press it down firmly using the back of a spoon or your hands to create an even layer.
    4. Place the baking dish in the preheated oven and bake for about 15-20 minutes, or until the edges turn golden brown.
    5. Remove the baking dish from the oven and let it cool completely. Once cooled, transfer the dish to the refrigerator and let it chill for at least 1-2 hours to allow the bars to firm up.
    6. Once the bars are chilled and firm, remove them from the refrigerator and carefully lift the parchment paper to remove the whole batch from the dish.
    7. Place the batch on a cutting board and use a sharp knife to cut it into individual bars of your desired size.

    Storage Tips for Homemade Trail Snacks

    Store the homemade energy bars in an airtight container or wrap them individually in plastic wrap for easy grab-and-go snacks. They can be kept at room temperature for up to a week or stored in the refrigerator for longer freshness.

    Customizing Recipes for Dietary Restrictions

    You can always add or leave out some ingredients to suit your own needs. And, there are plenty of diet-specific substitutes available, many of them being natural and just as healthy for you.

    Since everyone has their own very specific needs, the best way to go is to do a little of your own research to make sure the ingredients you use are compatible with your dietary needs.

    What Portable Backpacking Recipes Require No Cooking Equipment?

    What to cook on trail? Best backpacking meals need no heat, just ingredients. For quick, easy meals, think about no-cook recipe ideas for backpackers. You can use simple foods that are ready to eat or need little prep.

    No-Cook Recipe Ideas for Backpackers

    Try nut butters, like peanut or almond, on whole grain bread. It’s easy and full of good energy. Or wrap cheese and veggies in a tortilla. You get calories and taste without cooking.

    The Art of Cold-Soaking Meals on the Trail

    Did you know some hikers soak food in water to “cook” it? This cold-soaking method works for oats, couscous, and lentils. It’s simple: mix food and cold water in a jar, then wait. After a few hours, it’s ready to eat!

    Tips for Preparing and Packing No-Cook Foods

    Pick foods that won’t spoil, like dried fruits, nuts, and seeds. They’re light to carry and keep you going. Pack them in zip bags or containers to stay fresh. And always remember to bring clean water or a way to filter it.

    Hydration-Focused Recipes for Long Hikes

    Water is key on any hike. For tasty hydration, add fruit bits to your water bottle. Choose oranges or berries for a natural sweet drink. And keep an eye on how much you drink, to stay safe and healthy all day.

    How Do You Choose and Prepare Lightweight Hiking Foods?

    What are the best trail foods? Foods that are light, high in energy, and easy to pack. Look for snacks that won’t weigh you down but will keep you going strong on the trail.

    Criteria for Selecting Lightweight Foods

    Choose dry foods since they’re less heavy than wet foods. Go for high-calorie foods to help you stay energized. Whole-grain pasta, rice, and jerky are great. Nuts, seeds, and dried fruits are perfect for a quick energy boost.

    Preparing and Dehydrating Your Meals

    Dry your own meals to cut weight and save space. You can dehydrate meats, fruits, and veggies. Dehydrated foods last long and rehydrate well on the trail. This also lets you know exactly what’s in your food.

    Meal Planning for Ultralight Backpacking

    Need a 7-day backpacking meal plan? Pick meals you can cook with one pot. Pasta, oatmeal, and instant rice save space and fuel. Write down your meals to make sure you have enough food. Remember to plan for extra snacks.

    Portion Control and Packing Strategies

    Measure your food for each meal. This ensures you pack enough without extra weight. Repack food into zip-top bags. They’re lighter than original packaging and help with portion control. Label each meal for convenience.

    In your quest for lightweight hiking foods, aim for high-calorie, dry items. Prepare by dehydrating your meals and planning carefully. Portion control is key – it saves space and weight. Use these tips for a lighter pack and a happier hike.

    What Are the Best Vegan and Vegetarian Options for Trekking?

    Good trail foods for vegans and vegetarians have plenty of protein. Think nuts, seeds, and beans. You can make creative vegan meals for your hike easily. Tasty wraps with hummus, veggies, and brown rice are one example. They are full of energy and taste great cold.

    Protein is key for vegetarian backpackers. You can find it in foods like lentils, chickpeas, and quinoa. Mix these with other foods to make complete proteins. This means they have all the amino acids your body needs.

    When packing plant-based foods, keep them cool and dry. This helps them last longer. An insulated bag can help, especially for fresh produce.

    If you have food allergies, plan ahead to make allergen-free meals. Use separate containers for different foods. This avoids cross-contamination. You can enjoy a safe, allergy-friendly trek.

    Remember, good food means a better hike. Eat well and enjoy the trail!

    How Do You Preserve Trail Food for Multi-Day Hikes?

    When you’re on a multi-day hike, keeping your food good is key. One way is dehydrating food for trails. This pulls moisture out so food weighs less and lasts longer. Fruits, veggies, and meats work well for this. You can even make full meals that just need water on the trail.

    Here’s how you dehydrate food: First, cut it into small pieces. This helps dry it out fast. Spread these on a dehydrator tray, set your dehydrator to the recommended temp, and wait. It’s done when it feels hard and no wet spots show.

    Pack dehydrated foods in tight, waterproof bags or containers. This keeps air and moisture out. For preserving homemade trail food, vacuum sealing is best. It locks in freshness and fights off bacteria.

    Take calorie-dense hiking snacks too. Nuts, seeds, and dried fruit give you quick energy without taking up much room. Look for snacks with lots of calories in small amounts. These help fuel you for those tough trail climbs.

    Keep all your food safe by storing it right. Use bear-proof containers in bear areas and hang food up high when you rest. Always seal it up tight to keep animals and bugs away. Following these steps can stop food spoilage and keep you safe on the trail.

    What Sustainable Packaging Options Are Available for Trail Food?

    Good trail foods are meals and snacks that boost energy and are easy to carry. To pack these foods, choose materials that won’t harm our earth. Use containers that you can use many times. Buy in large amounts to cut down on trash. Hike with care for nature, and always clean up your mess.

    Reusable food containers are great for the planet. They can be steel boxes, cloth bags, or tough plastic that lasts. We can use them again and again for many hikes. This cuts down on waste and keeps our trails clean.

    It’s smart to prepare lots of meals at once. This means buying less packaging overall. It’s easier to hike without trash, and better for the world too. When we pack our food in bulk, we save time and help the earth.

    We must hike without leaving a trace. That means taking all our trash home. Use food packs that don’t make much mess. We need to keep the wild places wild and clean. This is part of the Leave No Trace Principles. Remember these ideas for a fun and green hike!

    How Can You Safely Store Food to Prevent Wildlife Encounters?

    Safety tips for trail food? Use bear canisters and hang food high above ground. These practices keep snacks safe from wild animals. Always store food away from your sleeping area. This can stop animals from sniffing around your tent. On multi-day hikes, storing food right matters a lot. It can keep bears and other critters at bay.

    For storing food, choosing the right bear canisters is key. They are like a safe for your snacks. Bear-proof bags are lighter but still strong. Canisters and bags keep smells in so bears can’t find your food. Before your hike, find out what works best in the area you’ll be hiking in.

    Hanging food is a smart move in bear country. Use a rope to lift your food bag between trees. Aim for 12 feet up and 5 feet from tree trunks. This way, bears can’t reach or pull it down.

    Making your food smell less is smart too. Use odor-proof bags when you pack. These help hide smells that can lure animals. Check that every bit of food is inside before you hit the trail.

    Remember these steps and you’ll sleep sound knowing your food – and you – are safe from curious bears and other wildlife.

    What Are Some Budget-Friendly Backpacking Meal Options?

    When planning for a hike, budget-friendly backpacking meals are key. They save you cash and make sure you have enough food. Look for meals that cost less but still give you the energy you need.

    Cost-Effective Meal Planning for Hikers

    The best trail food is both cheap and filling. Think pasta, rice, and oats. These pack light and won’t cost much. You can buy them in big bags to save even more. Add spices or dried veggies to make them tasty.

    Kid-Friendly Trail Food That Won’t Break the Bank

    Kids need food they’ll like that’s good for them too. Peanut butter, granola bars, and trail mix are great. They are the best trail food for kids because they’re tasty and won’t spoil fast. Plus, making them at home can help you cut costs.

    Nutritious and Affordable Homemade Meals

    What to cook on trail? Use simple ingredients to make your own meals. Mix dried beans, rice, and seasonings for a simple but power-packed dish. Homemade means you know what’s in your food, and it’s often cheaper than store-bought.

    Smart Shopping Tips for Trail Food Ingredients

    A good budget backpacking nutrition plan starts with smart shopping. Look for sales on dried fruits, nuts, and whole grains. Buy in bulk if you can. This will save you money and you can use them in lots of different meals. Remember, eggs and potatoes are also cheap and full of nutrients.

    When you hit the trail with these meals, you’ll hike without the worry of high food costs!

    Conclusion

    We’ve walked through key tips to keep your fuel tank full on long hikes, from tasty breakfasts to make-ahead trail mixes. Remember, energy-packed ingredients are your friends on the trail. Prep meals ahead and choose lightweight options to make your load lighter. For those avoiding meat or dairy, we provided plant-powered picks too. Keep meals fresh and safe with smart packing tricks. And don’t forget to store food right to avoid furry visitors. With these ideas, not only will you save money, but you’ll also enjoy delicious, nutritious bites every step of your adventure. Happy trails!

    Loading


  • A hyperrealistic mountain camping scene that captures the essence of adventure and solitude.

    What Essentials Do I Need for Mountain Camping?

    Essentials for mountain camping? Get the ultimate checklist and survival tips for your next adventure.

    • Essential mountain camping gear: weatherproof tent, cold-resistant sleeping bag, sturdy backpack, map/compass/GPS, layered clothing, boots, power banks/solar chargers, water purification, whistle, mirror, and bear spray.
    • Campsite selection tips: Seek flat ground, avoid sharp objects, use natural windbreaks, opt for seclusion, check for permits, consider RV parks for amenities, and use online maps for best spots.
    • Safety measures: Prepare for altitude sickness, bear-proof food storage, smart camp setup away from hazards, equipped first aid kit, keep a safe distance from wildlife, and adhere to fire safety rules.
    • Cooking advice: Use durable cooking tools, plan easy-to-make and hearty meals, be ready for sudden weather changes, choose appropriate stove fuel, and wear layers for warmth.
    • Must-visit Smoky Mountains attractions: Clingmans Dome, Cades Cove, trails with panoramic views, lakes for fishing, natural hot springs, mountain caves, and hammock-friendly trees.
    • Eco-conscious camping: Follow Leave No Trace principles, reduce waste, use established campsites, source firewood responsibly, and engage in trail preservation volunteering to protect the environment.

    Heading out to the mountains? Don’t start your adventure without a solid plan! In this must-read guide, I’ll share essential tips to make sure you have all the gear for a safe and awesome mountain camping trip. From the checklist to the gear, you’ll learn what you need to pack, how to stay hydrated, and how to keep safe. Get your boots ready and let’s dive into what you need to make your mountain escape unforgettable!

    What Essentials Are Needed for Mountain Camping?

    Let’s dig into the crucial gear for mountain camping. First off, what should you not leave without? You need a proper tent, a sleeping bag suitable for cold nights, and a sturdy backpack. Throw in a map, compass, or GPS device for good measure. This stuff is your lifeline out there.

    The Comprehensive Mountain Camping Checklist

    A thorough mountain camping checklist is step one. It should include your tent, sleeping gear, food supplies, and tools. Don’t forget a first aid kit—accidents happen. Always double-check your list before heading out.

    Selecting Weatherproof Camping Equipment for High Altitudes

    Gear that stands up to wind and rain is vital for high places. Aim for a tent that says “weatherproof” on the label. It means cozy nights instead of wet, windy ones.

    Essential Alpine Camping Gear: What to Pack

    High up in the mountains, the air gets thin and cold. Your gear needs to handle this. Pack layers of clothes, and make sure your boots can grip rocky trails.

    Off-grid Camping Essentials for Self-sufficiency

    Going off the grid? Power banks and solar chargers are a must. Bring water purification tools too. You need to drink safe, clean water to stay sharp.

    Hydration Tips for Camping at Elevation

    At high elevations, your body loses water fast. Drink often, even if you’re not thirsty. Use streams and lakes to refill, but always purify the water first. Dehydration is a real danger up high.

    Survival Tips: Staying Safe in the Wilderness

    When out in the wild, let someone know where you’ll be. Learn how to signal for help. Pack a whistle, mirror, and bear spray just in case. These items are small, but they can save your life.

    Backpacking Gear Essentials for Mountain Terrain

    Quality backpacking gear should be light but tough. Your pack, poles, and shoes carry you forward. They should be up to the challenge of rough mountain trails. Choose gear that feels like part of you. This way, the mountain feels less like an obstacle and more like home.

    Remember, any adventure starts with being well-prepared. Your gear is your best friend on the mountain, so pick wisely and respect the wilderness you’re stepping into. Happy trails!

    How Do I Choose a Campsite in the Mountains?

    Can you camp in Colorado’s Rocky Mountains? Yes, you can! But you need to know how to pick a good spot. To set up a good wilderness campsite, look for flat ground. You need space to sleep and eat without tipping over! Check the ground for sharp things or big rocks. You don’t want a stick poking you at night. Are there trees around? They can block the wind. That makes your fire safe and keeps you warm.

    Choose secluded mountain campsites for quiet and peace. Look online or ask local hikers where you can find them. You might hike a bit more, but it’s worth it!

    For family fun, find places with clean water and space for games. If you plan to stay in a national park, you might need a camping permit. Get it early so you don’t miss out. Visit park websites or call their offices for help on how to apply.

    RV parks have nice stuff like showers and toilets. But they can be busy. Wilderness spots have less noise but fewer comforts.

    If you want to make sure you have privacy, don’t camp right on the trail or too close to others. Hide your tent with bushes and trees if you can.

    Use mountain camping maps to help you find the best spots. Online maps can show where to find these places and how to get there. They give you a lot of useful info.

    There you have it. Picking the right spot is big in making your camp trip great. Remember, good camps have flat ground, are nice and quiet, and keep you safe. Happy camping!

    What Safety Precautions Should I Take When Mountain Camping?

    When mountain camping, safety is key. Prepare for possible sickness due to high heights. Getting sick from thin air can happen fast. Look for headaches, dizziness, or trouble with sleep. These signs mean you need to take it easy. Start at lower heights and slowly climb. Drink water and rest well too.

    Protect yourself in bear lands. Learn what to do if you see bears. Make noise when you hike. Carry bear spray. Keep food safe in bear-proof boxes. Never keep food in your tent. Store it far away from where you sleep. This will keep the bears from coming close to you.

    Set up camp safely and smart. Choose a place away from lone trees. Storms can make them a risk. Look for flat ground. Keep clear from paths that water could flow through. This will help keep your tent dry if it rains hard.

    Always have a first aid kit. Fill it with bandages, gauze, tape, and creams for cuts. Painkillers can help with sore muscles. And don’t forget things for tummy troubles. A good kit can fix many problems.

    Watch wildlife from a safe spot. Do not get too close. Use binoculars to see animals from far away. Stay in groups. Most wild animals will stay away from big groups of people.

    Be smart with fires. Only use fire rings in camping spots. Put out fires with water until the ashes are cool. Follow rules about when and where you can make fires. This helps to stop wildfires.

    Bears want your food, so you must store it right. Use bear boxes, poles, or canisters to keep your food safe. Bears can’t get in them. This keeps both you and the bears from harm.

    How Do I Cook and Eat Properly in a Mountain Environment?

    You might ask, “Can you camp anywhere in the Smoky Mountains?” The short answer is no. You must camp at designated sites or shelters.

    Cooking in the mountains needs the right tools and food. You’ll want campfire cooking essentials that can handle open flames. This means a sturdy grill grate, pots, and pans made for the heat. Don’t forget a metal spatula and tongs!

    Mountain camping cuisine can be both tasty and simple. Think of meals that are filling and can fuel your hikes. Quick pasta, beans, rice, and canned veggies work well. They’re light to carry and easy to cook.

    Some campsites have barbecue facilities that you can use. Be sure to clean up after so you leave it ready for the next person! And always check fire rules before you light up that grill.

    Mountain weather can switch fast. You need to be ready to cook in wind, rain, or cold. A windshield for your stove can be a lifesaver. Pack for all weather to stay comfy while you cook.

    The right clothing helps a lot, especially in cold weather camping. Layers work best so you can put on or take off as needed. A warm hat and gloves can make cooking outside nicer.

    What about your stove? The type of fuel is key. Some work better in cold or high places. Propane and isobutane are good choices for many trips. They are easy to find and use.

    So, gear up, plan your meals, and get ready for a mountain feast!

    What Are the Must-Visit Natural Attractions for Mountain Campers?

    When you camp in the Smoky Mountains, you find many natural draws. The best natural attractions for campers in the Smoky Mountains include Clingman Dome and Cades Cove. Clingmans Dome stands as the highest point in the park, where you can see over 100 miles on clear days. Cades Cove offers lush valleys, wildlife viewing, and historic buildings. Aside from these, you might want to try out a few other must-visits:

    Top Smoky Mountains Natural Attractions for Campers

    Here, you’ll see tons of trees and feel like you’re on top of the world. There are also spots to fish, hike, and take photos you’ll never forget.

    Discovering Peaceful Mountain Vistas

    Look for trails that lead up high—it’s worth it. You’ll find spots so quiet, it’s just you and the sound of the wind.

    Ideal Spots for Scenic Photography: Peaks and Panoramas

    Search for peaks like Mount LeConte. They give you wide views perfect for those epic sunrise and sunset shots.

    Lakes like Abrams or Fontana are full of trout. Get there early or at dusk for the best fishing.

    Etiquette for Enjoying Natural Hot Springs

    If you find hot springs, always keep them clean. Waiting your turn and being quiet lets everyone enjoy the peace.

    Exploring Mountain Caves: Recommendations

    Caves tell stories of the mountains. Alum Cave and Tuckaleechee Caverns are great spots. Don’t forget your light and helmet.

    Best Locations for Hammock Camping Among the Trees

    Trees are everywhere, so it’s easy to find two perfect ones for hammock camping. Just make sure your hammock doesn’t harm the trees.

    Nature gives us these spots to enjoy but remember to treat them right. Pack out your trash, leave what you find, and keep the noise down so these places stay beautiful for all.

    How Can I Be Eco-Conscious While Camping in the Mountains?

    Camping in the mountains is great. But we must think about nature too. We can camp without hurting the land. How? Let’s dig in.

    Embracing Eco-Friendly Camping Practices

    First, leave things as you find them. Do not make new spots for tents. Use what is already there.

    Implementing Leave No Trace Principles

    To leave no trace, take all trash with you. And do not take things from the wild. Keep nature clean and pure for others.

    Engaging in Sustainable Camping Initiatives

    Next, help protect the wild. Join groups that keep camping green. They do great work to save our lovely outdoors.

    Responsible Firewood Sourcing: Do’s and Don’ts

    Be smart with firewood. Do not cut living trees. Use dead wood or buy it locally. This keeps forests healthy and safe.

    Best Practices for Campsite Waste Disposal

    For waste, have a plan. Pack it out so nothing is left behind. Carry bags for trash and recycle what you can.

    How to Get Involved in Nature Trail Preservation Volunteering

    Want to do more? Help mend trails. Giving time keeps paths clear and saves plants along the way. It’s good for you, too.

    We can all camp the right way. Let’s keep the mountains great. Little acts make a big change. Let’s do this together!

    Conclusion

    In this post, we explored key tips for mountain camping, like picking the right gear and staying safe. We covered everything from creating a solid camping checklist to cooking in the wild. We also looked at how to find great spots and keep nature clean. Remember, good prep is key to enjoying the mountains safely and responsibly. Use what you’ve learned here to make your next outdoor adventure the best one yet!

    Loading


  • Mesmerizing photo of a hiker equipped with winter gear navigating icy trails.

    Winter Hiking Safety: What Are the Non-Negotiable Essentials?

    Struggling with winter hiking safety? This guide details essentials, tips for beginners, and how to stay secure in the cold.

    • Winter hiking essentials: warm layers, signaling devices (whistles, mirrors), navigation tools (map and compass), and modified first aid kit (with thermal blankets, and hand warmers).
    • Preparation includes checking trails and weather, creating an itinerary, and getting physically fit.
    • Prevent hypothermia by dressing in layers, staying dry, and eating high-calorie foods; prevent frostbite by keeping skin covered and warm.
    • Navigation: use a map, compass, and GPS (with spare batteries), be aware of reduced visibility from winter darkness, and inform others of your plan.
    • Ice hiking: wear the right footwear (with crampons) and walk carefully.
    • Hydration/nutrition: drink regularly (using insulated flasks) and eat high-calorie snacks that won’t freeze.
    • Layering clothing: moisture-wicking base, insulating middle, wind-blocking outer layer.
    • Wildlife: maintain a distance and understand animal tracks; avalanches: know the risks and survival techniques.
    • Signaling in emergencies: visual (flares) and audio (whistles) devices, consider rescue insurance.
    • Advanced survival skills: fire-starting, shelter building, maintaining body heat, staying active, and consuming high-energy food and water.

    Are you ready to brave the chill and conquer the trails this winter? Before you step into the snowy wonderland, gear up with non-negotiable winter hiking essentials! Learn to layer like a pro, signal for help in emergencies, and navigate through icy landscapes. Here’s your guide to staying safe and enjoying every frosty step. Let’s get you prepped for an adventure where only the essentials make the cut!

    What Should You Include in Your Winter Hiking Safety Essentials?

    What are the non-negotiable items for winter hiking safety?
    The must-haves are warm layers, signaling devices, navigational tools, and a winter-ready first aid kit.

    Can beginners learn about winter hiking safety essentials?
    Yes, beginners can learn about winter hiking safety essentials with proper research and guidance.

    Learning to dress in layers is key. Start with a base layer that wicks sweat away. Add an insulation layer to keep warmth in. Top it off with a shell to block wind and wet. Materials like wool or synthetics work best as they keep you warm even when damp.

    Always carry a signaling device. This can be a whistle or a mirror, which you use to alert rescuers if you get lost.

    Bring navigational tools. A map and a compass are must-haves because GPS can fail in cold or remote areas.

    Change your first aid kit for winter. Add items like thermal blankets and hand warmers to deal with the cold. Don’t forget about extra meds and bandages as well.

    Be wise and well-equipped. It can make all the difference when braving the cold, wild outdoors.

    How Do You Prepare for a Winter Hike?

    Before a winter hike, you must check the trail and weather. Make sure to make an itinerary. You need to be fit and strong to hike in the cold.

    To answer “What should be done before embarking on a winter hike?” — know the trail, look up the weather, plan your route, and train your body. A winter hiking checklist should include gear for warmth, safety, and navigation.

    For a solid start, study the path you’ll take. Trail conditions can change fast in winter. Ice and snow may cover the ground. This makes it hard to walk. Knowing this, you can bring the right gear, like snowshoes or crampons.

    Always keep an eye on the weather forecasts. This can help you dodge bad storms. When the sky turns mean, it’s time to pack extra warm gear or change your plans.

    Your trip plan — or itinerary — is key. You should know how long you will hike each day. Let someone know this plan. If trouble hits, they will know where to look for you.

    And don’t forget your body needs to be ready. Winter hiking is tough. Start getting fit now with walks and strength training. This way your muscles can handle the extra work of hiking in the snow.

    So gear up, plan well, and get fit! This way you stand the best chance against Old Man Winter’s tricks.

    What Techniques Can Prevent Hypothermia and Frostbite?

    The best practices to prevent hypothermia include dressing warmly, staying dry, and eating high-energy foods. For frostbite, keep the skin covered and warm.

    Now, let’s jump into the details. Hypothermia prevention is critical. It happens when your body loses heat faster than it can make it. This can make your heart and nervous system shut down. To stop this, layer up. Start with a moist-wicking fabric close to your skin. Then add an insulating layer, like fleece, to trap warmth. The outer layer should block wind and wetness. This could be a waterproof, breathable jacket.

    For frostbite first aid, you need to act fast if your skin looks white or numb. Gently warm the area in warm water, not hot, for up to 30 minutes. Don’t rub the skin or walk on frostbitten feet, if that’s the case. After warming, wrap the area in a clean cloth for protection. If frostbite seems bad, get to a doctor as soon as possible.

    Thermal regulation techniques are key to staying safe. Move around to keep blood flowing but don’t sweat too much, as it can make you cold later. Drink plenty of fluids to stay hydrated. This might seem odd in the cold, but it’s vital. Eat energy-rich foods like nuts and energy bars. These foods help your body make heat.

    Remember, in cold weather, drink water and munch on snacks often. Keep your energy up so you stay warm. Use these tips to stay toastier out in the wild winter!

    What Are the Best Navigation Strategies in Winter Conditions?

    Navigation aids you should rely on during a winter hike include a map and compass, as well as GPS devices. Winter darkness affects trail navigation by reducing visibility, which makes it hard to stay on track.

    Let’s break that down. Always carry a map and compass. Know how to use them in case your tech fails. GPS devices are good but not perfect. They need power and a signal to work. Learn the land before you go. Marks on trees or big rocks can help when trails vanish under snow.

    Darkness comes early in winter. This means less time to hike in daylight. Good lights can help you see the trail in the dark. Still, it’s best to plan hikes to finish before night. Or know the trail well if you must hike in dark hours.

    Remember, tech can break or lose power in the cold. Carry spare batteries to stay safe. Always let someone know your hike plan too. This way, they can help if you get lost. Be ready for whiteouts. These are snow storms you can’t see through. If caught in one, find shelter. Wait until you can see well again before moving on.

    Using the right tools and knowing your limits keeps you safe. Stay on top trails and enjoy winter wonders with care.

    What Are the Necessary Ice Hiking Techniques?

    How can one safely hike over ice? Walk flat-footed and use gear that grips. To safely hike over ice, you need the right footwear and careful steps. It’s like you’ve got a secret power against slips. Ice hiking techniques include knowing how to walk and using tools for extra grip. A crampon usage guide helps a lot.

    What is the proper use of crampons and other ice hiking gear? Attach them snugly and step with care. Crampons need to fit your boots just right. You strap or clip them on so they won’t slip off. Once they’re on, you take slow, steady steps. Slip-resistant footwear for ice helps, too. Boots with deep grooves bite into the ice. They keep you standing when the ground tries to trip you up.

    To make sure you stay safe, always check if the ice is solid enough to walk on. For crampons, follow a step-by-step guide. It’s super important to get them on right. For footwear, choose boots made for ice. Look for ones with great grip and that keep your feet warm. Remember, safe ice hiking is all about being steady and prepared.

    How Can You Stay Hydrated and Nourished During Winter Hikes?

    What are the risks and solutions for hydration in cold weather? In cold weather, you don’t feel as thirsty. But you still need water to keep warm and energized. The answer is to drink often, even if you’re not thirsty. Use an insulated flask to keep your water from freezing.

    What food should be consumed on winter hikes? Choose high-calorie snacks. They give you energy and help your body stay warm. Foods that won’t freeze are best, like nuts or energy bars.

    Hydration is key when you hike in the cold. Your body loses water through sweat and breath. It can trick you because you might not feel like drinking. However not drinking enough can lead to dehydration. That’s why it’s important to take breaks and sip water, even when not thirsty.

    Insulating your water bottles or using containers designed for winter can keep your water in liquid form. Pack hot drinks in a thermos, and take sips regularly to add warmth and energy to your body.

    Now, let’s talk eats. What you scoff down during your hike can make or break your day. Winter hiking food ideas circle around high-calorie snacks. We need these calories to fuel our bodies in the cold. Think nuts, seeds, cheese, and chocolate. They pack a lot of energy and are less likely to freeze.

    Planning meals? Go for simple-to-make and eat foods. Good choices could be peanut butter sandwiches or pasta that can stay edible even in cold temps. Remember, food can stiffen or freeze. So, pack items that you can eat without much fuss, even when cold.

    To keep your food from freezing, store it close to your body. Body heat helps. Also, choose packaging that is easy to open with gloves on. You don’t want to struggle with tiny zips in the cold.

    Hydration and proper food are non-negotiable. They keep you going strong on winter trails. Remember, cold weather hydration and munching on those high-calorie snacks could save your hike and your health. Drink up, chow down, and hit the snowy trails with confidence.

    What Clothing Layers Are Essential for Winter Hiking?

    How should hikers layer for winter conditions? In short: with care. Use moisture-wicking base layers to keep sweat off your skin. Pick wool or synthetic materials. They work best. Add insulation layers to trap body heat. Use fleece or goose down for this. Your wind chill protection layer matters too. It keeps biting winds at bay.

    Base layers work like a second skin. They should pull sweat away from your body. This keeps you dry and warm. Materials like polyester or merino wool are top-notch choices for base layers. Why? Because they’re super at managing moisture and keeping you toasty.

    Now, let’s talk about the middle layer. It’s all about trapping air to keep you warm. For milder days, a light fleece works. When the mercury drops, you’ll want heavier insulation. Think puffy, insulated jackets.

    Wind chill can turn a hike into a risky business. That’s where your outermost layer comes in. It must block wind and let sweat escape. This way, you keep the chill out without getting damp from inside. Jackets with vents are great. They offer an extra way to control your body’s warmth.

    Remember this: Dressing right is your first step to a safe winter hike.

    How to Deal with Wildlife and Stay Safe in the Snow?

    The best way to deal with wildlife in winter is to watch from afar. Give animals space. To avoid avalanches, look for signs and follow trails. Animal tracks in the snow tell you what’s nearby.

    Safety tips for common wildlife encounters in snowy regions

    Always watch wildlife from a safe spot. Do not try to feed them. Loud noises can help scare them away if they get too close. Know which animals live in your hiking area. Some might be sleeping in winter, but others are still out.

    Basic avalanche safety measures every hiker should know

    Avalanches are serious. Learn about them before your hike. Check local reports for risk levels. Hiking in groups is safer. Avoid risky areas like steep slopes. If caught in an avalanche, try to swim to stay on top.

    How to identify and interpret animal tracks in the snow

    Animal tracks in snow share tales of who passed by. Look for clear, fresh tracks to see recent activity. Deer tracks have two parts and are pointed. Bear paw prints are big with claw marks. If you see many tracks together, it might be a group, and you should be careful. Remember, some tracks lead to food, but it’s not ours to take. Always keep your own safety in mind.

    What Emergency Signaling Should You Carry in Snow?

    What emergency signaling should you carry in the snow? Always have both visual and audio signaling devices. Flares and whistles are key.

    Snow hides you well. If you get stuck, you need a strong signal. A flare can be seen from afar. It tells people where you are. The bright light stands out against the snow. But flares are not toys. Only use them in real trouble. They show you need help fast.

    Carry a whistle, too. Sound travels far in quiet snow. Three short blows mean you’re in danger. Keep blasting, someone should hear.

    Is it worth getting rescue insurance before a winter hike? Yes, it’s smart. Rescue insurance can save your money and life. If a rescue team must come, the cost is high. Insurance pays for that. Always hope you don’t use it, but be glad if you do.

    Rescue teams work hard in bad snow. They help injured or lost hikers. When you have to call for help, you won’t have to worry about money. Your focus stays on staying safe. That peace of mind is worth the fee.

    What Advanced Winter Survival Skills Should a Hiker Know?

    The key survival skills for winter hiking are fire-starting, shelter-building, and maintaining body heat. To stay warm during activities in freezing temperatures, keep moving. This helps your body make its own heat.

    Fire-starting in wet conditions can be tough. But it’s key to warm up and dry clothes. You’ll need waterproof matches or a lighter, and dry kindling. In the snow, build a platform with logs. This stops the fire from sinking.

    For shelter, dig into the snow. A snow cave keeps you warm and out of the wind. Use a tarp and branches to make a quick lean-to. Always block the wind and stay dry.

    Building stamina for winter hikes means being active. Start with short hikes and go longer as you get stronger. Work on your legs and core. It makes hikes easier and keeps you warm. Always eat high-energy foods and drink water. Even if it’s cold, your body needs it to make heat and energy.

    In summary, master fire-making, build a strong shelter, stay active, eat well, and keep hydrated. These skills will keep you safe and warm on winter trails.

    Conclusion

    In this post, we’ve dug deep into what you need for safe winter hikes. Layer your clothes, carry a map, compass, and GPS for those tricky trails. Know how to spot frostbite and keep warm. Got crampons? Learn to use them right, and choose boots that grip the ice. Pack foods that give you power and won’t turn into ice blocks. Keep water handy so it doesn’t freeze. Meet wildlife? Stay calm and know your safety steps. And don’t forget, signal devices and rescue insurance—they’re big deals. Out there, with the right skills and gear, you’re set to enjoy and conquer the cold!

    Loading