Category: Hiking


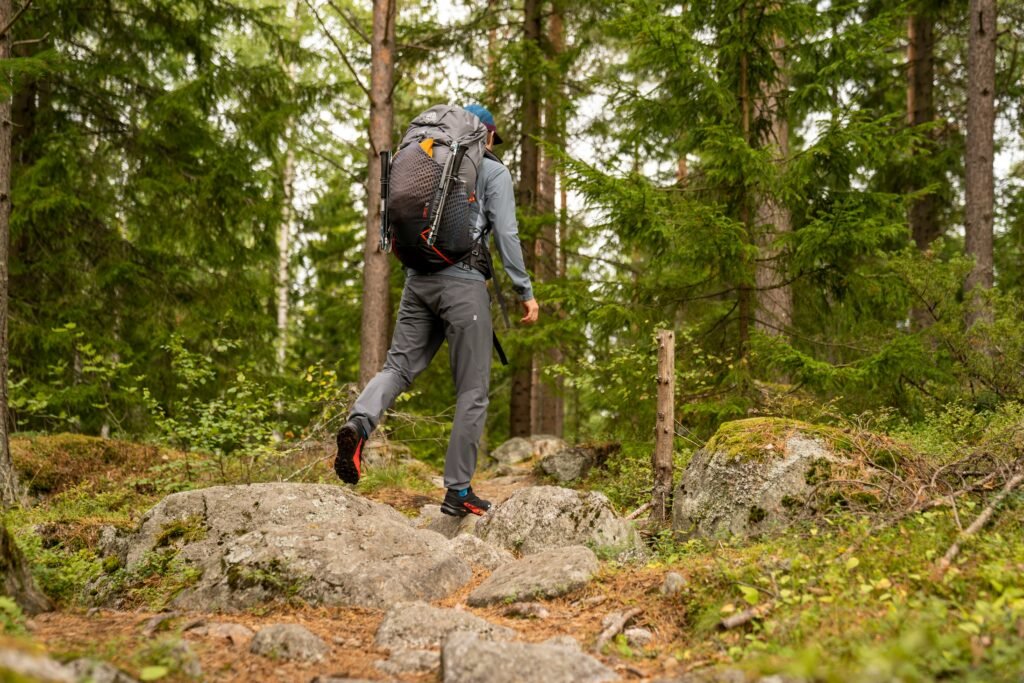
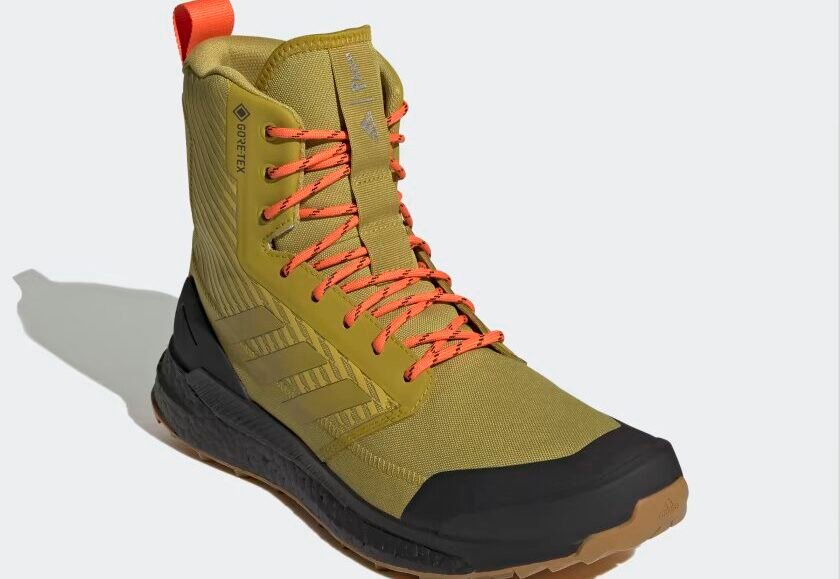
  • Welcome to this comprehensive review of the Adidas Terrex Free Hiker XPL GTX hiking boots. As an expert in outdoor performance gear, I will provide you with an objective assessment of these boots, highlighting their features tailored for hiking enthusiasts. Whether you’re a seasoned hiker or a beginner looking for reliable footwear, this review will help you make an informed decision.

    Design and Aesthetics

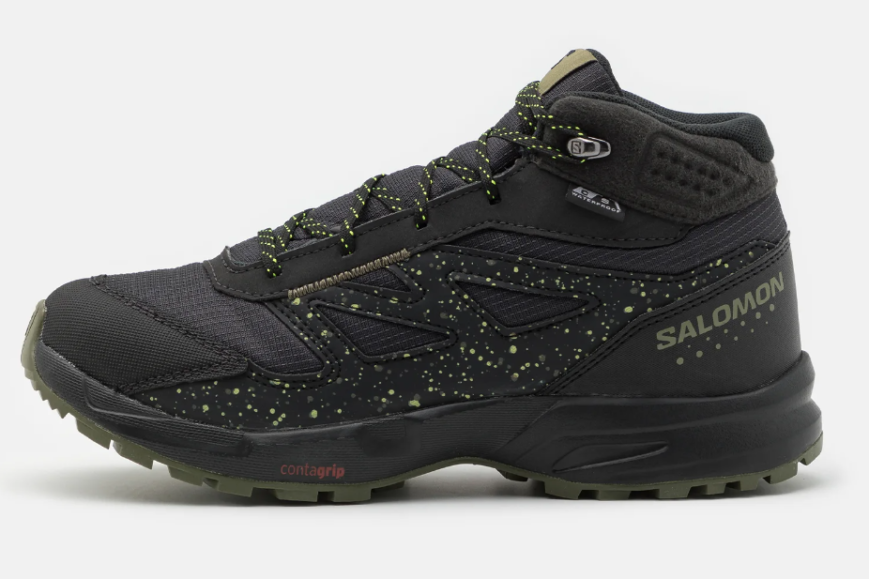
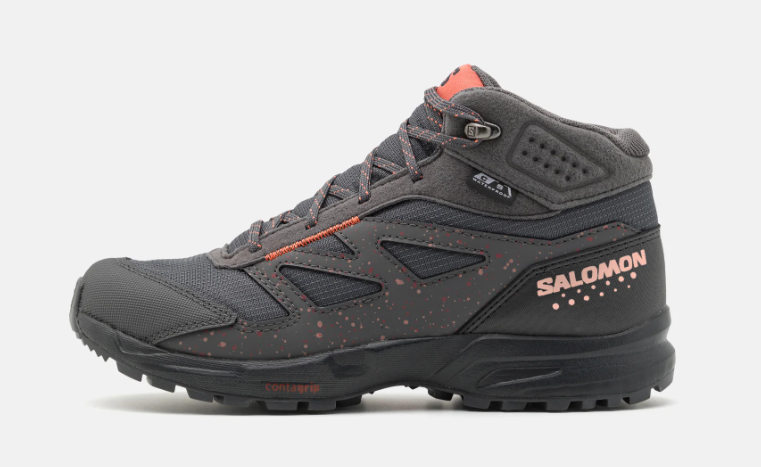
    The TERREX FREE HIKER XPL GTX hiking boots boast a sleek and modern design that combines style with functionality. Available in a range of attractive color options, these boots are sure to catch the eye of outdoor enthusiasts. The design seamlessly blends into the outdoor gear market, making them a fashionable choice for any hiking adventure.

    Key Features

    Materials and Construction

    The TERREX FREE HIKER XPL GTX hiking boots are crafted using high-quality materials. The textile upper provides durability and flexibility, allowing for natural foot movement. The rubber outsole offers excellent traction on various terrains, ensuring stability and grip during hikes.

    GORE-TEX Technology

    One of the standout features of these boots is the GORE-TEX membrane, which provides exceptional waterproofing and breathability. This technology allows your feet to stay dry and comfortable, even in wet conditions, while still allowing moisture to escape.

    Boost Midsole

    The Boost technology incorporated into the midsole of these boots offers superior energy return and cushioning. This means that every step you take is supported and comfortable, reducing fatigue during long hikes.

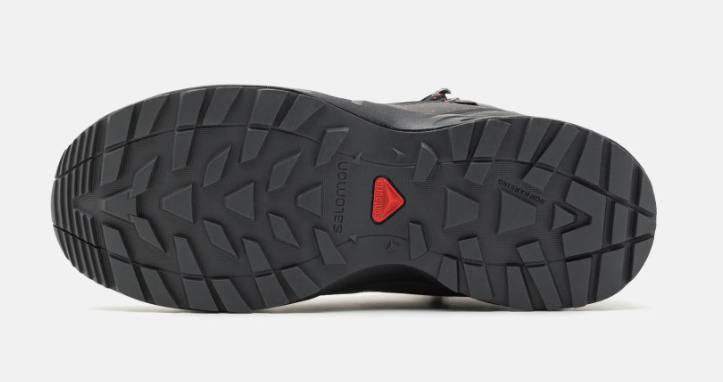
    Continental Rubber Outsole

    The Continental rubber outsole is designed to provide exceptional grip and durability. It ensures reliable traction on both wet and dry surfaces, giving you the confidence to tackle any terrain.

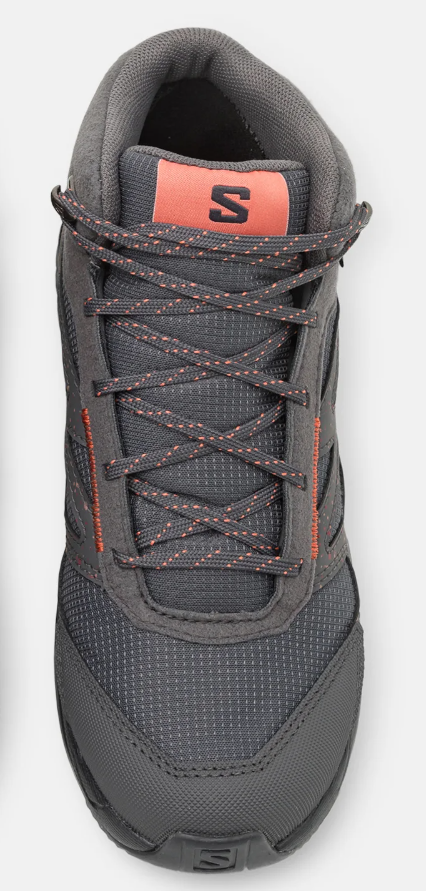
    Sock-like Construction

    The sock-like construction of the TERREX FREE HIKER XPL GTX hiking boots offers a snug and supportive fit. This design feature enhances comfort and stability, reducing the risk of blisters and foot fatigue.

    Comfort and Fit

    Initial Comfort

    Right out of the box, these boots provide impressive comfort. The combination of the sock-like construction, Boost midsole, and supportive upper ensures a pleasant wearing experience from the first step.

    Break-in Period

    While some hiking boots require a break-in period, the TERREX FREE HIKER XPL GTX boots are designed to minimize this. Users report minimal discomfort during the initial use, allowing you to hit the trails without delay.

    Fit and Sizing

    When it comes to fit and sizing, it is recommended to choose your regular shoe size. However, it’s worth noting that some users have found these boots to run slightly larger or smaller, so it’s advisable to try them on before making a purchase.

    Performance

    Traction

    The traction provided by the TERREX FREE HIKER XPL GTX boots is exceptional. Whether you’re navigating muddy trails, rocky terrains, or wet surfaces, these boots offer reliable grip, ensuring stability and confidence with every step.

    Stability and Support

    Ankle support and overall stability are crucial factors in hiking boots, and the TERREX FREE HIKER XPL GTX does not disappoint. The design provides excellent stability, reducing the risk of ankle injuries, and allowing you to tackle challenging trails with ease.

    Waterproof Performance

    The GORE-TEX lining in these boots effectively keeps your feet dry, even in wet weather conditions. Whether you encounter rain or step into puddles, you can trust that your feet will remain comfortable and protected.

    Breathability

    Despite their waterproofing capabilities, these boots also excel in breathability. The GORE-TEX membrane allows moisture and heat to escape, preventing your feet from becoming sweaty and uncomfortable during active use.

    Versatility

    The TERREX FREE HIKER XPL GTX boots are highly versatile, suitable for various types of hiking and outdoor activities. Whether you’re embarking on day hikes, multi-day treks, or even trail running, these boots can handle it all.

    Durability

    Material Wear

    With regular and intensive use, the materials of these boots hold up remarkably well. The textile upper and rubber outsole exhibit excellent durability, ensuring that these boots will accompany you on many adventures.

    Signs of Wear and Tear

    While the overall durability is commendable, some users have reported early signs of wear and tear, particularly in high-stress areas such as the toe box. However, it’s important to note that these instances are relatively rare and may vary depending on individual usage patterns.

    Use Cases

    Ideal Terrain and Conditions

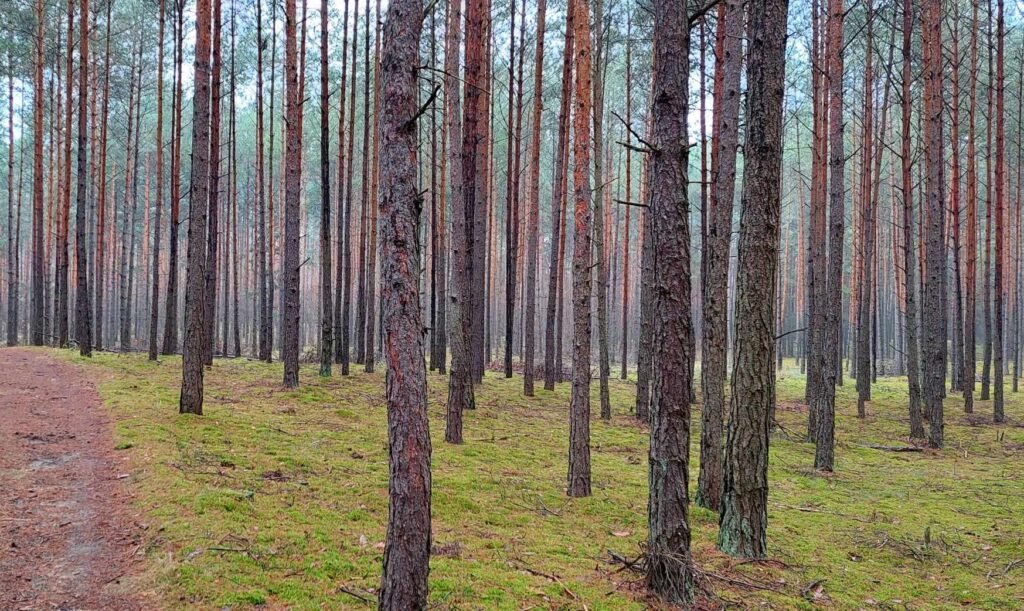
    The TERREX FREE HIKER XPL GTX boots excel in a variety of terrains, including muddy trails, rocky surfaces, and wet conditions. They are particularly well-suited for hikers who enjoy exploring diverse landscapes and encountering different weather conditions### Seasonal Use

    These boots are suitable for year-round use, adapting well to different seasons. Whether you’re hiking in the heat of summer or traversing snowy trails in winter, the TERREX FREE HIKER XPL GTX boots provide the necessary comfort, support, and protection.

    Pros and Cons

    Comparison with Other Models

    When compared to similar models from other brands, the TERREX FREE HIKER XPL GTX hiking boots hold their own. The combination of comfort, traction, waterproofing, and breathability sets them apart from the competition, making them a top choice for outdoor enthusiasts.

    Price vs. Value

    In terms of price, the TERREX FREE HIKER XPL GTX boots fall within the mid to high range. Considering the quality of materials, innovative features, and overall performance, these boots offer excellent value for money. They are a worthwhile investment for those seeking reliable and durable hiking footwear.

    Conclusion

    To conclude, the TERREX FREE HIKER XPL GTX hiking boots by Adidas are a standout choice for outdoor enthusiasts. With their stylish design, exceptional comfort, reliable traction, and waterproofing capabilities, these boots are a reliable companion on any hiking adventure. While there may be minor sizing inconsistencies and occasional signs of wear and tear, the overall performance and value make them a top contender in the hiking boot market.

    Whether you’re a seasoned hiker or a beginner looking for reliable footwear, the TERREX FREE HIKER XPL GTX boots are worth considering. They provide the necessary support, comfort, and durability to tackle various terrains and weather conditions. Invest in these boots and embark on your next hiking journey with confidence.

    FAQs

    Q. Are the TERREX FREE HIKER XPL GTX boots true to size?

    Yes, the boots generally run true to size. However, it’s recommended to try them on before purchasing, as some users have reported minor sizing inconsistencies.

    Q. Do the boots require a break-in period?

    While some hiking boots require a break-in period, the TERREX FREE HIKER XPL GTX boots are designed to minimize this. Users have reported minimal discomfort during the initial use, allowing for immediate use on the trails.

    Q. Can these boots handle wet conditions?

    Absolutely! The GORE-TEX lining in these boots provides excellent waterproofing, keeping your feet dry even in wet weather conditions.

    Q. Are the boots suitable for year-round use?

    Yes, the TERREX FREE HIKER XPL GTX boots are versatile and suitable for year-round use. They adapt well to different seasons and weather conditions.

    Q. How durable are these boots?

    These boots are built to last. With regular and intensive use, the materials hold up remarkably well, ensuring they will accompany you on many adventures. However, occasional signs of wear and tear may occur in high-stress areas, although these instances are relatively rare.

    Loading


  • Salomon is a renowned brand known for its exceptional outdoor gear, catering to the needs of outdoor enthusiasts and adventurers. In this review, we will delve into the Salomon Outway hiking boots, analyzing their design, features, performance, durability, practicality, and overall value. Whether you’re an avid hiker or a beginner looking for reliable footwear, this review aims to provide you with all the necessary information to make an informed decision.

    Pros

    • Exceptional waterproof capabilities keep your feet dry in wet conditions.
    • Reliable traction and grip on various surfaces.
    • Comfortable fit with ample cushioning and ankle support.
    • Lightweight design enhances mobility and reduces fatigue.
    • Durable construction ensures long-term use.

    Cons

    • May require a break-in period for optimal comfort.
    • Some individuals may find the sizing to be slightly narrow.

    Design and Aesthetics

    The Salomon Outway hiking boots boast a sleek and modern design that combines functionality with style. These boots are available in a range of attractive color options, allowing hikers to choose a pair that suits their personal preferences. The attention to detail in the design, such as the contrasting stitching and Salomon branding, adds to the overall aesthetic appeal of the boots.

    Key Features

    Material Composition and Build Quality

    Salomon prioritizes quality in their products, and the Outway hiking boots are no exception. Crafted with premium materials, these boots offer durability and longevity. The combination of high-quality leather and synthetic materials ensures that the boots can withstand the rigors of various hiking terrains.

    Waterproof Capabilities

    One of the standout features of the Salomon Outway hiking boots is their exceptional waterproofing capabilities. Constructed with advanced waterproof technology, these boots keep your feet dry and comfortable even in wet and rainy conditions. The waterproof membrane effectively repels water while allowing moisture to escape, preventing your feet from becoming sweaty and uncomfortable.

    Sole Technology and Traction Design

    The Outway hiking boots feature Salomon’s innovative Contagrip sole technology, which provides excellent traction on a variety of surfaces. Whether you’re traversing wet rocks, loose soil, or slippery trails, these boots offer reliable grip and stability. The multidirectional lugs on the outsole enhance traction, ensuring a secure footing in challenging terrains.

    Lacing System Specifics and Ease of Use

    Salomon has incorporated a user-friendly lacing system into the Outway hiking boots. The Quicklace system allows for easy and quick adjustment, ensuring a secure and customized fit. With a single pull, you can tighten the laces and achieve the desired level of comfort and support. The lace pocket on the tongue keeps the laces neatly tucked away, preventing them from snagging on branches or rocks during hikes.

    Weight and Mobility

    The weight of hiking boots plays a crucial role in determining the overall mobility and comfort during long hikes. The Salomon Outway hiking boots strike a balance between durability and lightweight design. These boots are surprisingly lightweight, allowing for effortless movement and reduced fatigue. Whether you’re embarking on a day hike or a multi-day backpacking trip, the lightweight nature of these boots enhances your overall hiking experience.

    Comfort and Fit

    Initial Fit and Comfort

    From the moment you slip your feet into the Salomon Outway hiking boots, you’ll notice the exceptional comfort they provide. The boots offer a snug and supportive fit, cradling your feet and providing ample cushioning. The padded collar and tongue contribute to the overall comfort, preventing discomfort and chafing during long hikes.

    Break-in Period

    Like most hiking boots, the Salomon Outway boots require a break-in period to achieve optimal comfort. During the initial uses, you may experience some stiffness, but as you continue to wear them, the boots gradually mold to the shape of your feet, ensuring a personalized fit. It is recommended to wear them for shorter hikes or walks before embarking on longer adventures.

    Fit Accuracy

    The Salomon Outway hiking boots generally run true to size, providing an accurate fit for most individuals. However, it is advisable to try them on before purchasing, as personal preferences and foot shapes may vary. If you have wider feet or prefer a roomier fit, sizing up may be a suitable option. Conversely, those with narrow feet may consider sizing down for a snugger fit.

    Performance

    Traction and Grip

    When it comes to hiking boots, reliable traction is essential for navigating various terrains. The Salomon Outway hiking boots excel in this aspect, providing exceptional grip on different surfaces. Whether you’re hiking on wet rocks, loose soil, or steep inclines, these boots offer reliable traction, minimizing the risk of slips and falls.

    Stability and Support

    The Outway hiking boots prioritize stability and ankle support, ensuring a secure and confident stride. The mid-cut design provides ample ankle support, reducing the risk of sprains and injuries. The boots’ overall stability allows hikers to tackle challenging terrains with ease, providing a sense of confidence and control.

    Durability

    Durability is a crucial factor to consider when investing in hiking boots. The Salomon Outway hiking boots are built to withstand the demands of rugged outdoor environments.

    These boots exhibit exceptional durability, withstanding mud, rain, and other environmental conditions without compromising their performance. The high-quality materials and solid construction ensure that these boots can withstand the test of time, making them a reliable companion for countless hiking adventures.

    Waterproofing Effectiveness

    The waterproof capabilities of the Salomon Outway hiking boots are truly impressive. Even in heavy rain or wet conditions, these boots keep your feet dry and comfortable. The waterproof membrane effectively repels water, preventing it from seeping into the boots. This feature is particularly valuable for hikers who frequently encounter wet or damp terrains during their adventures.

    Breathability

    Proper moisture management is essential for maintaining comfort during extended hikes. The Salomon Outway hiking boots excel in breathability, allowing for efficient moisture and heat management. The breathable materials and ventilation channels prevent excessive sweating and keep your feet cool and dry, even during intense physical activity.

    Salomon Outway Tread

    Durability

    Long-Term Durability

    The long-term durability of the Salomon Outway hiking boots is exceptional. These boots are designed to withstand the rigors of regular use and extended hiking trips. The high-quality materials and solid construction ensure that they hold up well even after extensive wear. Whether you’re a casual hiker or a seasoned adventurer, these boots are built to last.

    Wear and Tear Characteristics

    During the testing period, the Salomon Outway hiking boots exhibited minimal wear and tear. The durable materials and reinforced stitching contribute to their longevity. However, it is important to note that proper care and maintenance, such as regular cleaning and conditioning, are essential for maximizing the lifespan of any hiking boots.

    Quality of Materials and Construction

    Salomon is renowned for its commitment to quality, and the Outway hiking boots exemplify this dedication. The materials used in the construction of these boots are of the highest caliber, ensuring durability and performance. The attention to detail in the construction, such as reinforced toe caps and sturdy eyelets, further enhances their overall quality and longevity.

    Practicality for Different Hiking Scenarios

    The Salomon Outway hiking boots are versatile and suitable for various hiking scenarios. Whether you’re embarking on a short day hike or a multi-day backpacking trip, these boots offer the necessary features and performance to meet your needs. Their stability, traction, and durability make them ideal for mountainous terrains, while their comfort and breathability ensure a pleasant experience on forest trails.

    Comparative Analysis

    When comparing the Salomon Outway hiking boots to other similar hiking boots in the market, several distinctive features set them apart. The exceptional waterproofing capabilities, combined with their comfortable fit and reliable traction, make them a top choice for outdoor enthusiasts. Additionally, the attention to detail in the design and the overall durability of these boots make them a standout option in their category.

    Price vs. Value

    The Salomon Outway hiking boots are competitively priced considering their features, performance, and durability. While they may be slightly higher in price compared to some other hiking boots on the market, the value they offer is well worth the investment. These boots provide long-term durability, reliable performance, and exceptional comfort, making them a worthwhile purchase for avid hikers and outdoor enthusiasts.

    Conclusion

    In conclusion, the Salomon Outway hiking boots are a top-notch choice for outdoor adventurers seeking reliable footwear. With their exceptional waterproof capabilities, reliable traction, and durable construction, these boots are designed to withstand the demands of various hiking terrains.

    The comfortable fit, breathability, and overall performance make them a reliable companion for both short hikes and extended backpacking trips. If you’re looking for hiking boots that prioritize quality, comfort, and performance, the Salomon Outway hiking boots are an excellent choice.

    Loading


  • Hiking Safely Near Bears

    Hiking through bear country can be an exhilarating experience, offering a connection to nature and wildlife that’s both humbling and majestic. However, it’s crucial to respect and understand the power and unpredictability of bears in the wild. This comprehensive guide should help equip you with the necessary knowledge of basic bear safety, and strategies to hike safely through bear habitats, ensuring your outdoor adventures remain memorable for all the right reasons.

    TL;DR

    • Understand Bear Behavior: Know the types of bears (grizzly, black, polar) and their behaviors, including feeding patterns, mating and motherhood, territory, and seasonal activities like hibernation and hyperphagia.
    • Preparing for Your Hike: Research bear activity in the area, carry bear spray, noise-making devices, and bear-proof containers, wear appropriate clothing to minimize scent.
    • On the Trail: Make noise to alert bears, hike in groups, select trails with good visibility, be vigilant for bear signs, and handle food properly to avoid attracting bears.
    • If You Encounter a Bear: Assess the bear’s behavior, recognize warning signs, stand your ground or back away slowly, and use bear spray if necessary. If attacked, play dead with grizzlies or fight back with black bears.
    • After an Encounter: Report it to authorities, share your experience to educate others, and reflect on the encounter to improve future hiking practices.
    • Conclusion: Practice bear safety to protect yourself and conserve wildlife, ensuring a safe and respectful coexistence with bears in their natural habitat.

    With increasing human-bear encounters due to expanding recreational activities and habitat encroachment, the importance of bear safety cannot be overstated. Whether you’re a seasoned hiker or setting out on your first wilderness trek, this article will serve as an essential resource on bear behavior, preventative measures, and steps to take during a bear encounter.

    Understanding Bear Behavior

    Types of Bears Encountered in North America

    When hiking through bear country in North America, there are three main types of bears you may encounter:

    • Grizzly Bears: Grizzly bears, also known as brown bears, are found in various regions of North America, including Alaska, western Canada, and parts of the United States. They are known for their large size and distinctive shoulder hump.
    • Black Bears: Black bears are the most common bear species in North America. They can be found in forests across the continent, from Alaska to Florida. Despite their name, black bears can range in color from black to brown, cinnamon, or even blonde.
    • Polar Bears: Polar bears are primarily found in the Arctic regions of North America, including Alaska and Canada. They are well-adapted to the cold climate and are known for their white fur and excellent swimming abilities.

    Bear Biology and Behavior

    To hike safely through bear country, it’s essential to understand the biology and behavior of bears. This knowledge will help you anticipate their actions and make informed decisions to avoid potential conflicts. Here are some key aspects of bear behavior:

    Feeding Patterns

    Bears are omnivorous creatures, meaning they eat both plant matter and meat. Their diet can vary depending on the season and availability of food sources. While bears primarily feed on vegetation, they can also consume small mammals, fish, and carrion.

    Mating and Motherhood

    Bears have a specific mating season, which varies depending on the species and location. During this time, male bears compete for the attention of female bears. Once a female bear mates, she enters a period of delayed implantation, where the fertilized egg does not immediately attach to the uterus. Cubs are typically born during the winter months while the mother is in hibernation.

    Territory and Range

    Bears are territorial animals and have a defined home range that they defend against other bears. The size of their territory can vary depending on factors such as food availability and population density. Bears mark their territory through scent marking and other visual cues.

    Seasonal Considerations

    Understanding the seasonal behavior of bears is crucial for hiking safely through bear country. Here are two important seasonal considerations:

    Hibernation and Hyperphagia

    In regions where bears hibernate, they enter a state of dormancy during the winter months. Before hibernation, bears undergo a period of hyperphagia, where they consume large amounts of food to build up fat reserves. This behavior is essential for their survival during hibernation.

    Spring Awakening

    As winter ends and spring arrives, bears emerge from their dens and begin searching for food. This period is known as the spring awakening. Bears are particularly active during this time as they replenish their depleted energy reserves.

    Fall Foraging

    In preparation for the upcoming winter, bears engage in intense foraging during the fall. They consume large quantities of food to build up fat reserves for hibernation.

    Preparing for Your Hike

    Before embarking on a hike through bear country, proper preparation is key to ensuring your safety. Here are some essential steps to take:

    Research and Awareness

    Research the specific area you plan to hike in and familiarize yourself with any recent bear activity reports. This information will give you insights into bear behavior and potential risks in the area. Additionally, be aware of any local regulations or advisories regarding bear encounters.

    Hiking Gear Essentials

    Having the right gear can significantly enhance your safety while hiking through bear country. Here are some essential items to include in your hiking gear:

    • Bear Spray: Bear spray is a highly effective deterrent against bear attacks. It should be easily accessible and carried in a holster on your belt or backpack strap. Familiarize yourself with how to use bear spray correctly before your hike.
    • Noise-Making Devices: Carrying noise-making devices, such as bells or whistles, can help alert bears to your presence and reduce the risk of surprising them.
    • Bear-Proof Containers: When camping in bear country, it’s important to store your food and toiletries in bear-proof containers. These containers are designed to prevent bears from accessing your supplies, reducing the likelihood of attracting them to your campsite.
    • Clothing and Scent Reduction: Wearing appropriate clothing can help minimize your scent and make you less appealing to bears. Opt for neutral colors and avoid wearing strong-smelling perfumes or lotions.

    On the Trail: Preventative Measures

    While on the trail, there are several preventative measures you can take to minimize the risk of bear encounters. These measures include:

    • Making Your Presence Known: Bears are more likely to avoid humans if they are aware of their presence. Make noise while hiking, especially in areas with limited visibility, to alert bears to your presence.
    • Hiking in Groups: Hiking in a group is generally safer than hiking alone. Bears are less likely to approach a larger group of people, reducing the risk of an encounter.
    • Avoiding Surprise Encounters: Be aware of your surroundings and avoid surprising bears. Make noise, especially in areas with dense vegetation or around blind corners.
    • Trail Selection and Visibility: Choose well-traveled trails with good visibility. Avoid hiking in areas with dense vegetation or limited sightlines, as these can increase the chances of surprising a bear.
    • Being Alert at All Times: Stay vigilant and keep an eye out for signs of bear activity, such as tracks, scat, or overturned rocks. If you notice signs of recent bear activity, adjust your route if possible.
    • Proper Food Handling: Properly handling and storing food is crucial to minimize the risk of attracting bears to your campsite. Follow guidelines for cooking and eating away from your camp and store food and toiletries in bear-proof containers.

    If You Encounter a Bear

    Despite taking preventative measures, there is still a possibility of encountering a bear while hiking. Here’s what to do if you come face-to-face with a bear:

    • Identifying Bear Behavior: Assess the bear’s behavior to determine if it is defensive or non-defensive. Defensive bears may exhibit signs of stress or aggression, while non-defensive bears may appear calm and uninterested.
    • Warning Signs: Bears may display warning signs if they feel threatened. These signs include huffing, jaw popping, or swaying from side to side. If you observe these behaviors, the bear may be feeling stressed or agitated.
    • Appropriate Responses: The appropriate response to a bear encounter depends on the bear’s behavior and the situation. In general, it’s best to:
      • Standing Your Ground: If the bear is defensive but not charging, stand your ground and speak calmly to the bear. Back away slowly and avoid turning your back on the bear.
      • Slowly Backing Away: If the bear is non-defensive, slowly back away while keeping an eye on the bear. Avoid sudden movements or running, as this may trigger a chase response.
      • When to Use Bear Spray: If a bear charges or attacks, use bear spray as a last resort. Aim for the bear’s face and deploy the spray in short bursts.
      • What to Do in an Attack: In the rare event of a bear attack, the appropriate response depends on the species:
        • Playing Dead with Grizzlies: If attacked by a grizzly bear, play dead by lying flat on your stomach with your hands clasped behind your neck. Spread your legs to make it harder for the bear to flip you over.
        • Fighting Back with Black Bears: If attacked by a black bear, fight back aggressively. Use any available objects as weapons and aim for the bear’s face and sensitive areas.

    After an Encounter

    After a bear encounter, it’s important to take the following steps:

    • Reporting to Authorities: Report the bear encounter to the appropriate authorities, such as local park rangers or wildlife agencies. Provide them with detailed information about the encounter, including the location, time, and bear behavior.
    • Importance of Sharing Your Experience: Sharing your bear encounter experience with others can help raise awareness and educate fellow hikers about bear safety. It can also contribute to ongoing research and conservation efforts.
    • Providing Detailed Information: When sharing your experience, provide as much detail as possible. This includes the bear’s behavior, your response, and any factors that may have contributed to the encounter.
    • Reflecting and Learning: Take time to reflect on the bear encounter and analyze your actions. Consider how you can adjust your future hiking practices to minimize the risk of future encounters.

    Conclusion

    The wilderness is a shared space where humans can coexist with majestic creatures like bears. By hiking responsibly and adopting bear safety practices, we not only protect ourselves but also contribute to the conservation of these magnificent animals. Armed with knowledge and preparedness, we can make every hike through bear country a safe and awe-inspiring journey.

    Loading


  • When it comes to backpacking, having a reliable and versatile knife is essential. Whether you’re hiking, trekking, or backpacking, a good knife can be a valuable tool in various situations. But with so many options available, which one should you choose, a folding knife or a fixed blade knife? In this article, we will explore the differences between these two types of knives and help you make an informed decision on which one is best for your backpacking adventures.

    Understanding the Basics

    Folding Knives

    Folding knives, also known as pocket knives, are designed with a pivot mechanism that allows the blade to fold into the handle. These knives are compact and easy to carry, making them popular among backpackers. They typically have a locking mechanism to keep the blade securely in place when in use.

    In backpacking, folding knives are versatile tools that can be used for various tasks such as cutting ropes, preparing food, or even starting a fire. They are lightweight and take up minimal space, making them ideal for those who prioritize weight and space considerations in their backpacking gear.

    Fixed Blade Knives

    On the other hand, fixed blade knives have a blade that extends from the handle without any folding mechanism. These knives are known for their strength, durability, and reliability. They are commonly used in more demanding backpacking scenarios, such as bushcraft or survival situations.

    Fixed blade knives excel in tasks that require more force, such as batoning wood or performing heavy-duty cutting tasks. They are also easier to clean and maintain compared to folding knives. However, due to their larger size, they may take up more space and add weight to your backpack.

    Factors to Consider When Choosing a Backpacking Knife

    When deciding between a folding knife and a fixed blade knife for backpacking, several factors should be taken into consideration:

    Purpose and Type of Tasks

    Think about the specific tasks you expect to perform with your knife during your backpacking trips. Are you mainly looking for a knife to handle basic cutting tasks like food preparation and rope cutting? Or do you anticipate needing a knife for more demanding tasks like wood processing or self-defense? Understanding your intended use will help you determine which type of knife is best suited for your needs.

    Weight and Space Considerations

    Backpacking often requires careful consideration of weight and space limitations. If you prioritize minimizing weight and saving space, a folding knife may be the better option. These knives are generally lighter and more compact than fixed blade knives. However, if you value the added strength and durability of a fixed blade knife, you may be willing to sacrifice a bit of weight and space.

    Durability and Reliability

    In rugged backpacking environments, durability and reliability are crucial. Fixed blade knives are generally considered to be more durable and reliable due to their solid construction and lack of moving parts. Folding knives, while still durable, may have more potential points of failure due to their folding mechanism. Consider the conditions in which you will be backpacking and choose a knife that can withstand the demands of your adventures.

    Ease of Use and Accessibility

    When it comes to ease of use and accessibility, folding knives have the advantage. They can be easily opened with one hand and are generally more user-friendly. Fixed blade knives, on the other hand, require a sheath for safe storage and may take a bit more time and effort to access. Consider your preference for quick and easy access versus the added security and stability of a fixed blade knife.

    Safety Concerns

    Safety should always be a top priority when choosing a backpacking knife. Folding knives with a reliable locking mechanism can provide added safety by preventing accidental closure during use. Fixed blade knives, while lacking a folding mechanism, require proper sheathing and handling techniques to ensure safe use. Consider your comfort level with each type of knife and choose the one that aligns with your safety preferences.

    Maintenance and Care

    Proper maintenance and care are essential for the longevity of your backpacking knife. Folding knives may require more frequent cleaning and lubrication to ensure smooth operation of the folding mechanism. Fixed blade knives, on the other hand, are generally easier to clean and maintain due to their simpler design. Consider your willingness to invest time and effort into maintaining your knife and choose accordingly.

    Legal Considerations for Carrying Knives

    Before purchasing a backpacking knife, it’s important to familiarize yourself with the legal regulations regarding knife carry in your specific region. Different countries and even states may have varying laws and restrictions on the length and type of knives that can be carried. Ensure that you choose a knife that complies with the legal requirements of your backpacking destinations.

    In-Depth Comparison

    Now that we have explored the basics and factors to consider, let’s dive deeper into the specific pros and cons of folding knives and fixed blade knives for backpacking.

    Folding Knives

    Folding knives offer several advantages for backpackers:

    • Portability: Folding knives are compact and easy to carry, making them convenient for backpacking trips where space is limited.
    • Versatility: These knives can handle a wide range of tasks, from basic cutting to more intricate tasks like food preparation.
    • Safety: Folding knives often come with a locking mechanism that keeps the blade securely in place during use, reducing the risk of accidents.
    • Accessibility: Many folding knives can be opened with one hand, allowing for quick and easy access when needed.

    However, there are also some drawbacks to consider:

    • Durability: The folding mechanism of these knives introduces potential points of failure, and the moving parts may require more frequent maintenance.
    • Strength: Folding knives may not be as strong as fixed blade knives, making them less suitable for heavy-duty tasks.
    • Cleaning: The folding mechanism can make cleaning and maintenance more challenging compared to fixed blade knives.

    When choosing a folding knife for backpacking, consider the following features:

    • Blade Steel: Look for high-quality blade steel that offers good edge retention and corrosion resistance, such as stainless steel or carbon steel.
    • Lock Type: Different folding knives use various locking mechanisms, including liner locks, frame locks, and lockbacks. Choose a lock type that provides secure blade locking during use.

    Fixed Blade Knives

    Fixed blade knives also have their own set of advantages:

    • Strength and Durability: Fixed blade knives are generally stronger and more durable than folding knives, making them suitable for heavy-duty tasks.
    • Easy Maintenance: With no moving parts, fixed blade knives are easier to clean and maintain.
    • Reliability: These knives are less prone to mechanical failure, providing a reliable tool in demanding backpacking situations.
    • Sheath Quality: Fixed blade knives often come with high-quality sheaths that offer secure storage and quick access when needed.

    However, there are a few considerations to keep in mind:

    • Size and Weight: Fixed blade knives are typically larger and heavier than folding knives, which may impact your overall backpacking gear weight and space.
    • Accessibility: You will need a sheath to carry a fixed blade knife safely, which may require additional effort to access the knife when needed.
    • Legal Restrictions: Fixed blade knives may be subject to stricter legal regulations in some regions, so be sure to check the laws before carrying one.

    When choosing a fixed blade knife for backpacking, consider the following features:

    • Full Tang: Look for knives with a full tang construction, where the blade extends through the entire handle. This provides added strength and durability.
    • Blade Shape: Different blade shapes, such as drop point, clip point, or tanto, offer varying advantages for different tasks. Choose a blade shape that suits your specific needs.
    • Sheath Design: Consider the quality and functionality of the sheath, ensuring it provides secure storage and easy access.

    Situational Considerations

    To further guide your decision, consider the specific situations and backpacking styles you may encounter:

    Match the Knife to Your Backpacking Style

    Different backpacking styles may require different knife types. Consider the following:

    • Ultralight Backpacking: If you prioritize minimizing weight, a folding knife may be more suitable for your ultralight gear setup.
    • Bushcraft and Survival: In scenarios where you anticipate heavy-duty tasks like wood processing or building shelters, a fixed blade knife’s strength and durability may be preferable.

    Environmental Factors

    Environmental conditions can also influence your knife choice:

    • Wet Conditions: If you expect to encounter wet environments or need a knife for water-related tasks, consider a knife with corrosion-resistant materials.
    • Cold Weather: In cold weather, folding knives may be more prone to freezing or becoming difficult to operate. Fixed blade knives are generally more reliable in such conditions.

    Duration and Nature of the Trip

    The length and nature of your backpacking trip can impact your knife choice:

    • Short Trips: For shorter trips where weight and space are less critical, you may opt for a fixed blade knife for its added strength and versatility.
    • Long Expeditions: On longer expeditions, where durability and reliability are paramount, a fixed blade knife may be the better choice.

    User Experience and Ergonomics

    Consider the following aspects of user experience and ergonomics when choosing a backpacking knife:

    • Handling and Comfort: Look for a knife with a handle that feels comfortable in your hand and provides a secure grip, even in wet or slippery conditions.
    • One-Handed Operation vs. Two-Handed Operation: Folding knives offer the convenience of one-handed operation, while fixed blade knives typically require two hands for use.
    • Grip and Handle Materials: Consider the materials used for the handle, such as rubber, G10, or wood, and choose one that suits your preferences for grip and comfort.

    Technical Specifications

    Understanding the technical specifications of knives can help you make an informed decision:

    Blade Materials and Edge Retention

    Different blade materials offer varying levels of edge retention and corrosion resistance. Common blade materials include stainless steel, carbon steel

    and high-carbon stainless steel. Stainless steel blades are known for their corrosion resistance, making them ideal for outdoor use. Carbon steel blades, on the other hand, are known for their excellent edge retention and are easier to sharpen. Consider your priorities in terms of edge retention and corrosion resistance when selecting a blade material.

    Blade Length and Shape

    The length and shape of the blade can greatly impact its functionality. Longer blades are better suited for tasks that require more reach, such as batoning wood or cutting larger objects. Shorter blades, on the other hand, offer more control and precision for tasks like food preparation or carving. Blade shapes, such as drop point, clip point, or tanto, offer different advantages for specific tasks. Choose a blade length and shape that align with your intended use.

    Handle Design and Materials

    The design and materials of the handle can greatly affect the comfort and grip of the knife. Look for handles that are ergonomically designed and provide a secure grip, even in wet or slippery conditions. Common handle materials include rubber, G10, wood, and synthetic composites. Consider your preferences for grip and comfort when selecting a handle material.

    Overall Size and Weight

    The overall size and weight of the knife can impact your backpacking experience. A compact and lightweight knife is ideal for those who prioritize minimizing weight and saving space. However, if you value the added strength and durability of a larger knife, you may be willing to carry the extra weight. Consider the size and weight of the knife in relation to your backpacking gear and personal preferences.

    FAQ

    Q: Can I carry a folding knife in my backpack while traveling?

    Yes, you can generally carry a folding knife in your backpack while traveling. However, it’s important to familiarize yourself with the legal regulations regarding knife carry in your specific region. Different countries and even states may have varying laws and restrictions on the length and type of knives that can be carried. Ensure that you comply with the legal requirements of your backpacking destinations.

    Q: Are fixed blade knives more durable than folding knives?

    Yes, fixed blade knives are generally considered to be more durable than folding knives. Fixed blade knives have a solid construction with no moving parts, making them less prone to mechanical failure. However, folding knives can still be durable, but their folding mechanism introduces potential points of failure.

    Q: Which type of knife is better for basic cutting tasks like food preparation?

    Both folding knives and fixed blade knives can handle basic cutting tasks like food preparation. However, folding knives offer the advantage of being more compact and easily accessible. They are often designed with a locking mechanism to keep the blade securely in place during use, providing added safety.

    Q: Can I use a folding knife for heavy-duty tasks like batoning wood?

    While folding knives can handle some heavy-duty tasks, they may not be as suitable as fixed blade knives. Fixed blade knives are generally stronger and more durable, making them better suited for tasks that require more force, such as batoning wood or performing heavy-duty cutting tasks.

    Q: How often should I clean and maintain my backpacking knife?

    The frequency of cleaning and maintenance for your backpacking knife will depend on several factors, including the type of knife and the conditions in which it is used. Folding knives with a folding mechanism may require more frequent cleaning and lubrication to ensure smooth operation.

    Fixed blade knives, on the other hand, are generally easier to clean and maintain due to their simpler design. It’s recommended to clean and lubricate your knife regularly, especially after extended use or exposure to harsh conditions.

    Conclusion

    When it comes to choosing between a folding knife and a fixed blade knife for backpacking, there is no definitive answer. Both types of knives have their own advantages and considerations. It ultimately comes down to your personal preferences, intended use, and the specific requirements of your backpacking adventures.

    Consider factors such as purpose, weight and space considerations, durability, ease of use, safety, maintenance, and legal considerations when making your decision. By understanding the differences and considering your specific needs, you can choose the knife that best suits your backpacking style and enhances your outdoor experiences.

    Loading


  • Embarking on a day hike is an exhilarating way to explore the great outdoors, but the right gear can make or break your experience. One of the most critical pieces of equipment is your hiking backpack. It’s your companion carrying all the essentials you need on the trail. For beginner hikers, selecting the perfect daypack can seem overwhelming, but with a few tips, you’ll be ready to hit the trails with confidence. Here’s how to choose a hiking backpack that’s just right for your day-long adventure.

    TL;DR

    • Capacity Considerations: Choose a backpack with a capacity of 10-30 liters based on hike duration, weather, water needs, personal gear, and any special equipment.
    • Size Guidelines: For short hikes, use a 10-20 liter pack. For longer hikes with extra gear, opt for a 20-30 liter backpack.
    • Comfort is Key: Look for backpacks with padded and adjustable shoulder straps, a well-designed hip belt for weight distribution, and a comfortable, ventilated back panel.
    • Proper Fit: Ensure the backpack fits your torso length and has adjustable straps. Women and youth may benefit from specially designed packs.
    • Compartmentalization: Choose backpacks with multiple compartments for organization – a spacious main compartment, accessible top lid/pocket, side pockets for water bottles, and a front pocket for additional storage.
    • Additional Tips: Perform trial runs with packed gear, consider modular packing, invest in scalable backpack options, and balance padding with weight for optimal load distribution.

    Understand Capacity: Size Does Matter

    When you set off on a day hike, the backpack you carry is your lifeline, holding all of the necessities for your journey. The capacity of hiking backpacks is a critical factor to consider, and understanding how to choose the right size can significantly enhance your outdoor experience.

    Capacity Measurement

    The volume of hiking backpacks is generally measured in liters, which indicates the amount of space available inside the pack to store your items. For day hikes, which typically last anywhere from a few hours to a full day, a pack ranging from 10 to 30 liters is usually sufficient, depending on several factors.

    Factors Influencing Backpack Size

    Here are some considerations that can help you decide on the appropriate backpack size for your day hike:

    • Duration of Hike: The length of your hike is a primary factor. A short hike may only require water, a snack, and a few essentials, whereas a longer trek may necessitate additional food, water, and gear.
    • Weather Conditions: Always check the forecast before heading out. If rain or colder temperatures are expected, you’ll need space for rain gear and extra layers of clothing.
    • Water Needs: Hydration is vital. A good rule of thumb is to carry about half a liter of water per hour of moderate activity in moderate temperatures. However, this can vary based on individual needs, weather, and the intensity of the hike.
    • Personal Gear: Consider the space needed for your personal items, such as a camera, a guidebook, a map, a compass, and a first-aid kit.
    • Special Equipment: If you’re planning a hike that involves other activities like bird watching or sketching nature, you may need to carry additional items such as binoculars or a sketchpad.

    Backpack Size Guidelines

    To help you choose, consider the following backpack size guidelines:

    • 10-20 liters: These compact packs are ideal for short, simple hikes lasting a few hours. They have enough space for water, a light snack, basic first aid supplies, and a lightweight jacket or fleece. They’re also a good choice for when you’re hiking in well-maintained trails with easy access to facilities or when you’re familiar with the trail and conditions and can pack very minimally.
    • 20-30 liters: This range is the sweet spot for most day hikers. They offer ample space for extra layers, which is crucial for dealing with changing conditions. There’s also room for a larger water reservoir, additional food, and snacks, as well as room for some nice-to-have items like a camera, a compact pair of binoculars, or a small sit pad. These packs may also include features like hip belts and chest straps for added support, useful when carrying heavier loads.

    Additional Tips

    • Trial Runs: Before committing to a backpack size, it’s a good idea to do a trial run. Pack everything you think you’ll need for your hike and see how it fits in the backpack you’re considering. Adjust the size accordingly.
    • Modular Packing: Some hikers prefer using smaller packs and supplementing with items like waist packs or vests with pockets to distribute weight differently.
    • Scalability: For those who hike frequently under varying conditions, it may be worth investing in two sizes of backpacks to choose from based on the specific hike’s demands.

    Choosing the right capacity for your hiking backpack is a balance between carrying enough to be prepared and not overburdening yourself with unnecessary weight. Take the time to assess your needs and choose a backpack that will carry them efficiently and comfortably, allowing you to focus on the joy of the hike itself.

    Look for Comfort: Fit and Design

    Comfort is indeed paramount when selecting a day hiking backpack. An uncomfortable pack can quickly turn a pleasurable hike into a challenging ordeal. To ensure your backpack won’t hinder your enjoyment of the great outdoors, let’s delve deeper into the key features that contribute to a comfortable fit and design.

    Shoulder Straps

    Shoulder straps are your primary connection to your backpack, so their design is crucial for comfort. Here’s what to look for:

    • Padding: Adequate padding on shoulder straps prevents them from digging into your shoulders. The padding should be firm enough to cushion the load but not so bulky that it becomes cumbersome.
    • Width and Contour: The straps should be wide enough to distribute weight without impinging on your neck or underarm area. An ergonomic, S-shaped contour can help the straps better fit the natural shape of your body.
    • Adjustability: Straps should offer easy adjustability so you can change the fit based on the layers you’re wearing and the load you’re carrying. This helps maintain proper weight distribution and balance throughout your hike.

    Hip Belt

    A hip belt plays a significant role in transferring the weight of the pack from your shoulders to your hips, which are better suited to bear heavier loads. Here’s why a good hip belt is important:

    • Load Transfer: A well-designed hip belt should wrap comfortably around your iliac crest—the upper part of your hip bones—and should be adjustable to ensure the majority of the pack’s weight (up to 80-90%) is supported by your legs and hips, not your back and shoulders.
    • Padding: Just like with shoulder straps, the padding on the hip belt should be sufficient to cushion your hips without causing discomfort or restricting movement.
    • Stabilizer Straps: Many hip belts come with stabilizer straps that enable you to adjust the load closer to your body, improving balance and control.

    Back Panel

    The back panel is the part of the backpack that rests against your back, and it can significantly affect your comfort level. Consider these aspects:

    • Padded Back Panel: Some backpacks feature padding with channels or ridges that promote airflow and offer cushioning. This can prevent the pack from pressing uncomfortably against your spine.
    • Ventilated Back Panel: Many modern backpacks have a suspended mesh design that creates a ventilation channel between your back and the pack, allowing for air circulation and reducing sweat build-up.
    • Frame Sheet or Support: For carrying heavier loads, look for a backpack with a frame sheet or lightweight internal frame that helps maintain the shape of the pack and distributes the weight evenly.

    Fit

    A properly fitted backpack can make the difference between a comfortable hike and a painful experience. Here’s how to ensure a good fit:

    • Torso Length: Backpacks often come in multiple sizes to accommodate different torso lengths. Measure the distance from the base of your neck to the top of your hip bones to find your torso length and choose a pack size that matches.
    • Adjustable Straps: The backpack should have adjustable shoulder straps, hip belt, and load-lifter straps at the top of the shoulders. These allow you to fine-tune the fit according to your body size and the load you are carrying.
    • Women-Specific and Youth Designs: Women and younger hikers might find that packs designed specifically for their body types offer a better fit. These packs typically have narrower shoulder widths, contoured shoulder straps, and adjusted hip belts.

    Additional Considerations

    • Chest Strap: A sternum strap can help stabilize the pack and distribute the weight more evenly. It also keeps the shoulder straps in place, which is especially useful during more active hiking.
    • Padding vs. Weight: More padding can mean more comfort, but it also adds weight. Look for a balance that offers comfort without excessively increasing the pack’s weight.
    • Load Distribution: Consider how the backpack allows you to distribute weight. Ideally, heavier items should be closer to your body and higher up in the pack to keep your center of gravity optimal for hiking.

    Ultimately, the best way to test for comfort is to try the backpack on with weight in it, as this will give you the most accurate feel for how it will perform on the trail. Specialty outdoor stores often provide sandbags or other weights so you can simulate a loaded pack. Take your time adjusting all the straps and walk around the store to get a sense of the fit and comfort. Only then can you make an informed decision about which hiking backpack will best suit your needs.

    Consider Compartmentalization: Stay Organized

    Effective organization of your gear can streamline your hiking experience, allowing for quick access to items when you need them and helping to distribute weight evenly. A well-designed daypack will offer a variety of compartments and pockets tailored for the needs of a hiker. Let’s explore the types of compartments and pockets that can enhance your pack’s functionality.

    Main Compartment

    The main compartment of a daypack is the heart of your storage space. Here’s what to look for:

    • Capacity: It should be spacious enough to fit the core items you need, such as extra clothing, the bulk of your food, a hydration system, and larger items that are not needed immediately but are essential for the day’s hike.
    • Accessibility: Some backpacks offer panel loading, which means the main compartment can be fully zipped open like a suitcase for easy access to all your gear, as opposed to top-loading options which may require digging through items to reach the bottom.
    • Internal Dividers: Some packs include dividers or separate internal pockets within the main compartment to help segregate gear for better organization and to prevent smaller items from getting lost at the bottom.

    Top Lid or Pocket

    The top lid or pocket of a backpack is an ideal place for certain items. Consider these aspects:

    • Ease of Access: This pocket is designed for items you need to get to quickly, such as sunscreen, lip balm, sunglasses, or a headlamp.
    • Security: Items in the top lid are less likely to fall out when opening the main compartment, making it a good spot for keys, a wallet, or a cell phone.
    • Detachable Lids: Some backpacks have removable top lids that can be used as a waist pack for short excursions from your main camp or rest spot.

    Side Pockets

    Side pockets add additional convenience and accessibility:

    • Elastic or Mesh Pockets: These are typically used for water bottles, but they can also hold other items like trekking poles or a compact umbrella that you might need to reach for quickly.
    • Zippered Side Pockets: Some backpacks have zippered pockets that offer more security for items than open mesh pockets. They can be useful for storing smaller items that you want to keep accessible yet secure.

    Front Pocket

    A good front pocket can serve multiple purposes:

    • Organization: It is often used for flat, slim items such as a map, field guide, notepad, or a rain cover for your backpack.
    • Accessibility: Items in the front pocket can be reached without having to open the main compartment, saving time and hassle, especially if you need to access them frequently.

    Additional Storage Options

    Beyond the standard compartments, consider these additional features for further organization:

    • Hip Belt Pockets: Ideal for small items that you want to access while walking, like energy gels, a small camera, or a GPS device.
    • Daisy Chains or Attachment Loops: These can be useful for attaching gear on the outside of your pack, such as carabiners, hiking poles, or ice axes.
    • Internal Sleeves: Often used for hydration bladders, these can also double as a laptop or tablet sleeve for those who want their daypack to serve multiple purposes.
    • Compression Straps: These not only help to stabilize the load but can also be used to attach additional items externally.

    When choosing a daypack, imagine packing it with your typical hiking gear to see if the compartments and pockets suit your needs. Organizational features should make sense for the type of hiking you do and the items you carry, without adding unnecessary complexity or weight.

    Remember that while pockets and compartments are useful, over-packing them can lead to a bulky and unbalanced pack, so be mindful of how you distribute your gear.

    Assess Accessibility: Quick Entry is Key

    Accessibility is a crucial consideration for a hiking backpack. The ability to quickly and easily reach your gear can improve your hiking experience by minimizing frustration and downtime. Here’s how to evaluate the accessibility features of a backpack:

    Panel Access

    Panel access is a design feature that allows for broader entry into the backpack, beyond the traditional top opening. Here’s why it’s beneficial:

    • Full Access: A panel access backpack typically has a large zipper that opens around the front, which can fold open to give you a clear view and access to all the contents without having to dig through from the top.
    • Organization: This feature often reveals multiple sub-compartments, sleeves, and zippered pockets inside, which makes organizing and accessing gear much more straightforward.
    • Convenience: Saves time when you need to retrieve gear that’s packed in the middle or bottom of your pack, which is particularly useful in inclement weather or when you’re on a tight schedule.

    External Attachment Points

    External attachment points increase a pack’s versatility and accessibility. Here’s how:

    • Trekking Poles and Tools: Loops and straps on the outside of a pack can secure trekking poles, ice axes, or other tools, making them easily reachable when needed and stowable when not in use.
    • Tripod Carry: Photographers and videographers often need to carry a tripod. Some backpacks include specialized straps or attachment points for this purpose, which can also be used for other bulky items.
    • Modular Gear: Some packs offer a modular attachment system, like the MOLLE (Modular Lightweight Load-carrying Equipment) webbing, which lets you customize the pack with additional pouches and gear.
    • Quick-Release Buckles: These buckles can be found on external straps to allow for fast attachment and detachment of gear without having to fiddle with knots or tight straps.

    Additional Access Features

    Beyond panel access and external attachment points, consider these additional features for improved accessibility:

    • Top Lid Pockets: These allow for easy access to smaller items without opening the main compartment. Some are accessible without removing the pack, such as those reachable from the sides or the underside of the lid.
    • Side Zippers: Some backpacks have zippers along the sides that allow you to reach into the main compartment from the outside, grabbing items that are packed away from the top.
    • Hydration Port: A dedicated slot for a hydration hose increases water accessibility, which is essential for staying hydrated on the go without having to stop and search for a water bottle.
    • Hip Belt Pockets: These pockets are perfect for items you need on the go, like snacks, smartphone, pocket knife, or a small camera.
    • Stretch Pockets: Often made of mesh, these can expand and contract to fit various items, allowing for quick stashing and retrieval of layers like a rain jacket or hat.

    When choosing a backpack, it’s important to consider what types of gear you’ll be carrying and how frequently you’ll need to access each item.

    A backpack with a mix of accessibility features can serve a hiker well, allowing for efficient management of gear both on the move and during breaks. As with all features, there’s a balance to be struck between accessibility and the potential for over-complexity or excessive weight, so prioritize the features that align with your specific hiking needs.

    Evaluate Durability: Built to Last

    Durability is a key factor in selecting a backpack that can stand up to the rigors of outdoor adventure, frequent travel, or daily use. Here’s how to assess the durability of a backpack and understand the materials and construction involved:

    Material Strength

    The fabric of a backpack is the first line of defense against wear and tear. Here’s what to know about common materials:

    • Nylon: Known for its excellent strength-to-weight ratio, nylon is a popular choice for backpacks. High-denier (D) nylon offers greater toughness and abrasion resistance. Ripstop nylon has a special reinforcing technique that makes it resistant to tearing and ripping.
    • Polyester: While generally not as strong as nylon, polyester is good at resisting UV degradation from sunlight. Lower-end backpacks often use polyester because it’s less expensive than high-grade nylon.
    • Cordura: A brand name known for its durability and resistance to abrasions, tears, and scuffs. Cordura fabrics are often used in high-stress areas of a backpack to add durability without too much weight.
    • Dyneema: Also known by the brand name Cuben Fiber, Dyneema is an ultra-lightweight yet extremely strong fabric used in high-end backpacks, especially in the ultralight hiking community.

    Water Resistance and Proofing

    Water can be one of the biggest threats to your gear. Here’s how to protect against it:

    • Waterproof Backpacks: These are made from materials that are impermeable to water, like PVC or TPU-coated nylon or polyester, and have sealed seams to prevent water ingress. They are essential for activities like kayaking or torrential environments but might be overkill for casual use.
    • Water-Resistant Backpacks: These are often made with a DWR (Durable Water Repellent) coating that causes water to bead up and roll off the fabric. They can handle light rain but aren’t designed for prolonged exposure to water.
    • Rain Cover: For many hikers, a water-resistant backpack with a removable rain cover is sufficient. The cover can be stored in a small pocket and deployed when needed, offering flexibility and reducing pack weight.

    Construction and Hardware

    The way a backpack is put together is just as important as the materials it’s made of:

    • Seams: Reinforced or double-stitched seams can prevent fraying and splitting. Taped or sealed seams are a must in waterproof backpacks to prevent water from seeping through needle holes.
    • Zippers: YKK zippers are widely recognized for their durability and resistance to rust and snagging. Consider backpacks with covered zippers for additional protection against water and dirt.
    • Buckles and Straps: High-quality buckles and compression straps are crucial for maintaining the shape of the pack and securing the load. They should be made of tough plastic or metal with a high tensile strength.

    Additional Protective Features

    • Reinforced Bottom: The bottom of the backpack is prone to damage from being set down on rough surfaces. Look for packs with a reinforced or double-layered bottom.
    • Protective Coatings: Some backpacks feature additional protective coatings, such as Teflon, to repel dirt and water.
    • Load-Bearing Points: Ensure that areas which will bear the brunt of the weight, such as shoulder strap attachments and hip belts, are reinforced.

    When evaluating a backpack for durability, consider the conditions you expect to encounter and balance the need for robust construction with the desire for a lightweight pack. A durable backpack can be a larger upfront investment, but it often pays off in the long run by withstanding years of use, saving you money and hassle over time.

    Weigh Your Options: Light is Right

    Choosing a lightweight backpack is essential for reducing fatigue and increasing comfort during long hikes or when you need to be agile on your feet. However, it’s crucial to find the right balance between minimal weight, comfort, and durability. Here’s a detailed look at how to select a lightweight backpack that meets all your needs:

    Importance of Lightweight Design

    • Energy Efficiency: Carrying less weight means your body expends less energy, which is especially important on long hikes or when covering challenging terrain.
    • Reduced Strain: Lighter loads reduce the strain on your shoulders, back, and legs, which can help prevent injuries and soreness.
    • Increased Enjoyment: With less weight to carry, you’re more likely to enjoy the experience and maintain a positive attitude throughout your journey.

    Structural Considerations

    • Frame Types: Internal frame backpacks are generally lighter than external frame ones. Some ultralight models even forgo the frame altogether or use a removable frame sheet or inflatable frame, which can double as a sleeping pad.
    • Material Weight: Manufacturers often use advanced materials like ultra-high-molecular-weight polyethylene (UHMWPE) to create fabrics that are both light and strong. However, these materials can be more expensive.
    • Load Distribution: A well-designed lightweight backpack will have an efficient load distribution system to ensure that the pack sits comfortably on your body, without compromising on comfort for the sake of cutting weight.

    Comfort and Fit

    • Ventilated Back Panels: To keep weight down without sacrificing comfort, look for backpacks with ventilated back panels that provide airflow to reduce sweat.
    • Shoulder and Hip Padding: Adequate padding on the shoulder straps and hip belt is crucial to comfort. Look for designs that offer support and cushioning using lightweight, breathable materials.
    • Adjustability: The ability to adjust the fit of your backpack is important for comfort. Lightweight packs should still offer adjustable straps and load lifters to ensure a snug fit.

    Capacity and Organization

    • Volume: Consider the volume of the backpack. A smaller capacity pack will naturally weigh less, but make sure it can still hold all the essentials for your trip.
    • Compartmentalization: Efficient organization can help reduce the need for extra bags or pouches, which adds weight. Look for designs that incorporate smart storage solutions without adding unnecessary bulk.

    Durability vs. Weight

    • Reinforced Stress Points: Areas subject to the most wear, such as the bottom of the pack or strap attachments, should be reinforced to prevent failure without significantly increasing weight.
    • Material Thickness: Thinner materials will reduce weight but may be less durable. Look for backpacks that strike a balance, using tougher materials in high-stress areas and lighter ones elsewhere.

    Added Features

    • Removable Components: Some backpacks have removable lids, hip belts, and other components that can be left behind when not needed, allowing you to customize the pack’s weight.
    • Minimalist Design: Packs with fewer bells and whistles are typically lighter. Consider whether each feature is necessary or if it’s an added luxury that increases weight.

    When weighing your backpack options, it’s essential to think about the type of activity you’ll be doing. For instance, an ultralight pack may be perfect for a fast-and-light weekend hike but may not hold up under the demands of a rugged multi-week expedition where durability is more critical.

    Always try on backpacks with some weight in them to get a clear idea of how they feel when loaded and adjust the fit accordingly. By selecting a backpack that is light, comfortable, and suitably durable for your needs, you’ll be well-equipped for a more enjoyable and less burdensome adventure.

    Personal Preference: Style and Extras

    When it comes to selecting a backpack, functionality should be your primary concern, but personal preference in terms of style and extra features also plays a significant role. A backpack that fits your personal aesthetic and functional needs will enhance your overall experience. Here’s a deeper dive into these considerations:

    Hydration System Compatibility

    • Built-In Reservoir: Some backpacks come with a built-in hydration reservoir, which can be a convenient feature. Check the capacity and make sure it’s sufficient for your needs.
    • Tube Routing: The design of the hydration port matters. Look for backpacks with multiple routing options for the drinking tube, which can be run over either shoulder or under an arm.
    • Ease of Refilling: Consider how easily you can refill the reservoir. Some designs allow you to refill without removing the bladder from the pack, while others require more effort.

    Color and Visibility

    • Personal Expression: The color of your backpack is a way to express your personality and style on the trail or during your travels. Backpacks come in a wide range of colors and patterns, so choose one that resonates with your sense of style.
    • Environment Matching: For hunters or wildlife enthusiasts, choosing a color that blends into the environment can be important. Conversely, bright colors can be beneficial for safety in environments where visibility is crucial.
    • Dirt and Stain Concealment: Darker colors and patterns can hide dirt and stains better than light colors, which may be something to consider if you’re traveling for extended periods.

    Additional Features

    • Reflective Materials: If you’ll be traveling during low-light conditions or at night, reflective materials on your backpack can make you more visible to others, increasing safety.
    • Rain Covers: While some backpacks are made with water-resistant materials, a rain cover provides an extra layer of protection against heavy downpours, keeping your gear dry.
    • Gear Loops and Attachment Points: For those who carry additional gear like trekking poles, ice axes, or climbing equipment, having built-in loops and attachment points can be very convenient.
    • Pockets and Organization: The number and arrangement of pockets can greatly affect how you pack and access your gear. Look for a backpack with a pocket configuration that suits your organizational style.
    • Compression Straps: These allow you to cinch down your load for better weight distribution and stability, which can be particularly handy when your pack isn’t full.
    • Expandable Capacity: Some backpacks offer an expandable main compartment or removable daypacks for shorter excursions, offering flexibility for varying trip lengths.

    Personal Fit and Comfort

    • Back Panel Adjustability: A backpack with an adjustable torso length can offer a more customized fit, which is especially valuable for those who fall outside the average height range.
    • Women-Specific and Unisex Designs: These designs are shaped differently to accommodate different body types, with women-specific backpacks typically offering narrower shoulder widths and tailored hip belts.

    Environmental and Ethical Considerations

    • Sustainable Materials: Those concerned with environmental impact may want to choose backpacks made from recycled materials or produced by companies with a commitment to sustainability.
    • Ethical Manufacturing: You might also consider the brand’s labor practices and whether they align with fair trade principles.

    Selecting a backpack is a personal journey, and it’s worth taking the time to find one that not only fits your physical requirements but also aligns with your values and preferences.

    A backpack is not just a piece of equipment; it’s a companion on your adventures that reflects your identity and supports your lifestyle. By giving thought to these styles and extra features, you ensure your backpack will be an asset, both functionally and personally, for many trips to come.

    Making the Right Choice

    To select the right hiking backpack for a day hike, start by assessing the length and type of your hikes, the gear you’ll need, and your body size for the best fit. Visit an outdoor equipment store to try on different models, and don’t hesitate to ask for help. It’s also beneficial to read reviews and talk to experienced hikers. Remember, the best backpack for you is the one that feels right on your back, fits all your gear, and makes you excited to start your hiking journey.

    Loading


  • For outdoor enthusiasts, few activities are as rewarding as hiking, trekking, and backpacking. While these terms are often used interchangeably, they denote different experiences, intensity levels, and preparations. Understanding the nuances can help you plan your next adventure with better clarity and expectation. Here’s a detailed exploration of these three popular outdoor pursuits.

    Hiking: A Day’s Journey on Foot

    Hiking is the most accessible of the three activities, often characterized by day walks on trails or within parks. It offers a wonderful opportunity to connect with nature, get some exercise, and enjoy the outdoors. The key features of hiking include:

    • Duration: Hikes typically last anywhere from an hour to a full day, allowing you to tailor your experience to your schedule and preferences.
    • Distance: Hiking trails can cover a few miles to more than ten miles in some cases, providing options for both leisurely strolls and more challenging treks.
    • Terrain: Hiking trails are usually well-marked and maintained, varying from flat and even to hilly and rugged. This diversity allows hikers of all fitness levels to find suitable trails.
    • Equipment: Gear requirements for hiking are minimal. A good pair of hiking shoes, water, snacks, and perhaps a map or GPS device are usually sufficient for a day hike.
    • Preparation: Physical preparation for hiking is not as intense as for other activities. Anyone in reasonable shape can enjoy a day hike without extensive training.

    Hiking is a fantastic way to get a taste of nature without committing to a long-term journey. It allows you to explore scenic trails, breathe in fresh air, and recharge your mind and body. Whether you’re a beginner or an experienced hiker, there’s always a trail waiting to be discovered.

    Trekking: A Multi-Day Adventure

    Trekking takes hiking up a notch, involving multi-day trips through more challenging environments. It offers a deeper immersion into nature and the opportunity to explore remote and breathtaking landscapes. Here’s what sets trekking apart:

    • Duration: Trekking can last from a couple of days to several weeks, allowing you to embark on a more extended adventure and truly disconnect from the daily grind.
    • Distance: Trekkers cover greater distances compared to hikers, often venturing into remote areas that are inaccessible by day hikes alone.
    • Terrain: The terrain encountered during trekking is more varied and demanding. It can include mountain paths, dense forests, rugged terrain, and even vast deserts, providing a diverse range of experiences.
    • Equipment: More gear is required for trekking to ensure comfort and safety during overnight stays. This includes a sturdy pair of boots, a backpack, a sleeping bag, food, water, and a tent.
    • Preparation: Trekkers need to be physically fit and may need to train for the demanding nature of the trek. Building endurance, strength, and stamina is crucial to fully enjoy the experience.

    Trekking is about immersing oneself in the environment and experiencing it over a longer period. It often involves camping out or staying in shelters along the trail, allowing trekkers to connect with nature on a deeper level and witness stunning sunrises and sunsets in remote locations.

    Backpacking: The Essence of Self-Sufficiency

    Backpacking is often seen as the most intense of the three pursuits, encapsulating elements of both hiking and trekking but with a distinct focus on self-sufficiency and exploration. It offers the opportunity to venture into the wilderness, off the beaten path, and experience the thrill of long-term exploration. Here’s what you need to know about backpacking:

    • Duration: Like trekking, backpacking trips can last a few days to several months, providing the ultimate adventure for those seeking an extended escape from civilization.
    • Distance: Backpackers have the freedom to cover vast distances, often not confined to a single trail or region. This allows for a more exploratory approach to outdoor adventures.
    • Terrain: The terrain encountered during backpacking can be diverse and challenging. It may involve off-trail wilderness areas, rugged mountains, dense forests, and other remote landscapes.
    • Equipment: Backpackers carry everything they need on their backs, embracing the concept of self-sufficiency. This includes food, water filtration systems, tents, clothing for various weather conditions, navigation tools, and camping equipment.
    • Preparation: Significant physical and mental preparation is necessary for backpacking. It requires not only physical fitness but also skills in navigation, campcraft, and first aid. Being self-reliant and prepared for unexpected situations is crucial.

    Backpacking offers a unique sense of freedom and adventure. It allows you to explore uncharted territories, discover hidden gems, and challenge your limits. The self-sufficiency aspect of backpacking adds an extra layer of excitement and accomplishment to the journey.

    Let’s Sum It All Up

    While hiking, trekking, and backpacking share the common thread of walking and enjoying the great outdoors, they differ mainly in scope, duration, and preparation required. Here’s a quick summary of each activity:

    • Hiking is your go-to for short-term nature trips. It offers accessibility, flexibility, and the chance to enjoy the outdoors with minimal equipment and preparation.
    • Trekking requires more commitment and is ideal for those looking to experience different cultures or remote landscapes over several days. It offers a deeper immersion into nature and the opportunity to challenge yourself physically and mentally.
    • Backpacking is for the adventure-seeker who wants a deep dive into wilderness self-reliance and long-term exploration. It provides the freedom to venture off the beaten path, cover vast distances, and experience the thrill of carrying everything you need on your back.

    Whatever your choice, each activity offers its own unique set of rewards and challenges, promising unforgettable experiences amid the beauty of the natural world. So, lace up your boots, pack your essentials, and set off on the adventure that calls to you. Whether you’re an afternoon hiker, a cultural trekker, or a backcountry backpacker, there’s a trail out there waiting for you.

    Frequently Asked Questions

    What should I wear for hiking, trekking, or backpacking?

    When it comes to outdoor activities, it’s important to dress appropriately. Opt for moisture-wicking and breathable clothing, sturdy hiking boots, and layers to adapt to changing weather conditions. Don’t forget to bring a hat, sunglasses, and sunscreen for sun protection.

    How do I choose the right trail or route for my adventure?

    Choosing the right trail or route depends on your fitness level, experience, and preferences. Research different options, consider the difficulty level, distance, and scenery, and read reviews or seek advice from experienced hikers or backpackers. It’s also essential to check for any permits or restrictions in the area you plan to explore.

    What safety precautions should I take during these activities?

    Safety should always be a priority when engaging in outdoor activities. Make sure to inform someone about your plans, carry a map and compass or GPS device, stay hydrated, pack enough food, and be aware of any potential hazards or wildlife in the area. It’s also advisable to learn basic first aid skills and carry a first aid kit.

    Can I go hiking, trekking, or backpacking alone?

    While it’s generally recommended to go with a partner or a group for safety reasons, experienced outdoor enthusiasts may choose to go solo. If you decide to venture out alone, make sure you have the necessary skills, knowledge, and equipment to handle any situation that may arise. Always inform someone about your plans and check in regularly if possible.

    How can I minimize my impact on the environment during these activities?

    Responsible outdoor practices are crucial to preserve the natural beauty of our surroundings. Follow Leave No Trace principles, such as packing out your trash, staying on designated trails, respecting wildlife and vegetation, and minimizing campfire impact. Be mindful of the environment and leave it as you found it for future generations to enjoy.

    Remember, the key to a successful outdoor adventure is proper planning, preparation, and a sense of adventure. So, get out there and explore the wonders of hiking, trekking, or backpacking. The great outdoors awaits!

    Loading


  • Hiking is an incredible way to immerse yourself in nature, explore scenic trails, and challenge yourself physically. If you’re new to hiking, you may be wondering what essentials you need to get started. In this comprehensive guide, we’ll walk you through all the gear, clothing, and essentials you’ll absolutely need before you head out. By the end, you’ll be well-prepared to hit the trails. Just keep in mind, the need for some items may depend on your particular environment.

    TL;DR

    • Backpack, hiking boots/shoes, water bottles/hydration system, snacks, first aid kit, and navigation tools like maps and compass are essential hiking gear for beginners.
    • When choosing a backpack, consider durability, comfort, weight, accessibility, water resistance, size/fit, and organization.
    • For footwear, look for ankle support, grip, waterproofing/breathability, fit/comfort, and break-in period.
    • Bring multiple water bottles or a hydration reservoir/bladder. Hydration systems provide hands-free drinking.
    • Pack nutritious, portable snacks like trail mix, energy bars, fresh fruit, sandwiches/wraps, and jerky.
    • A first aid kit should include bandages, antiseptic, pain relievers, blister treatment, and personal medications.
    • Navigation tools like maps, compass, GPS, and apps help you stay on track safely.
    • Layer clothing for changing temperatures and conditions. Choose moisture-wicking, quick-drying fabrics.
    • Additional hiking essentials include trekking poles, emergency shelter, whistle, sun protection, and multi-tool.

    Gear Essentials

    Backpack

    A good backpack is not just a convenient way to carry your gear during a hike; it’s an essential tool that can greatly enhance your hiking experience. When choosing a backpack, there are several factors to consider that go beyond just its capacity and compartments. Let’s explore some additional aspects to look for in a backpack to ensure you make the right choice for your hiking adventures.

    • Durability: Hiking can be a rugged and demanding activity, so it’s crucial to invest in a backpack that can withstand the elements and rough terrain. Look for backpacks made from durable materials such as nylon or ripstop fabric, which are known for their resistance to tears and abrasions. Reinforced stitching and strong zippers are also important features to consider.
    • Comfort: Since you’ll be carrying your backpack for extended periods, it’s essential to prioritize comfort. Adjustable straps, including padded shoulder straps and a hip belt, are crucial for distributing the weight evenly and reducing strain on your back and shoulders. Look for a backpack with a suspension system that provides proper support and ventilation to keep you cool and comfortable during your hike.
    • Weight: The weight of your backpack itself can significantly impact your hiking experience. Opt for a lightweight backpack that doesn’t add unnecessary weight to your load. However, be cautious not to compromise durability and functionality for the sake of reducing weight. Strike a balance between weight and durability to ensure your backpack can withstand the demands of the trail.
    • Accessibility: Easy access to your gear is essential, especially when you need to quickly grab an item on the trail. Look for backpacks with multiple access points, such as a top-loading main compartment, side pockets, and front panel access. This allows you to organize your gear efficiently and access it without having to unpack everything.
    • Water Resistance: While not all backpacks are fully waterproof, it’s beneficial to choose one that offers some level of water resistance. This can protect your gear from light rain or accidental spills. Look for backpacks with water-resistant coatings or included rain covers to keep your belongings dry during wet conditions.
    • Size and Fit: Choosing the right size backpack is crucial for comfort and functionality. Consider the length of your hikes and the amount of gear you typically carry to determine the appropriate capacity. Additionally, make sure the backpack fits your torso length properly. Many backpacks come in different sizes, so take the time to measure your torso length and consult the manufacturer’s sizing guide.
    • Organization: A well-organized backpack can make a significant difference in your hiking experience. Look for backpacks with multiple compartments, pockets, and attachment points to keep your gear organized and easily accessible. This allows you to separate and secure items like your water bottle, snacks, map, and other essentials.
    • Versatility: While primarily used for hiking, a versatile backpack can serve you well in other outdoor activities and travel adventures. Consider a backpack that can be adjusted for different purposes, such as removing or hiding straps for airline travel or converting into a daypack for shorter hikes or exploring around your campsite.

    Hiking Boots or Shoes

    When it comes to hiking, your choice of footwear can make or break your outdoor adventure. Investing in a pair of sturdy and comfortable hiking boots or shoes is not just a luxury; it’s a necessity. Your feet are your most important asset on the trail, and taking care of them should be a top priority. Let’s delve into the key factors to consider when selecting the perfect hiking footwear.

    • Ankle Support: Hiking often involves traversing uneven terrain, rocky paths, and steep slopes. Therefore, ankle support is crucial to prevent sprains and injuries. Look for hiking boots that provide adequate ankle support, typically reaching above the ankle bone. This extra support helps stabilize your ankles and reduces the risk of twisting or rolling them during your hike.
    • Grip and Traction: The ability to maintain a firm grip on various terrains is essential for hiking footwear. Look for boots or shoes with a robust outsole made of high-quality rubber or a specialized hiking sole. These soles are designed with deep lugs or multidirectional treads that provide excellent traction on different surfaces, including wet rocks, muddy trails, and slippery slopes. Good grip ensures stability and minimizes the risk of slipping and falling.
    • Waterproof or Water-Resistant: Hiking often involves encountering wet conditions, whether it’s crossing streams, walking through dewy grass, or getting caught in unexpected rain showers. Therefore, having waterproof or water-resistant footwear is highly advantageous. Waterproof hiking boots are typically made with a breathable membrane, such as Gore-Tex, that keeps water out while allowing moisture to escape. Water-resistant shoes may not be fully waterproof but offer some level of protection against light rain and moisture. Consider the climate and terrain you’ll be hiking in to determine the level of waterproofing you need.
    • Fit and Comfort: Ill-fitting footwear can quickly turn a pleasant hike into an uncomfortable and painful experience. Ensure that your hiking boots or shoes fit properly and provide ample comfort. Look for a snug fit that allows for toe wiggle room and prevents your feet from sliding around inside the shoe. Consider trying on different brands and styles to find the one that suits your foot shape and provides the necessary support. Remember to wear hiking socks when trying on footwear to replicate the conditions you’ll encounter on the trail.
    • Breathability: Hiking can be physically demanding, causing your feet to sweat. Therefore, it’s essential to choose footwear that offers breathability to keep your feet cool and dry. Look for hiking boots or shoes with breathable uppers made of materials like mesh or synthetic fabrics. These materials allow air circulation, preventing excessive moisture buildup and reducing the likelihood of blisters and discomfort.
    • Weight: The weight of your hiking footwear can impact your overall comfort and fatigue level during long hikes. While hiking boots tend to be heavier due to their added ankle support and durability, hiking shoes are lighter and more flexible. Consider the type of hiking you’ll be doing and the level of support you require to determine whether boots or shoes are the better choice for you. If you’re planning on carrying a heavy backpack or hiking on rugged terrain, boots may provide better stability and protection.
    • Break-in Period: It’s crucial to allow time to break in your new hiking boots or shoes before embarking on a long hike. Wearing them around the house, on shorter walks, or during day hikes allows the footwear to mold to your feet and reduces the risk of blisters and discomfort during longer treks. Avoid wearing brand-new footwear on a multi-day hike without prior wear.

    Remember, investing in high-quality hiking boots or shoes is an investment in your comfort, safety, and overall hiking experience. Take the time to research and try on different options to find the perfect fit for your feet. Your feet will thank you as you explore the great outdoors with confidence and comfort.

    Navigation Tools

    When venturing into the wilderness, having the right navigation tools is crucial for a safe and successful hiking experience. While getting lost can be an adventure in itself, it’s always best to stay on the right path and reach your destination without any unnecessary detours. Let’s explore the essential navigation tools you should carry and familiarize yourself with before heading out on your hiking journey.

    • Map: A map is a fundamental navigation tool that provides a visual representation of the surrounding area. It shows the terrain, trails, landmarks, and other important features that help you navigate through the wilderness. When selecting a map, choose one that is specific to your hiking location and is up-to-date. Topographic maps are particularly useful as they provide detailed information about elevation changes, contour lines, and natural features. Familiarize yourself with map reading skills, including understanding symbols, scales, and grid coordinates, to effectively navigate using a map.
    • Compass: A compass is an invaluable tool for determining direction and orienting yourself on a map. It consists of a magnetized needle that aligns with the Earth’s magnetic field, pointing towards magnetic north. By using a compass in conjunction with a map, you can establish your position, determine which direction to follow, and navigate accurately. Learn how to use a compass to take bearings, measure distances, and adjust for declination. Remember to keep your compass away from magnetic objects, such as smartphones or metal objects, as they can interfere with its accuracy.
    • GPS Device or Smartphone with Hiking App: Global Positioning System (GPS) devices and smartphones with hiking apps have revolutionized navigation in the outdoors. These devices use satellite signals to determine your precise location, allowing you to track your progress, mark waypoints, and follow preloaded routes. GPS devices specifically designed for hiking often have additional features such as altimeters, barometers, and electronic compasses. Alternatively, smartphones with hiking apps offer similar functionality, utilizing built-in GPS capabilities. Ensure you have a reliable power source or backup batteries for extended hikes when relying on electronic devices.
    • Hiking Apps and Online Mapping Tools: In addition to traditional navigation tools, modern technology offers a wide range of hiking apps and online mapping tools that can enhance your navigation experience. These apps provide detailed maps, route planning, real-time tracking, and even offline capabilities. Some popular hiking apps include AllTrails, Gaia GPS, and ViewRanger. However, it’s important to remember that electronic devices can be prone to battery drain, signal loss, or technical issues, so always have a backup plan and carry physical maps as a fail-safe.
    • Additional Navigation Aids: Depending on your hiking location and personal preferences, you may consider carrying additional navigation aids. These can include a handheld or wearable GPS beacon for emergency situations, a whistle for signaling, a signal mirror for attracting attention, or a personal locator beacon (PLB) for remote areas with limited cell phone coverage. These tools can provide an extra layer of safety and peace of mind during your outdoor adventures.

    Water Bottles or Hydration System

    Dehydration can lead to fatigue, muscle cramps, dizziness, and even more severe health issues. To ensure you have a reliable source of water throughout your hike, it’s essential to carry enough water bottles or invest in a hydration system such as a bladder or water reservoir that fits inside your backpack. Let’s explore the benefits and considerations of both options to help you make an informed choice.

    • Water Bottles: Water bottles are a popular and straightforward option for carrying water during a hike. They come in various sizes, materials, and designs to suit different preferences. Here are some key considerations when choosing water bottles for hiking:
      • Capacity: Select water bottles with an adequate capacity to meet your hydration needs. Consider factors such as the duration of your hike, weather conditions, and your personal water intake requirements. It’s generally recommended to carry at least 1 liter (32 ounces) of water per hour of moderate hiking in moderate temperatures.
      • Durability: Opt for durable water bottles made from materials such as stainless steel, BPA-free plastic, or ruggedized plastic. These materials are less likely to break or leak, ensuring your water stays accessible and secure throughout your hike.
      • Weight: Keep in mind that water bottles add weight to your backpack. If you prefer to distribute weight evenly or have limited carrying capacity, consider lightweight options such as collapsible water bottles or those made from lightweight materials like titanium or aluminum.
      • Ease of Use: Look for water bottles with features that enhance usability on the trail. This can include wide-mouth openings for easy filling and cleaning, leak-proof lids or caps, and integrated handles or loops for attaching to your backpack or gear.
      • Insulation: If you’re hiking in hot or cold conditions, consider insulated water bottles to help maintain the temperature of your water. Insulated bottles can keep your water cool on hot days or prevent it from freezing in cold weather.
    • Hydration Systems: Hydration systems, also known as hydration bladders or reservoirs, offer a convenient and hands-free way to stay hydrated during a hike. These systems consist of a flexible bladder or reservoir that fits inside your backpack, with a drinking tube and bite valve that allow you to sip water without stopping or removing your backpack. Here are some advantages and considerations of hydration systems:
      • Hands-Free Hydration: One of the main benefits of hydration systems is the ability to drink water without interrupting your stride. The drinking tube can be easily accessed and sipped from, allowing you to stay hydrated on the move. This can be particularly beneficial during high-intensity activities or when you prefer not to stop frequently.
      • Large Capacity: Hydration systems typically offer larger water capacity compared to individual water bottles. Most bladders range from 1.5 to 3 liters (50 to 100 ounces), allowing you to carry a significant amount of water without taking up additional space in your backpack.
      • Weight Distribution: By placing the bladder inside your backpack, hydration systems help distribute the weight more evenly across your back. This can contribute to better balance and stability, especially during challenging or technical terrain.
      • Compatibility: Ensure that your backpack is compatible with hydration systems and has a dedicated compartment or sleeve to hold the bladder securely. Some backpacks come with built-in hydration sleeves and hose ports for convenient integration.

    Snacks and Food

    Choosing lightweight and nutritious options will provide the necessary nutrients and calories to keep you going throughout the hike. Let’s explore some ideas for snacks and meals that are both convenient and nourishing for your hiking adventures.

    • Trail Mix: Trail mix is a classic hiking snack that combines a variety of ingredients for a balanced and energy-packed treat. It typically includes a mix of nuts, dried fruits, seeds, and sometimes chocolate or granola. The combination of healthy fats, protein, and carbohydrates in trail mix provides a quick and sustained source of energy. You can either purchase pre-packaged trail mix or create your own custom blend to suit your taste preferences.
    • Energy Bars: Energy bars are compact, lightweight, and designed to provide a quick and convenient source of energy during physical activities. Look for bars that are high in carbohydrates, moderate in protein, and low in added sugars. Choose options that contain whole food ingredients such as nuts, seeds, dried fruits, and whole grains. Energy bars come in a variety of flavors and formulations, including gluten-free, vegan, and nut-free options to accommodate different dietary needs.
    • Fresh Fruits: Packing fresh fruits is a refreshing and nutritious choice for hiking. Fruits like apples, oranges, grapes, and bananas are portable and provide natural sugars, vitamins, and minerals. They also offer hydration due to their high water content. Consider choosing fruits that have a longer shelf life and are less prone to bruising or squishing, making them more durable for the duration of your hike.
    • Sandwiches or Wraps: Preparing sandwiches or wraps with a variety of fillings can provide a satisfying and substantial meal during a longer hike. Opt for whole grain bread or tortillas and choose fillings that are protein-rich, such as lean meats, cheese, hummus, or nut butter. Add vegetables like lettuce, tomatoes, cucumbers, or sprouts for added freshness and crunch. Wrapping them tightly in foil or plastic wrap will help keep them intact and prevent them from getting squished in your backpack.
    • Non-Perishable Food Items: Non-perishable food items are ideal for longer hikes or multi-day backpacking trips when refrigeration is not available. These items have a longer shelf life and can withstand various weather conditions. Some examples include:
      • Jerky: Jerky is a dried and preserved meat snack that is high in protein and low in fat. It comes in different varieties such as beef, turkey, or even plant-based options. Look for jerky that is minimally processed and free from additives or excessive sodium.
      • Nut Butter Packets: Single-serve packets of nut butter, such as almond or peanut butter, are convenient and provide a good source of healthy fats and protein. They can be enjoyed on their own or spread on crackers, rice cakes, or fruit.
      • Granola Bars: Granola bars are similar to energy bars but often have a more substantial texture and may contain additional ingredients like oats, honey, and dried fruits. Look for options that are low in added sugars and high in fiber.

    First Aid Kit

    When venturing into the great outdoors, it’s essential to be prepared for any unexpected situations that may arise. Carrying a well-stocked first aid kit is a crucial part of your hiking gear. While we always hope for a safe and incident-free hike, accidents can happen, and being equipped with a basic first aid kit can make a significant difference in handling minor injuries or emergencies. Let’s explore some additional items you should consider including in your first aid kit to ensure you’re fully prepared for any situation on the trail.

    • Adhesive Bandages: Adhesive bandages, commonly known as Band-Aids, are a must-have in any first aid kit. They are ideal for treating minor cuts, scrapes, and blisters. Include a variety of sizes to accommodate different wound sizes. Waterproof or fabric bandages are excellent options, as they provide better durability and stay in place even when exposed to moisture or sweat.
    • Antiseptic Wipes or Solution: Cleaning wounds properly is crucial to prevent infection. Include antiseptic wipes or a small bottle of antiseptic solution in your first aid kit. These can be used to clean wounds before applying bandages or dressings. Look for antiseptic wipes that are individually packaged for convenience and hygiene.
    • Pain Relievers: Hiking can sometimes lead to minor aches, pains, or headaches. Including over-the-counter pain relievers such as acetaminophen or ibuprofen can provide temporary relief until further medical assistance is available. Be sure to follow the recommended dosage guidelines and consult a healthcare professional if you have any specific medical conditions or concerns.
    • Blister Treatment: Blisters can be a common occurrence during long hikes, especially if you’re wearing new or ill-fitting footwear. Including blister treatment items such as moleskin, blister cushions, or blister pads can provide immediate relief and prevent further discomfort. These items can help protect the affected area and reduce friction, allowing you to continue your hike with minimal pain.
    • Personal Medications: If you have any specific medical conditions or require regular medications, it’s crucial to include them in your first aid kit. Ensure you have an adequate supply of any necessary prescription medications, such as inhalers, EpiPens, or insulin. It’s also a good idea to carry a list of your medications, allergies, and emergency contact information in case of a medical emergency.
    • Gauze and Adhesive Tape: For more significant wounds or injuries, it’s important to have sterile gauze pads and adhesive tape in your first aid kit. These items can be used to dress and secure larger wounds until professional medical help is available. Look for individually wrapped sterile gauze pads and hypoallergenic adhesive tape for added convenience and safety.
    • Tweezers and Scissors: Tweezers and small scissors are handy tools to have in your first aid kit. Tweezers can be used to remove splinters or ticks, while scissors can be used to cut tape, gauze, or clothing if necessary. Opt for small, compact versions of these tools to save space in your kit.
    • First Aid Manual: It’s essential to have a basic understanding of first aid procedures and techniques. Including a first aid manual or reference guide in your kit can provide valuable instructions and guidance when faced with an emergency. Familiarize yourself with the contents of the manual before your hike to ensure you’re prepared to handle various situations.

    Multi-Tool

    A multi-tool is an essential item to have on the trail, offering a wide range of tools in one compact package. Whether you need to make gear repairs, handle emergency situations, or perform various tasks during your hike, a multi-tool can be a lifesaver. Let’s explore the different features and tools to consider when choosing a multi-tool for your hiking adventures.

    When selecting a multi-tool, consider factors such as size, weight, durability, and ease of use. Look for reputable brands that offer high-quality products with reliable construction. It’s also important to practice using the tools in your multi-tool before your hike to familiarize yourself with their functionality and ensure they meet your expectations.

    A multi-tool can be a valuable companion on the trail, providing you with the tools you need for gear repairs, emergency situations, or everyday tasks. By choosing a multi-tool that suits your needs and maintaining it properly, you’ll have a versatile tool that can enhance your hiking experience and help you tackle unexpected challenges along the way.

    Trekking Poles

    Trekking poles are an indispensable tool for hikers, offering numerous benefits that enhance your hiking experience and overall performance. These poles act as an extension of your arms, providing stability, reducing strain on your joints, and improving balance while navigating various terrains. Let’s delve deeper into the advantages of using trekking poles during your hiking adventures.

    • Stability and Balance: One of the primary benefits of trekking poles is the added stability and balance they provide. When hiking on uneven or slippery terrain, the poles act as additional points of contact with the ground, helping you maintain stability and prevent falls. They distribute your weight more evenly, reducing the risk of tripping or losing your footing. This is especially crucial when crossing streams, traversing rocky surfaces, or hiking on steep inclines or descents.
    • Reduced Joint Strain: Trekking poles help to alleviate strain on your joints, particularly in the knees and ankles. By transferring some of your body weight to the poles, you can reduce the impact and stress on these joints, making hiking more comfortable and less strenuous. This can be especially beneficial during long hikes or when carrying a heavy backpack, as it helps to minimize the risk of overuse injuries and joint pain.
    • Improved Endurance: Using trekking poles can enhance your endurance on the trail. By engaging your upper body muscles, particularly the arms, shoulders, and core, you can distribute the workload and reduce fatigue in your lower body. This balanced muscle engagement allows you to hike for longer periods without feeling as tired, ultimately increasing your overall endurance and allowing you to explore more challenging trails.
    • Aid in Uphill and Downhill Sections: Trekking poles are particularly useful when tackling uphill and downhill sections of a trail. When ascending, you can use the poles to push yourself forward and upward, providing additional power and stability. This helps to engage your upper body and take some of the strain off your legs, making the ascent more manageable. On the other hand, when descending, the poles act as anchors, providing support and balance as you navigate steep slopes and uneven terrain. They help to absorb the impact of each step, reducing strain on your knees and preventing potential injuries.
    • Improved Posture: Trekking poles promote better posture while hiking. By using the poles, you naturally engage your core muscles and maintain an upright position, preventing slouching or leaning forward. This proper alignment not only reduces strain on your back and neck but also improves your breathing and overall biomechanics. By maintaining good posture, you can hike more efficiently and reduce the risk of muscle fatigue or discomfort.
    • Extra Support for Injuries: Trekking poles can be a valuable aid if you have a pre-existing injury or are recovering from one. They provide additional support and stability, allowing you to continue hiking while minimizing the strain on the injured area. Whether you’re dealing with a sprained ankle, knee pain, or any other lower body injury, trekking poles can help alleviate the pressure and provide the necessary support for a safer and more comfortable hiking experience.

    Emergency Shelter

    Carrying a lightweight emergency shelter is a crucial part of any outdoor adventure, providing you with a reliable refuge in case of unexpected situations. Whether you’re hiking, camping, or engaging in any outdoor activity, having an emergency shelter such as a bivy sack, emergency blanket, or a tarp can make a significant difference in your safety and well-being. Let’s explore the importance and benefits of carrying an emergency shelter with you.

    • Protection from the Elements: One of the primary functions of an emergency shelter is to provide protection from the elements. It acts as a barrier between you and the external environment, shielding you from rain, wind, snow, or extreme temperatures. Even a lightweight bivy sack or emergency blanket can offer a significant level of protection, keeping you dry and reducing the risk of hypothermia or other weather-related dangers.
    • Retaining Body Heat: An emergency shelter is designed to help retain your body heat, which is crucial for survival in cold conditions. When faced with an unexpected night outdoors or a sudden drop in temperature, an emergency shelter can prevent heat loss and provide insulation. The materials used in these shelters are often reflective or thermal, reflecting your body heat back to you and minimizing heat dissipation.
    • Quick and Easy Setup: Most emergency shelters are designed for quick and easy setup, ensuring that you can create a safe space efficiently. Bivy sacks, for example, are lightweight and compact, allowing you to set them up within minutes. Emergency blankets are even simpler to use, as they often come in a folded or compact form that can be easily unfolded and wrapped around yourself or your existing shelter.
    • Versatility and Portability: Emergency shelters are designed to be versatile and portable, making them convenient to carry in your backpack or emergency kit. Bivy sacks, for instance, are lightweight and packable, taking up minimal space in your gear. Emergency blankets are made from lightweight materials like Mylar or space blanket material, allowing them to be folded into compact sizes. Their portability ensures that you can always have an emergency shelter on hand without adding excessive weight to your load.
    • Multi-Purpose Use: In addition to their primary function as emergency shelters, bivy sacks and emergency blankets can serve multiple purposes in survival situations. Bivy sacks often have a waterproof and durable exterior, making them suitable for use as a groundsheet or improvised rain shelter. Emergency blankets can be used as a signaling device due to their reflective properties, helping rescuers locate you in case of an emergency.
    • Peace of Mind and Safety: Carrying an emergency shelter provides you with peace of mind and a sense of safety during your outdoor adventures. Knowing that you have a reliable shelter option in case of unforeseen circumstances can alleviate anxiety and allow you to enjoy your activities with confidence. It also ensures that you are prepared for emergencies, reducing the potential risks associated with being caught off guard in challenging situations.

    Whistle

    A whistle is indeed a simple yet invaluable tool that should be a part of every outdoor adventurer’s essential gear. While it may seem like a small and insignificant item, a whistle can play a crucial role in signaling for help and potentially saving lives in emergency situations. Let’s delve deeper into the importance of a whistle and the reasons why it is considered an essential tool for outdoor enthusiasts.

    • Emergency Signaling: In critical situations where you find yourself in need of immediate assistance, a whistle can serve as a universal distress signal. Three short bursts or blasts on a whistle are widely recognized as a distress signal, indicating that you require help. This distinct sound pattern can cut through the surrounding noise and alert potential rescuers to your location. Whether you’re lost, injured, or facing any other emergency, a whistle can attract attention and expedite the arrival of aid.

    Sun Protection

    Sun protection is indeed a critical aspect to consider when embarking on a hike or spending time outdoors. The sun’s ultraviolet (UV) rays can cause sunburns, premature aging, and even increase the risk of skin cancer. To ensure optimal sun protection during your outdoor adventures, it’s important to go beyond just sunscreen. Let’s explore some additional measures and tips to safeguard your skin from harmful UV radiation.

    • Sunscreen with High SPF: Applying sunscreen with a high Sun Protection Factor (SPF) is a fundamental step in protecting your skin from the sun’s rays. Look for a broad-spectrum sunscreen that shields against both UVA and UVB rays. The SPF number indicates the level of protection the sunscreen offers against UVB rays, which are primarily responsible for causing sunburns. Opt for a sunscreen with an SPF of 30 or higher, as it provides effective protection. Remember to apply sunscreen generously to all exposed areas of skin, including your face, neck, arms, and legs. Reapply every two hours or more frequently if you’re sweating or swimming.
    • Wide-Brimmed Hat: Wearing a wide-brimmed hat is an excellent way to provide additional shade and protection for your face, neck, and ears. Look for a hat with a brim that extends at least three inches all around to shield your face from direct sunlight. Hats made from lightweight and breathable materials, such as cotton or nylon, are ideal for outdoor activities as they allow for proper ventilation and help regulate body temperature. Additionally, consider a hat with UPF (Ultraviolet Protection Factor) fabric for added sun protection.
    • Sunglasses: Protecting your eyes from the sun’s harmful UV rays is just as important as shielding your skin. Choose sunglasses that provide 100% UV protection to safeguard your eyes from both UVA and UVB rays. Look for sunglasses labeled as “UV400” or “100% UV protection” to ensure adequate shielding. Additionally, opt for sunglasses with larger frames or wraparound styles that offer better coverage and minimize the amount of sunlight entering from the sides.

    Clothing Essentials

    Moisture-Wicking Base Layers

    When it comes to outdoor activities, including hiking, having the right clothing is essential for comfort and performance. One crucial component of your hiking attire is a moisture-wicking base layer. This foundational layer of clothing plays a vital role in keeping your body dry and comfortable throughout your hike. Let’s explore the benefits of moisture-wicking base layers and the materials to look for when selecting the perfect one.

    • Moisture-Wicking Technology: Moisture-wicking base layers are designed to pull moisture away from your skin and move it to the outer surface of the fabric, where it can evaporate more easily. This technology helps to keep you dry by preventing sweat from accumulating on your skin. By wicking away moisture, these base layers help regulate your body temperature and prevent the discomfort caused by excessive sweating.
    • Regulation of Body Temperature: Hiking often involves varying weather conditions and physical exertion, which can lead to fluctuations in body temperature. Moisture-wicking base layers help regulate your body temperature by allowing excess heat and moisture to escape, keeping you cool when it’s hot and preventing chilling when it’s cold. This thermoregulation is crucial for maintaining comfort and preventing overheating or hypothermia during your hike.
    • Comfort and Reduced Friction: Moisture-wicking base layers offer a comfortable next-to-skin feel. The fabric’s ability to pull moisture away from your body helps to minimize the discomfort caused by wet or sticky clothing. Additionally, these base layers help reduce friction between your skin and outer layers, preventing chafing and irritation, especially during long hikes or when carrying a backpack.
    • Quick-Drying Properties: One of the key advantages of moisture-wicking base layers is their quick-drying properties. The fabrics used in these base layers are designed to dry rapidly, allowing them to keep you dry even in wet or humid conditions. This feature is particularly beneficial during multi-day hikes or when encountering unexpected rain showers. Quick-drying base layers help prevent prolonged exposure to moisture, reducing the risk of discomfort, chills, and potential skin issues.
    • Material Selection: When choosing a moisture-wicking base layer, consider the materials that offer optimal performance for outdoor activities. Two popular options are merino wool and synthetic fabrics.
      • Merino Wool: Merino wool is a natural fiber known for its excellent moisture-wicking properties. It can absorb a significant amount of moisture without feeling wet, making it an ideal choice for base layers. Merino wool is also naturally breathable, odor-resistant, and has insulating properties that help regulate body temperature. It is a versatile material suitable for both warm and cold weather hiking.
      • Synthetic Fabrics: Synthetic fabrics, such as polyester or nylon, are engineered to mimic the moisture-wicking properties of natural fibers. These fabrics are lightweight, durable, and offer excellent moisture management. They dry quickly and are often more affordable than merino wool. Synthetic base layers are a popular choice for high-intensity activities and warm weather hiking, as they provide efficient moisture-wicking performance.
    • Fit and Layering: When selecting a moisture-wicking base layer, ensure that it fits snugly against your skin without being too tight or restrictive. A proper fit allows for efficient moisture transfer and ensures optimal performance. Additionally, consider the layering system when choosing a base layer. Base layers are typically worn next to the skin, followed by insulating layers and outer shells. The moisture-wicking properties of the base layer help transport moisture away from your body, preventing it from getting trapped in your clothing system.

    Hiking Pants or Shorts

    When it comes to hiking, having the right clothing is crucial for your comfort and protection, especially when facing varying weather conditions. One essential component of your hiking attire is a reliable pair of pants or shorts. Choosing the right hiking pants or shorts can significantly enhance your hiking experience by providing comfort, durability, and functionality. Let’s delve into the key factors to consider when selecting the perfect hiking pants or shorts for your outdoor adventures.

    • Comfort and Range of Movement: Hiking involves a lot of physical activity and movement, so it’s essential to choose pants or shorts that allow for a wide range of motion. Look for designs that incorporate stretchable fabrics or articulated knees, which provide flexibility and freedom of movement. This feature is particularly important when navigating uneven terrain or scrambling over rocks and obstacles. Opt for a comfortable fit that allows you to move with ease throughout your hike.
    • Durability and Protection: Hiking pants or shorts should be made from durable materials that can withstand the rigors of the trail. Look for fabrics that are resistant to abrasion, tearing, and snagging. Reinforced knees and seat areas can provide extra durability in high-wear areas. Additionally, consider pants or shorts with built-in UPF (Ultraviolet Protection Factor) to shield your skin from harmful sun rays during long hours of sun exposure.
    • Quick-Drying and Moisture-Wicking Fabrics: Hiking often involves encountering wet conditions, whether from rain, crossing streams, or sweating. Choosing pants or shorts made from quick-drying and moisture-wicking fabrics is essential to keep you comfortable and prevent chafing or discomfort caused by wet clothing. Synthetic materials such as nylon or polyester are excellent choices as they dry quickly and efficiently wick moisture away from your skin.
    • Pockets and Storage: Having ample storage options is essential when hiking. Look for pants or shorts with multiple pockets, including zippered or cargo pockets, to securely store small essentials such as a map, compass, snacks, or a pocket knife. This allows for easy access to your belongings without the need for a separate backpack or waist pack. Consider the placement and size of the pockets to ensure they are convenient and functional for your needs.
    • Versatility and Convertibility: Some hiking pants or shorts offer versatile features that allow you to adapt to changing weather conditions or terrain. Convertible pants, for example, have zip-off legs that can be easily transformed into shorts, providing flexibility when temperatures rise. This versatility eliminates the need to carry both pants and shorts, saving space in your backpack. Additionally, look for pants or shorts with adjustable waistbands or drawstrings for a customized fit.

    Waterproof Jacket

    A waterproof jacket is an absolute must-have when it comes to outdoor activities, especially hiking. Whether you’re facing unexpected rain showers or venturing into wet environments, a reliable waterproof jacket is your ultimate shield against the elements. Let’s explore the key features and benefits of a high-quality waterproof jacket to ensure you stay dry and comfortable throughout your hike.

    • Waterproof Materials: When selecting a waterproof jacket, it’s crucial to look for materials that offer excellent water resistance. The jacket should be constructed with a waterproof membrane or coating that prevents water from penetrating through the fabric. Common waterproof materials used in jackets include Gore-Tex, eVent, and DryVent. These materials are designed to repel water while allowing moisture vapor to escape, ensuring breathability and comfort.
    • Breathability: While keeping you dry from the outside, a good waterproof jacket should also allow moisture vapor to escape from the inside. This breathability feature is essential to prevent excessive sweating and the buildup of moisture inside the jacket. Look for jackets that incorporate breathable membranes or technologies that allow for efficient moisture transfer. This helps regulate your body temperature and prevents the clammy feeling often associated with non-breathable rain jackets.
    • Sealed Seams: In addition to waterproof materials, pay attention to the jacket’s seam construction. Sealed seams are a critical feature in a waterproof jacket as they prevent water from seeping through the stitching. Taped or welded seams provide an extra layer of protection, ensuring that no water can penetrate through the tiny holes created by the needle and thread. This feature is particularly important during heavy downpours or when spending extended periods in wet conditions.
    • Hood and Adjustable Features: A well-designed waterproof jacket should have a fully adjustable hood to protect your head and face from rain and wind. Look for hoods that have a brim or peak to shield your eyes and provide better visibility. Additionally, adjustable cuffs, hem, and waist drawcords allow you to customize the fit of the jacket, sealing out rain and preventing water from entering through the openings. These adjustable features also help trap warmth and enhance overall comfort.
    • Packability and Weight: When hiking, it’s essential to consider the packability and weight of your gear. A good waterproof jacket should be lightweight and easily compressible, allowing you to pack it into a small space when not in use. This feature is especially valuable for backpackers or those with limited storage capacity. Look for jackets that come with a stuff sack or can be folded into their own pocket for convenient storage and transportation.
    • Versatility: A waterproof jacket can serve multiple purposes beyond hiking. It can be your go-to outer layer for various outdoor activities, such as camping, backpacking, or even urban adventures. Look for jackets with a versatile design that can be worn in different settings and weather conditions. Some jackets come with removable liners or zippered vents, allowing you to adapt to changing temperatures and activity levels.

    Hiking Socks

    When it comes to hiking, your feet are your most valuable asset, and investing in a good pair of hiking socks is essential for a comfortable and enjoyable hiking experience. Hiking socks play a crucial role in protecting your feet, providing cushioning, moisture-wicking properties, and preventing blisters. Let’s explore the key features and benefits of high-quality hiking socks to ensure your feet stay happy and blister-free on the trails.

    • Cushioning and Support: Hiking socks are designed to provide extra cushioning and support to your feet, reducing the impact of each step and minimizing fatigue. Look for socks with strategically placed padding in the heel, toe, and ball of the foot. This cushioning helps absorb shock and provides additional comfort during long hikes or when traversing rugged terrain. Opt for socks with a medium to thick cushioning level, depending on your personal preference and the intensity of your hikes.
    • Moisture-Wicking Properties: Hiking often involves sweating, and moisture build-up can lead to discomfort and blisters. That’s why it’s crucial to choose socks with excellent moisture-wicking properties. Look for socks made of merino wool or synthetic materials such as polyester or nylon. Merino wool is a popular choice for hiking socks as it naturally wicks away moisture from your skin, keeping your feet dry and comfortable. Synthetic materials are also effective at wicking moisture and drying quickly, making them a great alternative for those with wool sensitivities.
    • Breathability: In addition to moisture-wicking properties, hiking socks should also be breathable to allow proper airflow around your feet. Breathable socks help regulate temperature, preventing your feet from becoming too hot or sweaty. Look for socks with mesh panels or ventilation channels that promote air circulation. This feature is particularly important during warmer hikes or when engaging in high-intensity activities. Breathable socks also help prevent the growth of odor-causing bacteria, keeping your feet fresh throughout your hike.
    • Blister Prevention: Blisters can quickly turn a pleasant hike into a painful experience. Hiking socks are specifically designed to minimize the risk of blisters by reducing friction and rubbing. Look for socks with a seamless construction, as seams can cause irritation and lead to blisters. Additionally, socks with a snug but not overly tight fit help prevent excess movement and rubbing. Some hiking socks also feature extra padding in areas prone to blister formation, such as the heel and toe. By choosing socks that prioritize blister prevention, you can hike for longer distances without discomfort.
    • Proper Fit and Length: The fit and length of your hiking socks are crucial for their effectiveness. Look for socks that fit snugly without being too tight or restrictive. Avoid socks that bunch up or slide down inside your boots, as this can lead to friction and discomfort. Consider the height of the socks as well, as different hiking conditions may require different lengths. Crew-length socks are a popular choice as they provide coverage and protection for the lower leg. However, for hot weather or low-cut hiking shoes, ankle-length or quarter-length socks may be more suitable.
    • Durability: Hiking socks should be durable enough to withstand the rigors of the trail. Look for socks with reinforced heels and toes, as these areas tend to experience the most wear and tear. Double-layered or cushioned socks are also known for their durability. Additionally, consider the sock’s construction and quality of materials to ensure they can withstand frequent use and washing without losing their shape or performance.
    • Layering and Seasonal Considerations: Depending on the weather and hiking conditions, you may need to layer your socks for added warmth or moisture management. In colder temperatures, consider wearing a thin moisture-wicking liner sock underneath your hiking socks to enhance insulation and prevent moisture buildup. This layering system helps regulate temperature and provides additional cushioning. Additionally, for wet or snowy conditions, consider wearing waterproof or water-resistant socks as an outer layer to keep your feet dry.

    Hat and Gloves

    When venturing into the great outdoors, it’s essential to pack a hat and gloves to ensure your comfort and protection in various weather conditions. These accessories play a vital role in shielding your head, face, and hands from the elements, be it the cold, wind, or sun. Let’s explore the importance of wearing a hat and gloves and how to choose the right ones for your outdoor adventures.

    • Hat for Sun Protection: A hat is a must-have item to safeguard your head and face from the sun’s harmful rays. When selecting a hat, opt for one that provides ample shade and has a wide brim. A wide-brimmed hat, such as a sun hat or a safari hat, offers excellent coverage, shielding your face, neck, and ears from direct sunlight. This helps prevent sunburns, reduces the risk of heatstroke, and lowers the chances of long-term sun damage, such as skin cancer.
    • Gloves for Hand Protection: Gloves are essential for protecting your hands from the elements and ensuring optimal dexterity while engaging in outdoor activities. When choosing gloves, consider factors such as weight, breathability, and dexterity. Lightweight gloves made from materials like synthetic blends or merino wool are ideal as they provide insulation without compromising breathability. Look for gloves with a snug fit that allow for easy movement and manipulation of gear, such as adjusting backpack straps, handling trekking poles, or operating a camera.
    • Cold Weather Protection: In colder climates, it’s crucial to choose hats and gloves that provide adequate insulation to keep you warm. Look for hats made from materials like fleece or wool, as they offer excellent insulation properties and retain heat effectively. Consider hats with ear flaps or a built-in lining for added protection against chilly winds. For gloves, opt for insulated options that provide warmth without sacrificing dexterity. Look for gloves with a waterproof or water-resistant outer layer to keep your hands dry in wet or snowy conditions.
    • Wind Protection: Wind can be particularly harsh on exposed skin, leading to discomfort and increased heat loss. When selecting a hat, choose one with a snug fit that stays securely on your head even in windy conditions. Look for hats made from wind-resistant materials or those with a windproof lining to provide an additional barrier against gusts. Similarly, gloves with windproof exteriors or those designed with a wind-resistant membrane can help shield your hands from chilling winds.
    • Sun Protection for Hands: While we often focus on protecting our face and head from the sun, it’s essential not to neglect our hands. Excessive sun exposure can lead to sunburns, premature aging, and an increased risk of skin cancer. Consider wearing gloves with built-in UPF (Ultraviolet Protection Factor) to shield your hands from harmful UV rays. UPF gloves provide an extra layer of sun protection, reducing the risk of sunburn and long-term sun damage.
    • Breathability and Moisture Management: When engaging in physical activities, it’s crucial to choose hats and gloves that offer breathability and moisture-wicking properties. Look for hats with ventilation panels or mesh inserts to allow airflow and prevent excessive sweating. Moisture-wicking gloves made from materials like polyester or nylon help to keep your hands dry by drawing moisture away from the skin. This prevents discomfort, chafing, and the formation of blisters.
    • Versatility and Packability: When selecting hats and gloves for outdoor adventures, consider their versatility and packability. Opt for hats that can be easily folded or crushed without losing their shape, allowing you to stow them in your backpack when not in use. Similarly, choose gloves that are lightweight and compact, making them easy to carry and store. This versatility ensures that you can always have your hat and gloves on hand, ready to protect you from changing weather conditions.

    Gaiters

    Gaiters are an essential piece of gear that outdoor enthusiasts, hikers, and adventurers should consider adding to their equipment. These protective coverings, worn over your boots, serve a crucial purpose: to keep debris, snow, water, and other unwanted elements from entering your shoes. Let’s delve deeper into the benefits and uses of gaiters and why they are particularly useful in muddy or snowy conditions.

    • Protection from Debris: When hiking on trails, especially in rugged or overgrown terrains, there’s a high chance of encountering debris such as rocks, twigs, thorns, or loose dirt. Gaiters act as a barrier, preventing these elements from entering your boots and causing discomfort or potential injuries. They cover the vulnerable areas around your ankles and lower legs, ensuring that you can hike with peace of mind, free from the annoyance of debris constantly finding its way into your shoes.
    • Keep Feet Dry: Gaiters are especially valuable in wet or muddy conditions. They provide an additional layer of protection against water, preventing it from seeping into your boots and keeping your feet dry. Whether you’re crossing streams, hiking in rainy weather, or trudging through muddy trails, gaiters act as a shield, reducing the chances of your boots becoming soaked and your feet getting wet. Dry feet contribute to overall comfort, prevent blisters, and help maintain a healthy environment for your feet.
    • Prevent Moisture and Mud: In addition to keeping your feet dry, gaiters also help to minimize the amount of moisture and mud that comes into contact with your boots and lower legs. This is particularly important in muddy or slushy terrains where each step can result in splashes of mud or water. Gaiters create a barrier that prevents excessive moisture and mud from saturating your boots, making your hiking experience more enjoyable and reducing the need for constant cleaning and maintenance.
    • Protection from Snow: Gaiters are a must-have accessory for winter hiking, snowshoeing, or mountaineering. They provide an extra layer of protection against snow entering your boots, keeping your feet warm and dry. When hiking in deep snow or traversing icy slopes, gaiters prevent snow from accumulating inside your boots, which can lead to discomfort, cold feet, and potentially dangerous situations. They also help to keep your lower legs insulated, reducing the risk of frostbite or hypothermia.
    • Prevent Insect Bites and Stings: Gaiters offer an added benefit of protection against insects, particularly in areas where ticks, mosquitoes, or other biting insects are prevalent. By covering your lower legs and ankles, gaiters create a physical barrier that makes it more difficult for insects to reach your skin. This can help reduce the risk of insect bites, stings, and potential exposure to insect-borne diseases. However, it’s important to note that gaiters cannot provide complete protection, and it’s still advisable to use insect repellent and take other necessary precautions.
    • Durability and Versatility: Gaiters are typically made from durable materials such as nylon or Gore-Tex, which are resistant to tears, abrasions, and water. This ensures that they can withstand the rigors of outdoor activities and provide long-lasting protection. Gaiters are also designed to be adjustable and versatile, allowing them to fit a range of boot sizes and accommodate different leg shapes. They often feature adjustable straps, hooks, or zippers for a secure and customizable fit.
    • Easy to Use and Carry: Gaiters are relatively easy to use and can be quickly put on or taken off as needed. They are lightweight and compact, making them easy to carry in your backpack when not in use. Some gaiters are even designed to be packable, folding down to a small size for convenient storage. Their portability ensures that you can always have gaiters on hand, ready to be deployed when the terrain or weather conditions call for their use.

    Bandana or Buff

    A bandana or buff is indeed a versatile and practical accessory that should be a staple in any outdoor enthusiast’s gear collection. Whether you’re hiking, camping, or engaging in other outdoor activities, a bandana or buff offers a range of benefits and uses that can enhance your comfort and protection. Let’s explore the various ways you can utilize a bandana or buff and the advantages they provide in different situations on the trail.

    • Headband or Sweatband: One of the primary uses of a bandana or buff is as a headband or sweatband. When you’re engaged in physical activities, such as hiking or running, it’s common to sweat, and the moisture can drip into your eyes, causing discomfort and affecting your vision. By wearing a bandana or buff as a headband, you can absorb sweat and keep it from running down your face. This helps to keep your eyes clear and maintain focus on the trail ahead.
    • Neck Gaiter or Scarf: A bandana or buff can be worn as a neck gaiter or scarf, providing protection and insulation for your neck in various weather conditions. In colder temperatures, you can pull it up to cover your mouth and nose, providing an extra layer of warmth and shielding your face from chilly winds. In warmer weather, it can offer protection from the sun’s rays, preventing sunburn on your neck and minimizing the risk of heatstroke. Additionally, a bandana or buff can act as a barrier against dust, pollen, and other airborne particles, keeping them away from your face and reducing the risk of allergies or respiratory discomfort.
    • Face Covering or Mask: In recent times, face coverings have become essential in certain situations to help reduce the spread of respiratory droplets and protect yourself and others. A bandana or buff can be used as a makeshift face covering or mask when needed. While it may not provide the same level of filtration as a medical-grade mask, it can still act as a physical barrier, preventing larger droplets from being released into the air when you talk, cough, or sneeze. It’s important to note that when using a bandana or buff as a face covering, it should be worn properly, covering both your nose and mouth, and washed regularly.
    • Sun Protection: When spending time outdoors, protecting your skin from the sun’s harmful rays is crucial. A bandana or buff can be used to shield your head, face, and neck from excessive sun exposure. Look for bandanas or buffs made from materials with a high Ultraviolet Protection Factor (UPF) rating, which indicates their ability to block out UV radiation. By wearing a bandana or buff as a sun-protective accessory, you can reduce the risk of sunburn, premature aging, and skin cancer.
    • Insect Protection: Insect bites can be a nuisance and potentially carry diseases. Wearing a bandana or buff around your neck or over your head can act as an additional layer of protection against insects, particularly around your face and neck. You can also apply insect repellent to the fabric of the bandana or buff for added effectiveness. This can help minimize the chances of mosquito bites, ticks latching onto your skin, or other insect-related discomforts while you enjoy your outdoor activities.

    Conclusion

    Embarking on a hiking adventure can be an exhilarating experience, but it’s essential to be well-prepared with the right gear and clothing. By investing in quality gear and following the tips in this guide, you’ll be ready to hit the trails and explore the beauty of nature. Remember to always prioritize safety, stay hydrated, and respect the environment. 

    FAQ

    How should I choose the right backpack for hiking?

    When choosing a backpack for hiking, consider the capacity, fit, and organization features. Look for a backpack with enough capacity to carry all your gear and supplies. Ensure the backpack has adjustable straps to achieve a comfortable fit. Compartments and pockets are essential for keeping your items organized.

    Are hiking boots necessary, or can I hike in regular sneakers?

    Hiking boots provide ankle support, better traction, and protection against rocks and debris. While it’s possible to hike in regular sneakers, investing in a good pair of hiking boots is highly recommended, especially for longer or more challenging hikes.

    How do I navigate on a hike without getting lost?

    Carry navigation tools such as a map, compass, and GPS device or smartphone with a hiking app. Familiarize yourself with how to use these tools before heading out. Pay attention to trail markers, signs, and landmarks. It’s also helpful to hike with a partner or join a guided hike if you’re new to navigation.

    How much water should I carry during a hike?

    The amount of water you should carry depends on the length and difficulty of the hike, as well as the weather conditions. As a general guideline, aim to carry at least 2 liters of water per person for a full-day hike. Adjust the amount based on your personal hydration needs and the availability of water sources along the trail.

    What should I do in case of a hiking emergency?

    In case of a hiking emergency, stay calm and assess the situation. If possible, use your navigation tools to determine your location and communicate your situation to emergency services. If you’re unable to move or find help, stay put and make yourself visible by using a whistle, signaling mirror, or brightly colored clothing.

    Loading


  • Hiking knife 101

    When preparing for a hike, one of the questions that often comes up is whether to pack a knife. For those new to hiking, the idea of carrying a knife may seem unnecessary or even intimidating. However, a knife is one of the most useful tools you can have with you on the trail.

    In this comprehensive guide, we’ll explore the various scenarios in which a knife could be invaluable during a hike, and we’ll provide detailed advice on how to choose the right knife for your adventures.

    TL;DR

    • A hiking knife is a versatile tool that can be invaluable during a hike.
    • It serves multiple purposes, including trail maintenance, food preparation, first aid, fire starting, gear repair, emergency shelter, and self-defense.
    • When choosing a hiking knife, consider factors such as the type of knife (fixed blade vs. folding knife), blade material (stainless steel, carbon steel, or high-carbon stainless steel), blade length, handle material, and additional features like locking mechanism, one-handed opening, pocket clip, and lanyard hole.
    • Invest in a quality knife with a warranty and prioritize safety by handling the knife with care, keeping the blade folded or sheathed when not in use, maintaining a stable grip, using a cutting board or stable surface, keeping the knife clean and dry, and regularly sharpening it.
    • Familiarize yourself with the knife carry laws in the area where you’ll be hiking, and remember that a hiking knife cannot be carried in carry-on luggage when flying.
    • Proper care and maintenance of your hiking knife will ensure its longevity and effectiveness.
    • Always prioritize safety, respect, and awareness when handling and using a knife during your hiking adventures.

    Understanding the Utility of a Hiking Knife

    A hiking knife is not just for wilderness survival scenarios or for the Bear Grylls among us. It is a multi-purpose tool that serves many practical purposes. Here are some of the scenarios where a knife can come in handy:

    Trail Maintenance and Navigation

    While on the trail, you may encounter overgrown vegetation that blocks your path or thorny bushes that can scratch and tear your clothes and skin. A knife allows you to trim back these obstacles and clear your way. Additionally, in an emergency situation, you can use a knife to mark trees or carve arrows to indicate your direction of travel for rescuers.

    Food Preparation

    Whether you’re slicing through a piece of fruit, cutting cheese or summer sausage for a trail snack, or prepping vegetables for a campfire meal, a good knife makes food preparation much easier. It’s also essential for opening food packaging that can be tough to tear by hand.

    First Aid

    In a medical emergency, a knife can be a lifesaver. It can be used to cut bandages, tape, or clothing to treat wounds. While we hope it’s never necessary, having a knife can make a significant difference in a first-aid situation.

    Fire Starting

    If you need to start a fire, a knife can be used to shave small pieces of wood to create tinder, or to strike a ferro rod if your knife has a sharp spine. This can be crucial for warmth and cooking if you end up spending an unplanned night in the wilderness.

    Gear Repair

    On the trail, gear can break. A knife can help in repairing equipment, from cutting repair tape or patches to fit, slicing rope, or even whittling a piece of wood to replace a broken tent peg.

    Emergency Shelter

    In the unfortunate event, that you have to stay out overnight unexpectedly, a knife can help you gather and cut materials for an emergency shelter, such as branches for a lean-to or insulation.

    Self-Defense

    While attacks from wildlife or other threats are extremely rare, a knife can provide a sense of security. It should be noted that the best defense is always to be aware of your surroundings and take preventative measures such as making noise to avoid startling wildlife.

    Choosing the Right Hiking Knife

    Now that we understand the uses of a hiking knife, let’s delve into how to choose the right one. There are several factors to consider:

    Type of Knife

    • Fixed Blade vs. Folding Knife: Fixed blades are generally more robust and reliable, whereas folding knives are compact and easy to carry. For most hikers, a folding knife will be sufficient and more convenient.
    • Multi-tool vs. Single Blade: Multi-tools come with additional features like scissors, screwdrivers, and even tweezers, which can be useful for gear repair and other tasks. A single blade is typically stronger and lighter.

    Blade Material

    • Stainless Steel: Resistant to rust and easy to maintain, ideal for wet environments.
    • Carbon Steel: Holds an edge longer but is prone to rust, so it requires more care.
    • High-Carbon Stainless Steel: Combines the best of both worlds with easier maintenance and good edge retention.

    Blade Length

    • Under 3 Inches: Ideal for most hiking tasks and legal in more places.
    • Over 3 Inches: This may be necessary for larger tasks but can be illegal in some areas and heavier to carry.

    Handle Material

    The grip is important for safety and ease of use. Look for materials like rubber for good grip, even in wet conditions, or hard-use materials like G-10 if durability is a priority.

    Additional Features

    • Locking Mechanism: Essential for folding knives to prevent accidental closure.
    • One-Handed Opening: Useful if you need to use the knife while holding something with your other hand.
    • Pocket Clip: Convenient for keeping your knife accessible.
    • Lanyard Hole: This allows you to attach the knife to your pack or wear it around your neck.

    Price and Warranty

    Invest in a quality knife that will last and look for brands that offer a warranty. While you don’t need to spend a fortune, the cheapest options may not provide the reliability you need.

    Knife Safety and Care

    Carrying a knife safely is just as important as choosing the right one. Here are some safety tips to keep in mind:

    • Always handle your knife with care and respect. Treat it as a tool, not a toy.
    • Keep the blade folded or sheathed when not in use to prevent accidental cuts.
    • When using the knife, make sure you have a stable grip and keep your fingers away from the blade.
    • Use a cutting board or stable surface when cutting food or other materials.
    • Keep your knife clean and dry to prevent rust and maintain its performance.
    • Sharpen your knife regularly to ensure it remains effective and safe to use.

    Frequently Asked Questions

    1. Is it legal to carry a hiking knife?

    Laws regarding knife carry vary from country to country and even within different states or regions. It’s essential to familiarize yourself with the specific regulations in the area where you’ll be hiking. In general, folding knives with blade lengths under a certain limit (usually 3 inches) are legal in most places. However, it’s always best to check local laws to avoid any legal issues.

    Here’s a great resource if you’re trying to figure out the legality of carrying a knife where you’re heading:

    2. Can I take a hiking knife on an airplane?

    No, you cannot carry a hiking knife in your carry-on luggage when flying. Knives, including hiking knives, must be packed in checked luggage. However, it’s important to note that rules and regulations regarding knives on airplanes can vary, so it’s best to check with the airline and relevant authorities before traveling.

    3. How do I sharpen a hiking knife?

    Sharpening a knife is a skill that takes practice, but it’s essential for maintaining its performance. There are various methods for sharpening a knife, including using a sharpening stone, a honing rod, or a knife sharpener. It’s recommended to follow specific instructions for the type of sharpener you’re using or seek guidance from a professional knife sharpener.

    4. Can I use a hiking knife for self-defense?

    While a hiking knife can provide a sense of security, it’s important to remember that it should be used primarily as a tool and not as a weapon. Self-defense situations are rare on the trail, and it’s always best to focus on prevention and awareness. Making noise, traveling in groups, and carrying bear spray are more effective measures for staying safe in the wilderness.

    5. How do I care for my hiking knife?

    Proper care and maintenance will ensure that your hiking knife lasts for years to come. After each use, clean the blade with mild soap and water, then dry it thoroughly. Apply a thin layer of oil to prevent rust. Store your knife in a dry place, preferably in a sheath or protective case. Regularly inspect the knife for any signs of damage or wear and address any issues promptly.

    Conclusion

    A hiking knife is a versatile and valuable tool to have on your outdoor adventures. From trail maintenance to food preparation and first aid to emergency situations, a knife can make a significant difference in your hiking experience.

    By choosing the right knife for your needs and taking proper care of it, you’ll have a reliable companion that can assist you in various situations. Remember to always prioritize safety and respect when handling and using a knife, and be aware of the laws and regulations regarding knife carry in the areas you’ll be hiking. Happy trails!

    Loading


  • Choosing the right campsite requires a combination of experience, knowledge of the wilderness, and careful consideration of key elements. Whether you’re a seasoned backpacker or a first-time multi-day trekker, here are the essential factors to consider when selecting your nightly campsite.

    TL;DR

    • Flat Terrain: Look for a naturally flat or previously cleared area to ensure a level surface and identify potential hazards.
    • Drainage: Avoid low-lying areas prone to collecting rainwater or snowmelt. Opt for slightly elevated spots that allow water to drain away from your tent.
    • Protection from the Elements: Seek out natural features like trees, shrubs, and rock formations that act as windbreaks and provide shelter from rain or snow.
    • Environmental Impact: Follow the principles of Leave No Trace by using established campsites and minimizing your impact on vegetation and soil.
    • Proximity to Water: Camp at least 200 feet away from lakes, streams, or rivers to preserve water sources and prevent contamination.
    • Wildlife Concerns: Avoid camping in wildlife corridors and properly store food to minimize disturbances and promote coexistence.
    • Legality and Regulations: Research and comply with camping regulations, permits, and specific rules for your chosen destination.

    Flat Terrain: The Foundation of Comfort and Safety

    When scouting for the perfect campsite, keep an eye out for a spot that is naturally flat or has been previously used and cleared by experienced campers. These established areas not only offer a level surface but also provide the added benefit of having any potential hazards already identified and addressed. In snowy conditions, you might even need to take matters into your own hands and stomp down or shovel an area to create a perfectly level space for your tent.

    By prioritizing flat terrain for your campsite, you’re setting a solid foundation for a restful and rejuvenating night’s sleep. So, take the time to scout the area, assess the ground, and choose a spot that will provide you with the utmost comfort and safety during your wilderness adventure.

    Drainage: Keeping Dry in Wet Conditions

    While access to clean water is essential for drinking, cooking, and cleaning, it’s equally important to safeguard your campsite from turning into a soggy mess during rainstorms.

    To keep dry and comfortable, it’s crucial to consider the drainage of your chosen campsite. Avoid setting up camp in low-lying areas that are prone to collecting rainwater or melting snow. These depressions can quickly transform into muddy pits, making for an unpleasant and potentially hazardous camping experience. Instead, opt for slightly elevated areas that allow water to naturally drain away from your tent.

    By selecting a campsite with proper drainage, you can ensure that rainwater and melting snow will flow away from your sleeping quarters, keeping you and your gear dry. This not only enhances your overall comfort but also helps to maintain the integrity of your equipment, preventing potential damage caused by prolonged exposure to moisture.

    So, when scouting for the ideal campsite, keep an eye out for areas with natural slopes or gentle inclines that promote efficient water runoff. By strategically positioning your tent on higher ground, you can rest easy knowing that you’ve taken proactive measures to stay dry in wet conditions.

    Protection from the Elements: Nature’s Shield

    The ever-changing weather patterns can swiftly transform a serene camping trip into a battle against the forces of nature. That’s why it’s crucial to seek out natural shields that can protect you from the wrath of wind and storms.

    In your quest for a safe and comfortable campsite, keep an eye out for the guardians of nature: trees, shrubs, and rock formations. These natural features can act as formidable windbreaks, shielding you from strong gusts and providing a much-needed respite from heavy rain or snowfall. The strategic placement of your tent near these protective barriers can make a world of difference in your camping experience.

    However, it’s essential to exercise caution and remain vigilant when seeking shelter among the elements. Dead trees or weak branches, although seemingly offering a sense of protection, can pose a significant danger during high winds. The last thing you want is for a gust of wind to send a weakened branch crashing down on your campsite, potentially causing injury or damage to your equipment. Always prioritize safety and choose sturdy, healthy natural features as your shield against the elements.

    Environmental Impact: Leave No Trace

    Embracing the principles of Leave No Trace is paramount in preserving the natural beauty and ecological balance of our surroundings. By following these guidelines, we can ensure that future generations will have the opportunity to experience the wonders of the outdoors.

    When selecting a campsite, prioritize established areas that have been previously used by fellow adventurers. These designated campsites often feature cleared spaces specifically designated for tents and may even have designated fire rings if fires are permitted. By utilizing these existing sites, we can minimize our impact on the surrounding vegetation and soil, allowing nature to thrive undisturbed.

    It is crucial to tread lightly and avoid trampling vegetation or moving rocks. These seemingly insignificant actions can have lasting consequences on fragile ecosystems. By respecting the natural environment and refraining from altering its delicate balance, we can contribute to the preservation of biodiversity and the overall health of the ecosystem.

    In our quest to protect water sources, it is essential to camp at least 200 feet away from lakes and streams. This buffer zone helps safeguard these vital water sources from contamination and disturbance. By maintaining a respectful distance, we can ensure the purity and integrity of these aquatic habitats, preserving them for the countless species that depend on them for survival.

    Remember, every action we take in the wilderness has an impact. By embracing the “Leave No Trace” philosophy, we can minimize our footprint and leave the environment as pristine as we found it.

    Proximity to Water: Balancing Convenience and Conservation

    While it may be tempting to set up camp right next to a pristine water source, we must be mindful of the potential risks and consequences. Camping too close to the water can inadvertently lead to contamination, as soap, food waste, or even human waste can find their way into the water, polluting its purity and endangering both aquatic life and our own health.

    To safeguard the integrity of these precious water sources, it is recommended to maintain a minimum distance of at least 200 feet from any lake, stream, or river when setting up camp. This buffer zone acts as a protective barrier, minimizing the risk of contamination and ensuring the preservation of these vital ecosystems.

    By adhering to this guideline, we not only prioritize the conservation of water sources but also demonstrate our commitment to responsible outdoor practices. It is our duty as nature enthusiasts to leave no trace and minimize our impact on the environment. By camping at a safe distance, we can enjoy the convenience of access to water while preserving the purity and ecological balance of these invaluable resources.

    Wildlife Concerns: Respect Nature’s Inhabitants

    Being aware of our surroundings and mindful of potential encounters with wildlife is not only crucial for our own safety but also for the well-being and preservation of these magnificent creatures.

    When selecting a campsite, it is important to consider the natural pathways and feeding areas that wildlife utilize. These areas, known as wildlife corridors, are vital for their movement and foraging activities. By avoiding camping in these sensitive zones, we can minimize our impact on their natural behavior and reduce the risk of unintentional disturbances.

    To further protect both ourselves and the wildlife, it is imperative to properly store our food. Bears, in particular, have a keen sense of smell and can be attracted to the scent of food from miles away. To prevent attracting these majestic creatures to our campsite, it is recommended to store food in bear-proof containers or hang it from a tree at a safe distance from our tent.

    By taking these precautions, we not only ensure our own safety but also promote the coexistence of humans and wildlife in harmony. It is our responsibility as outdoor enthusiasts to respect the natural habitats and behaviors of these creatures, allowing them to thrive undisturbed.

    Legality and Regulations: Know Before You Go

    Each region has its own set of rules and requirements, and it is our responsibility as responsible outdoor enthusiasts to know and abide by them. By taking the time to understand and comply with these regulations, we can ensure a smooth and enjoyable camping experience while also respecting the land and its management.

    One of the first steps in planning your camping trip is to determine whether camping is allowed in the area you have in mind. Some regions may have restrictions or even outright bans on camping due to various factors such as environmental concerns or safety considerations. To avoid any potential conflicts or legal issues, it is essential to research and confirm the camping regulations for your chosen destination.

    In addition to general camping regulations, certain areas may require permits or reservations to camp legally. These permits help manage the number of visitors and protect the natural resources of the area. It is crucial to check with local land management agencies, such as national parks, state parks, or forest services, to obtain the most up-to-date information on permit requirements and availability. By securing the necessary permits in advance, you can ensure that you are in compliance with the regulations and avoid any unnecessary complications during your trip.

    Furthermore, it is essential to familiarize yourself with specific rules and regulations that may be unique to the area you plan to camp in. These rules can vary widely and may include restrictions on campfire usage, specific camping zones, waste disposal guidelines, and more. By understanding and adhering to these area-specific rules, we can minimize our impact on the environment and contribute to the preservation of these natural spaces.

    In conclusion, selecting the perfect campsite involves finding a balance between comfort, safety, and environmental responsibility. By considering factors such as flat terrain, proper drainage, protection from the elements, minimizing environmental impact, proximity to water, and wildlife concerns, and adhering to Leave No Trace principles and local regulations, you can choose an ideal location to rest and recharge during your trek.


    FAQ

    Q. Why is sleeping on flat terrain important?

    Sleeping on flat terrain is important for both comfort and safety. Uneven ground can lead to an uncomfortable night’s sleep and increase the risk of sliding or rolling, potentially damaging your tent or sleeping gear.

    It’s best to look for a spot that is naturally flat or has been used before and cleared by previous campers. In snowy conditions, you may need to stomp down or shovel an area to create a level space. 1

    Q. Why should I consider drainage when selecting a campsite?

    Drainage is an important factor to consider because you want to keep dry in wet conditions. Avoiding low spots that could collect rainwater or melting snow is crucial to ensure your campsite doesn’t turn into a puddle during rainstorms. Instead, seek slightly elevated areas that allow water to drain away from your tent, keeping you dry and comfortable. 2

    Q. Why is protection from the elements important when choosing a campsite?

    Protection from the elements is vital because weather conditions in the wilderness can change rapidly. Natural features such as trees, shrubs, and rock formations can serve as effective windbreaks, providing shelter from strong gusts and heavy rain or snow. However, it’s important to exercise caution around dead trees or weak branches, as they can pose a danger in high winds. 3

    Q. What is the Leave No Trace principle?

    The Leave No Trace principle is a set of guidelines that help outdoor enthusiasts minimize their impact on the natural environment.

    These principles include planning and preparing, traveling and camping on durable surfaces, disposing of waste properly, leaving natural objects undisturbed, minimizing campfire impacts, respecting wildlife, and being considerate of other visitors. By following these principles, we can preserve the wilderness for future generations. 4

    Q. Why should I check the legality and regulations before camping?

    It’s important to check the legality and regulations of the area where you plan to camp to ensure that camping is allowed. Some regions have specific regulations or require permits.

    Checking with local land management agencies before your trip will provide you with the most up-to-date information on permits, campfire regulations, and any area-specific rules. This helps ensure that you are camping responsibly and by the rules and regulations of the area. 

    Loading


  • Navigating with a compass is an essential skill for outdoor enthusiasts, hikers, and adventurers. Whether you’re exploring unfamiliar terrain or finding your way back to a trailhead, a compass can be your reliable guide. This comprehensive tutorial will take you through the fundamentals of using a compass for navigation, covering everything from understanding the parts of a compass to executing accurate bearings and orienteering techniques.

    TL;DR

    • Navigating with a compass is crucial for outdoor enthusiasts, hikers, and adventurers.
    • Understanding the parts of a compass, such as the baseplate, rotating bezel, magnetic needle, and orienting arrow, is essential.
    • Differentiating between true north and magnetic north is important for accurate compass navigation.
    • Using the compass for basic navigation involves holding it correctly, orienting it, and navigating in a straight line.
    • Taking and following a bearing is a crucial skill for accurate navigation.
    • Combining a compass with a map enhances navigation capabilities.
    • Orienteering techniques, such as dead reckoning and aiming off, come in handy when traditional landmarks or maps are unavailable.
    • Navigating in challenging conditions requires additional skills and precautions.
    • Tips for compass navigation include calibrating the compass, practicing in familiar areas, and utilizing back bearings.
    • Mastering compass navigation opens up a world of exploration and adventure.

    Understanding the Parts of a Compass

    To effectively navigate with a compass, it’s important to understand its various components. Here are the key parts of a compass:

    • The baseplate: This features ruler markings and a direction-of-travel arrow, allowing you to measure distances and determine your intended direction.
    • The rotating bezel: Consisting of degree markings and an orienting arrow, the rotating bezel helps you align the compass with your desired direction.
    • The magnetic needle: The magnetic needle is a crucial element of the compass as it always points to magnetic north, providing you with a reliable reference point.
    • The orienting arrow: This arrow assists in aligning the compass with a map, ensuring accurate navigation.

    Determining Magnetic North

    Understanding the difference between true north and magnetic north is essential for accurate compass navigation. True north refers to the geographic North Pole, while magnetic north is the direction towards the Earth’s magnetic field. Here’s how to determine magnetic north:

    • Accounting for magnetic declination: Magnetic declination is the angle between true north and magnetic north at a specific location. It’s important to adjust your compass readings accordingly to compensate for this declination.
    • Using the compass to find magnetic north: By aligning the orienting arrow with the magnetic needle, you can determine the direction of magnetic north.

    Using the Compass for Basic Navigation

    Once you understand the parts of a compass and how to determine magnetic north, you’re ready to use the compass for basic navigation. Here are the steps to follow:

    • Holding the compass correctly: Hold the compass flat in your hand, ensuring that the baseplate is level.
    • Orienting the compass: Align the orienting arrow with the magnetic needle, ensuring they are parallel. This step helps you establish your desired direction.
    • Navigating in a straight line: Use the direction-of-travel arrow to guide you in a straight line towards your intended destination.

    Taking and Following a Bearing

    Taking and following a bearing is a crucial skill for accurate navigation. Here’s how to do it:

    • Setting a bearing on the compass: Rotate the bezel until the desired bearing aligns with the direction-of-travel arrow.
    • Taking a bearing from a landmark: Identify a prominent landmark in your line of sight and align it with the compass bezel. Read the bearing indicated by the direction-of-travel arrow.
    • Following a bearing: Keep the direction-of-travel arrow aligned with the bearing you’ve set and navigate towards your destination.

    Using a Compass with a Map

    Combining a compass with a map enhances your navigation capabilities. Here’s how to use them together:

    • Understanding the features of a topographic map: Familiarize yourself with the symbols, contour lines, and scale on a topographic map. These features provide valuable information about the terrain.
    • Orienting the map with a compass: Align the map’s north-south grid lines with the compass’s orienting arrow to ensure the map is correctly oriented.
    • Using the compass to navigate between two points on a map: Determine the bearing between two points on the map and transfer it to your compass. Follow the compass bearing on the ground to navigate between these points.

    Orienteering Techniques

    Orienteering techniques are advanced navigation methods that come in handy when traditional landmarks or maps are unavailable. Here are a few techniques to consider:

    • Dead reckoning: Navigating without landmarks or a map by estimating your direction and distance traveled.
    • Handrails and catching features: Using natural or man-made features, such as rivers or roads, as guides to maintain your course.
    • Aiming off: Intentionally offsetting your bearing to reach a desired point, allowing for more accurate navigation.

    Navigating in Challenging Conditions

    Navigating in challenging conditions requires additional skills and precautions. Here are some tips for navigating in specific situations:

    • Navigating in dense forests or areas with limited visibility: Use your compass to maintain a straight line and rely on other senses, such as sound and touch, to navigate.
    • Using a compass in low-light or nighttime conditions: In low-light or nighttime conditions, it’s crucial to have proper lighting and visibility. Use a headlamp or flashlight to illuminate your compass and map. Additionally, consider using reflective markers or glow sticks to mark your path for easy navigation.
    • Adjustments for navigating on steep slopes or mountainous terrain: When navigating on steep slopes or mountainous terrain, it’s important to account for the changes in elevation. Use contour lines on your map to identify the slope’s steepness and adjust your navigation accordingly.

    Tips for Compass Navigation

    To enhance your compass navigation skills, consider the following tips:

    • Calibrating the compass for accurate readings: Before each use, calibrate your compass by holding it level and rotating it in a figure-eight motion. This helps eliminate any magnetic interference and ensures accurate readings.
    • Practicing compass navigation skills in familiar areas: Start by practicing your compass navigation skills in familiar areas before venturing into unfamiliar terrain. This allows you to gain confidence and proficiency in using the compass.
    • Utilizing back bearings to confirm your direction: Back bearings are taken by turning 180 degrees from your original bearing. This helps confirm that you’re on the correct path and provides an additional reference point for navigation.

    Conclusion

    Mastering the art of compass navigation opens up a world of exploration and adventure. With the knowledge and skills gained from this comprehensive tutorial, you’ll be able to confidently navigate through unfamiliar terrain, find your way back to safety, and embark on exciting journeys with a sense of direction and purpose. Remember, practice is key to becoming proficient in compass navigation, so don’t hesitate to hone your skills and continue learning.


    FAQ

    Q: Can I use a compass on my smartphone instead of a traditional compass?

    While smartphone compass apps can be convenient, they may not always provide the same level of accuracy as a traditional compass. Additionally, smartphones rely on battery power, which can be a limitation in outdoor settings. It’s always recommended to carry a traditional compass as a reliable backup.

    Q: How often should I calibrate my compass?

    It’s best to calibrate your compass before each use to ensure accurate readings. This simple step can greatly enhance the reliability of your compass navigation.

    Q: Can I use a compass in conjunction with GPS devices?

    Absolutely! Combining a compass with GPS devices can provide you with multiple navigation tools and enhance your overall navigation experience. GPS devices can provide precise coordinates, while a compass can help you navigate in a more traditional and intuitive manner.

    Q: Are there any safety precautions I should take when using a compass?

    When using a compass, it’s important to be aware of your surroundings and stay focused on your navigation. Avoid distractions and always carry a map as a backup. Additionally, familiarize yourself with the area’s potential hazards, such as steep cliffs or dangerous wildlife, and plan your routes accordingly.

    Q: Can I use a compass in all weather conditions?

    While a compass can be used in various weather conditions, extreme weather conditions such as heavy rain or snowfall can affect visibility and make navigation more challenging. It’s important to take extra precautions and ensure you have the necessary equipment, such as waterproof maps and compasses, to navigate safely in adverse weather conditions.

    Loading