

- Backpacking tarp choices hinge on weight, strength, and cost considerations.
- Dyneema tarps are light and resilient but pricey; Silnylon tarps offer durability at a lower cost.
- Tarps provide a minimalistic approach to camping, are versatile, and setup is fast.
- Seasonal conditions like winter’s snow or summer’s heat and bugs influence tarp usage and setup.
- For solo backpackers, a 7×9 or 8×10 foot tarp strikes a balance between coverage and portability.
- Tarps can be customized for particular needs and reconfigured into various shelter types.
- Maintaining a tarp involves cleaning, drying, proper folding, and storage, as well as timely repairs.
- Sustainable tarp camping aligns with low environmental impact practices and responsible disposal.
- Essential backpacking tarp accessories include stakes, guy lines, and a reliable repair kit.
- For ultralight tarp configurations, consider A-frame or lean-to setups with a focus on quick deployment.
Ever dodge sudden rain while hauling a heavy tent? It’s time to change up your game. Picture this: you, a breeze-kissed hero, setting up a sleek backpacking tarp in minutes. Your buddies? They’re jaw-dropped and wondering why they’re not in on the secret. Dive into our tarp tell-all to lighten your load, turn heads on the trail, and become one with nature. Let’s unpack the ins and outs of picking a champion tarp that reigns over tents. Ready to rule the wild? Let’s go!
How to Choose the Right Backpacking Tarp?
Choosing the right #backpacking tarp depends on where you go and what weather you face. For my needs, Dyneema tarps are the best because they are light and strong. However, Silnylon tarps offer a good balance of durability and cost.
When looking at tarp materials, we see two big choices: Dyneema and Silnylon. Dyneema is super light and tough. It’s often seen as the best but costs more. Silnylon is heavier than Dyneema but also tougher. It’s good for rough trips and costs less.
We should think about weight, strength, and cost when picking a tarp. Ultralight tarps are great for long trips. You can carry them far without getting worn out. Strong tarps last longer and can take more hits from rocks or branches.
Let’s compare Dyneema and Silnylon. Dyneema tarps are top-ranked for being light. They last long and handle weather well. But their price is higher. Silnylon tarps weigh more but they won’t tear easily. They can stand up to harsh use and are easier on your wallet.
Which should you choose? For quick trips with less gear, pick ultralight Dyneema. For hard trips or if you want to spend less, Silnylon could be better. Each tarp has its place. Think about what matters to you most – low weight, strength, or price.
In the end, it’s all about finding a balance that fits your type of adventure. With a good waterproof tarp, you can explore more and worry less. Choose wisely and your tarp will be a loyal buddy on many trips!
What Are the Benefits of Tarp Camping Over Traditional Tents?
Why choose a tarp over a tent for backpacking? Tarps weigh less and pack smaller. Now let’s dive into the details behind this simple answer. While tents can be bulky, a backpacking tarp is light. Your back will thank you after a long hike. It slides easily into your pack, taking up less space.
Tarps reign supreme in versatility too. Use them in forests, mountains, or beaches. They adapt to many spots tents can’t go. Ever tried to pitch a tent on rocky ground? With a tarp, it’s no sweat.
What about speed in setting up and breaking down? Faster with a tarp. No poles or complicated parts. Just tie your tarp to trees or with stakes. And when it’s time to leave, it packs up in a snap.
And the connection to nature? Far better with a tarp. You lie under the stars, the breeze on your face. It’s as close as you get to sleeping outdoors with some cover over your head. With tents, you’re zipped away from the world.
Tarps serve many uses in different camping environments. They are lightweight, easy to carry, and quick to set up. Plus, you feel closer to the great outdoors. That’s the benefit of tarp camping for you. Life is simpler and lighter on the trail. And yes, it’s all worth it.
How Do I Set Up a Tarp Shelter?
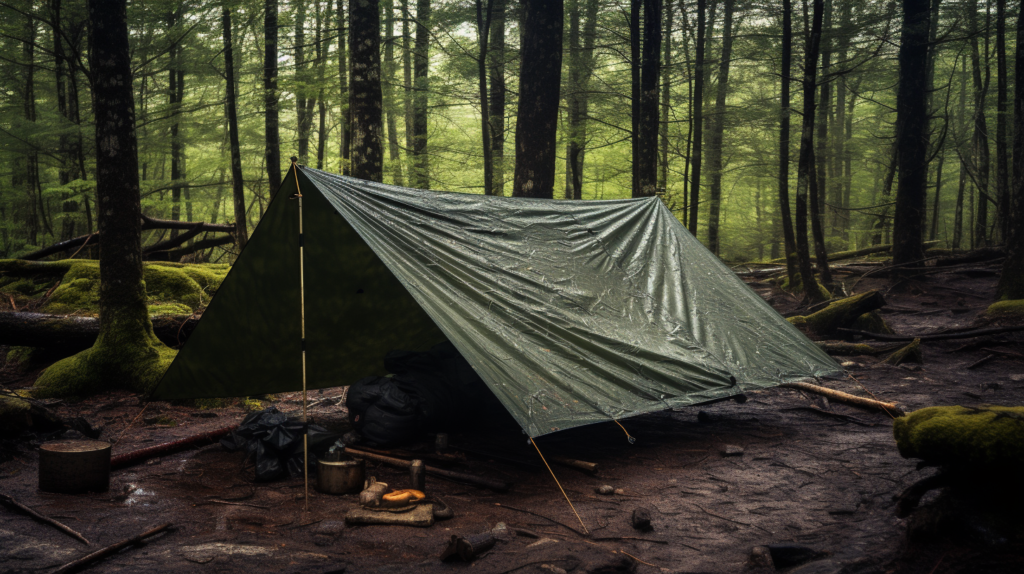
Q: How can I quickly and easily set up my tarp shelter?
A: Choose flat ground and use two trees to string a ridge line.
First, find flat ground with trees nearby. Use the trees to string a ridge line. Then, drape your tarp over the line. Pull the corners tight and stake them to the ground. Voila! You have basic shelter.
Keep these tips in mind for a quick setup. Angle your tarp against the wind for better shelter. Drape it high for cool air in the heat. For rain, pitch it low and tight to keep dry.
Q: What are some tried and true tarp pitching techniques?
A: Go for classic shapes like the A-frame or lean-to for reliability.
The A-frame is easy and effective. To make it, secure your ridge line between two supports. Then, place your tarp over the line and secure it to the ground, making an A shape.
Lean-tos work well too, especially in windy spots. Just tie one long edge of your tarp to a ridge line. Then, stake the free sides out, leaving one side open.
Getting creative? Beginners can try the plow point. Secure one corner high and pull out the other corners. It’s quick and stands strong in the wind.
Basic setups are quick, even for beginners. They keep you dry, warm, and out of the wind. So, next time you pack for the wild, grab a tarp and try these tricks. You’ll love how fast you can get cozy and enjoy nature.
Are There Any Seasonal Considerations When Tarp Camping?
Yes, camping seasons change how you should use a backpacking tarp. In winter, build your tarp shelter to block wind and snow. Close sides and create steep angles for snow to slide off. Use a waterproof and sturdy backpacking tarp. Look for ones designed for snowy conditions. Secure your tarp well. Snow and wind can pull stakes out of the ground. Ventilation is also key to preventing too much moisture from building up. Pitch your tarp higher to let air in and damp air out.
Summer brings different challenges for tarp campers. Choose a light, reflective tarp to keep cool. Pitch it high for a breeze or make a simple roof for shade. Rainy season? Make sure you have a tarp that won’t leak. Tilt it so water runs off fast and away from you. Keep gear under the tarp but away from the edges – you don’t want them wet!
Seasonal changes mean bugs too. In summer, think about a tarp with a mesh net. It will keep bugs out so you can sleep in peace. Remember, tarps for backpacking differ. Some are best for cold weather, while others suit hot, bug-filled times. Pick a seasonal tarp that fits the time of year. This way, you can focus on the adventure, not the weather.
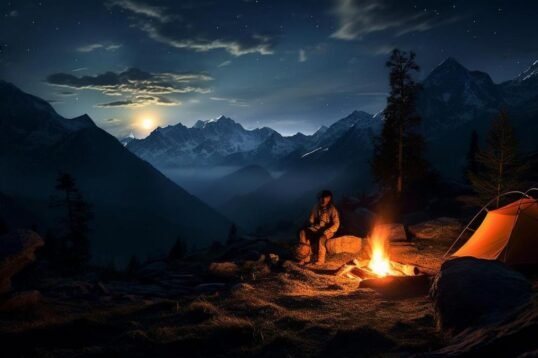
Ultralight Tarp Configurations for Solo Backpackers
What is the ideal tarp size for a solo backpacker? For solo trips, a 7×9 or 8×10 foot tarp works great. It gives enough cover to shield you from rain and wind. Yet, it’s small so it won’t weigh you down.
Now let’s dig into why that size makes sense and how to pitch it for fast hiking. When you’re alone, you must balance the need for shelter with the wish to hike light. A large tarp would offer more space but at the cost of extra weight. And if you’re speed hiking, each ounce matters.
Some favor a tiny, light tarp for these fast trips. This way, you move quickly with less to carry. But, you still get some shelter at rest times. A bigger tarp can seem good until you’re far from home with too much to carry. With the right size, you don’t feel trapped by your gear.
Fast and light tarp setups often use what’s at hand. Sticks or your trekking poles can hold up your tarp. This means no extra poles to carry. You can use trees too if they’re around. This kind of setup is not just for speed. It also helps when you need to set up shelter fast as the weather turns.
A minimalist setup means more mobility. An ultralight tarp can go in your pack easily. And when you use one, you trade some comfort for the joy of moving free. You choose when and where to rest, and your shelter is set in minutes.
To balance your tarp’s cover with its weight, think about what you really need. Will you face heavy rain, or is a light shield from dew enough? A solo hiker finds joy in this freedom. It’s why picking the right ultralight tarp, and knowing how to use it quickly, is so key for your trips.
Maximizing Tarp Use: Multi-Functionality and Extended Adventures
Yes, a tarp can be versatile in different camping scenarios. You can make your standard tarp suitable for backpacking by adding tie-out points and trimming excess material.
Tarps are genius tools for the trail. They shield us from rain and notch up comfort. But there’s more to them than just cover. Tarps can turn into gear sheds or windblocks. You just need skill and some knots.
Now let’s dive deeper. A tarp is like a Swiss Army knife for backpackers. Think of all the shapes you can mold it into. Lean-to, A-frame, or even a bivy-style wrap. It’s all in how you fold and tie it. For each setup, you need the right knots and a little practice. With these, you can tailor your shelter to the land and the sky.
Let’s talk DIY tarp shelters. You can choose from many designs. Each fits a need, like more space or better airflow. Want to make your own shelter? Start with a simple design. Add some personal flair as you learn. Crafting a tarp shelter can also save you money, as you reuse and recycle tarps.
Techniques for converting a standard tarp into a backpacking tarp include sealing the seams for waterproofing, adding reinforced tie-out points, and cutting it to reduce weight. Customizing your tarp means it fits your pack and your needs like a glove.
And here’s a pro tip: consider an ultralight tarp with doors. It adds privacy and shields against draughts. Such a tarp is a haven in the wild. It keeps you snug and keeps your gear dry.
In short, tarps are not just for sleep. They can be shelters, lounges, or forts against the storm. With a tarp, the trail is yours to shape.
Tarp Maintenance and Longevity Tips
To care for and store your tarp, clean it, let it dry, and fold it neatly. For a longer life, keep your tarp clean after trips. Wash off dirt and leaves. Make sure it’s dry before you put it away. Wet tarps can get moldy quickly. Pack it right to avoid damage.
Proper folding and storage help a lot. Fold it along the same lines every time. This method stops stress on the tarp fabric. Store it in a cool and dry spot. Avoid places with direct sunlight. UV rays can weaken tarps over time.
Keeping your tarp safe from sun and rain matters too. When you set up your tarp, pick a spot with some shade. This can stop UV damage. If the weather gets bad, take down your tarp if you can. This will help it last through more trips.
Do a check on your tarp now and then. Look for small tears or weak spots. Fix them up before they get worse. Small fixes can save you from needing a new tarp. Use repair tape or a patch kit for holes. Make sure your tarp is clean before you apply these.
With good tarp maintenance and care, your shelter can last many hikes. Clean it often and store it right. This way, you can make your trips last and enjoy many nights under the stars.
Integrating Tarps into a Sustainable Backpacking Ethos
Tarp camping can form a part of sustainable backpacking by reducing environmental impact. Tarps, made from light materials, often mean less manufacturing waste. They fit with ‘leave no trace’ ideals, making you an earth-friendly camper. You might ask, what about the environmental impact of tarp camping? It’s generally low. Use and dispose of tarps responsibly to keep it that way.
To make sure your tarp camping is sustainable, start with the tarp. Pick one made of long-lasting material. You want it to stand up to many trips. This cuts down waste. Also, tarps made from materials like Dyneema are strong but leave less of a footprint than heavier gear.
When you’re in the woods or on the mountain, sustainable practices are key. Always leave your campsite the way you found it. Tarps make this easy. They don’t disrupt soil and plants like some big tents do. Plus, they’re quick to set up and take down.
What should you do with old tarps? That’s where responsible disposal comes in. Don’t just throw them away. Some tarps can be recycled. Others can be repurposed or donated. Find out how to recycle or dispose of your tarp in a way that’s good for nature. One less piece of trash in the landfill helps everyone.
Remember, when you’re picking and pitching your tarp, think ahead. Aim for low impact on our planet. Care for your gear so it lasts long. And when it’s time to say goodbye, do it in a way that helps our earth. This is what makes you a sustainable backpacker with a tarp.
Finding and Fixing Tarp Accessories
The best tarp accessories for backpacking are stakes, guy lines, and a repair kit.
When camping, you want your tarp setup ready for any weather. That means having the right gear. Stakes and guy lines keep your tarp steady in the wind. A repair kit is a must to fix any tears fast. To pick the best guy lines, think about weight and strength. Light lines are easy to pack, but they must also hold tight.
Fixing a ripped tarp in the field seems hard, but it’s not with the right tools. For tears, use patches and adhesives from your lightweight repair kit. These essentials don’t add much weight but are worth their weight in gold when trouble pops up. A small roll of duct tape can also provide a quick, if less elegant, solution.
Remember, talent in fixing comes from practice. Try repairs at home before you hit the trails. That way, you’re a pro when in the wild. Always check your gear before a trip, and keep those repair skills sharp. It’s all about being prepared so you can keep your focus on the adventure.
Ultralight Tarp Configurations for Solo Backpackers
What is the ideal tarp size for a solo backpacker? The best size is large enough to cover you and your gear but as light as possible. For a solo hike, you want a tarp that’s easy to carry and sets up fast. You also need one that packs down small. A tarp that’s around 8 to 10 feet in length works well for one person.
Now, which configurations are best for ultralight and speed hiking? A simple A-frame setup is quick and offers good protection. For speed hikes, go for a lean-to style. This uses fewer stakes and can be set up even faster. Another great style for solo treks is the bivy-tarp setup which is compact yet shields well against wind and rain.
When it comes to tarps, size and weight matter a lot. You must balance coverage against bulk. Think about where you’ll camp. If trees are plenty, you might opt for a hammock tarp. They are built for hanging and are super light.
For ultralight tarps, materials like Dyneema win praise. Yes, they can get pricey. But they last long and buck the wind like champs. Silnylon tarps are also great, more budget-friendly but a bit heavier.
To choose your ideal ultralight tarp, consider these questions:
- How much weather protection do I need?
- What’s more important – low weight or low cost?
- Do I prefer quick setups or varied pitching options?
By answering these, you match your needs with the right tarp. And remember, practice your setup at home first. This way, you’re a pro when it’s time to camp.
With these tips, your solo adventures will be more about the hike and less about the hassle!
Conclusion
Choosing the right backpacking tarp can make or break your adventure. We’ve looked at materials, from light Dyneema to sturdy Silnylon, and saw why tarps win over tents. They’re lighter and let you feel closer to nature. Setting one up is quick once you learn the ropes, and yes, they work in all seasons—even in the snow! Solo hikers, pack a tarp that balances size and weight. Remember, your tarp can do more than cover you at night. Take care of it, and it will provide adequate shelter for many trips to come. Finally, always think green when you pack up. Happy trails!
![]()


