
- Essential for long hikes: macronutrients (protein, carbs, fats) and micronutrients (vitamins, minerals).
- High-calorie foods like nuts, seeds, energy bars, jerky, and trail mix are excellent for sustained energy.
- DIY energy bars and trail mix can be made at home with oats, nuts, honey, fruit.
- Opt for lightweight, high-energy foods for backpacking; prepare with dehydration and portion control.
- Vegan and vegetarian hikers should focus on protein-rich foods like nuts, beans, and whole grains.
- Use sustainable packaging and preserve foods via dehydration for multi-day hikes.
- To avoid wildlife encounters, use bear canisters and proper food hanging techniques.
- Budget-friendly meals include pasta, rice, oats, homemade granola bars, and buying ingredients in bulk.
- No-cook meals and soaking methods like cold-soaking oats or lentils are practical for trails.
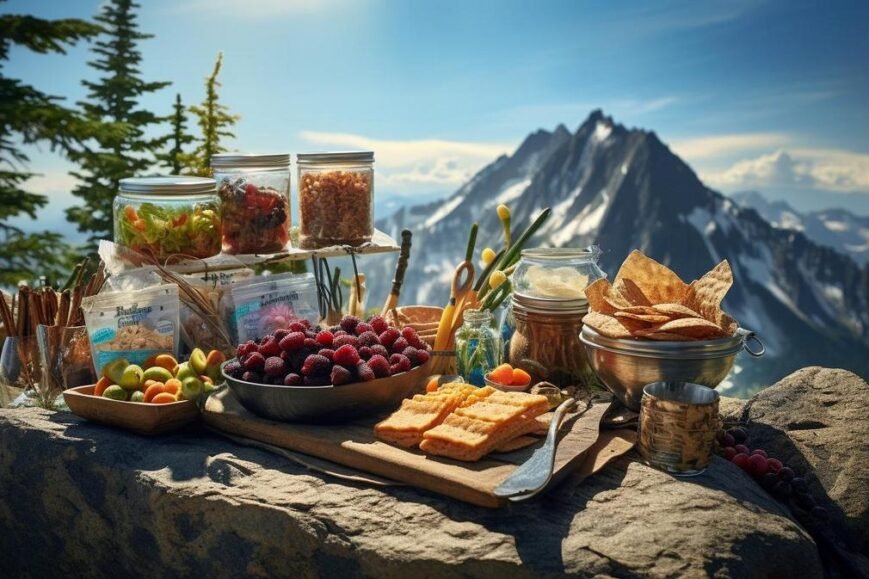
Hungry on the trail? Choosing the right food can make or break your hike. You need meals that pack energy, taste good, and won’t weigh you down. Whether you’re crossing steep hills or long distances, your body craves nutrients to keep going. In this guide, I’ll share top trail food picks that are both delicious and nutritious, ensuring every step you take is fueled by the best. Let’s dive in and transform your backpack into a hiker’s pantry that caters to adventure!
What Are Essential Nutrients Needed for Long Hikes?
When you pack food for long hikes, think nutrition. You need protein-rich foods, carbs, and fats. These are called macronutrients. They give you the power to climb hills and walk far. Things like nuts, seeds, and energy bars can help. For proteins, take jerky or nut butter. Want a quick boost? Try calorie-dense hiking snacks like trail mix or chocolate.
Understanding Macronutrients: Proteins, Carbs, Fats
Proteins build muscle. Carbs give quick energy. Fats give long energy. Your body needs all three when you hike. Choose snacks that mix these well. For carbs, dried fruit or oatmeal bars are great. For fats, pack some cheese or almonds. This combo keeps you strong on the trail.
Importance of Micronutrients: Vitamins and Minerals
Your body also needs things like vitamins and minerals. They help keep you healthy. Foods like fruits and veggies are full of them. But on the trail, you can’t always take fresh stuff. So, dried fruits or veggie chips can be good. They are light to carry and last long.
Calorie Requirements for High-Energy Activities
Hiking needs lots of energy. You burn more calories when you are active. So, eat more than you do on a usual day. This means more nuts, grains, and cheese. Packing calorie-dense hiking snacks means you get more fuel without more weight.
Breakfast Ideas to Start Your Hiking Day Strong
Your day starts with breakfast. It sets you up for hours of walking. High-energy breakfasts for hikers can be like oatmeal with nuts and honey. It’s tasty and fills you up. Add some dried berries for extra flavor and a vitamin boost.
Remember, packing smart means you get to hike strong!
How Can You Make Your Own Trail Mix at Home?
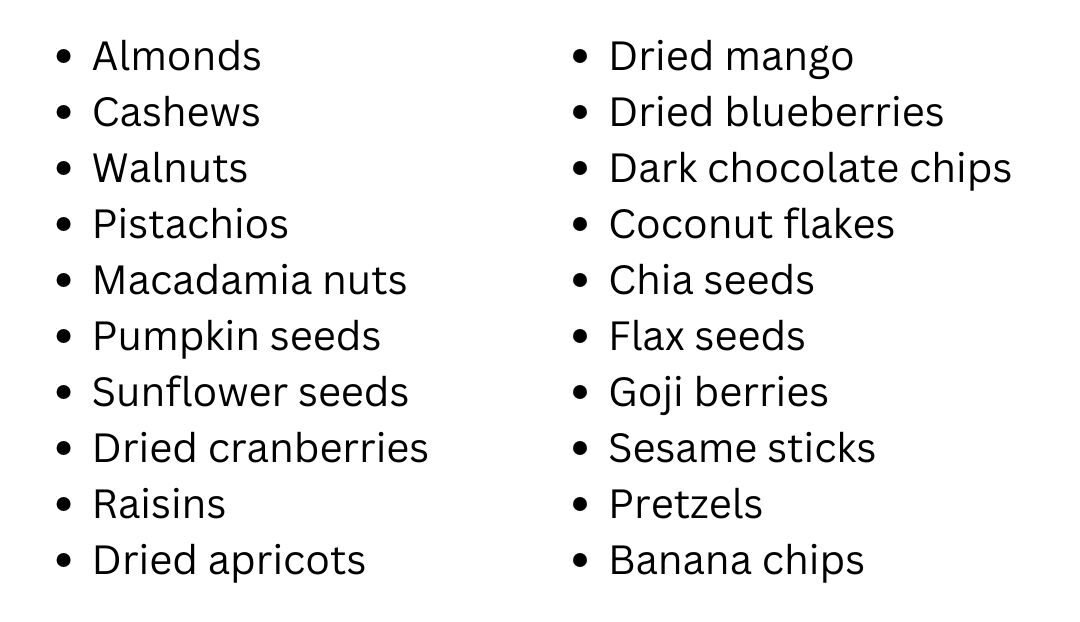
Selecting the Right Ingredients for Energy
Here are some of our favorite ingredients for homemade trail mix, most of them being natural foods.
Steps for Making Homemade Energy Bars
Mix oats, nuts, honey, and fruit. Press, chill, cut. Now you have DIY energy bars for hiking!
Ingredients:
- 1 cup rolled oats
- 1/2 cup almond butter
- 1/4 cup honey or maple syrup
- 1/4 cup chopped nuts (such as almonds, walnuts, or cashews)
- 1/4 cup dried fruits (such as raisins, cranberries, or chopped dates)
- 1/4 cup seeds (such as chia seeds, flax seeds, or sunflower seeds)
- 1/4 cup unsweetened shredded coconut
- 1/2 teaspoon vanilla extract
- A pinch of salt
Instructions:
- Preheat your oven to 350°F (175°C) and line a square baking dish with parchment paper.
- In a large mixing bowl, combine the rolled oats, almond butter, honey or maple syrup, chopped nuts, dried fruits, seeds, shredded coconut, vanilla extract, and a pinch of salt. Mix well until all the ingredients are evenly combined.
- Transfer the mixture to a lined baking dish and press it down firmly using the back of a spoon or your hands to create an even layer.
- Place the baking dish in the preheated oven and bake for about 15-20 minutes, or until the edges turn golden brown.
- Remove the baking dish from the oven and let it cool completely. Once cooled, transfer the dish to the refrigerator and let it chill for at least 1-2 hours to allow the bars to firm up.
- Once the bars are chilled and firm, remove them from the refrigerator and carefully lift the parchment paper to remove the whole batch from the dish.
- Place the batch on a cutting board and use a sharp knife to cut it into individual bars of your desired size.
Storage Tips for Homemade Trail Snacks
Store the homemade energy bars in an airtight container or wrap them individually in plastic wrap for easy grab-and-go snacks. They can be kept at room temperature for up to a week or stored in the refrigerator for longer freshness.
Customizing Recipes for Dietary Restrictions
You can always add or leave out some ingredients to suit your own needs. And, there are plenty of diet-specific substitutes available, many of them being natural and just as healthy for you.
Since everyone has their own very specific needs, the best way to go is to do a little of your own research to make sure the ingredients you use are compatible with your dietary needs.
What Portable Backpacking Recipes Require No Cooking Equipment?
What to cook on trail? Best backpacking meals need no heat, just ingredients. For quick, easy meals, think about no-cook recipe ideas for backpackers. You can use simple foods that are ready to eat or need little prep.
No-Cook Recipe Ideas for Backpackers
Try nut butters, like peanut or almond, on whole grain bread. It’s easy and full of good energy. Or wrap cheese and veggies in a tortilla. You get calories and taste without cooking.
The Art of Cold-Soaking Meals on the Trail
Did you know some hikers soak food in water to “cook” it? This cold-soaking method works for oats, couscous, and lentils. It’s simple: mix food and cold water in a jar, then wait. After a few hours, it’s ready to eat!
Tips for Preparing and Packing No-Cook Foods
Pick foods that won’t spoil, like dried fruits, nuts, and seeds. They’re light to carry and keep you going. Pack them in zip bags or containers to stay fresh. And always remember to bring clean water or a way to filter it.
Hydration-Focused Recipes for Long Hikes
Water is key on any hike. For tasty hydration, add fruit bits to your water bottle. Choose oranges or berries for a natural sweet drink. And keep an eye on how much you drink, to stay safe and healthy all day.
How Do You Choose and Prepare Lightweight Hiking Foods?
What are the best trail foods? Foods that are light, high in energy, and easy to pack. Look for snacks that won’t weigh you down but will keep you going strong on the trail.
Criteria for Selecting Lightweight Foods
Choose dry foods since they’re less heavy than wet foods. Go for high-calorie foods to help you stay energized. Whole-grain pasta, rice, and jerky are great. Nuts, seeds, and dried fruits are perfect for a quick energy boost.
Preparing and Dehydrating Your Meals
Dry your own meals to cut weight and save space. You can dehydrate meats, fruits, and veggies. Dehydrated foods last long and rehydrate well on the trail. This also lets you know exactly what’s in your food.
Meal Planning for Ultralight Backpacking
Need a 7-day backpacking meal plan? Pick meals you can cook with one pot. Pasta, oatmeal, and instant rice save space and fuel. Write down your meals to make sure you have enough food. Remember to plan for extra snacks.
Portion Control and Packing Strategies
Measure your food for each meal. This ensures you pack enough without extra weight. Repack food into zip-top bags. They’re lighter than original packaging and help with portion control. Label each meal for convenience.
In your quest for lightweight hiking foods, aim for high-calorie, dry items. Prepare by dehydrating your meals and planning carefully. Portion control is key – it saves space and weight. Use these tips for a lighter pack and a happier hike.
What Are the Best Vegan and Vegetarian Options for Trekking?
Good trail foods for vegans and vegetarians have plenty of protein. Think nuts, seeds, and beans. You can make creative vegan meals for your hike easily. Tasty wraps with hummus, veggies, and brown rice are one example. They are full of energy and taste great cold.
Protein is key for vegetarian backpackers. You can find it in foods like lentils, chickpeas, and quinoa. Mix these with other foods to make complete proteins. This means they have all the amino acids your body needs.
When packing plant-based foods, keep them cool and dry. This helps them last longer. An insulated bag can help, especially for fresh produce.
If you have food allergies, plan ahead to make allergen-free meals. Use separate containers for different foods. This avoids cross-contamination. You can enjoy a safe, allergy-friendly trek.
Remember, good food means a better hike. Eat well and enjoy the trail!
How Do You Preserve Trail Food for Multi-Day Hikes?
When you’re on a multi-day hike, keeping your food good is key. One way is dehydrating food for trails. This pulls moisture out so food weighs less and lasts longer. Fruits, veggies, and meats work well for this. You can even make full meals that just need water on the trail.
Here’s how you dehydrate food: First, cut it into small pieces. This helps dry it out fast. Spread these on a dehydrator tray, set your dehydrator to the recommended temp, and wait. It’s done when it feels hard and no wet spots show.
Pack dehydrated foods in tight, waterproof bags or containers. This keeps air and moisture out. For preserving homemade trail food, vacuum sealing is best. It locks in freshness and fights off bacteria.
Take calorie-dense hiking snacks too. Nuts, seeds, and dried fruit give you quick energy without taking up much room. Look for snacks with lots of calories in small amounts. These help fuel you for those tough trail climbs.
Keep all your food safe by storing it right. Use bear-proof containers in bear areas and hang food up high when you rest. Always seal it up tight to keep animals and bugs away. Following these steps can stop food spoilage and keep you safe on the trail.
What Sustainable Packaging Options Are Available for Trail Food?
Good trail foods are meals and snacks that boost energy and are easy to carry. To pack these foods, choose materials that won’t harm our earth. Use containers that you can use many times. Buy in large amounts to cut down on trash. Hike with care for nature, and always clean up your mess.
Reusable food containers are great for the planet. They can be steel boxes, cloth bags, or tough plastic that lasts. We can use them again and again for many hikes. This cuts down on waste and keeps our trails clean.
It’s smart to prepare lots of meals at once. This means buying less packaging overall. It’s easier to hike without trash, and better for the world too. When we pack our food in bulk, we save time and help the earth.
We must hike without leaving a trace. That means taking all our trash home. Use food packs that don’t make much mess. We need to keep the wild places wild and clean. This is part of the Leave No Trace Principles. Remember these ideas for a fun and green hike!
How Can You Safely Store Food to Prevent Wildlife Encounters?
Safety tips for trail food? Use bear canisters and hang food high above ground. These practices keep snacks safe from wild animals. Always store food away from your sleeping area. This can stop animals from sniffing around your tent. On multi-day hikes, storing food right matters a lot. It can keep bears and other critters at bay.
For storing food, choosing the right bear canisters is key. They are like a safe for your snacks. Bear-proof bags are lighter but still strong. Canisters and bags keep smells in so bears can’t find your food. Before your hike, find out what works best in the area you’ll be hiking in.
Hanging food is a smart move in bear country. Use a rope to lift your food bag between trees. Aim for 12 feet up and 5 feet from tree trunks. This way, bears can’t reach or pull it down.
Making your food smell less is smart too. Use odor-proof bags when you pack. These help hide smells that can lure animals. Check that every bit of food is inside before you hit the trail.
Remember these steps and you’ll sleep sound knowing your food – and you – are safe from curious bears and other wildlife.
What Are Some Budget-Friendly Backpacking Meal Options?
When planning for a hike, budget-friendly backpacking meals are key. They save you cash and make sure you have enough food. Look for meals that cost less but still give you the energy you need.
Cost-Effective Meal Planning for Hikers
The best trail food is both cheap and filling. Think pasta, rice, and oats. These pack light and won’t cost much. You can buy them in big bags to save even more. Add spices or dried veggies to make them tasty.
Kid-Friendly Trail Food That Won’t Break the Bank
Kids need food they’ll like that’s good for them too. Peanut butter, granola bars, and trail mix are great. They are the best trail food for kids because they’re tasty and won’t spoil fast. Plus, making them at home can help you cut costs.
Nutritious and Affordable Homemade Meals
What to cook on trail? Use simple ingredients to make your own meals. Mix dried beans, rice, and seasonings for a simple but power-packed dish. Homemade means you know what’s in your food, and it’s often cheaper than store-bought.
Smart Shopping Tips for Trail Food Ingredients
A good budget backpacking nutrition plan starts with smart shopping. Look for sales on dried fruits, nuts, and whole grains. Buy in bulk if you can. This will save you money and you can use them in lots of different meals. Remember, eggs and potatoes are also cheap and full of nutrients.
When you hit the trail with these meals, you’ll hike without the worry of high food costs!
Conclusion
We’ve walked through key tips to keep your fuel tank full on long hikes, from tasty breakfasts to make-ahead trail mixes. Remember, energy-packed ingredients are your friends on the trail. Prep meals ahead and choose lightweight options to make your load lighter. For those avoiding meat or dairy, we provided plant-powered picks too. Keep meals fresh and safe with smart packing tricks. And don’t forget to store food right to avoid furry visitors. With these ideas, not only will you save money, but you’ll also enjoy delicious, nutritious bites every step of your adventure. Happy trails!
![]()