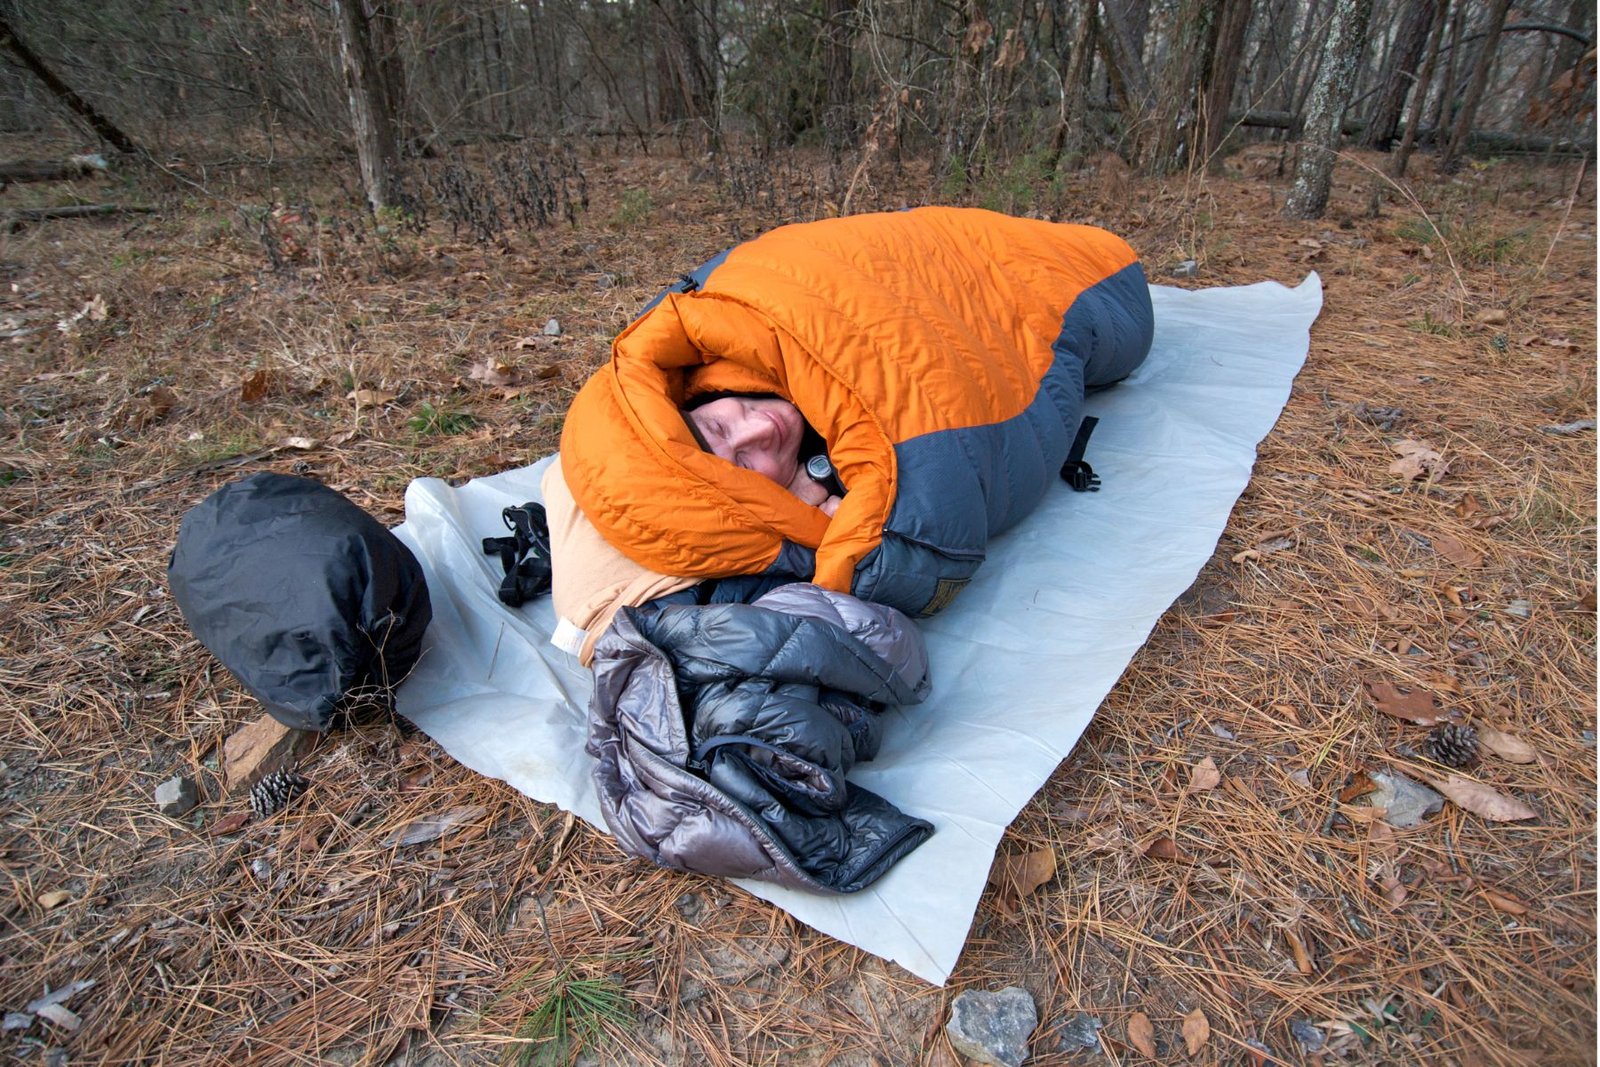
Tag: Overnight Hiking


  • When it comes to backpacking, having a reliable and versatile knife is essential. Whether you’re hiking, trekking, or backpacking, a good knife can be a valuable tool in various situations. But with so many options available, which one should you choose, a folding knife or a fixed blade knife? In this article, we will explore the differences between these two types of knives and help you make an informed decision on which one is best for your backpacking adventures.

    Understanding the Basics

    Folding Knives

    Folding knives, also known as pocket knives, are designed with a pivot mechanism that allows the blade to fold into the handle. These knives are compact and easy to carry, making them popular among backpackers. They typically have a locking mechanism to keep the blade securely in place when in use.

    In backpacking, folding knives are versatile tools that can be used for various tasks such as cutting ropes, preparing food, or even starting a fire. They are lightweight and take up minimal space, making them ideal for those who prioritize weight and space considerations in their backpacking gear.

    Fixed Blade Knives

    On the other hand, fixed blade knives have a blade that extends from the handle without any folding mechanism. These knives are known for their strength, durability, and reliability. They are commonly used in more demanding backpacking scenarios, such as bushcraft or survival situations.

    Fixed blade knives excel in tasks that require more force, such as batoning wood or performing heavy-duty cutting tasks. They are also easier to clean and maintain compared to folding knives. However, due to their larger size, they may take up more space and add weight to your backpack.

    Factors to Consider When Choosing a Backpacking Knife

    When deciding between a folding knife and a fixed blade knife for backpacking, several factors should be taken into consideration:

    Purpose and Type of Tasks

    Think about the specific tasks you expect to perform with your knife during your backpacking trips. Are you mainly looking for a knife to handle basic cutting tasks like food preparation and rope cutting? Or do you anticipate needing a knife for more demanding tasks like wood processing or self-defense? Understanding your intended use will help you determine which type of knife is best suited for your needs.

    Weight and Space Considerations

    Backpacking often requires careful consideration of weight and space limitations. If you prioritize minimizing weight and saving space, a folding knife may be the better option. These knives are generally lighter and more compact than fixed blade knives. However, if you value the added strength and durability of a fixed blade knife, you may be willing to sacrifice a bit of weight and space.

    Durability and Reliability

    In rugged backpacking environments, durability and reliability are crucial. Fixed blade knives are generally considered to be more durable and reliable due to their solid construction and lack of moving parts. Folding knives, while still durable, may have more potential points of failure due to their folding mechanism. Consider the conditions in which you will be backpacking and choose a knife that can withstand the demands of your adventures.

    Ease of Use and Accessibility

    When it comes to ease of use and accessibility, folding knives have the advantage. They can be easily opened with one hand and are generally more user-friendly. Fixed blade knives, on the other hand, require a sheath for safe storage and may take a bit more time and effort to access. Consider your preference for quick and easy access versus the added security and stability of a fixed blade knife.

    Safety Concerns

    Safety should always be a top priority when choosing a backpacking knife. Folding knives with a reliable locking mechanism can provide added safety by preventing accidental closure during use. Fixed blade knives, while lacking a folding mechanism, require proper sheathing and handling techniques to ensure safe use. Consider your comfort level with each type of knife and choose the one that aligns with your safety preferences.

    Maintenance and Care

    Proper maintenance and care are essential for the longevity of your backpacking knife. Folding knives may require more frequent cleaning and lubrication to ensure smooth operation of the folding mechanism. Fixed blade knives, on the other hand, are generally easier to clean and maintain due to their simpler design. Consider your willingness to invest time and effort into maintaining your knife and choose accordingly.

    Legal Considerations for Carrying Knives

    Before purchasing a backpacking knife, it’s important to familiarize yourself with the legal regulations regarding knife carry in your specific region. Different countries and even states may have varying laws and restrictions on the length and type of knives that can be carried. Ensure that you choose a knife that complies with the legal requirements of your backpacking destinations.

    In-Depth Comparison

    Now that we have explored the basics and factors to consider, let’s dive deeper into the specific pros and cons of folding knives and fixed blade knives for backpacking.

    Folding Knives

    Folding knives offer several advantages for backpackers:

    • Portability: Folding knives are compact and easy to carry, making them convenient for backpacking trips where space is limited.
    • Versatility: These knives can handle a wide range of tasks, from basic cutting to more intricate tasks like food preparation.
    • Safety: Folding knives often come with a locking mechanism that keeps the blade securely in place during use, reducing the risk of accidents.
    • Accessibility: Many folding knives can be opened with one hand, allowing for quick and easy access when needed.

    However, there are also some drawbacks to consider:

    • Durability: The folding mechanism of these knives introduces potential points of failure, and the moving parts may require more frequent maintenance.
    • Strength: Folding knives may not be as strong as fixed blade knives, making them less suitable for heavy-duty tasks.
    • Cleaning: The folding mechanism can make cleaning and maintenance more challenging compared to fixed blade knives.

    When choosing a folding knife for backpacking, consider the following features:

    • Blade Steel: Look for high-quality blade steel that offers good edge retention and corrosion resistance, such as stainless steel or carbon steel.
    • Lock Type: Different folding knives use various locking mechanisms, including liner locks, frame locks, and lockbacks. Choose a lock type that provides secure blade locking during use.

    Fixed Blade Knives

    Fixed blade knives also have their own set of advantages:

    • Strength and Durability: Fixed blade knives are generally stronger and more durable than folding knives, making them suitable for heavy-duty tasks.
    • Easy Maintenance: With no moving parts, fixed blade knives are easier to clean and maintain.
    • Reliability: These knives are less prone to mechanical failure, providing a reliable tool in demanding backpacking situations.
    • Sheath Quality: Fixed blade knives often come with high-quality sheaths that offer secure storage and quick access when needed.

    However, there are a few considerations to keep in mind:

    • Size and Weight: Fixed blade knives are typically larger and heavier than folding knives, which may impact your overall backpacking gear weight and space.
    • Accessibility: You will need a sheath to carry a fixed blade knife safely, which may require additional effort to access the knife when needed.
    • Legal Restrictions: Fixed blade knives may be subject to stricter legal regulations in some regions, so be sure to check the laws before carrying one.

    When choosing a fixed blade knife for backpacking, consider the following features:

    • Full Tang: Look for knives with a full tang construction, where the blade extends through the entire handle. This provides added strength and durability.
    • Blade Shape: Different blade shapes, such as drop point, clip point, or tanto, offer varying advantages for different tasks. Choose a blade shape that suits your specific needs.
    • Sheath Design: Consider the quality and functionality of the sheath, ensuring it provides secure storage and easy access.

    Situational Considerations

    To further guide your decision, consider the specific situations and backpacking styles you may encounter:

    Match the Knife to Your Backpacking Style

    Different backpacking styles may require different knife types. Consider the following:

    • Ultralight Backpacking: If you prioritize minimizing weight, a folding knife may be more suitable for your ultralight gear setup.
    • Bushcraft and Survival: In scenarios where you anticipate heavy-duty tasks like wood processing or building shelters, a fixed blade knife’s strength and durability may be preferable.

    Environmental Factors

    Environmental conditions can also influence your knife choice:

    • Wet Conditions: If you expect to encounter wet environments or need a knife for water-related tasks, consider a knife with corrosion-resistant materials.
    • Cold Weather: In cold weather, folding knives may be more prone to freezing or becoming difficult to operate. Fixed blade knives are generally more reliable in such conditions.

    Duration and Nature of the Trip

    The length and nature of your backpacking trip can impact your knife choice:

    • Short Trips: For shorter trips where weight and space are less critical, you may opt for a fixed blade knife for its added strength and versatility.
    • Long Expeditions: On longer expeditions, where durability and reliability are paramount, a fixed blade knife may be the better choice.

    User Experience and Ergonomics

    Consider the following aspects of user experience and ergonomics when choosing a backpacking knife:

    • Handling and Comfort: Look for a knife with a handle that feels comfortable in your hand and provides a secure grip, even in wet or slippery conditions.
    • One-Handed Operation vs. Two-Handed Operation: Folding knives offer the convenience of one-handed operation, while fixed blade knives typically require two hands for use.
    • Grip and Handle Materials: Consider the materials used for the handle, such as rubber, G10, or wood, and choose one that suits your preferences for grip and comfort.

    Technical Specifications

    Understanding the technical specifications of knives can help you make an informed decision:

    Blade Materials and Edge Retention

    Different blade materials offer varying levels of edge retention and corrosion resistance. Common blade materials include stainless steel, carbon steel

    and high-carbon stainless steel. Stainless steel blades are known for their corrosion resistance, making them ideal for outdoor use. Carbon steel blades, on the other hand, are known for their excellent edge retention and are easier to sharpen. Consider your priorities in terms of edge retention and corrosion resistance when selecting a blade material.

    Blade Length and Shape

    The length and shape of the blade can greatly impact its functionality. Longer blades are better suited for tasks that require more reach, such as batoning wood or cutting larger objects. Shorter blades, on the other hand, offer more control and precision for tasks like food preparation or carving. Blade shapes, such as drop point, clip point, or tanto, offer different advantages for specific tasks. Choose a blade length and shape that align with your intended use.

    Handle Design and Materials

    The design and materials of the handle can greatly affect the comfort and grip of the knife. Look for handles that are ergonomically designed and provide a secure grip, even in wet or slippery conditions. Common handle materials include rubber, G10, wood, and synthetic composites. Consider your preferences for grip and comfort when selecting a handle material.

    Overall Size and Weight

    The overall size and weight of the knife can impact your backpacking experience. A compact and lightweight knife is ideal for those who prioritize minimizing weight and saving space. However, if you value the added strength and durability of a larger knife, you may be willing to carry the extra weight. Consider the size and weight of the knife in relation to your backpacking gear and personal preferences.

    FAQ

    Q: Can I carry a folding knife in my backpack while traveling?

    Yes, you can generally carry a folding knife in your backpack while traveling. However, it’s important to familiarize yourself with the legal regulations regarding knife carry in your specific region. Different countries and even states may have varying laws and restrictions on the length and type of knives that can be carried. Ensure that you comply with the legal requirements of your backpacking destinations.

    Q: Are fixed blade knives more durable than folding knives?

    Yes, fixed blade knives are generally considered to be more durable than folding knives. Fixed blade knives have a solid construction with no moving parts, making them less prone to mechanical failure. However, folding knives can still be durable, but their folding mechanism introduces potential points of failure.

    Q: Which type of knife is better for basic cutting tasks like food preparation?

    Both folding knives and fixed blade knives can handle basic cutting tasks like food preparation. However, folding knives offer the advantage of being more compact and easily accessible. They are often designed with a locking mechanism to keep the blade securely in place during use, providing added safety.

    Q: Can I use a folding knife for heavy-duty tasks like batoning wood?

    While folding knives can handle some heavy-duty tasks, they may not be as suitable as fixed blade knives. Fixed blade knives are generally stronger and more durable, making them better suited for tasks that require more force, such as batoning wood or performing heavy-duty cutting tasks.

    Q: How often should I clean and maintain my backpacking knife?

    The frequency of cleaning and maintenance for your backpacking knife will depend on several factors, including the type of knife and the conditions in which it is used. Folding knives with a folding mechanism may require more frequent cleaning and lubrication to ensure smooth operation.

    Fixed blade knives, on the other hand, are generally easier to clean and maintain due to their simpler design. It’s recommended to clean and lubricate your knife regularly, especially after extended use or exposure to harsh conditions.

    Conclusion

    When it comes to choosing between a folding knife and a fixed blade knife for backpacking, there is no definitive answer. Both types of knives have their own advantages and considerations. It ultimately comes down to your personal preferences, intended use, and the specific requirements of your backpacking adventures.

    Consider factors such as purpose, weight and space considerations, durability, ease of use, safety, maintenance, and legal considerations when making your decision. By understanding the differences and considering your specific needs, you can choose the knife that best suits your backpacking style and enhances your outdoor experiences.

    Loading


  • Embarking on an overnight hike is an exhilarating adventure that immerses you in nature’s beauty while testing your physical endurance. To make the most of your experience, proper packing is essential. This guide will walk you through the process of packing for an overnight hike, ensuring you have the necessary gear and valuable tips to enhance your outdoor escapade. So lace up your boots, grab your backpack, and let’s get started!

    TL;DR

    • Proper packing is essential for an overnight hike to enhance your outdoor experience.
    • Assess your hiking destination, weather conditions, terrain, and trip duration to determine necessary gear.
    • Invest in a quality backpack that fits well and distributes weight evenly.
    • Consider brands like Osprey, Deuter, Gregory, Lowe Alpine, Karrimor, and Quechua for backpack options.
    • Choose moisture-wicking and breathable clothing, layering for changing weather conditions.
    • Pack a lightweight and durable tent, sleeping bag, sleeping pad, and pillow for a good night’s sleep.
    • Bring a compact and lightweight cookset, stove, fuel, and food for cooking meals.
    • Ensure safe drinking water with a water filter or purification tablets, water reservoir or bottles.
    • Carry navigation aids like a map, compass, GPS device, guidebook, or trail notes.
    • Don’t forget personal care items, first aid kit, sun protection, insect repellent, and medications.
    • Pack safety and emergency gear such as a headlamp, whistle, emergency shelter, fire starter, multi-tool, and PLB.
    • Use compression bags or stuff sacks to maximize space and keep gear organized.
    • Place heavier items closer to your back for better weight distribution.
    • Keep frequently used items easily accessible and test gear before the hike.
    • Consider the weather forecast before embarking on your hike.

    Assessing Your Needs

    Before you pack, it’s crucial to assess your hiking destination, weather conditions, terrain, and the duration of your trip. Understanding these factors will help you determine the necessary gear and pack accordingly. Additionally, consider your personal preferences and comfort level when selecting equipment.

    Choosing the Right Backpack

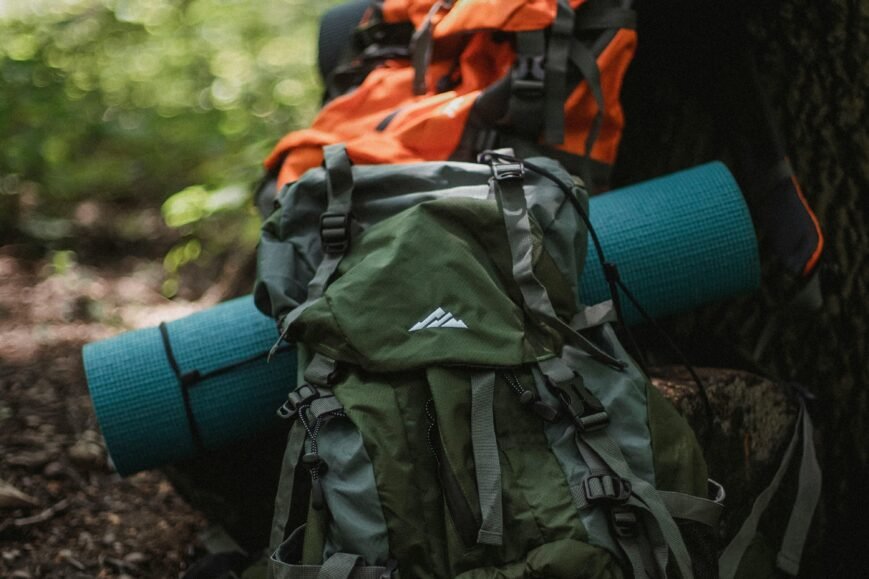
    Investing in a quality backpack is vital since it will carry all your gear throughout the hike. Look for a backpack that fits well, distributes weight evenly, and has adjustable straps for a comfortable fit.

    Consider the backpack’s capacity, keeping in mind the duration of your hike and the gear you’ll be carrying. If you’re traveling light, you can probably pull off an over-nighter with a 20-liter or 30-liter backpack. You’ll have to have a clear picture of the gear you’ll need to carry.

    • Osprey: Osprey is well-regarded for its innovative designs, durability, and comfort. They offer a wide range of backpacks suitable for various hiking adventures, including overnight hikes. To be completely honest this is my favorite brand for long-distance packs.
    • Deuter: Deuter is a German brand known for its high-quality backpacks that prioritize comfort, functionality, and durability. They offer a range of backpack sizes and styles to meet different hiking needs.
    • Gregory: Gregory is recognized for its backpacks’ excellent fit, comfort, and load-carrying capabilities. They provide backpacks designed specifically for different hiking activities, including overnight hikes.
    • Lowe Alpine: Lowe Alpine is a reputable brand that has been producing quality backpacks for outdoor enthusiasts since 1967. Their backpacks are known for their durability, innovative features, and comfort.
    • Karrimor: Karrimor is a British brand with a long history of producing hiking backpacks. They offer a range of backpacks suitable for different hiking needs, known for their durability and value for money. Wider availability through Europe.
    • Quechua: Quechua is the hiking and outdoor brand of Decathlon, offering affordable and reliable backpacks. They provide a variety of backpack options suitable for different hiking durations and terrains. This is another brand you’re more likely to come across in Europe.
    • And if you’re looking for a decent backpack on a budget, there are other packs online from lesser-known brands such as Naturehike, Mountain Top, New Outlander, AI One, Jungle King, and Nevo Rhino.

    Clothing and Layering

    Selecting the right clothing is crucial for comfort and safety during an overnight hike. Opt for moisture-wicking and breathable materials that dry quickly. Layering is key for adapting to changing weather conditions. Essential clothing items include:

    • Base Layer: Choose a lightweight and moisture-wicking fabric such as merino wool or synthetic materials.
    • Insulating Layer: Pack a warm fleece or down jacket to retain body heat during colder nights.
    • Outer Layer: A waterproof and windproof jacket will protect you from rain and harsh winds.
    • Hiking Pants: Opt for durable, quick-drying pants that provide mobility and protection against brush and rocks.
    • Extra Socks: Pack a few pairs of moisture-wicking socks to keep your feet dry and prevent blisters.
    • Hat and Gloves: Depending on the weather, bring a hat and gloves to protect your extremities from the cold.

    Shelter and Sleeping Gear

    A good night’s sleep is crucial to recharge for the next day’s hike. Consider the following items for shelter and sleeping arrangements:

    • Tent: Choose a lightweight and durable tent suitable for the number of hikers. Look for quick setup options and good ventilation.
    • Tarp: If the weather is permissive, and you want to cut down on weight, a good weather-resistant tarp is a great choice. Just keep in mind, that it provides less shelter than a tent you can zip yourself up inside.
    • Sleeping Bag: Select a sleeping bag appropriate for the expected temperature range. Consider the insulation type (down or synthetic) based on weather conditions.
    • Sleeping Pad: An inflatable or foam sleeping pad provides insulation and cushioning for a comfortable night’s sleep.
    • Pillow: A compressible pillow offers added comfort and support.

    Cooking and Eating Equipment

    Preparing meals and staying hydrated is essential during an overnight hike. Pack the following kitchen items:

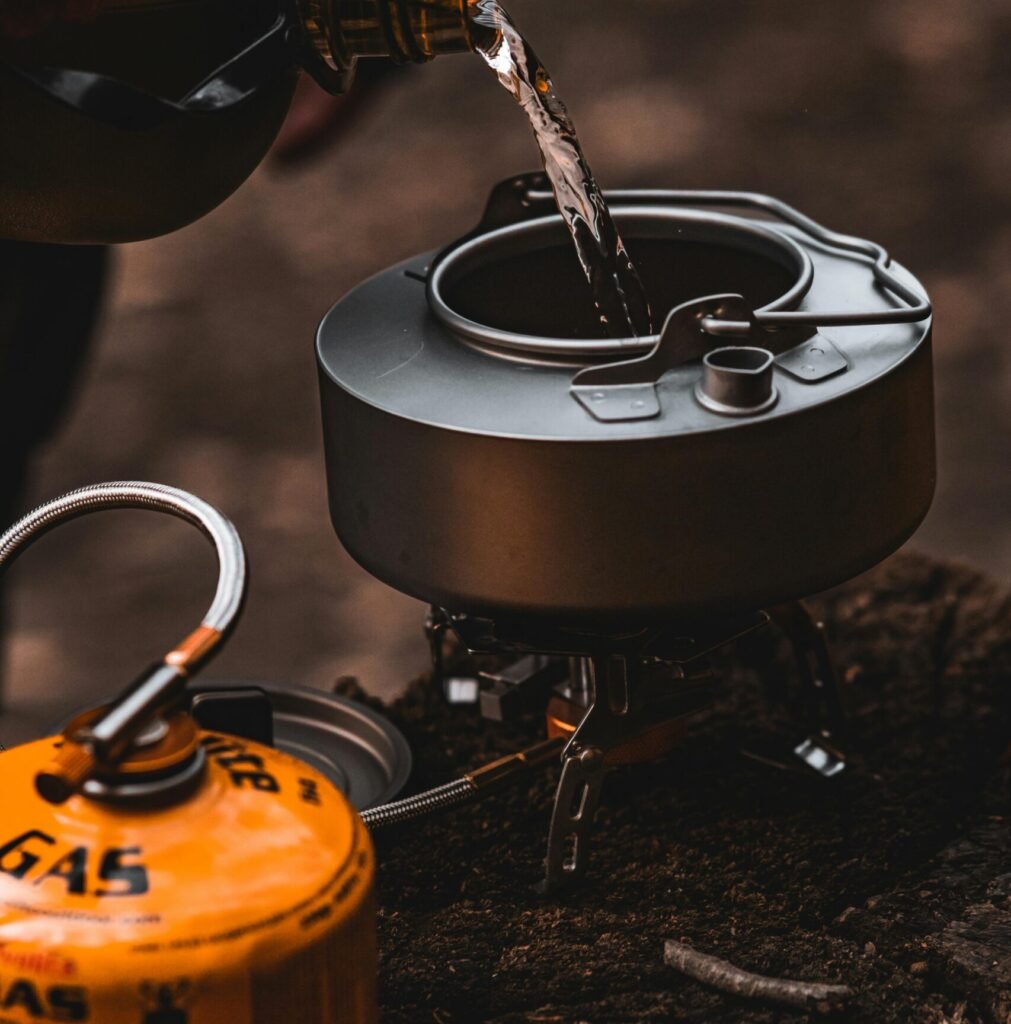
    • Stove and Fuel: Choose a lightweight and efficient backpacking stove along with the appropriate fuel for cooking meals. Don’t forget a windscreen.
    • Cookware: Opt for a compact and lightweight cookset that includes a pot, pan, and utensils. You may want to consider spending a little more money on a top-quality lightweight pan that your dinner won’t stick to.
    • Food and Snacks: Pack dehydrated meals, energy bars, nuts, and other lightweight, non-perishable food items.
    • Water Bottles: Carry durable water bottles or a hydration bladder with sufficient capacity to stay hydrated throughout the hike. Soft flasks and collapsible bottles are a great way to reduce gear mass once empty.

    Hydration and Water Treatment

    Safe drinking water is crucial while hiking. Ensure you have the means to purify water from natural sources. Consider the following items:

    • Water Filter or Purification Tablets: Choose a reliable water filter or purification tablets to eliminate harmful bacteria and parasites.
    • Water Reservoir or Bottles: Carry a reservoir or multiple bottles to store and carry water. Consider a capacity that meets your hydration needs between water sources.
    • Water filtration system: Pick up a fairly inexpensive LifeStraw disposable drinking filter for the trip, or a reusable system like one from Katadyn, LieStraw, Sawyer, or Platypus.

    Navigation Aids

    Staying on the right path is essential for a successful hike. Depending on the complexity of your route, pack the following navigation aids:

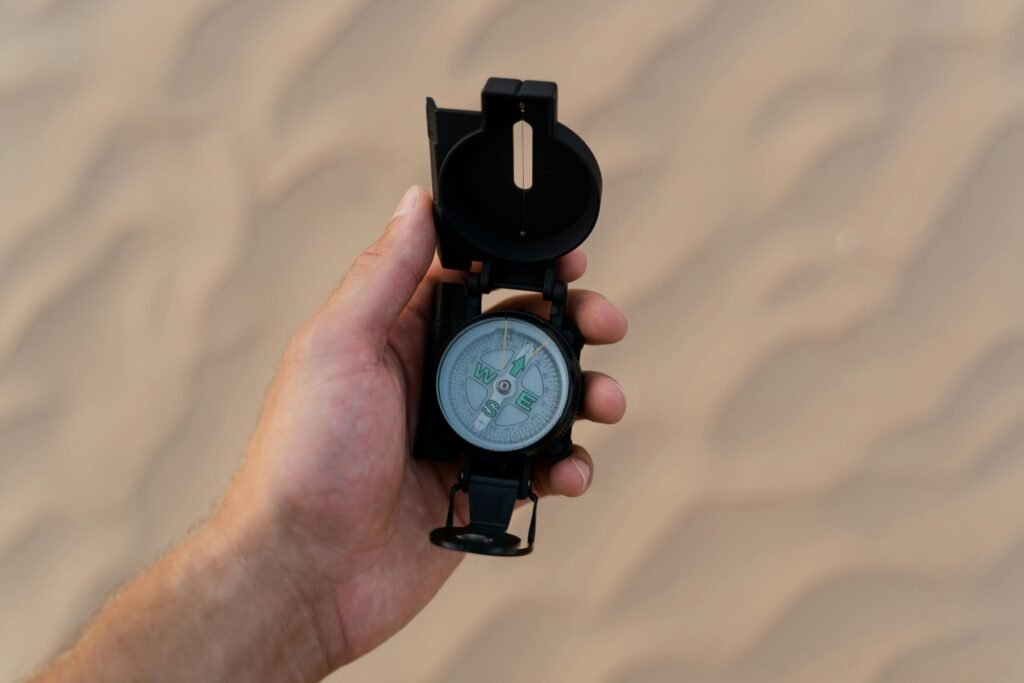
    • Map and Compass: Carry a detailed topographic map and a compass to navigate through unfamiliar terrain.
    • GPS Device: Use a GPS device or smartphone app with offline maps as a backup for navigation.
    • Guidebook or Trail Notes: If available, bring a guidebook or trail notes with information about the hike, landmarks, and potential hazards.

    Personal Care Items

    Maintaining personal hygiene and addressing basic medical needs are crucial during an overnight hike. Pack the following personal care items:

    • Toiletries: Carry travel-sized items such as a toothbrush, toothpaste, biodegradable soap, and toilet paper. Also, a small pack of wet wipes can be a lifesaver when you’re in the middle of nowhere.
    • First Aid Kit: Include essential items such as bandages, antiseptic ointment, pain relievers, blister treatment, and any necessary prescription medications.
    • Sun Protection: Pack sunscreen, sunglasses, and a wide-brimmed hat to protect yourself from harmful UV rays.
    • Insect Repellent: Depending on the location and season, bring insect repellent to ward off mosquitoes and other biting insects.
    • Hand Sanitizer: Keep a small bottle of hand sanitizer for maintaining cleanliness, especially before meals.
    • Medications: Don’t forget any prescription meds or allergy relief aids if you need them.

    Safety and Emergency Gear

    Being prepared for unexpected situations is crucial for your safety. Pack the following safety and emergency gear:

    • Headlamp or Flashlight: Carry a reliable headlamp or flashlight with extra batteries for navigating in low-light conditions.
    • Whistle: A whistle can be used to signal for help in case of an emergency.
    • Emergency Shelter: Consider carrying an emergency bivy or lightweight tarp as a backup shelter option.
    • Fire Starter: Pack waterproof matches, a lighter, or a fire starter kit for emergency fire-making.
    • Multi-tool: A versatile multi-tool can come in handy for various tasks and repairs.
    • Personal Locator Beacon (PLB): In remote areas, consider carrying a PLB for emergency communication and rescue.

    Packing Pro Tips

    • Minimize Redundancy: Avoid packing duplicate items or unnecessary extras. Opt for multi-purpose gear whenever possible.
    • Use Compression Bags: Utilize compression bags or stuff sacks to maximize space and keep gear organized.
    • Pack Heavier Items Close to Your Back: Place heavier items, such as food and cooking equipment, closer to your back for better weight distribution.
    • Keep Essentials Accessible: Store frequently used items, such as snacks, water bottles, and rain gear, in easily accessible pockets or compartments.
    • Test Gear Beforehand: Familiarize yourself with your gear and test it before the hike to ensure everything is in working order.
    • Distribute Weight Properly: Distribute weight evenly in your backpack to maintain balance and avoid strain on your back and shoulders.
    • Consider the Weather: Check the weather forecast before your hike and adjust your gear accordingly. Pack extra layers or rain gear if needed.

    Conclusion

    Packing for an overnight hike requires careful consideration of your needs, the terrain, and the weather conditions. By selecting the right gear and following the pro tips mentioned in this guide, you can ensure a comfortable and safe hiking experience. Remember to pack efficiently, prioritize essential items, and test your gear beforehand. With proper preparation, you’ll be ready to embark on an unforgettable overnight adventure in the great outdoors. Happy hiking!

    Loading


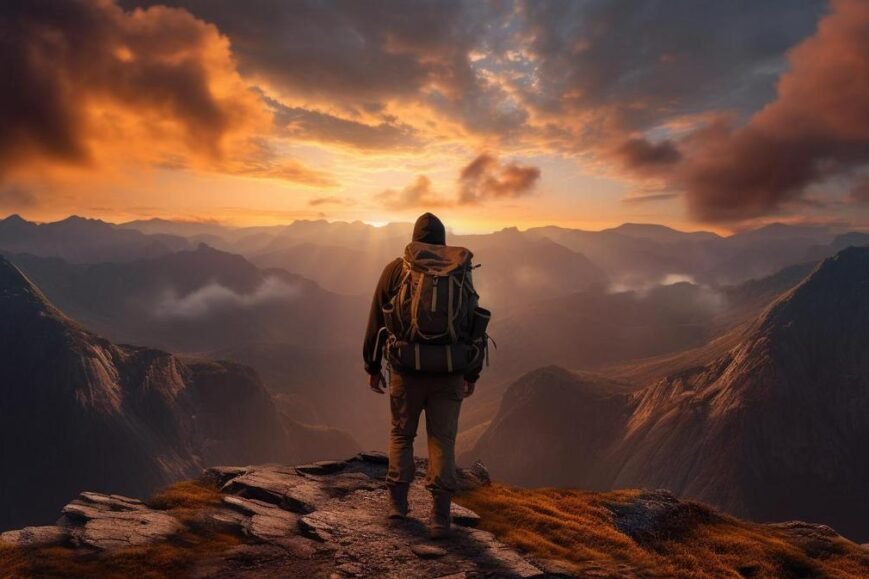
  • Awe-inspiring solitude and untouched wilderness - a lone hiker gazes upon nature's beauty.

    Solo Overnight Hiking: How Do I Plan My Itinerary?

    Embarking on solo overnight hiking? Get tips for planning, packing, and safety for your adventure.

    • Carefully plan your solo hiking itinerary, including trail selection, navigation, campsite identification, permits, and informing someone about your plans.
    • Pack essential gear for safety, navigation, shelter, food, and hydration, focusing on weight and utility.
    • Ensure safety with appropriate night gear, bear spray, a personal locator beacon, and knowledge of emergency procedures.
    • Stay hydrated by carrying enough water, choosing a purification method, and mapping water sources beforehand.
    • Choose a lightweight and easy-to-set-up tent, a suitable sleeping bag, and a pad, and consider bivouac shelters or hammocks for alternate sleeping systems.
    • Navigate trails confidently with a map, compass, GPS, and by recognizing trail markers; practice navigation skills in familiar settings.
    • Mentally prepare for solo hiking by coping with fear and loneliness, practicing mindfulness, and ensuring proper mental conditioning.
    • Adjust meal planning for balanced nutrition, high-calorie foods, and essential cooking gear, including a first aid kit with hydration and nutrient replenishment supplies.

    Ready to tackle the trails on your own but not sure where to start? Setting up a solo overnight hike can feel daunting, but I’ve got your back. From picking out trails to snagging permits and letting folks know your plans, I’ll guide you through it. Pack your gear—a big solo adventure awaits!

    How Do I Plan My Solo Overnight Hiking Itinerary?

    Is it OK to go hiking alone? Yes, if you plan well. First, pick your trail. Look for a route that fits your level of skill. Choose one that won’t be too tough. Make sure you check the weather too.

    Where do hikers sleep while hiking? We find spots called campsites. Some trails have shelters for you to use. Others let you pick your spot. Just be sure it’s safe and allowed.

    Start by choosing your destination and trail. Think about the views you want and what challenges you’re ready for.

    Next, estimate how much time you’ll need. Think about how far you can hike each day. Don’t forget to include time for breaks and setting up camp.

    Then, identify spots for camping and if they have shelters. This is key to a safe night’s sleep. Use tools like trail maps to find these spots ahead of time.

    Getting permits and reservations can be a must. Some places need you to book spots to camp or hike. Do this early to make sure you get a place.

    Last, tell someone about your hike and your full plan. Let them know when you plan to be back. This step could be a lifesaver in an emergency.

    What Should Be on My Packing List for a Solo Hike?

    What to take on a solo overnight hike? You’ll need gear for safety, comfort, food, water, and the right clothes.

    First, figure out what you’ll eat and drink. Pack snacks that give you quick energy and meals that are easy to make. Don’t forget to bring enough water and tools to purify more from streams.

    Next, think about tools to find your way. A good map and a compass are must-haves. Sometimes, trails can be tricky, so knowing how to use them is key.

    Your bag should be light but fit all you’ll need. Picking the right backpack is vital to keep you moving with ease. Clothing should be just right for day and night temps.

    Don’t forget other basics like a light tent, a warm sleeping bag, and something to cook with. Plus, a first aid kit is a big deal for those ‘just in case’ times.

    As an outdoor adventure enthusiast, I suggest planning with a solo hiking gear guide. This can help you make sure you don’t miss a thing. Simple hacks can have a big impact. For instance, knowing how to pack can keep your bag light. This helps you hike longer and feel better at the end of the day.

    Each item in your pack should serve a purpose. Think, “Do I really need this?” Keep your pack as light as you can. This means a better and safer hike for you.

    Happy trails and pack smart! Keep it simple and think safety, but remember to savor the journey ahead.

    How Can I Ensure Safety on My Solo Overnight Hike?

    Is it a good idea to go hiking at night? Yes, but you must take the right safety steps. When hiking alone at night, always use a strong headlamp. Stick to marked paths to avoid getting lost and watch out for tripping hazards. Be aware of wildlife that is active after dark, and know how to react if you encounter any.

    What about wildlife encounters when hiking solo? Know the animals you might meet. Read up on how to stay safe with bears, snakes, and others. Make noise while you walk to alert animals to your presence. Carry bear spray where it is allowed and know how to use it.

    Should you use personal locator beacons for hikers and other safety devices? Yes, absolutely. A personal locator beacon is key when you hike alone. It sends out a signal if you need help. Consider also taking a whistle, a mirror, or a flare to signal for help in emergencies.

    What emergency protocols for hikers are important? Learn basic first aid before you set out. Write down your plan and share it with a friend or family member. Know the signs of common health issues like dehydration or hypothermia. Practice how to stay calm if things don’t go as planned. Remember, calm thinking can save the day if you face trouble.

    By planning for wildlife, taking key safety gear, and knowing emergency steps, your solo hike can be both safe and fun. Your gear and knowledge are your best pals out in the wild. They keep you safe so you can focus on the beauty of the night sky and the peaceful trail ahead.

    How Should I Approach Water Purification and Hydration?

    How to stay hydrated on a solo overnight hike?

    You need to select a water purification method and map water sources. It’s vital to carry enough water, renew your supply, and use hydration systems.

    Water is key when you pack for a solo overnight hike. First, pick a way to clean water. Think about tablets, filters, or boiling. Each method has its pros and cons. Tablets are light and easy but take time and can taste odd. Filters clean quickly but can break and weigh more. Boiling is sure but needs a stove and fuel.

    Stay safe by knowing where to find water. Look at maps and plan where you can fill up. Check reports for water source information. If you can’t find water, carry more and keep an eye out for signs of streams or lakes.

    Next, think about how to take water with you. Hydration packs let you drink while you walk. Water bottles are simple to use and fill. Some hikers use a mix of both.

    Stick to these tips to stay hydrated and enjoy your hike. Remember, water is life when you’re out on the trail.

    What Are the Best Shelter and Sleeping Systems for Solo Hikers?

    When heading out on a solo overnight hike, where you will sleep is key. You need the right tent and sleep gear to stay safe and warm. The best tents for solo hikers must be light but strong. They should protect from rain, wind, and cold. You will find one-person hiking sleeping systems perfect for this.

    Selecting a suitable tent for solo hikers is about more than just size. It’s also about easy set-up. As a solo hiker, you must do everything by yourself. You want a tent that you can pitch fast if a storm comes. Start by looking for “best tents for solo hikers” online. This will show tents that fit just one person and are simple to use.

    Sleeping bag and pad considerations matter too. They keep you cozy when temps drop at night. Pick a sleeping bag rated for the coldest weather you expect. Your pad should be thick enough to cushion you from the hard ground. Make sure both items are light. Hauling a heavy load is not fun when you’re by yourself.

    Some solo hikers like to utilize bivouac shelters or hammocks. A bivvy is a small, waterproof cover that fits over your sleeping bag. It’s perfect when you want to sleep under the stars. A hammock lets you sleep off the ground. It’s best in places without lots of bugs or when you don’t need warmth from the ground.

    Evaluating the best spots to set up camp is your last step. Look for flat, dry ground away from trails and water sources. High spots are good because cold air sinks. But stay away from cliffs and ridges that could be windy. Ensure your spot is safe from falling trees or rocks. Most of all, pick a spot where you can enjoy the peace of nature and have a good night’s rest!

    Solo overnight hiking can seem tough at first. But choose the right tent and sleep system, and you’re on your way. And don’t let being a solo overnight hiker worry you. Many women enjoy these adventures safely. Plan well and enjoy the stars!

    How Can I Navigate Trails Alone Safely and Efficiently?

    To safely navigate trails alone, use a map and compass. GPS helps too. Know how to read trail signs. Do not lose your way.

    When I hit the trails by myself, my top skill is map reading. Before I even step out, I study my route. I mark important spots like water sources and shelters. It keeps me on track and safe.

    I also pack a sturdy compass. It’s my trusty sidekick when electronics fail. I pair it with my map to find my way through the wild.

    But, GPS has its place, I admit. I load the route on my device. I check it helps me stick to my path. Still, I keep my map close. Device batteries can die.

    Trail markers are like breadcrumb trails. I look for colored blazes or stacked rocks. They guide me like a friend. They tell me, “This way” or “Not that way.”

    Here’s a pro tip: Practice at a local park. Get a feel for your map and compass before you tackle big, wild places.

    If you think you might have a knack for navigating trails alone, staying on the right path is key. You’ve got this! Just make sure you’re familiar with your solo wilderness navigation tools before you set out. Your adventure awaits!

    What Solo Hiking Mental Preparation Techniques Are There?

    Is it OK to go hiking alone? Yes, it is OK to hike alone if you prepare well. Fear and loneliness can be big challenges when you set out for a solo hike. Have a plan to manage these feelings before you hit the trail. Being alone in nature can make you feel small or lost at times. But with the right mindset, you can enjoy the peace that comes from hiking alone.

    How to cope with the mental challenges of hiking solo? You can manage fear by learning about the trail and its risks. Know what animals or weather you might face. Prepare for these with the right gear and knowledge. Dealing with loneliness is about finding joy in your own company. Mindfulness can help here. Take in the sights, sounds, and smells around you. They can boost your happiness and keep your mind off being alone.

    Strategies for enjoying solitude include taking pictures or writing in a journal. These activities keep your mind busy. They also give you something to share when you return. Plan breaks as well—a moment to rest and enjoy the view can remind you why you started the hike.

    Preparing mentally for solo hiking also means knowing your limits. Don’t plan a hike that’s too hard for you. Build up to bigger hikes as you gain strength and confidence. Always tell someone where you’re going and when you plan to return. This way, someone knows to look for you if there’s trouble.

    Mindfulness and mental health bonuses come with hiking solo too. Nature can calm and refresh your mind. You learn about yourself, too. Every hike teaches what you can do and what you enjoy. This builds confidence that goes beyond the trail.

    How Do I Adjust My Meal Planning for Solo Trekking?

    What are the nutritional considerations for solo hikers?

    Solo hikers need enough calories and a balanced diet. They must eat and pack smart. Here’s how:

    • Pack high-calorie food that won’t weigh you down.
    • Use small, easy-to-use stoves for quick meals.
    • Pick foods from all groups for good health.
    • Have a first aid kit with items to treat dehydration and nutrient loss.

    Plan Your Meals with Care

    When you hit the trail alone, your body works hard. You need food that gives you power and helps you move. Bring food rich in protein, fat, and carbs. Think about nuts, dry fruit, energy bars, and ready-to-eat meals. They can keep you going for a long time.

    Cook Smart, Eat Well

    Out there, alone with nature, you can’t bring your home kitchen. But you can still eat tasty food. Solo backpacking stoves are small and easy to use. They’re perfect for boiling water fast. You can make hot food that warms your body and soul. Simple meals like instant oatmeal, soup, and noodles work great.

    Balance on the Menu

    When you plan your meals, think about colors. Try to eat different colors of fruits and veggies. This way, your body gets all kinds of good stuff. Add seeds, nuts, and whole grains too. A good mix of food keeps your body strong on the trail.

    First Aid Food

    Your first aid kit is not just bandages and antiseptic. You need to think about your belly too. Pack rehydration salts or powder. Include some vitamins if you walk for many days. And don’t forget a water filter or purification tablets. Clean water is key to good health.

    When you carry all on your back, each item counts. Pack smart and eat right. Happy trails, solo hikers!

    Conclusion

    Planning a solo hike takes skill. You learned how to pick trails, manage time, and find sleep spots. Permits, gear, and telling a friend are key. Pack right for safety and comfort. Stay safe with the right gear and know-how to handle wildlife.

    Keep hydrated with good water sources. Choose a tent, sleep system, and where to set up. Know how to use maps and tech for trail navigation. Get your mind ready to be on your own. Plan meals to keep your energy up. Remember, solo trips need smart prep to be safe and fun!

    Loading


  • An immersive photo capturing a backpacker preparing for an overnight hike in nature.

    How Do I Prepare for an Overnight Hike?

    Planning your overnight hike? Ensure you pack by our checklist with essential gear, safety, and sustenance tips.

    • For an overnight hike, pack safety gear, navigation tools, appropriate clothing, a lightweight shelter, and a first-aid kit.
    • Essential equipment includes a comfortable, durable backpack and a tent suitable for the terrain and weather.
    • Night hiking requires proficiency with maps, compasses, and GPS, and awareness of local wildlife, using bear spray and food storage techniques if necessary.
    • Food and water management involves packing energy-dense foods, using water purifiers, and carrying lightweight cooking supplies.
    • Research local trails for unique experiences that match your skill level and desired scenery.
    • New hikers should build physical and mental preparation, understand Leave No Trace principles, and plan with safety and etiquette in mind.
    • Minimize environmental impact by using existing campsites, handling waste properly, and respecting wildlife.
    • Carry a headlamp, emergency shelter, and signaling device for safety after dark, and familiarize yourself with the trail in daylight.
    • Stay hydrated with a suitable water system, and maintain energy with balanced, lightweight meals and snacks.
    • Prepare physically with endurance exercises, stretching, and proper nutrition; post-hike, eat nutrient-rich foods, and practice relaxation for recovery.

    Preparing for an overnight hike? It’s exciting but don’t step out the door just yet! A solid plan means more fun and less trouble. You’ll need the right gear for safe trekking and good sleep under the stars. I’ll show you how to pack smart and choose the best shelter, so you’re ready when the trail calls. Ready to gear up and get on the trails? Keep reading to make your next adventure worry-free and unforgettable.

    What Should Be on My Overnight Hike Preparation Checklist?

    How do I plan an overnight hiking trip? First, list all you need. This should include:

    • Safety gear and tools for finding your way
    • Clothes and shoes that fit the hike
    • Food and water to keep you going

    For your night’s rest, what should you sleep in on an overnight hike? Choose from a tent, hammock, or bivy sack. Think about what fits the place and how heavy it is.

    Always care for where you hike. Bring soap that won’t harm nature. Pack out all your trash.

    Don’t forget a first-aid kit for accidents or sudden illness. Your safety must come first.

    Think about where you are going. The trail or area may need special gear. Always check the local weather and trail info before your trip. This will help you stay safe.

    Pack smart for one-night hikes. Your back will thank you if your load is light. But make sure you have all you need.

    Remember, you share the woods with wildlife. Plan how to keep food safe and what to do if you see animals.

    Checklists help you not to miss anything important for your adventure. Happy hiking!

    How Do I Choose the Best Backpack and Tent for My Overnight Trails?

    Overnight hiking trips need good gear. Your backpack and tent matter most. What’s called backpacking or trekking is not just about lacing up boots and hitting the trail. Planning is key. The question is: How do I plan an overnight hiking trip? Start by picking the right backpack. It should hold 3 to 7 days’ worth of stuff. Comfort is king. Look for padded straps and a hip belt. It should hug your back.

    Now, tents. Choose based on where you sleep. For night hiking, the tent should match the weather and land. Think about space and weight. Roomier tents are bigger to carry. A heavy tent can tire you out fast.

    Your backpack and tent should last. No one wants a broken strap or ripped tent. Get stuff that can take a beating. Do this, and you’re on your way to a great overnight hike.

    What Are the Best Practices for Trail Navigation and Wildlife Safety on Overnight Hikes?

    Is it smart to hike at night? Yes, but only with the right gear and know-how. When daylight fades, trails look different. You need a clear plan and tools to find your way. Pack a map, compass, and GPS for night treks. Learn to use these before your hike.

    Animals are more active at night. Know what lives in your hiking area. Understand their habits to stay safe. Make noise while you hike to avoid startling wildlife. Carry bear spray if you’re in bear country. If you see an animal, stay calm and back away slowly. Never feed wildlife.

    To keep animals away from camp, store food in bear-proof containers. Hang your food in a tree if you can. Pick a sleeping spot away from natural animal paths. Knowing how to navigate and respect wildlife ensures a safe and fun night on the trails.

    How Should I Manage Food, Water, and Cooking on an Overnight Hike?

    When you plan an overnight hiking trip, start by planning your meals. Choose foods that provide a lot of energy but don’t weigh much. Think of nuts, energy bars, and dried fruits. These are overnight hiking food essentials. Pack food that you can cook quickly. Instant oatmeal or soup mixes are good.

    You also need water on your hike. Sometimes you find water on the trail. But you must make it safe to drink. Boil water or use a water filter or purification tablets. This is water purification on overnight hikes.

    Bring must-have cooking gear. Take a small stove and fuel to cook or boil water. Your gear should be light so it’s easy to carry. Include a pot, a spoon, and maybe a small cup.

    You need to store your food and water well. Use tight-seal containers so animals can’t get in. Keep everything dry and away from your tent to stay safe from wildlife.

    Every hike needs a plan for meals, water, and cooking. With good planning, your hike is more fun and no stress!

    Where Can I Find Unique and Memorable Overnight Hike Locations?

    Overnight hike near me? Best places for overnight hikes near me. Explore nearby backpacking trails.

    Finding a great overnight hike starts with some research. Look at maps, ask friends, and check online communities. They help a lot.

    Famous trails are known for good reasons, like amazing views. They can offer the best overnight experiences you could ask for.

    Search for trails that fit your skill level too. Some are just right for those new to hiking. Others will give hikers a tough challenge. Remember to look for variety in your area.

    When you choose a trail, think about the scenery it offers and its length. Consider how tough the hike is and what others say about it. The right trail makes your adventure much better.

    What Key Tips Should First-Time Overnight Hikers Know?

    Preparing mentally and physically for your first overnight hike

    Begin your hike prep with body and mind. Work out to build muscles for those hills. Hikes can be tough, so ready your mind too. Think of this as your fun challenge!

    Essential knowledge about trail etiquette and Leave No Trace principles

    Know the rules of the trail and stick to them. Respect nature and keep trails clean so others can also enjoy.

    Building a support system: Going solo vs. finding a group

    Plan to hike alone? Tell someone your plan. Better yet, join a hiking group. It’s safer and more fun.

    Identifying and avoiding common novice mistakes

    Pack light but bring what you need. Always check your gear before you hike. Learn these tricks to avoid mistakes that can ruin your trip.

    How Can I Ensure My Overnight Hike Has Minimal Environmental Impact?

    When you plan an overnight hiking trip, think green. Use Leave No Trace principles to keep nature wild. These principles tell us to hike and camp without hurting the land. They help us enjoy nature without leaving a mark.

    So how do we apply Leave No Trace on overnight hikes? First, plan to visit places in small groups. This lowers your mark on the land. Pick a campsite that’s already been used. It helps to keep new areas untouched. When you pick a spot, make sure it’s durable. This means areas with rock, gravel, or dry grass.

    What about handling waste? Always pack a small shovel. Dig a hole 6 to 8 inches deep for human waste, far from water, trails, and campsites. Cover and disguise the hole when you’re done. Pack out toilet paper and hygiene products to keep the land clean.

    Remember, waste also means food scraps. Never leave food waste behind. Animals might get sick eating it, or it can harm the plants. Store food tight so animals can’t get in. This stops them from finding human food.

    To care for wildlife, watch animals from a distance. If you see wildlife, keep calm and move slowly. This keeps you and them safe. Don’t follow or feed them because this can harm their health and change their natural actions.

    Leave plants, rocks, and other natural things as you find them. When you follow these tips, you help keep nature as it is. This means everyone can enjoy it for years to come.

    What Are the Essential Safety Measures for Hiking After Dark?

    Is it smart to hike at night? Yes, with the right gear and prep. You need good light and know-how.

    First, get a strong headlamp. It lets you see and keeps your hands free. Choose one that fits well and won’t slip as you move. Make sure it’s bright enough for your path. Some lamps also have a red light. It’s softer for dark hours and won’t blind your buddies.

    Learn to read a map and use a compass or GPS before you leave. Practice at home so you’re ready. Being able to find your way is key when the sun is down.

    Set up your camp before it gets dark. Get to know the spot in daylight. If you can’t, have an emergency shelter ready. This can be a small tent or a bivy sack. It should be easy to set up.

    Have a way to call for help if needed. Carry a whistle, phone, or a signal device. If you get lost or hurt, they can save your life.

    Walk the trail during the day first. It helps to see it in light before trying it in the dark. Familiar paths are safer and easier to follow.

    Safety gear for hiking after dark and emergency preparedness on trails are musts. Having the right tools and knowledge means you can hike at night with less risk. Always be prepared and stay safe out there!

    How Do I Stay Hydrated and Energized During My Hike?

    Water and food are key on the trail. You’ll need a good water bottle or a hydration pack. For food, plan meals with a mix of carbs, protein, and fats. And bring snacks that give quick energy like nuts or dried fruit.

    Choose a hydration system that fits your pack and is easy to use while hiking. A bladder system lets you drink without stopping. Or you can use water bottles that fit in your pack’s side pockets.

    Pack meals that don’t weigh much but still fill you up. Think about using dehydrated meals. You just add water to these when it’s time to eat. Be sure to pack extra snacks too. You might get more hungry than you think!

    On the trail, eat small snacks often. This keeps your energy up over the whole day. Try mixing stuff like trail mix, energy bars, or fresh fruit for variety. Drink water often too, even if you’re not thirsty yet.

    Watch out for signs that you don’t have enough water in your body. If you feel dizzy, have a headache, or get really tired, you might need more water. Drink before you get thirsty to stop this from happening. If you drink when you’re thirsty, you’re already behind.

    So remember, pick a good water system, plan your meals well, and keep snacks ready to eat. Drink water often, and listen to your body to keep having fun on your hiking trip!

    How Can I Prepare Physically for Overnight Hiking and Recover Post-Hike?

    To get ready for an overnight hike, mix exercises like walking, running, and biking. These boost your stamina and muscle power. You should also do stretches before and after your trip. Eat well and sleep enough for a good recovery. After hiking, have a healthy meal and take time to relax.

    Exercises and Cross-Training for Building Endurance and Strength

    Start with what you like, maybe walking or biking, and do it often. Aim for a pace that makes you sweat but still lets you talk. Then, try running or swimming to work different muscles. Add weight to your walks to mimic a full pack.

    Stretching Routines for Before and After the Hike

    Do light stretches before you hike to wake up your muscles. After your hike, go for longer, deeper stretches. This will help your muscles relax and rebuild.

    Nutrition and Sleep: Keys to Effective Recovery

    Eat carbs and proteins before your hike to fuel up. Keep healthy snacks handy during the hike. Once you’re done, pick foods rich in nutrients to help repair muscles. A good night’s rest aids recovery, too. Aim for 7-9 hours of sleep each night, especially after hiking.

    Post-Hike Recovery Meals and Relaxation Techniques

    Choose a meal with proteins, fats, and carbs to refuel after the hike. Consider yoga or light walking the next day to keep your body moving. But do it gently. Your goal is to help your body heal, not to strain it more.

    Conclusion

    We covered everything from what gear you need to how to pick a hiking spot. Remember, your comfort, safety, and the planet matter most. Always plan well, respect wildlife, and leave no trace. Enjoy your journey!

    Loading