Tag: Backpacking Gear

  • Nemo Dagger OSMO Ultralight Backpacking Tent

    Brief Overview

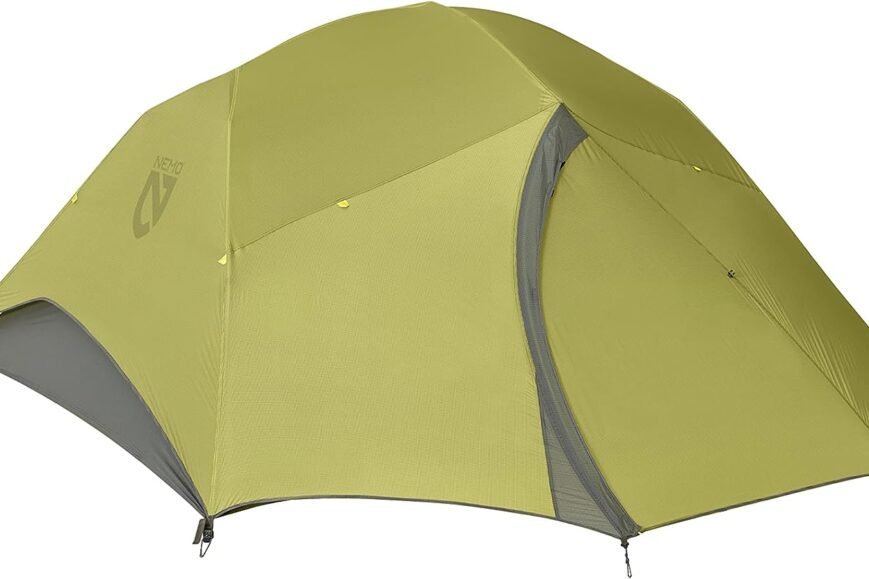
    The Nemo Dagger Osmo  is a cutting-edge 2-person backpacking tent that seamlessly blends innovative design, exceptional weather protection, and impressive versatility. As part of Nemo’s renowned Dagger line of high-performance shelters, the Dagger is engineered to provide a reliable and comfortable home-away-from-home for the modern outdoor adventurer. Now all this hype is great, but let’s dig in and see what this tent’s really all about.
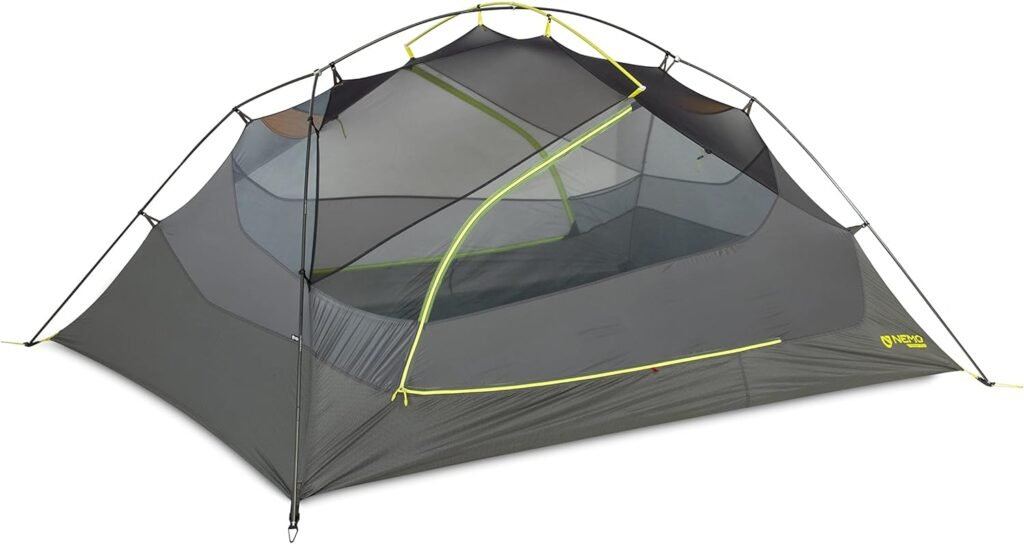
    Nemo Dagger Osmo

    Nemo Dagger OSMO Ultralight Backpacking Tent

    Specifications

    • Capacity: 2-person
    • Season: 3-season
    • Weight: 3 lbs 14 oz (1.76 kg)
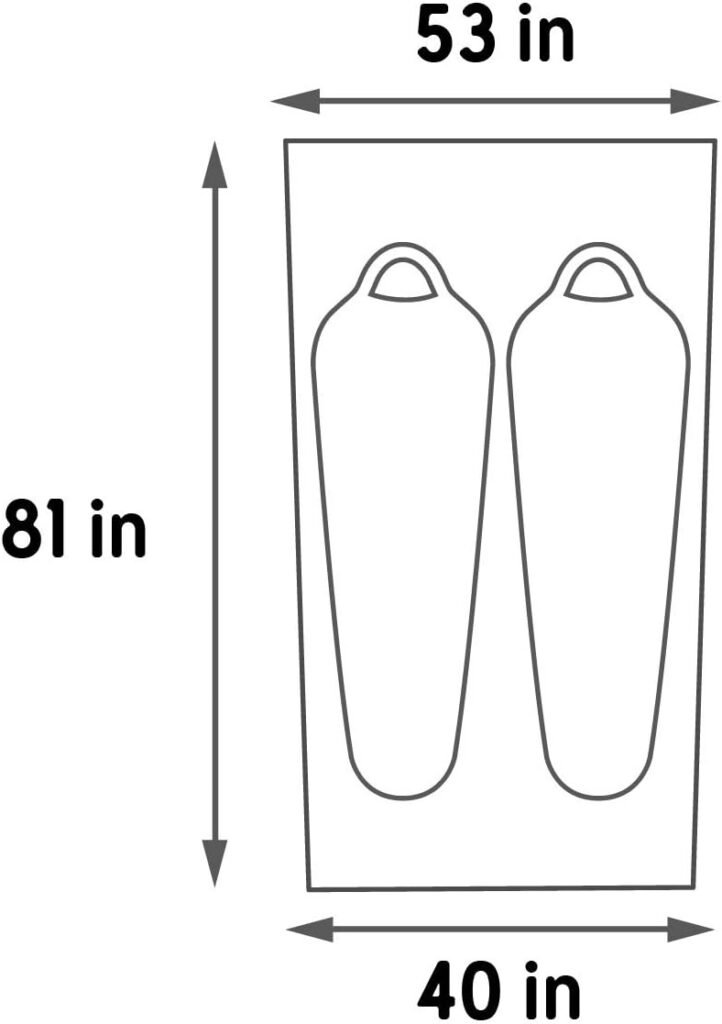
    • Floor Dimensions: 90 x 50 inches (229 x 127 cm)
    • Floor Area: 31.3 sq ft (2.91 sq m)
    • Vestibule Area: 11.4 sq ft (1.06 sq m) + 11.4 sq ft (1.06 sq m)
    • Peak Height: 42 inches (107 cm)
    • Packed Size: 19.5 x 6.5 inches (50 x 17 cm)
    • Fabric:
      • Canopy: 15D Nylon Ripstop/ No-See-Um Mesh
      • Fly: 15D Sil/PeU Nylon Ripstop (1200 mm)
      • Floor: 30D PeU Nylon Ripstop (3000 mm)

    First Impressions

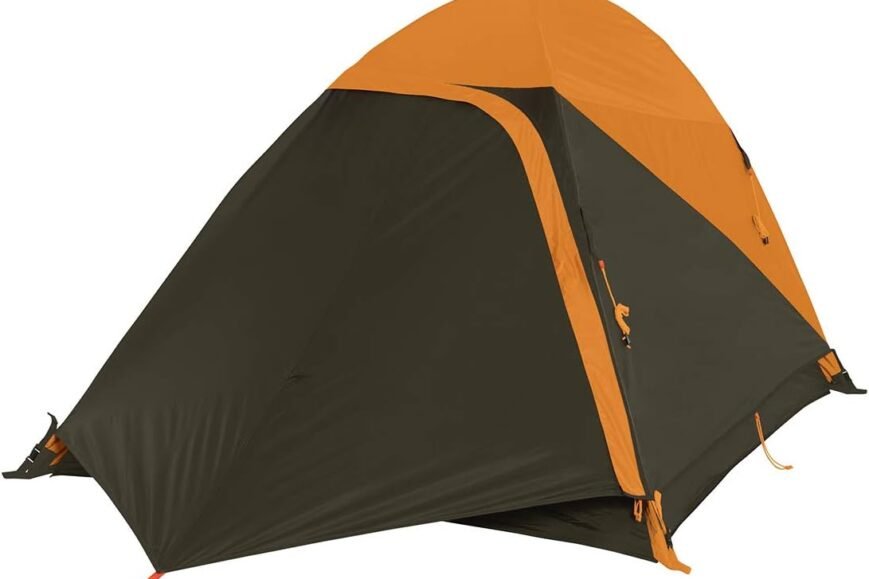
    Unboxing the Nemo Dagger 2 person tent, the immediate impression is one of quality and attention to detail. The tent arrives neatly packaged, with all components – poles, pegs, guylines, and accessories – carefully organized and easily accessible. This level of care in the packaging sets the stage for the overall craftsmanship and thoughtful design that we were hoping for.

    Upon initial setup, the tent reveals a sleek and refined silhouette, with a distinctive Nemo aesthetic that combines form and function. The fabrics have a supple yet durable feel, hinting at the brand’s commitment to using high-quality materials. The color scheme, a blend of muted grays and soft blues, seamlessly blends with natural outdoor environments.

    What We Like

    One of the most impressive aspects of the Nemo Dagger Osmo is its innovative design and cutting-edge features. The tent’s use of the brand’s proprietary Osmo fabric, a lightweight and highly breathable material, is a standout feature that sets it apart from traditional backpacking shelters.

    • Weather Protection: The Osmo fabric’s exceptional moisture-wicking and quick-drying properties, combined with its superb wind and water resistance, provide an unparalleled level of weather protection and breathability. This unique combination of performance attributes ensures that users stay dry and comfortable, even in challenging environmental conditions.
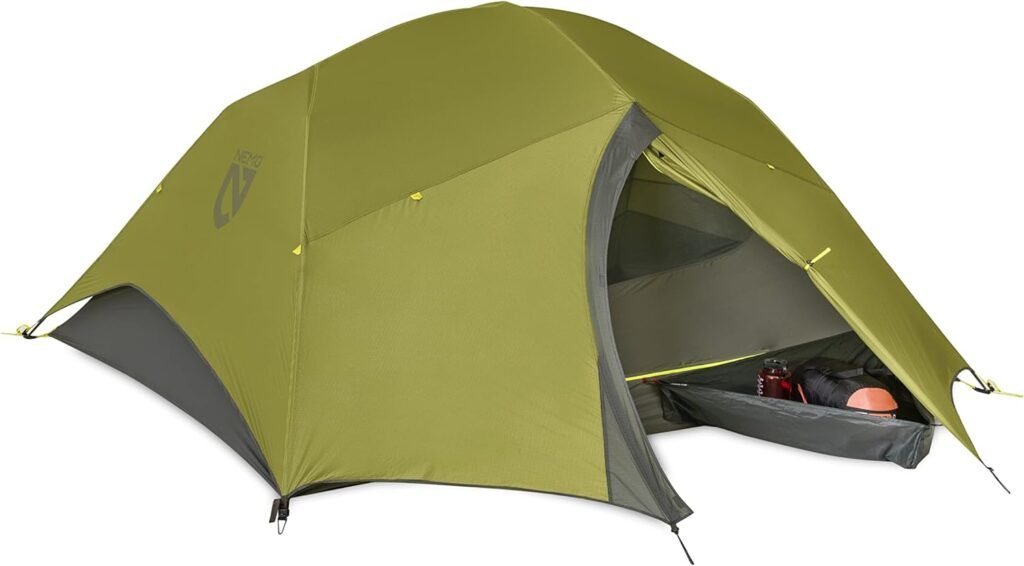
    • Spaciousness: Another key strength of the Dagger Osmo is its impressive livability and overall spaciousness. Despite its relatively compact footprint, the tent offers a comfortable and airy interior, with 29 sq ft (2.7 sq m) of floor space and a peak height of 42 inches (107 cm). The well-designed vestibules (10 sq ft / 0.9 sq m each) further enhance the overall livability by providing ample storage space for gear and equipment.
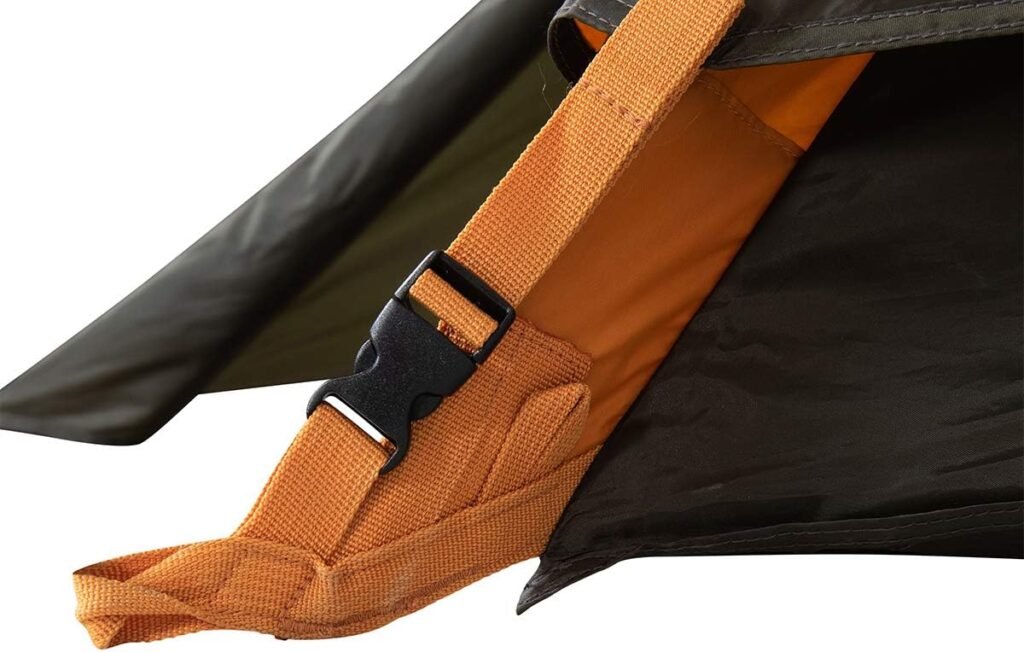
    • Thoughtful Features: The Dagger Osmo attention to detail and thoughtful features are also worthy of praise. From the convenient side-entry design and the color-coded pole system to the integrated media pockets and gear loft, every aspect of this tent has been carefully considered to provide a seamless and enjoyable user experience.

    What We Don’t

    While the Nemo Dagger is an exceptionally well-designed and innovative 2-person backpacking tent, there are a few aspects that may not appeal to all users.

    • Price: One potential drawback is the tent’s relatively high price point, with an MSRP of $499.95. This cost may be a deterrent for budget-conscious outdoor enthusiasts, especially when compared to more affordable options in the backpacking tent market.
    • Weight: Additionally, the Dagger’s weight, at 4 lbs 2 oz (1.9 kg), may be a consideration for ultralight enthusiasts who prioritize minimizing pack weight above all else. While the tent’s weight is still respectable for its class, it may not be the optimal choice for those seeking the absolute lightest shelter possible.
    • Maintenance: Finally, the Dagger’s unique Osmo fabric, while offering exceptional performance, may require some additional care and maintenance compared to more traditional tent materials. Users who are unfamiliar with this type of specialized fabric may need to familiarize themselves with the recommended cleaning and storage procedures to ensure the long-term durability of the tent.
    Nemo Dagger OSMO Ultralight Backpacking Tent

    The Specs

    Key Features:

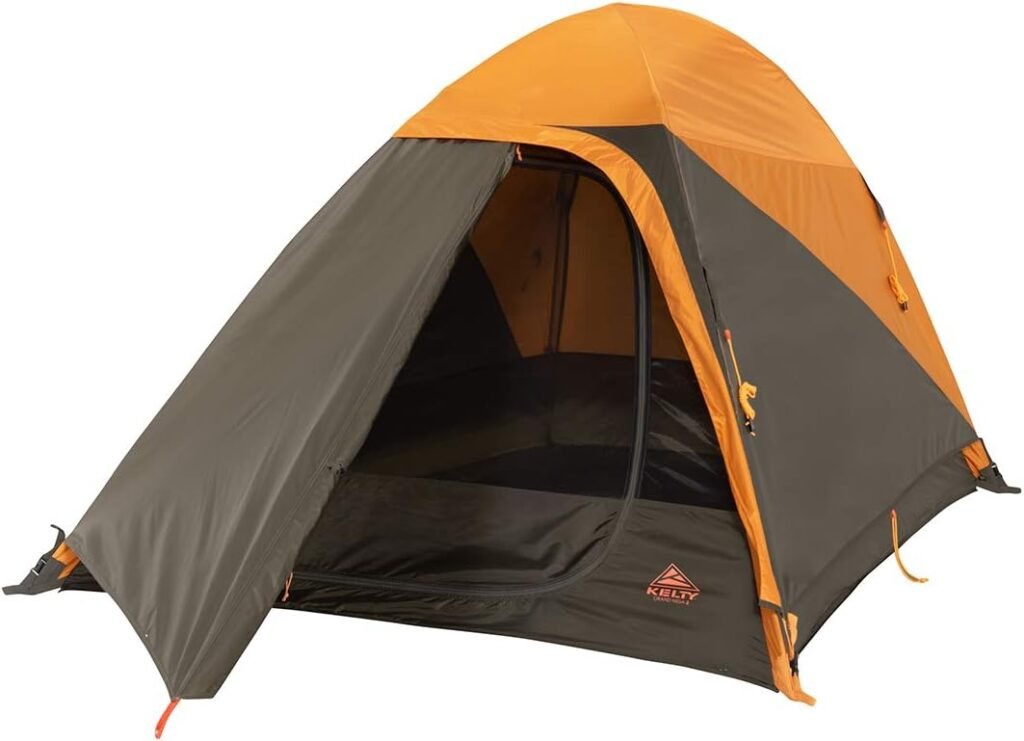
    • Design: The Nemo Dagger Osmo features a classic dome-style architecture with a side-entry configuration, which provides easy access and a streamlined silhouette. The tent’s use of the brand’s proprietary Osmo fabric is a standout design element that sets it apart from traditional backpacking shelters.
    • Fit: The Dagger is designed to accommodate two people comfortably, with a floor area of 29 sq ft (2.7 sq m) and a peak height of 42 inches (107 cm). The tent’s spacious and airy interior, combined with its thoughtful layout, ensures a comfortable living space for both occupants and their gear.
    • Materials: The tent’s body is constructed from Nemo’s innovative Osmo fabric, a lightweight and highly breathable material that offers superior wind and water resistance. The rainfly is made from a 30 Denier (30D) nylon with a silicone and polyurethane coating, providing reliable protection against the elements.
    • Dimensions: The Nemo Dagger has a packed size of 18 x 6 inches (46 x 15 cm) and measures 88 x 52 inches (224 x 132 cm) when fully set up.
    • Convenient Features: The tent features two large vestibules (10 sq ft / 0.9 sq m each) for additional storage space, as well as integrated media pockets and a gear loft for organizing small items. Nemo also includes several interior and exterior loops for attaching additional accessories.
    Nemo Dagger OSMO Ultralight Backpacking Tent

    Overall Performance

    Weatherproofing

    The use of the proprietary Osmo fabric, combined with the tent’s thoughtful design elements, such as the fully taped seams and adjustable vents, provides exceptional protection against heavy rain, strong winds, and light snow. This level of weatherproofing makes it a reliable choice for extended backcountry trips and challenging environments.

    Breathability

    Nemo’s Osmo fabric is a standout feature in terms of breathability and moisture management. The fabric’s exceptional moisture-wicking and quick-drying properties, coupled with its superb wind and water resistance, help to maintain a comfortable and dry sleeping environment, even in warm and humid conditions.

    Durability

    There is a clear use of high-quality materials and reinforced components contributes to its overall ruggedness and longevity. While the specialized Osmo fabric may require some additional care and maintenance, the tent is built to withstand the rigors of extended backcountry use and occasional rough handling without compromising its structural integrity.

    Ease of Use

    Pitching

    Setting up the Nemo Dagger is a relatively straightforward process, thanks to the color-coded pole system and intuitive clip-and-go design. The tent’s freestanding structure also means it can be pitched without the need for staking, which can be particularly useful in areas with challenging ground conditions.

    Breakdown

    Packing up the Dagger is a simple task, with a well-designed storage sack and helpful compression straps for efficient packed volume. The tent can be quickly disassembled and stored away, making transitions between campsites a hassle-free experience.

    Best Uses

    Seasonal Use

    The Nemo Dagger Osmo is designed for reliable three-season performance, with the ability to handle a wide range of weather conditions, including heavy rain, strong winds, and light snow. This versatility makes it a suitable choice for spring, summer, and fall backpacking and camping trips.

    Environment

    The tent’s freestanding design, combined with its exceptional weatherproofing and breathability, make it a versatile choice for a variety of environments, from forested areas to exposed alpine settings. Its stability and compact footprint also render it a reliable option for use in crowded backcountry campsites or when space is limited.

    Comparison to Other Tents

    When compared to other premium 2-person backpacking tents, the Nemo Dagger Osmo stands out for its innovative design, exceptional weather protection, and impressive breathability.

    • MSR Hubba Hubba 2P: One tent that warrants comparison is the MSR Hubba Hubba , a well-established and highly capable option. While the Hubba Hubba may offer a slightly more streamlined and user-friendly design, the Dagger Osmo surpasses it in terms of overall weatherproofing, breathability, and livability, making it a more suitable choice for extended expeditions and challenging environments.
    • Big Agnes Copper Spur HV UL2: Another contender is the Big Agnes Copper Spur HV UL2, a lightweight and feature-rich backpacking tent. While the Copper Spur HV UL2 may provide a more spacious interior and additional convenient features, the Dagger delivers superior weather protection and breathability, attributes that are particularly important for those venturing into remote or exposed areas.
    • Hilleberg Nallo 2: Compared to the Hilleberg Nallo 2, a premium expedition-grade tent, the Dagger may not offer the same level of ruggedness and extreme weather performance. However, the Dagger’s innovative design, impressive versatility, and exceptional livability make it a compelling choice for the discerning outdoor enthusiast who values a balance of weight, space, and functionality.

    Our Final Thoughts

    The Nemo Dagger Osmo is a true standout in the world of 2-person backpacking tents, offering a unique blend of innovative design, exceptional weather protection, and unparalleled breathability. Engineered for the modern outdoor adventurer, this tent sets a new benchmark for what a high-performance backpacking shelter can and should be.

    One of the most impressive aspects of the Dagger 2 person tent is its use of Nemo’s proprietary Osmo fabric, a cutting-edge material that redefines the boundaries of what’s possible in terms of moisture management and weather resistance. The fabric’s exceptional breathability, combined with its superb wind and water resistance, ensures that users stay dry and comfortable, even in the most challenging environmental conditions.

    Another key strength of the Dagger is its impressive livability and overall spaciousness. Despite its relatively compact footprint, the tent offers a comfortable and airy interior, with ample room for two people and their gear. The well-designed vestibules further enhance the overall livability by providing generous storage space for additional equipment and personal items.

    While the Dagger ‘s high price point and slightly heavier weight may be a consideration for some users, the tent’s innovative features, exceptional performance, and thoughtful design justify the investment for those who demand the best in backpacking gear. The attention to detail and user-friendly features, such as the convenient side-entry design and the color-coded pole system, further enhance its appeal for a wide range of outdoor enthusiasts.

    Overall, the Nemo Dagger Osmo 2P is a truly exceptional 2-person backpacking tent that sets a solid standard for innovation, weather protection, and breathability.

    FAQ

    Q. What makes the Nemo Dagger Osmo 2P stand out from other 2-person backpacking tents?

    The Nemo Dagger Osmo stands out due to its innovative design, use of proprietary Osmo fabric, exceptional weather protection, and impressive breathability. The tent’s thoughtful features, such as the side-entry design, color-coded pole system, and integrated media pockets, further enhance its appeal.

    Q. How does the Osmo fabric contribute to the tent’s performance?

    The Osmo fabric is a lightweight and highly breathable material that offers superior wind and water resistance. Its exceptional moisture-wicking and quick-drying properties ensure that users stay dry and comfortable, even in challenging environmental conditions.

    Q. Is the Nemo Dagger suitable for ultralight backpacking?

    While the Dagger Osmo 2P’s weight of 4 lbs 2 oz (1.9 kg) is respectable for its class, it may not be the optimal choice for ultralight backpacking enthusiasts who prioritize minimizing pack weight above all else. However, its innovative features and exceptional performance make it a compelling option for those who value a balance of weight, space, and functionality.

    Q. How does the Nemo Dagger compare to other premium 2-person backpacking tents?

    When compared to other premium 2-person backpacking tents, the Nemo Dagger Osmo stands out for its innovative design, exceptional weather protection, and impressive breathability. It surpasses the MSR Hubba Hubba in terms of weatherproofing and livability, and delivers superior weather protection and breathability compared to the Big Agnes Copper Spur HV UL2.

    Q. What are the recommended care and maintenance procedures for the Osmo fabric?

    To ensure the long-term durability of the Osmo fabric, users should follow the recommended cleaning and storage procedures provided by Nemo. This may include gentle hand washing with mild soap, avoiding harsh chemicals, and storing the tent in a cool, dry place when not in use.

    Loading


  • Kelty Grand Mesa 2 Person Backpacking Tent

    Brief Overview

    The Kelty Grand Mesa 2 is a classic 2-person backpacking tent designed for the budget-conscious outdoor enthusiast. As part of Kelty’s renowned line of reliable and affordable camping equipment, the Grand Mesa 2 offers a solid set of features and performance at a very attractive price point. Intended for casual adventures and weekend getaways, this tent aims to provide a comfortable and functional shelter for the modern backpacker.

    Kelty Grand Mesa

    Kelty Grand Mesa 2

    Specifications

    • Weight: 5 lbs 3 oz (2.4 kg)
    • Interior Floor Space: 29 sq ft (2.7 sq m)
    • Peak Height: 40 inches (102 cm)
    • Packed Size: 18 x 7 inches (46 x 18 cm)
    • Materials: 68D polyester ripstop fabric, 68D polyester rainfly with polyurethane coating
    • Vestibules: Two, 9 sq ft (0.8 sq m) each

    First Impressions

    Unboxing the Kelty Grand Mesa 2, the first thing that stands out is the straightforward and no-frills packaging. The tent arrives neatly folded and compressed, with the poles, stakes, and other components organized in a practical manner. This simplistic approach sets the tone for the overall design and intended use of the product.

    Upon initial setup, the Grand Mesa 2 reveals a classic dome-style silhouette with a clean and understated aesthetic. The fabric has a durable, yet slightly stiff feel, hinting at the tent’s focus on rugged functionality over modern, lightweight designs. The color scheme, a mix of muted earth tones, blends seamlessly with natural outdoor environments.

    What We Like

    One of the most appealing aspects of the Kelty Grand Mesa 2 is its exceptional value proposition. With an MSRP of just $149.95, this tent offers a tremendous amount of performance and features for the price, making it a highly accessible option for budget-conscious backpackers and casual campers.

    Despite its affordable price tag, the Grand Mesa 2 still manages to deliver a decent level of comfort and livability. The 29 sq ft (2.7 sq m) of interior floor space and 40-inch (102 cm) peak height provide a reasonably spacious and comfortable living area for two people, especially for shorter trips or solo use.

    Another standout feature of the Grand Mesa 2 is its straightforward and user-friendly setup. The color-coded pole system and intuitive clip-and-go design make the initial pitch a breeze, even for first-time users. The freestanding structure also means the tent can be set up without the need for staking, which is a significant advantage in areas with challenging ground conditions.

    Key Benefits:

    • Exceptional Value: Affordable price with solid performance.
    • Comfort and Livability: Reasonable interior space and peak height.
    • User-Friendly Setup: Color-coded poles and clip-and-go design.
    • Freestanding Structure: Can be set up without staking.

    What We Don’t

    While the Kelty Grand Mesa 2 offers impressive value and functionality for the price, there are a few areas where compromises have been made to achieve the low cost. The most notable drawback is the tent’s overall weight, which at 5 lbs 3 oz (2.4 kg) is on the heavier side for a 2-person backpacking tent.

    The Grand Mesa 2’s weatherproofing and breathability also fall short of more premium offerings in the backpacking tent market. The single-wall design, combined with the less durable fabrics, may not provide the same level of reliable protection against heavy rain, wind, and snow as some of the competition.

    Additionally, the tent’s somewhat bulky and rigid construction, while contributing to its durability, can make it less convenient to pack and transport, especially for minimalist backpackers or those with limited space.

    Key Drawbacks:

    • Weight: Heavier than some 2-person backpacking tents.
    • Weatherproofing: Less reliable in severe weather conditions.
    • Bulky Construction: Less convenient to pack and transport.

    The Specs

    Key Features:

    • Design: The Kelty Grand Mesa 2 features a classic dome-style architecture with a freestanding structure. This design provides a decent level of stability and weather protection, while maintaining a relatively compact footprint.
    • Fit: The tent is designed to accommodate two people comfortably, with a floor area of 29 sq ft (2.7 sq m) and a peak height of 40 inches (102 cm). The slightly tapered shape and sloping sidewalls help to maximize the usable interior space.
    • Materials: The Grand Mesa 2’s body is constructed from a durable 68D polyester ripstop fabric, which offers a balance of weight, strength, and weatherproofing. The rainfly is made from a 68D polyester with a polyurethane coating, providing reliable protection against the elements.
    • Dimensions: The Kelty Grand Mesa 2 has a packed size of 18 x 7 inches (46 x 18 cm) and measures 88 x 52 inches (224 x 132 cm) when fully set up.
    • Convenient Features: The tent features two vestibules (9 sq ft / 0.8 sq m each) for additional storage space, as well as two mesh pockets inside the tent for organizing small items. Kelty also includes a gear loft for improved gear organization.
    Kelty Grand Mesa 2

    Overall Performance

    Weatherproofing

    The Kelty Grand Mesa 2’s single-wall design and use of moderately water-resistant fabrics provide a decent level of protection against light rain and wind. However, the tent may struggle to maintain its integrity during extended periods of heavy precipitation or in more severe weather conditions.

    Breathability

    The Grand Mesa 2’s mesh canopy and vented rainfly help to promote airflow and mitigate condensation buildup, but the single-wall construction can still lead to some moisture retention, especially in warmer or humid environments.

    Kelty Grand Mesa 2

    Durability

    The Grand Mesa 2’s use of durable polyester fabrics and reinforced components contributes to its overall ruggedness and longevity. While not as robust as some higher-end backpacking tents, the tent is built to withstand moderate backcountry use and occasional rough handling.

    Ease of Use

    Pitching

    Setting up the Kelty Grand Mesa 2 is a straightforward process, thanks to the color-coded poles and intuitive clip-and-go design. The freestanding structure also means the tent can be pitched without the need for staking, which can be particularly useful in areas with challenging ground conditions.

    Breakdown

    Packing up the Grand Mesa 2 is equally easy, with a well-designed storage sack and a helpful compression strap for efficient packed volume. The tent can be quickly disassembled and stored away, making transitions between campsites a relatively hassle-free experience.

    Kelty Grand Mesa 2 backpacking tent

    Best Uses

    Seasonal Use

    The Kelty Grand Mesa 2 is primarily designed for three-season use, with the ability to handle mild to moderate weather conditions. It performs adequately in rain, wind, and light snow, making it a suitable option for spring, summer, and fall adventures.

    Environment

    The Grand Mesa 2’s compact footprint and freestanding design make it a versatile choice for use in a variety of environments, from wooded areas to more exposed settings. Its stability and weatherproofing also render it a reliable option for car camping and frontcountry campsites.

    Comparison to Other Tents

    When compared to other budget-friendly 2-person backpacking tents, the Kelty Grand Mesa 2 stands out for its exceptional value proposition and solid overall performance. While it may not offer the same level of advanced features or lightweight construction as some of the more premium options, the Grand Mesa 2 delivers a satisfactory camping experience at a very attractive price point.

    Competitors:

    • Coleman Sundome 2-Person: Both tents offer similar interior dimensions and weight specifications, but the Kelty Grand Mesa 2 distinguishes itself with a slightly more durable construction and a freestanding design, which can be a significant advantage in certain environments.
    • Marmot Catalyst 2P: A slightly more expensive but also more capable 2-person backpacking tent. While the Catalyst 2P may offer better weatherproofing and breathability, the Kelty Grand Mesa 2 remains a compelling choice for those seeking a reliable and affordable shelter for casual outdoor adventures.

    Our Final Thoughts

    The Kelty Grand Mesa 2 is a solid and dependable 2-person backpacking tent that delivers excellent value for the money. While it may not boast the same level of advanced features or lightweight construction as some of the premium offerings on the market, this tent provides a satisfactory camping experience at a very accessible price point.

    The Grand Mesa 2’s straightforward design, user-friendly setup, and decent level of comfort and livability make it an attractive option for budget-conscious backpackers, casual campers, and those new to the outdoor recreation scene. Its freestanding structure and relatively durable construction also lend themselves well to a variety of environments, from wooded campsites to more exposed settings.

    However, it’s important to note that the Grand Mesa 2’s compromises in areas like weatherproofing, breathability, and overall weight may not align with the needs of more experienced or hardcore backpackers. For those seeking a higher-performance, ultralight shelter, the Kelty Grand Mesa 2 may not be the ideal choice.

    Overall, the Kelty Grand Mesa 2 is a reliable and affordable 2-person backpacking tent that strikes a decent balance between functionality, comfort, and value. It’s an excellent option for budget-conscious outdoor enthusiasts and casual adventurers who are looking for a straightforward and dependable shelter for their weekend getaways and short backpacking trips.

    Frequently Asked Questions

    Q. Is the Kelty Grand Mesa 2 suitable for winter camping?

    The Kelty Grand Mesa 2 is primarily designed for three-season use. While it can handle light snow, it may not provide adequate protection in harsher winter conditions.

    Q. How easy is it to set up the Kelty Grand Mesa 2?

    The Kelty Grand Mesa 2 features a color-coded pole system and an intuitive clip-and-go design, making it very easy to set up, even for first-time users.

    Q. How does the Kelty Grand Mesa 2 compare to the Coleman Sundome 2-Person tent?

    Both tents offer similar interior dimensions and weight specifications. However, the Kelty Grand Mesa 2 has a more durable construction and a freestanding design, which can be advantageous in certain environments.

    Q. What are the main drawbacks of the Kelty Grand Mesa 2?

    The main drawbacks include its overall weight, less reliable weatherproofing in severe conditions, and somewhat bulky construction, which may be less convenient for minimalist backpackers.

    Q. Can the Kelty Grand Mesa 2 be used for car camping?

    Yes, the Kelty Grand Mesa 2 is versatile enough for car camping and frontcountry campsites, thanks to its compact footprint and freestanding design.

    Loading


  • A mesmerizing hyperrealistic photograph showcasing the freedom and beauty of backpacking with a tarp.

    Benefits of Backpacking with a Tarp: Is It Worth It?

    Choosing the ideal backpacking tarp? This guide discusses materials, ultralight options, and setup tips for every adventure.

    • Backpacking tarp choices hinge on weight, strength, and cost considerations.
    • Dyneema tarps are light and resilient but pricey; Silnylon tarps offer durability at a lower cost.
    • Tarps provide a minimalistic approach to camping, are versatile, and setup is fast.
    • Seasonal conditions like winter’s snow or summer’s heat and bugs influence tarp usage and setup.
    • For solo backpackers, a 7×9 or 8×10 foot tarp strikes a balance between coverage and portability.
    • Tarps can be customized for particular needs and reconfigured into various shelter types.
    • Maintaining a tarp involves cleaning, drying, proper folding, and storage, as well as timely repairs.
    • Sustainable tarp camping aligns with low environmental impact practices and responsible disposal.
    • Essential backpacking tarp accessories include stakes, guy lines, and a reliable repair kit.
    • For ultralight tarp configurations, consider A-frame or lean-to setups with a focus on quick deployment.

    Ever dodge sudden rain while hauling a heavy tent? It’s time to change up your game. Picture this: you, a breeze-kissed hero, setting up a sleek backpacking tarp in minutes. Your buddies? They’re jaw-dropped and wondering why they’re not in on the secret. Dive into our tarp tell-all to lighten your load, turn heads on the trail, and become one with nature. Let’s unpack the ins and outs of picking a champion tarp that reigns over tents. Ready to rule the wild? Let’s go!

    How to Choose the Right Backpacking Tarp?

    Choosing the right #backpacking tarp depends on where you go and what weather you face. For my needs, Dyneema tarps are the best because they are light and strong. However, Silnylon tarps offer a good balance of durability and cost.

    When looking at tarp materials, we see two big choices: Dyneema and Silnylon. Dyneema is super light and tough. It’s often seen as the best but costs more. Silnylon is heavier than Dyneema but also tougher. It’s good for rough trips and costs less.

    We should think about weight, strength, and cost when picking a tarp. Ultralight tarps are great for long trips. You can carry them far without getting worn out. Strong tarps last longer and can take more hits from rocks or branches.

    Let’s compare Dyneema and Silnylon. Dyneema tarps are top-ranked for being light. They last long and handle weather well. But their price is higher. Silnylon tarps weigh more but they won’t tear easily. They can stand up to harsh use and are easier on your wallet.

    Which should you choose? For quick trips with less gear, pick ultralight Dyneema. For hard trips or if you want to spend less, Silnylon could be better. Each tarp has its place. Think about what matters to you most – low weight, strength, or price.

    In the end, it’s all about finding a balance that fits your type of adventure. With a good waterproof tarp, you can explore more and worry less. Choose wisely and your tarp will be a loyal buddy on many trips!

    What Are the Benefits of Tarp Camping Over Traditional Tents?

    Why choose a tarp over a tent for backpacking? Tarps weigh less and pack smaller. Now let’s dive into the details behind this simple answer. While tents can be bulky, a backpacking tarp is light. Your back will thank you after a long hike. It slides easily into your pack, taking up less space.

    Tarps reign supreme in versatility too. Use them in forests, mountains, or beaches. They adapt to many spots tents can’t go. Ever tried to pitch a tent on rocky ground? With a tarp, it’s no sweat.

    What about speed in setting up and breaking down? Faster with a tarp. No poles or complicated parts. Just tie your tarp to trees or with stakes. And when it’s time to leave, it packs up in a snap.

    And the connection to nature? Far better with a tarp. You lie under the stars, the breeze on your face. It’s as close as you get to sleeping outdoors with some cover over your head. With tents, you’re zipped away from the world.

    Tarps serve many uses in different camping environments. They are lightweight, easy to carry, and quick to set up. Plus, you feel closer to the great outdoors. That’s the benefit of tarp camping for you. Life is simpler and lighter on the trail. And yes, it’s all worth it.

    How Do I Set Up a Tarp Shelter?

    Q: How can I quickly and easily set up my tarp shelter?
    A: Choose flat ground and use two trees to string a ridge line.

    First, find flat ground with trees nearby. Use the trees to string a ridge line. Then, drape your tarp over the line. Pull the corners tight and stake them to the ground. Voila! You have basic shelter.

    Keep these tips in mind for a quick setup. Angle your tarp against the wind for better shelter. Drape it high for cool air in the heat. For rain, pitch it low and tight to keep dry.

    Q: What are some tried and true tarp pitching techniques?
    A: Go for classic shapes like the A-frame or lean-to for reliability.

    The A-frame is easy and effective. To make it, secure your ridge line between two supports. Then, place your tarp over the line and secure it to the ground, making an A shape.

    Lean-tos work well too, especially in windy spots. Just tie one long edge of your tarp to a ridge line. Then, stake the free sides out, leaving one side open.

    Getting creative? Beginners can try the plow point. Secure one corner high and pull out the other corners. It’s quick and stands strong in the wind.

    Basic setups are quick, even for beginners. They keep you dry, warm, and out of the wind. So, next time you pack for the wild, grab a tarp and try these tricks. You’ll love how fast you can get cozy and enjoy nature.

    Are There Any Seasonal Considerations When Tarp Camping?

    Yes, camping seasons change how you should use a backpacking tarp. In winter, build your tarp shelter to block wind and snow. Close sides and create steep angles for snow to slide off. Use a waterproof and sturdy backpacking tarp. Look for ones designed for snowy conditions. Secure your tarp well. Snow and wind can pull stakes out of the ground. Ventilation is also key to preventing too much moisture from building up. Pitch your tarp higher to let air in and damp air out.

    Summer brings different challenges for tarp campers. Choose a light, reflective tarp to keep cool. Pitch it high for a breeze or make a simple roof for shade. Rainy season? Make sure you have a tarp that won’t leak. Tilt it so water runs off fast and away from you. Keep gear under the tarp but away from the edges – you don’t want them wet!

    Seasonal changes mean bugs too. In summer, think about a tarp with a mesh net. It will keep bugs out so you can sleep in peace. Remember, tarps for backpacking differ. Some are best for cold weather, while others suit hot, bug-filled times. Pick a seasonal tarp that fits the time of year. This way, you can focus on the adventure, not the weather.

    Ultralight Tarp Configurations for Solo Backpackers

    What is the ideal tarp size for a solo backpacker? For solo trips, a 7×9 or 8×10 foot tarp works great. It gives enough cover to shield you from rain and wind. Yet, it’s small so it won’t weigh you down.

    Now let’s dig into why that size makes sense and how to pitch it for fast hiking. When you’re alone, you must balance the need for shelter with the wish to hike light. A large tarp would offer more space but at the cost of extra weight. And if you’re speed hiking, each ounce matters.

    Some favor a tiny, light tarp for these fast trips. This way, you move quickly with less to carry. But, you still get some shelter at rest times. A bigger tarp can seem good until you’re far from home with too much to carry. With the right size, you don’t feel trapped by your gear.

    Fast and light tarp setups often use what’s at hand. Sticks or your trekking poles can hold up your tarp. This means no extra poles to carry. You can use trees too if they’re around. This kind of setup is not just for speed. It also helps when you need to set up shelter fast as the weather turns.

    A minimalist setup means more mobility. An ultralight tarp can go in your pack easily. And when you use one, you trade some comfort for the joy of moving free. You choose when and where to rest, and your shelter is set in minutes.

    To balance your tarp’s cover with its weight, think about what you really need. Will you face heavy rain, or is a light shield from dew enough? A solo hiker finds joy in this freedom. It’s why picking the right ultralight tarp, and knowing how to use it quickly, is so key for your trips.

    Maximizing Tarp Use: Multi-Functionality and Extended Adventures

    Yes, a tarp can be versatile in different camping scenarios. You can make your standard tarp suitable for backpacking by adding tie-out points and trimming excess material.

    Tarps are genius tools for the trail. They shield us from rain and notch up comfort. But there’s more to them than just cover. Tarps can turn into gear sheds or windblocks. You just need skill and some knots.

    Now let’s dive deeper. A tarp is like a Swiss Army knife for backpackers. Think of all the shapes you can mold it into. Lean-to, A-frame, or even a bivy-style wrap. It’s all in how you fold and tie it. For each setup, you need the right knots and a little practice. With these, you can tailor your shelter to the land and the sky.

    Let’s talk DIY tarp shelters. You can choose from many designs. Each fits a need, like more space or better airflow. Want to make your own shelter? Start with a simple design. Add some personal flair as you learn. Crafting a tarp shelter can also save you money, as you reuse and recycle tarps.

    Techniques for converting a standard tarp into a backpacking tarp include sealing the seams for waterproofing, adding reinforced tie-out points, and cutting it to reduce weight. Customizing your tarp means it fits your pack and your needs like a glove.

    And here’s a pro tip: consider an ultralight tarp with doors. It adds privacy and shields against draughts. Such a tarp is a haven in the wild. It keeps you snug and keeps your gear dry.

    In short, tarps are not just for sleep. They can be shelters, lounges, or forts against the storm. With a tarp, the trail is yours to shape.

    Tarp Maintenance and Longevity Tips

    To care for and store your tarp, clean it, let it dry, and fold it neatly. For a longer life, keep your tarp clean after trips. Wash off dirt and leaves. Make sure it’s dry before you put it away. Wet tarps can get moldy quickly. Pack it right to avoid damage.

    Proper folding and storage help a lot. Fold it along the same lines every time. This method stops stress on the tarp fabric. Store it in a cool and dry spot. Avoid places with direct sunlight. UV rays can weaken tarps over time.

    Keeping your tarp safe from sun and rain matters too. When you set up your tarp, pick a spot with some shade. This can stop UV damage. If the weather gets bad, take down your tarp if you can. This will help it last through more trips.

    Do a check on your tarp now and then. Look for small tears or weak spots. Fix them up before they get worse. Small fixes can save you from needing a new tarp. Use repair tape or a patch kit for holes. Make sure your tarp is clean before you apply these.

    With good tarp maintenance and care, your shelter can last many hikes. Clean it often and store it right. This way, you can make your trips last and enjoy many nights under the stars.

    Integrating Tarps into a Sustainable Backpacking Ethos

    Tarp camping can form a part of sustainable backpacking by reducing environmental impact. Tarps, made from light materials, often mean less manufacturing waste. They fit with ‘leave no trace’ ideals, making you an earth-friendly camper. You might ask, what about the environmental impact of tarp camping? It’s generally low. Use and dispose of tarps responsibly to keep it that way.

    To make sure your tarp camping is sustainable, start with the tarp. Pick one made of long-lasting material. You want it to stand up to many trips. This cuts down waste. Also, tarps made from materials like Dyneema are strong but leave less of a footprint than heavier gear.

    When you’re in the woods or on the mountain, sustainable practices are key. Always leave your campsite the way you found it. Tarps make this easy. They don’t disrupt soil and plants like some big tents do. Plus, they’re quick to set up and take down.

    What should you do with old tarps? That’s where responsible disposal comes in. Don’t just throw them away. Some tarps can be recycled. Others can be repurposed or donated. Find out how to recycle or dispose of your tarp in a way that’s good for nature. One less piece of trash in the landfill helps everyone.

    Remember, when you’re picking and pitching your tarp, think ahead. Aim for low impact on our planet. Care for your gear so it lasts long. And when it’s time to say goodbye, do it in a way that helps our earth. This is what makes you a sustainable backpacker with a tarp.

    Finding and Fixing Tarp Accessories

    The best tarp accessories for backpacking are stakes, guy lines, and a repair kit.

    When camping, you want your tarp setup ready for any weather. That means having the right gear. Stakes and guy lines keep your tarp steady in the wind. A repair kit is a must to fix any tears fast. To pick the best guy lines, think about weight and strength. Light lines are easy to pack, but they must also hold tight.

    Fixing a ripped tarp in the field seems hard, but it’s not with the right tools. For tears, use patches and adhesives from your lightweight repair kit. These essentials don’t add much weight but are worth their weight in gold when trouble pops up. A small roll of duct tape can also provide a quick, if less elegant, solution.

    Remember, talent in fixing comes from practice. Try repairs at home before you hit the trails. That way, you’re a pro when in the wild. Always check your gear before a trip, and keep those repair skills sharp. It’s all about being prepared so you can keep your focus on the adventure.

    Ultralight Tarp Configurations for Solo Backpackers

    What is the ideal tarp size for a solo backpacker? The best size is large enough to cover you and your gear but as light as possible. For a solo hike, you want a tarp that’s easy to carry and sets up fast. You also need one that packs down small. A tarp that’s around 8 to 10 feet in length works well for one person.

    Now, which configurations are best for ultralight and speed hiking? A simple A-frame setup is quick and offers good protection. For speed hikes, go for a lean-to style. This uses fewer stakes and can be set up even faster. Another great style for solo treks is the bivy-tarp setup which is compact yet shields well against wind and rain.

    When it comes to tarps, size and weight matter a lot. You must balance coverage against bulk. Think about where you’ll camp. If trees are plenty, you might opt for a hammock tarp. They are built for hanging and are super light.

    For ultralight tarps, materials like Dyneema win praise. Yes, they can get pricey. But they last long and buck the wind like champs. Silnylon tarps are also great, more budget-friendly but a bit heavier.

    To choose your ideal ultralight tarp, consider these questions:

    1. How much weather protection do I need?
    2. What’s more important – low weight or low cost?
    3. Do I prefer quick setups or varied pitching options?

    By answering these, you match your needs with the right tarp. And remember, practice your setup at home first. This way, you’re a pro when it’s time to camp.

    With these tips, your solo adventures will be more about the hike and less about the hassle!

    Conclusion

    Choosing the right backpacking tarp can make or break your adventure. We’ve looked at materials, from light Dyneema to sturdy Silnylon, and saw why tarps win over tents. They’re lighter and let you feel closer to nature. Setting one up is quick once you learn the ropes, and yes, they work in all seasons—even in the snow! Solo hikers, pack a tarp that balances size and weight. Remember, your tarp can do more than cover you at night. Take care of it, and it will provide adequate shelter for many trips to come. Finally, always think green when you pack up. Happy trails!

    Loading